Shyaporn
Well-Known Member
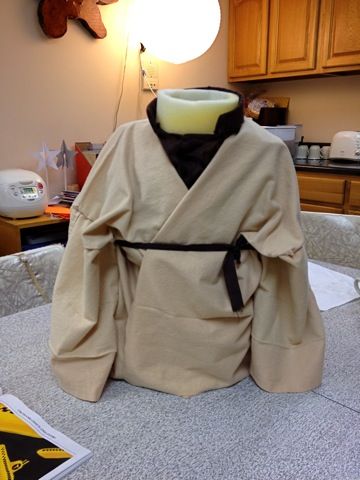
I've got a bit of a Lucas Films/Disney sketch in my head, but it requires a bit of costuming and, naturally, because I hate simplicity, a Yoda puppet.
Being currently unemployed, I toyed with trying to do a budget build with just things I could find at the 99-cent store. Then I suddenly realized I could give it a shot with just stuff lying around the house. So, a few scraps of leftover 1-inch thick foam padding from a kitchen chair reupholstering, a glue gun, and a few hours to kill during an awful Eagles-Saints game (I'm a Steelers fan) led to this sequence of events:
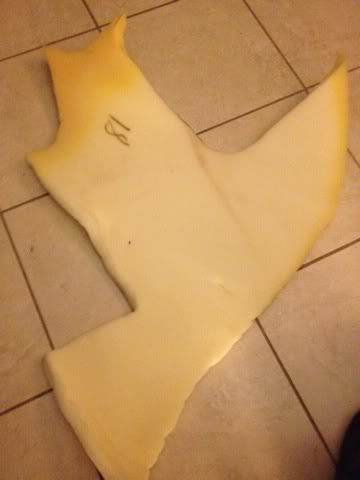
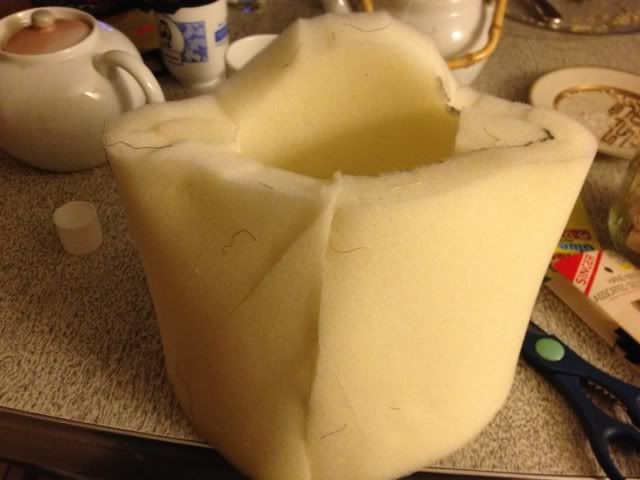
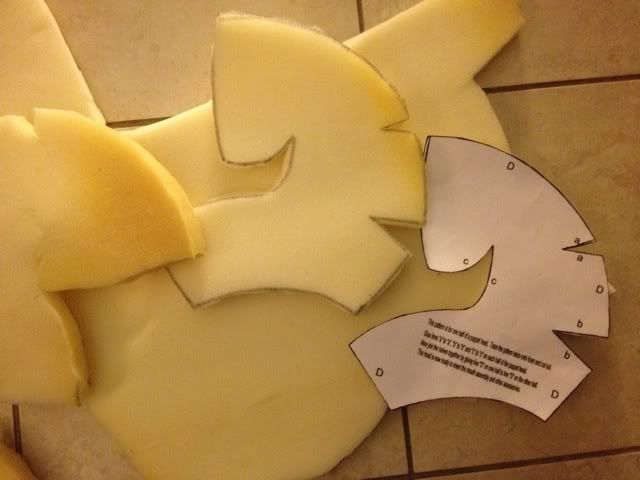
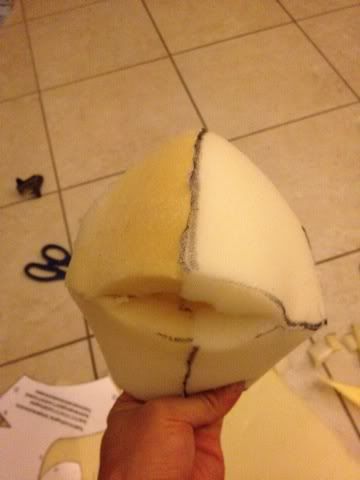
I started with a nifty tutorial I found on the intertubes at the Bashful Puppet Blog on how to create a round puppet head out of foam. I printed out the free template, watched the video, cut out the patterns and began a gluin'! I didn't have any contact cement (nor the desire to have to work with a respirator), so I just used hot glue, which various puppet forums went back and forth on.
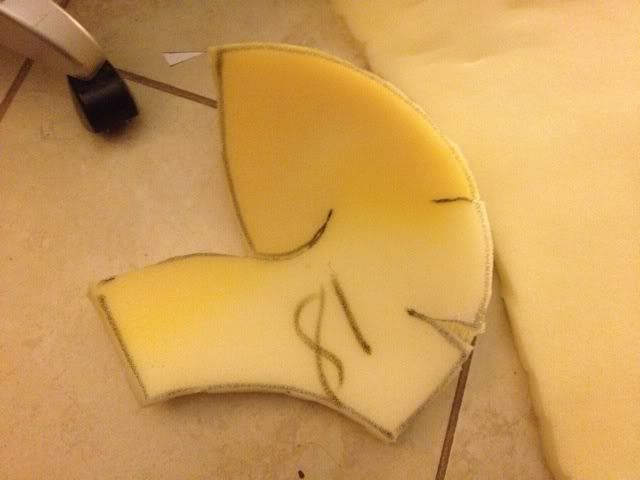
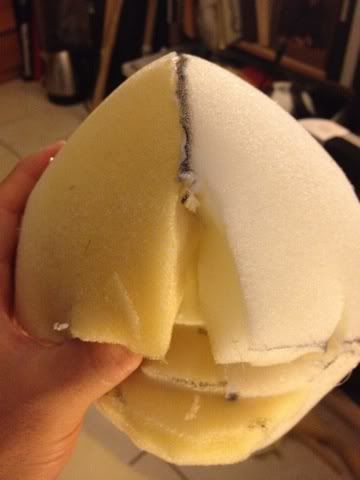
After I had the head formed, I futzed and trimmed the mouth a bit to get the Philtrum area between the nose and upper lip to round out a bit, and then just commenced to adding roughly cut accessories.
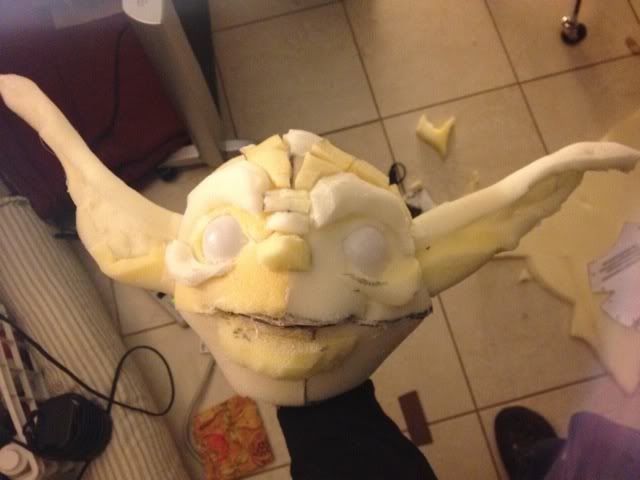
I started with the chin and nose, as I felt those would give me a good sense of reference.
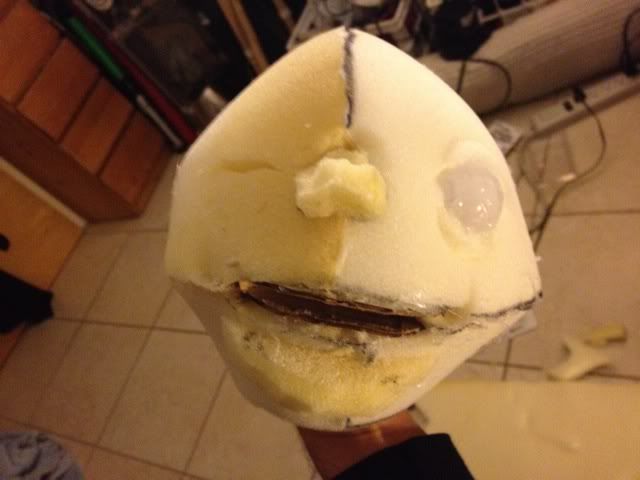
Then I cut slits on either side of the nose and pushed some ping pong balls I had lying around through from behind. They actually formed nice eye creases/lids above and below the eye, which gave me the first real inklings that this might work. I lifted up the lids a bit and dabbed a touch of hot glue to hold them in place, and then moved on.
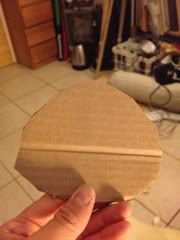
After I templated the shape of the mouth with a piece of folded paper, I cut out a piece of cardboard, I added a little depth to the template and cut it out, sliding it in from the front and gluing it in place. I forgot to add little finger loops on the top and bottom of the mouth piece, so I just made some with duct tape and applied them by touch from the inside.
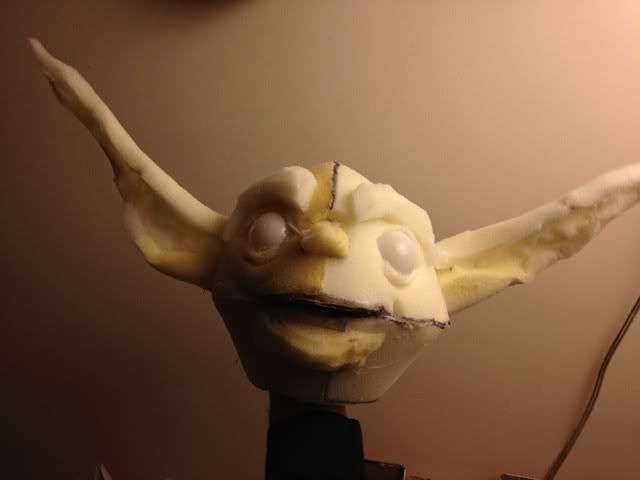
I then glued the brows in place, followed by the ears.
It was at this point that I went running around the apartment saying Yoda lines from Empire Strikes Back in a very mediocre Frank Oz impersonation.
Then I glued in the head ridges and finally the cheeks.
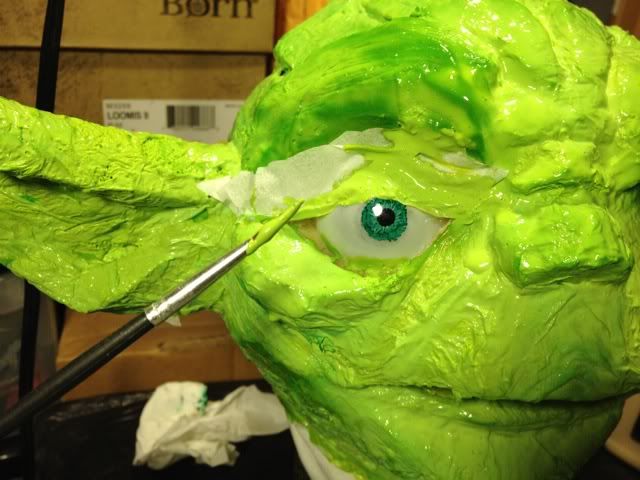
Finally, I drew in the pupils with Sharpies.
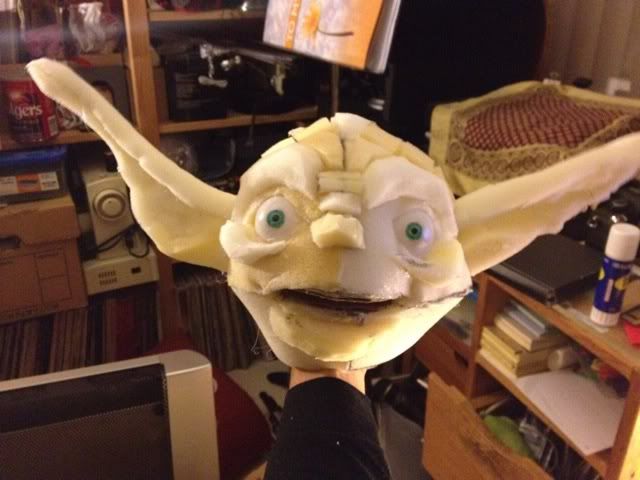
Total time to this point: 5 hours. Money spent: $0.
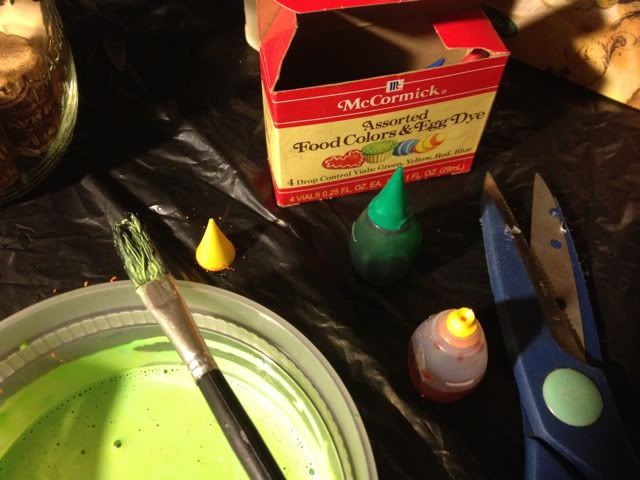
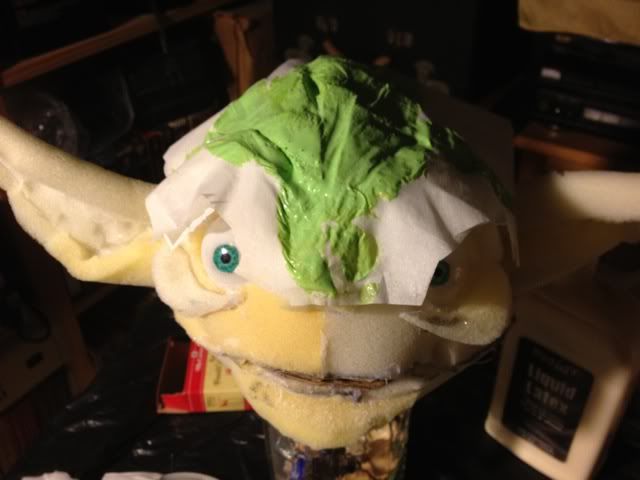
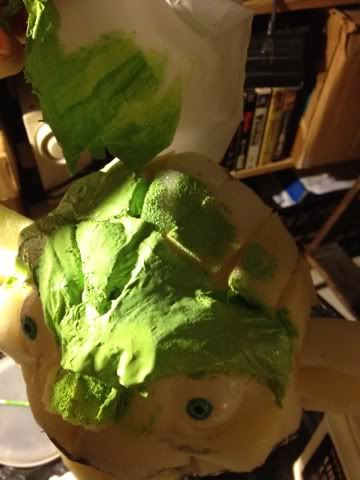
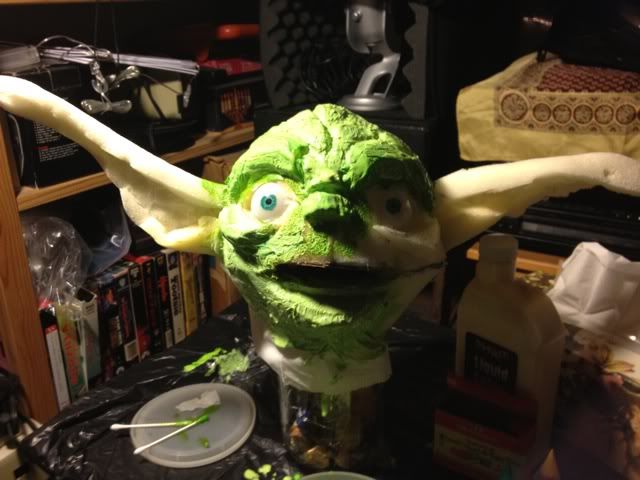
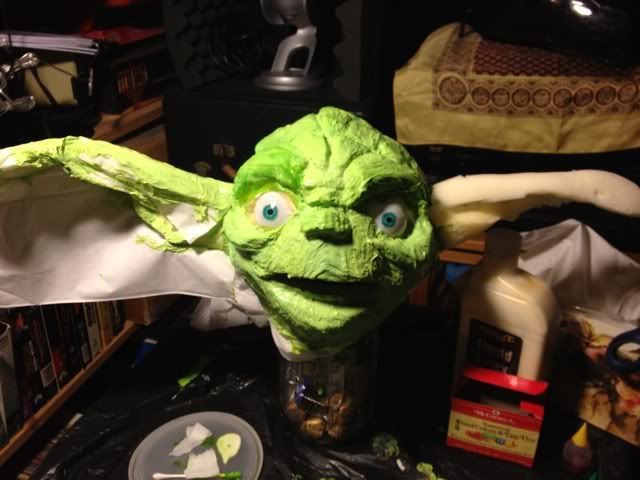
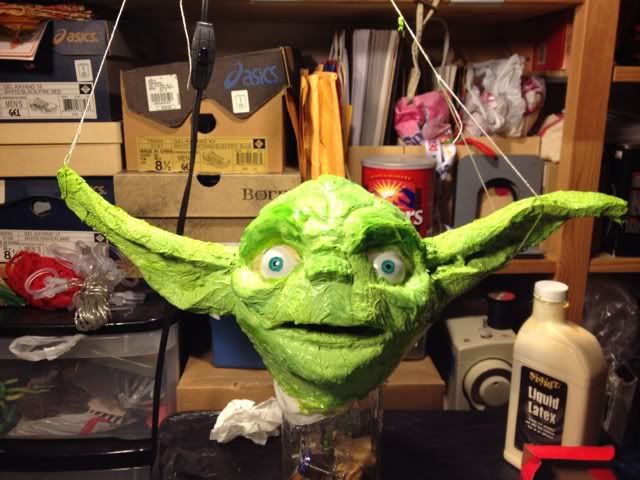
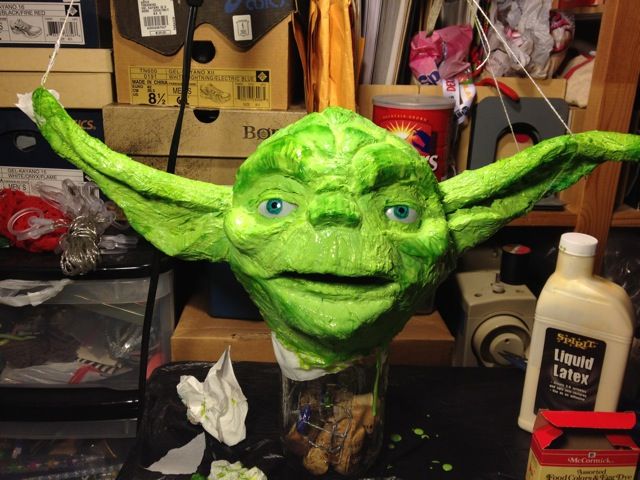
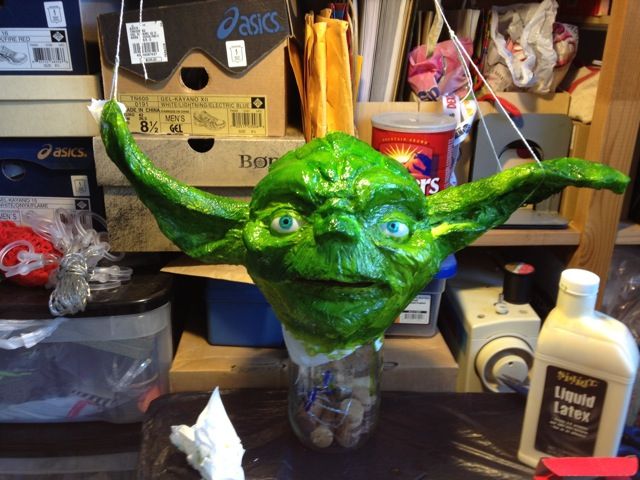
All these foam pieces are meant to be rough shapes as I intend on layering tissues or paper towels soaked in liquid latex over the model tomorrow, and then paint them using leftover green makeup from my Halloween Frankenstein's Monster Costume tutorial. This will either work well enough for my sketch or ruin the whole thing entirely. Should be interesting - more later!
Being currently unemployed, I toyed with trying to do a budget build with just things I could find at the 99-cent store. Then I suddenly realized I could give it a shot with just stuff lying around the house. So, a few scraps of leftover 1-inch thick foam padding from a kitchen chair reupholstering, a glue gun, and a few hours to kill during an awful Eagles-Saints game (I'm a Steelers fan) led to this sequence of events:
I started with a nifty tutorial I found on the intertubes at the Bashful Puppet Blog on how to create a round puppet head out of foam. I printed out the free template, watched the video, cut out the patterns and began a gluin'! I didn't have any contact cement (nor the desire to have to work with a respirator), so I just used hot glue, which various puppet forums went back and forth on.
After I had the head formed, I futzed and trimmed the mouth a bit to get the Philtrum area between the nose and upper lip to round out a bit, and then just commenced to adding roughly cut accessories.
I started with the chin and nose, as I felt those would give me a good sense of reference.
Then I cut slits on either side of the nose and pushed some ping pong balls I had lying around through from behind. They actually formed nice eye creases/lids above and below the eye, which gave me the first real inklings that this might work. I lifted up the lids a bit and dabbed a touch of hot glue to hold them in place, and then moved on.
After I templated the shape of the mouth with a piece of folded paper, I cut out a piece of cardboard, I added a little depth to the template and cut it out, sliding it in from the front and gluing it in place. I forgot to add little finger loops on the top and bottom of the mouth piece, so I just made some with duct tape and applied them by touch from the inside.
I then glued the brows in place, followed by the ears.
It was at this point that I went running around the apartment saying Yoda lines from Empire Strikes Back in a very mediocre Frank Oz impersonation.
Then I glued in the head ridges and finally the cheeks.
Finally, I drew in the pupils with Sharpies.
Total time to this point: 5 hours. Money spent: $0.
All these foam pieces are meant to be rough shapes as I intend on layering tissues or paper towels soaked in liquid latex over the model tomorrow, and then paint them using leftover green makeup from my Halloween Frankenstein's Monster Costume tutorial. This will either work well enough for my sketch or ruin the whole thing entirely. Should be interesting - more later!
Last edited:
")