NickyD
New Member
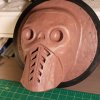
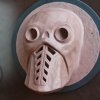
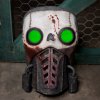
One of the masks I’ve always loved is the Bandit Steve mask from Borderlands 2. I’m in the process of sculpting this mask, trying a technique which I don’t think I’ve seen before (but wouldn’t be surprised if someone has used it).
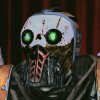
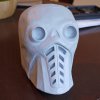
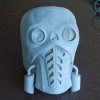
First I created a Pepakura model from the 3D game asset.
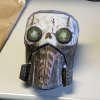
Then I applied rondo inside and out, and dremeled down the facet edges.
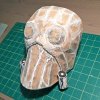
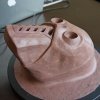
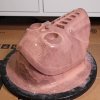
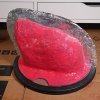
Then I added a thin layer of Monster Clay over the whole surface. Over that I am now building up the 3D details and adding texture. I’ve done something similar for previous projects using Apoxie Sculpt, but have been wanting to try a non-hardening clay so I can go back and tweak. The Apoxie Sculpt sands really well, so it is great for getting smooth, even surfaces on the original sculpt (instead of, say, having to mold the original, cast it, and then sand/smooth the cast). This mask doesn't need to be smooth, and the clay will let me experiment with textures.
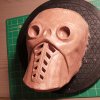
Before adding the clay, I cut holes in the Pep model where the eyes and mouth vents are. Where there were holes, there are now clay divots, which I’m hoping will be deep enough to leave openings in the slush cast. I’m sure a bunch of dremeling will be needed to clean all of that up.
I haven’t decided yet what to use for the eye lenses. I may experiment with casting some green tinted lenses. The cylindrical filters on the side of the mask will be molded and cast separately, attached with some method that is yet to be determined.
By the way, if you haven't seen it, SKS Props is working on a full Bandit Steve costume that’s totally worth checking out.
http://www.therpf.com/showthread.php?t=203152

First I created a Pepakura model from the 3D game asset.

Then I applied rondo inside and out, and dremeled down the facet edges.

Then I added a thin layer of Monster Clay over the whole surface. Over that I am now building up the 3D details and adding texture. I’ve done something similar for previous projects using Apoxie Sculpt, but have been wanting to try a non-hardening clay so I can go back and tweak. The Apoxie Sculpt sands really well, so it is great for getting smooth, even surfaces on the original sculpt (instead of, say, having to mold the original, cast it, and then sand/smooth the cast). This mask doesn't need to be smooth, and the clay will let me experiment with textures.

Before adding the clay, I cut holes in the Pep model where the eyes and mouth vents are. Where there were holes, there are now clay divots, which I’m hoping will be deep enough to leave openings in the slush cast. I’m sure a bunch of dremeling will be needed to clean all of that up.
I haven’t decided yet what to use for the eye lenses. I may experiment with casting some green tinted lenses. The cylindrical filters on the side of the mask will be molded and cast separately, attached with some method that is yet to be determined.
By the way, if you haven't seen it, SKS Props is working on a full Bandit Steve costume that’s totally worth checking out.
http://www.therpf.com/showthread.php?t=203152
Last edited:

