-
Welcome to the Project Runs Forum!
This forum is intended for interest gauging and active runs. Due to the transient nature of this forum, please keep all research and ongoing discussion in one of our main forums so your information is not lost.
Only Premium Members can start a new run.
You are using an out of date browser. It may not display this or other websites correctly.
You should upgrade or use an alternative browser.
You should upgrade or use an alternative browser.
Unlimited Run Blade Runner - Deckard's Blaster (Version 3)
- Thread starter rgriesbeck
- Start date
-
- Tags
- blade runner
Re: 3D Printed Blade Runner Gun Kit
I've got 2 kits and only 2 amber grips left, if you want one, especially with amber grips, nows the time! I can always do more kits, but the amber grips are limited to 10,and I've sold 8.
I've got 2 kits and only 2 amber grips left, if you want one, especially with amber grips, nows the time! I can always do more kits, but the amber grips are limited to 10,and I've sold 8.
Darth Brass
Sr Member
Re: 3D Printed Blade Runner Gun Kit
I want the last set with Amber!
I want the last set with Amber!
riftmaster
New Member
Re: 3D Printed Blade Runner Gun Kit
Just received my kit, it looks brilliant!
I have the week off soon, so will build it then.
I still haven't decided whether I will paint it or leave it looking like a 3d printed model.
Just received my kit, it looks brilliant!
I have the week off soon, so will build it then.
I still haven't decided whether I will paint it or leave it looking like a 3d printed model.
Re: 3D Printed Blade Runner Gun Kit
Glad you like it, I'll post and assembly guide in the next couple days
Just received my kit, it looks brilliant!
I have the week off soon, so will build it then.
I still haven't decided whether I will paint it or leave it looking like a 3d printed model.
Glad you like it, I'll post and assembly guide in the next couple days
TroublemakerO
New Member
Re: 3D Printed Blade Runner Gun Kit
Just got my kit! Looking foward to a few days of work to get her ready. Thanks Rgriesbeck
Just got my kit! Looking foward to a few days of work to get her ready. Thanks Rgriesbeck
Re: 3D Printed Blade Runner Gun Kit
Awesome, glad it made it quickly, have fun!
Just got my kit! Looking foward to a few days of work to get her ready. Thanks Rgriesbeck
Awesome, glad it made it quickly, have fun!
Re: 3D Printed Blade Runner Gun Kit
Wanted to share this, check out post #632 - http://www.therpf.com/f9/blade-runn...tomenosuke-blaster-coming-174014/index26.html
Wanted to share this, check out post #632 - http://www.therpf.com/f9/blade-runn...tomenosuke-blaster-coming-174014/index26.html
Last edited:
Re: 3D Printed Blade Runner Gun Kit
Not sure what I'm looking for....?
Wanted to share this, check out post #692 - http://www.therpf.com/f9/blade-runn...tomenosuke-blaster-coming-174014/index26.html
Not sure what I'm looking for....?
Re: 3D Printed Blade Runner Gun Kit
Dude came up with a neat way to turn the yellowish tomenosuke grips more amber...
Not sure what I'm looking for....?
Dude came up with a neat way to turn the yellowish tomenosuke grips more amber...
riftmaster
New Member
Re: 3D Printed Blade Runner Gun Kit
That is an old propsummit trick. Just be careful, I have found the red sharpies make them too bright, i use a dark orange instead.
Dude came up with a neat way to turn the yellowish tomenosuke grips more amber...
That is an old propsummit trick. Just be careful, I have found the red sharpies make them too bright, i use a dark orange instead.
A Rabid Wombat
New Member
Re: 3D Printed Blade Runner Gun Kit
Got my kit today! :thumbup:
Sent from my DROID2 using Tapatalk 2
Got my kit today! :thumbup:
Sent from my DROID2 using Tapatalk 2
TroublemakerO
New Member
Re: 3D Printed Blade Runner Gun Kit
Ok guys., anyone put paint to this kit yet? If so how well does it hid the print grooves? I know I have some sanding to do in order for some of the moving parts (bolt) to flush and still move after paint.
Ok guys., anyone put paint to this kit yet? If so how well does it hid the print grooves? I know I have some sanding to do in order for some of the moving parts (bolt) to flush and still move after paint.
TroublemakerO
New Member
Re: 3D Printed Blade Runner Gun Kit
Would love feedback and to see everyone finished prop
Would love feedback and to see everyone finished prop
Re: 3D Printed Blade Runner Gun Kit
I'll post an assembly soon, wife has me working too much. As far as sanding, I start at 80 then 150,then finish with 220. Sometimes I do primer after the 150, then finish with the 220
I'll post an assembly soon, wife has me working too much. As far as sanding, I start at 80 then 150,then finish with 220. Sometimes I do primer after the 150, then finish with the 220
Re: 3D Printed Blade Runner Gun Kit
Last kit with amber grips just became available again. If you're interested, lemme know, can ship Monday
Last kit with amber grips just became available again. If you're interested, lemme know, can ship Monday
Re: 3D Printed Blade Runner Gun Kit
So here is the long awaited how-to. Despite the number of pieces, this is actually pretty easy to build. My 1st tip is to do your sanding 1st. Make sure all the parts are prepped and the support material is removed. Make sure the parts line up and fit together well. Paint will add some thickness and may stop parts from fitting.
Assembly Guide:
1) Start by removing the inner support material from the two body pieces. The two triggers will need to fit as well as the piece of filament to hold the two triggers in place and the chamber hinge.

2) Practice fit the triggers and hinge with the filament
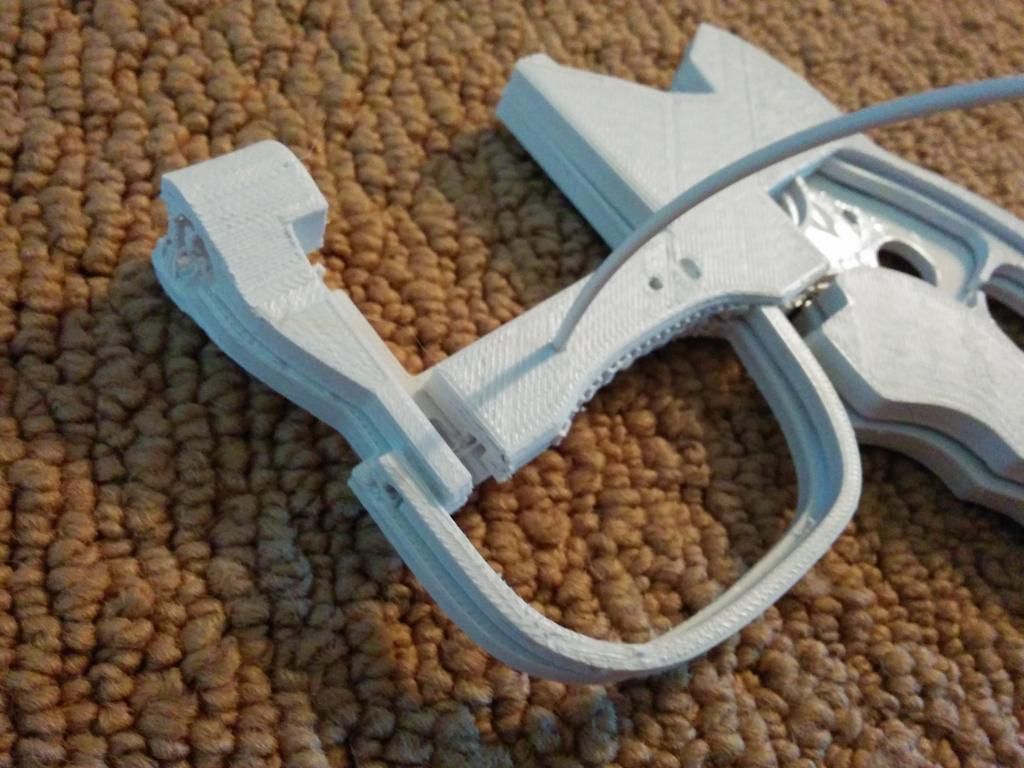 3) Glue the 2 halves together, then insert the triggers and the glue a small piece of the filament in place, then glue it and trim excess. Repeat for the chamber hinge

4) Glue the top barrel together
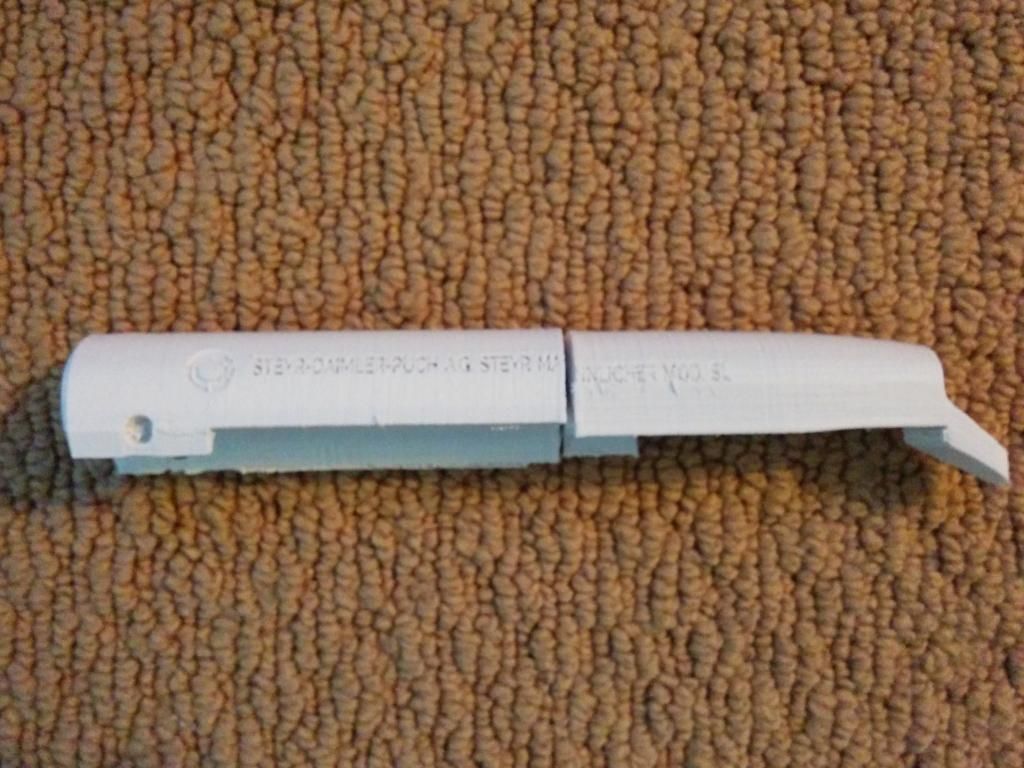
5) Glue the top barrel onto the body, using the lower barrel as a guide. Then glue the lower barrel onto the top barrel and bodies
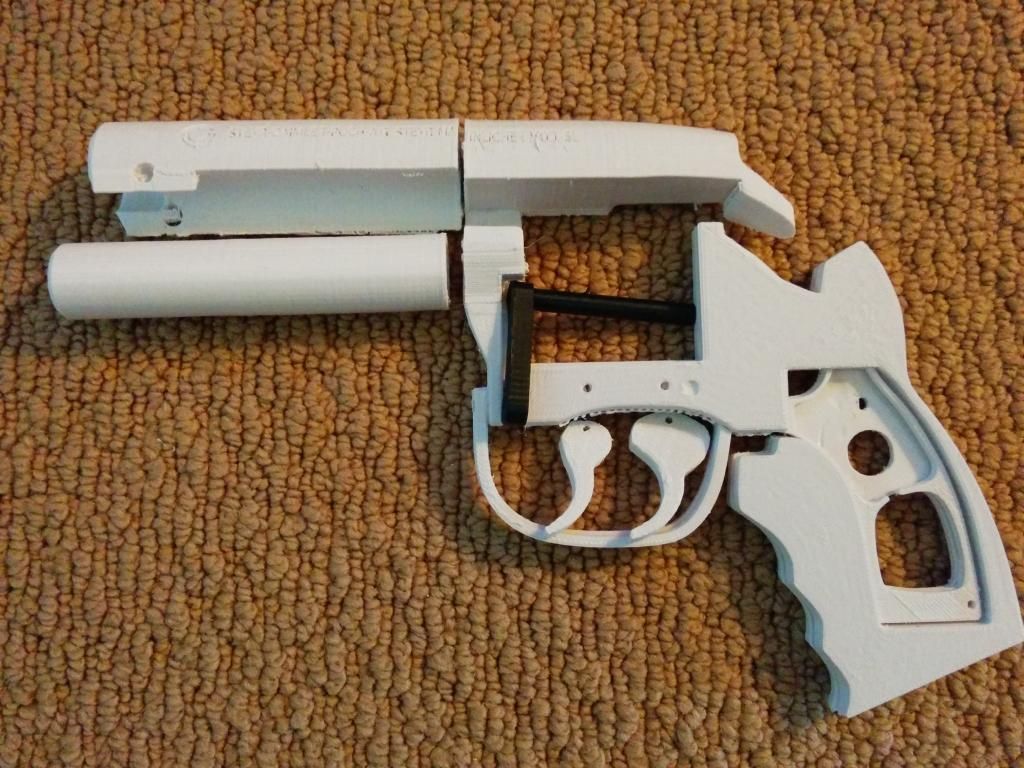
6) Glue in the battery box, it should slide up (on the left side) and almost touch the top barrel

7) Insert the "lever" into the back piece and glue in place with filament, make sure it still moves.

8) Make sure this piece slides into the back of the top barrel. It'll be tight, loosen it up with sanding
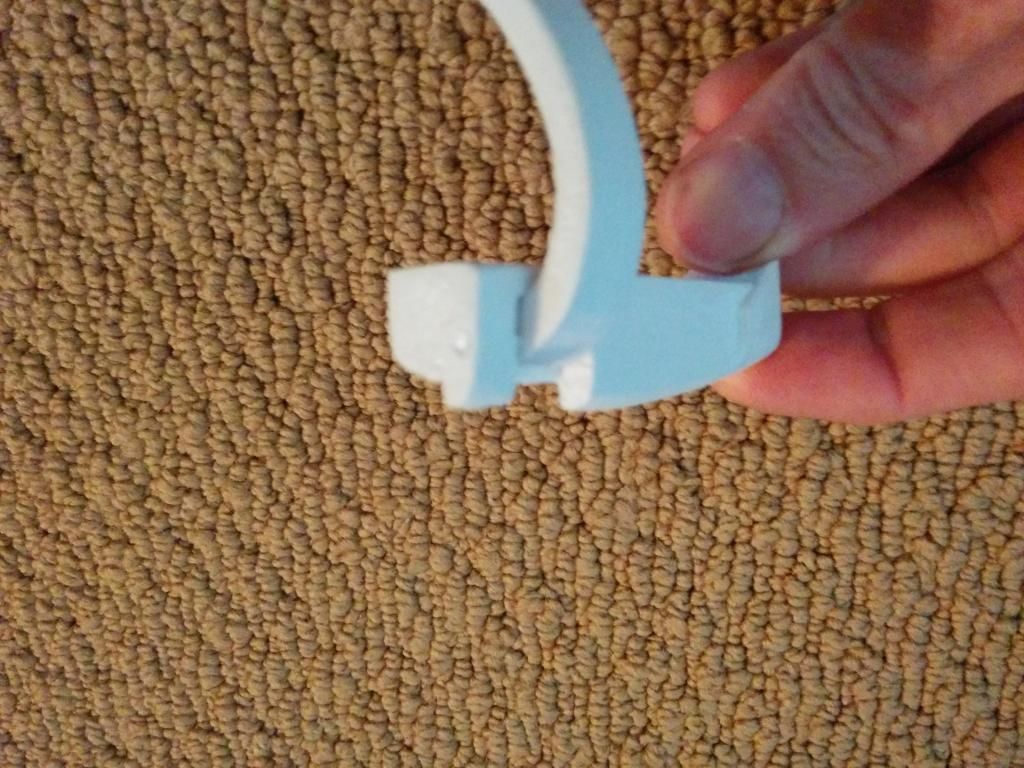
9) Slide the hammer piece in and use it to align the right chamber cover


10) Slide the chamber onto the hinge and close it, use that to align the left chamber cover. Glue the left chamber cover directly onto the chamber. Careful not to glue the whole thing together (as I've done once or twice) as it won't open if you do. It shohld still be able to slude off the hinge when done, it'll look like this (when the LED stick is also attached)
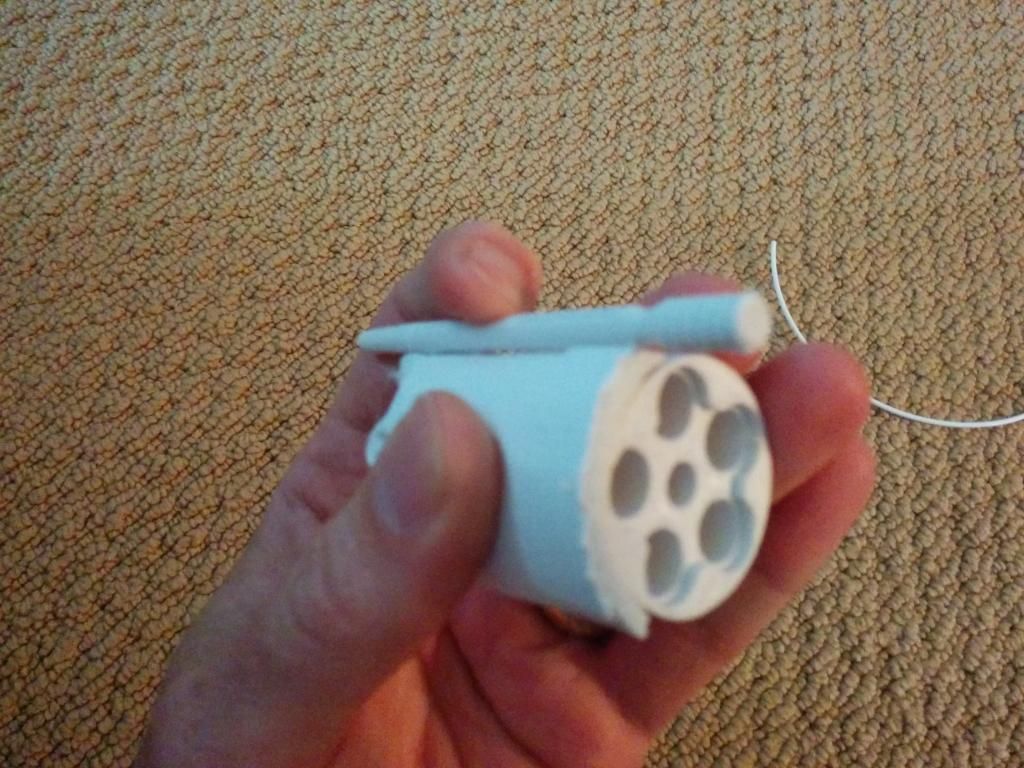

11) That's most of it. Glue the grip bottom onto the body, then the grips. If you've got the amber grips and the black grips, you might want to figure out a way to be able to swap the grips, I've never had that sort of time

12) Finish gluing the last few small parts on. The battery cover will friction fit it, don't glue it.
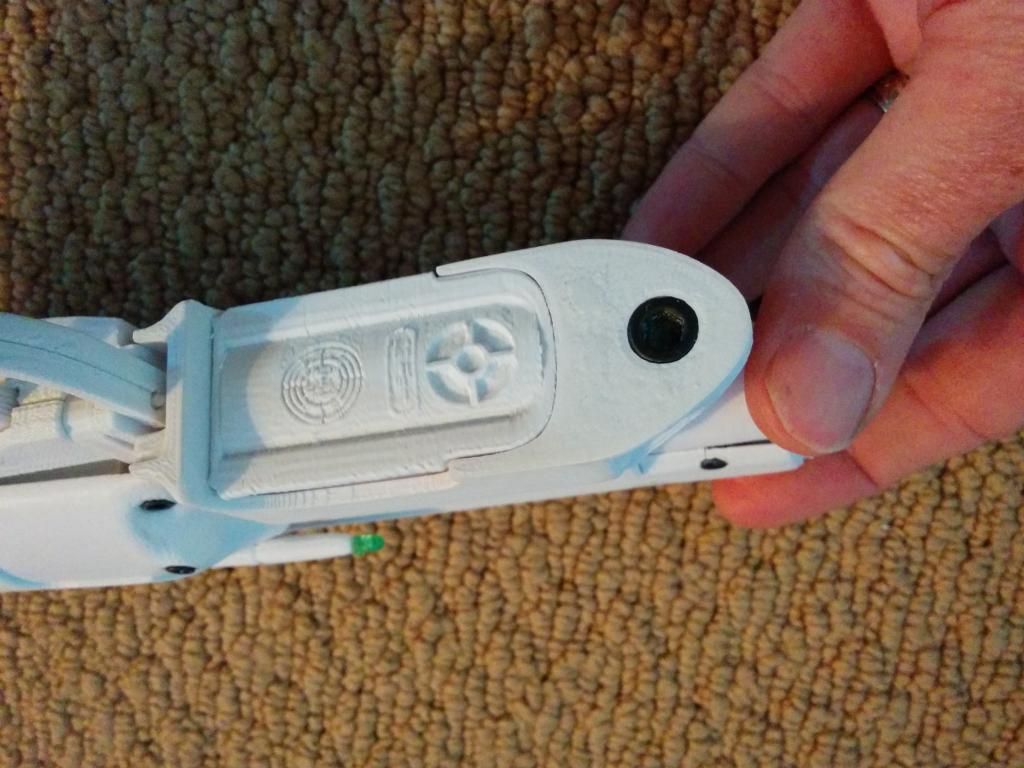
13) Next part is to cut off the bolt heads and put them in place. It shouldn't be too dificult to figure out where they go. You will probably have to drill the holes a bit bigger. Here's a few pics of where my bolts went.


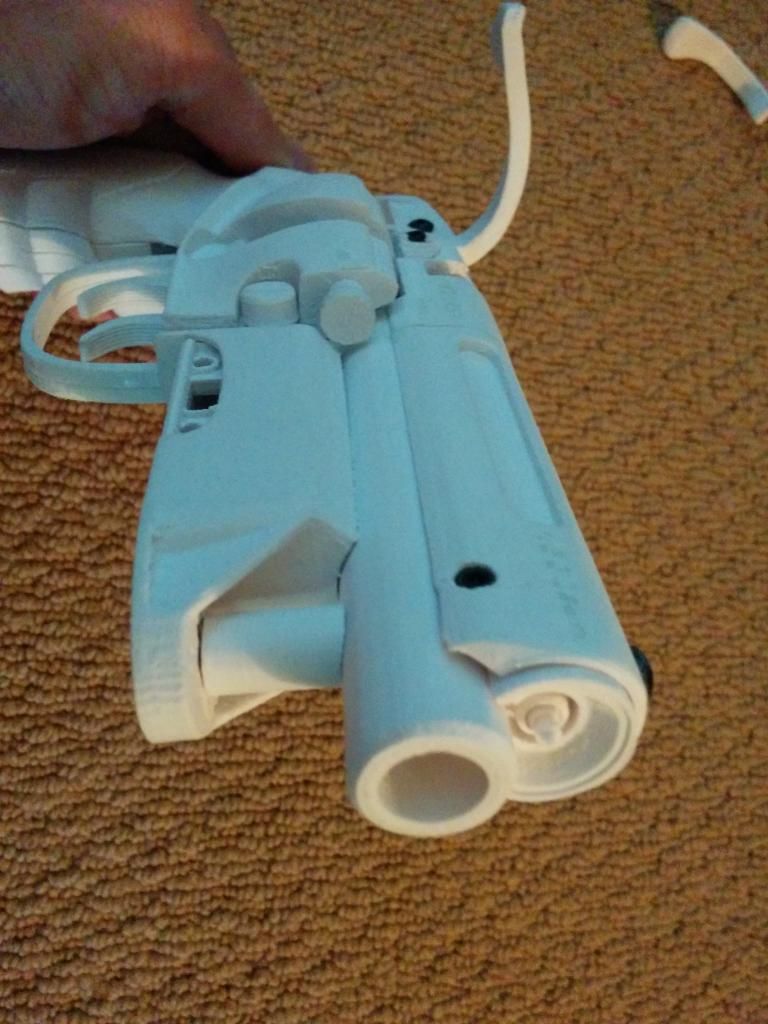
Hopefully that makes sense. I've done it so many times, I can do it in my sleep now. You'll want to fill seam lines and sand till smooth. You may also want to paint the parts 1st before you finish assembly. It's just up to you what version you want to do and what colors go on what parts. Here's the one I had started.

Please share your experiences and pics as you get your's done. This project was a labour of love (I'm still not sure I've broken even, or recovered from the stress of making this kit) and I hope you have fun assembling yours.
Thanks
Rob
So here is the long awaited how-to. Despite the number of pieces, this is actually pretty easy to build. My 1st tip is to do your sanding 1st. Make sure all the parts are prepped and the support material is removed. Make sure the parts line up and fit together well. Paint will add some thickness and may stop parts from fitting.
Assembly Guide:
1) Start by removing the inner support material from the two body pieces. The two triggers will need to fit as well as the piece of filament to hold the two triggers in place and the chamber hinge.

2) Practice fit the triggers and hinge with the filament
 3) Glue the 2 halves together, then insert the triggers and the glue a small piece of the filament in place, then glue it and trim excess. Repeat for the chamber hinge
4) Glue the top barrel together

5) Glue the top barrel onto the body, using the lower barrel as a guide. Then glue the lower barrel onto the top barrel and bodies

6) Glue in the battery box, it should slide up (on the left side) and almost touch the top barrel

7) Insert the "lever" into the back piece and glue in place with filament, make sure it still moves.

8) Make sure this piece slides into the back of the top barrel. It'll be tight, loosen it up with sanding

9) Slide the hammer piece in and use it to align the right chamber cover


10) Slide the chamber onto the hinge and close it, use that to align the left chamber cover. Glue the left chamber cover directly onto the chamber. Careful not to glue the whole thing together (as I've done once or twice) as it won't open if you do. It shohld still be able to slude off the hinge when done, it'll look like this (when the LED stick is also attached)


11) That's most of it. Glue the grip bottom onto the body, then the grips. If you've got the amber grips and the black grips, you might want to figure out a way to be able to swap the grips, I've never had that sort of time

12) Finish gluing the last few small parts on. The battery cover will friction fit it, don't glue it.

13) Next part is to cut off the bolt heads and put them in place. It shouldn't be too dificult to figure out where they go. You will probably have to drill the holes a bit bigger. Here's a few pics of where my bolts went.


Hopefully that makes sense. I've done it so many times, I can do it in my sleep now. You'll want to fill seam lines and sand till smooth. You may also want to paint the parts 1st before you finish assembly. It's just up to you what version you want to do and what colors go on what parts. Here's the one I had started.

Please share your experiences and pics as you get your's done. This project was a labour of love (I'm still not sure I've broken even, or recovered from the stress of making this kit) and I hope you have fun assembling yours.
Thanks
Rob
Last edited:
Similar threads
- Replies
- 53
- Views
- 7,876
- Replies
- 3
- Views
- 619
- Replies
- 4
- Views
- 653
- Replies
- 10
- Views
- 628
- Replies
- 2
- Views
- 531