Egon Spengler
Master Member
To make my Bill shirt I used images from Bill & Ted's Excellent Online Adventure - Home Page in the the "How to" section of the site and also from the gallery.
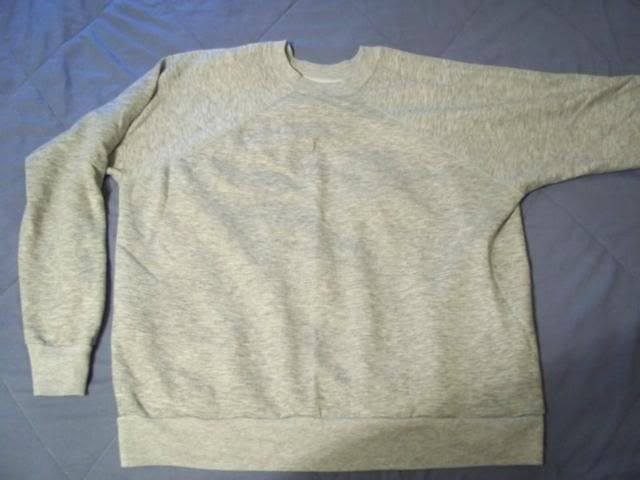
I managed to find a plan grey sweatshirt with diagonal shoulder seams at a thrift store. You can buy any grey sweat shirt as long as it has the diagonal shoulder seams it should work. Make sure that if it has a graphic on the front or back that it doesn't show when you turn the shirt inside out. The shirt MUST be TURNED INSIDE OUT before drawing anything onto it. Bill wears his shirt inside out.
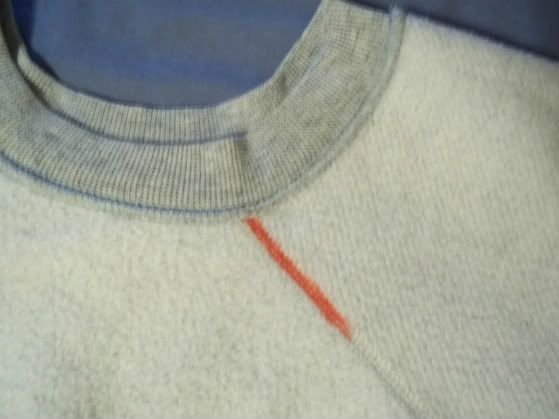
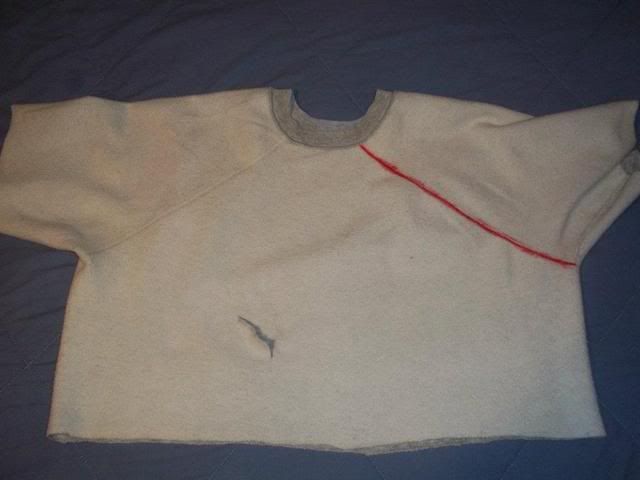
The seam on the front right of the shirt is colored red with pen. It doesn't need to be neat as it isn't on the original prop. Make sure the red pen goes on the FRONT where the collar isn't choking you.
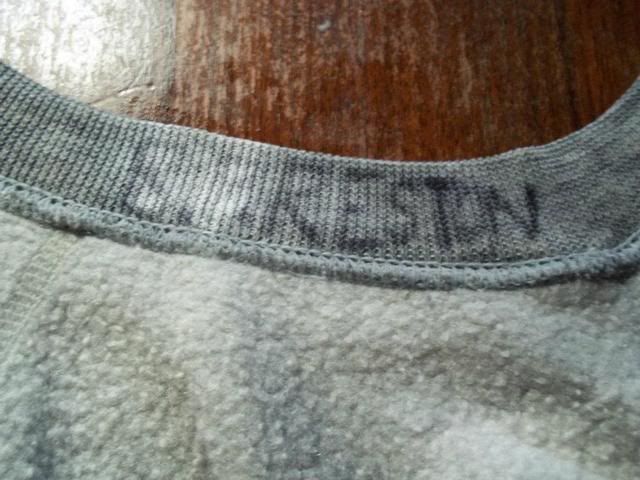
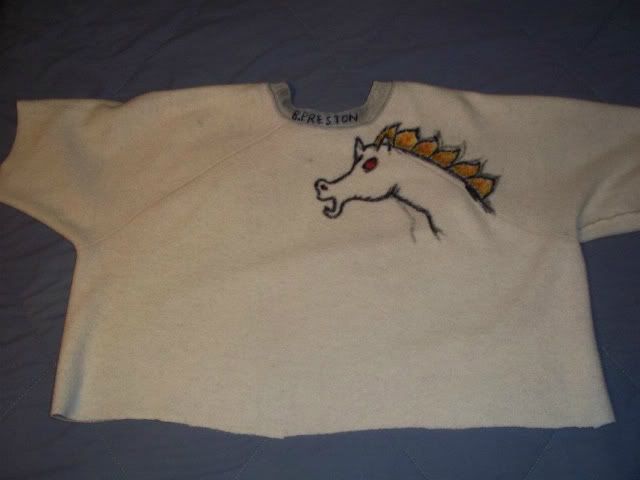
Make sure you space the letters properly on the collar. I messed up and had to redo it and work
out how to remove the screw up.
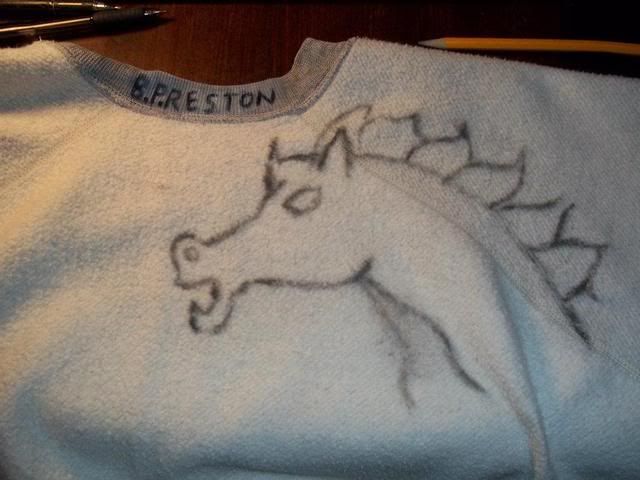
For some reason on the movie shirt it looks like there is a . between the P and R in PRESTON. I added it since it was there but faded it out a little more later since it looked strange.
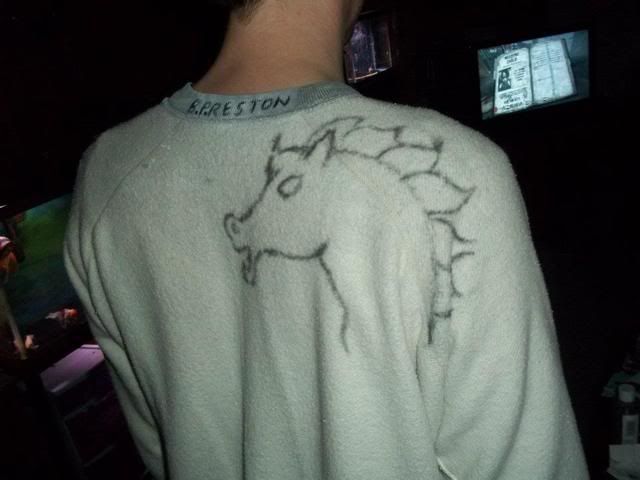
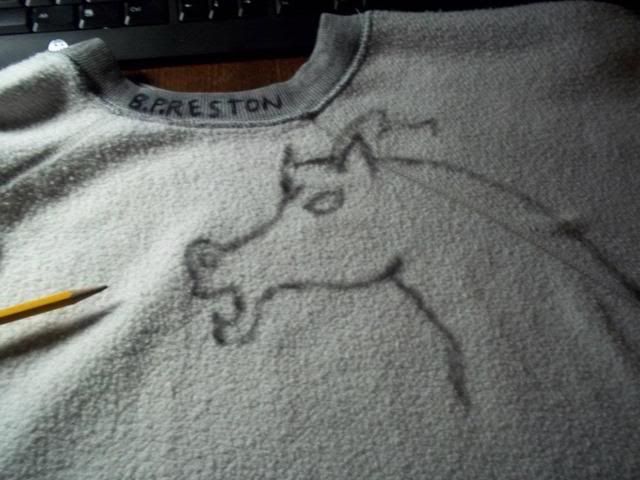
I tried to draw the horse in proper placement in relation to the seam on the back of the shirt using the reference image I had, but since the shirt he wears and the one I have are sized a little different the horse came out with a neck that was huge.
Thankfully I drew the horse on in pencil. I moved the front of the neck over a bit and adjusted the rest of the horse accordingly.

You can see the pencil marks where the horse was originally drawn in comparison to the permanent drawing. I used a black sharpy marker and a red pen.
I added a few more line scribbles to the horse to make it more accurate to the one on the actual prop shirt. Here you can see that the . between the P and R is practically gone. It just doesn't look right even though it seems to be on the original prop.
The red line on the front, neatly drawn out. I added some scribble lines later to make it more accurate. I cut the arms off just above where the elbow starts. First I cut it longer than it needed to be and adjusted it from there. I then cut the shirt so it would hang just above my bellybutton. I also added the tear in the front of the shirt on the left side, his right.
And here it is so far. The pencil lines will wash out.
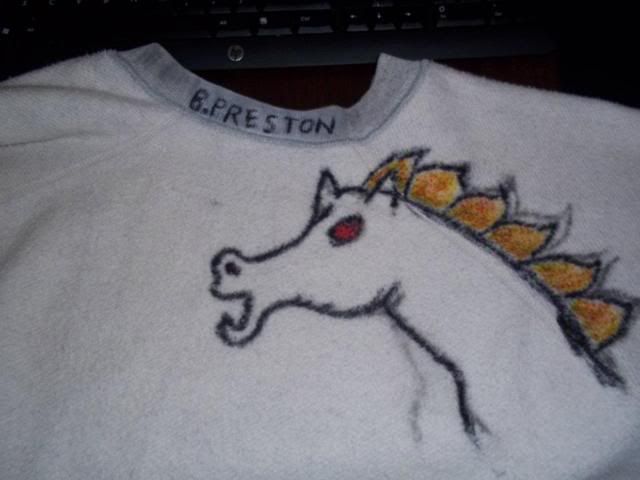
It's not a perfect replica but it's pretty excellent.
I managed to find a plan grey sweatshirt with diagonal shoulder seams at a thrift store. You can buy any grey sweat shirt as long as it has the diagonal shoulder seams it should work. Make sure that if it has a graphic on the front or back that it doesn't show when you turn the shirt inside out. The shirt MUST be TURNED INSIDE OUT before drawing anything onto it. Bill wears his shirt inside out.
The seam on the front right of the shirt is colored red with pen. It doesn't need to be neat as it isn't on the original prop. Make sure the red pen goes on the FRONT where the collar isn't choking you.
Make sure you space the letters properly on the collar. I messed up and had to redo it and work
out how to remove the screw up.
For some reason on the movie shirt it looks like there is a . between the P and R in PRESTON. I added it since it was there but faded it out a little more later since it looked strange.
I tried to draw the horse in proper placement in relation to the seam on the back of the shirt using the reference image I had, but since the shirt he wears and the one I have are sized a little different the horse came out with a neck that was huge.
Thankfully I drew the horse on in pencil. I moved the front of the neck over a bit and adjusted the rest of the horse accordingly.
You can see the pencil marks where the horse was originally drawn in comparison to the permanent drawing. I used a black sharpy marker and a red pen.
I added a few more line scribbles to the horse to make it more accurate to the one on the actual prop shirt. Here you can see that the . between the P and R is practically gone. It just doesn't look right even though it seems to be on the original prop.
The red line on the front, neatly drawn out. I added some scribble lines later to make it more accurate. I cut the arms off just above where the elbow starts. First I cut it longer than it needed to be and adjusted it from there. I then cut the shirt so it would hang just above my bellybutton. I also added the tear in the front of the shirt on the left side, his right.
And here it is so far. The pencil lines will wash out.
It's not a perfect replica but it's pretty excellent.
Last edited: