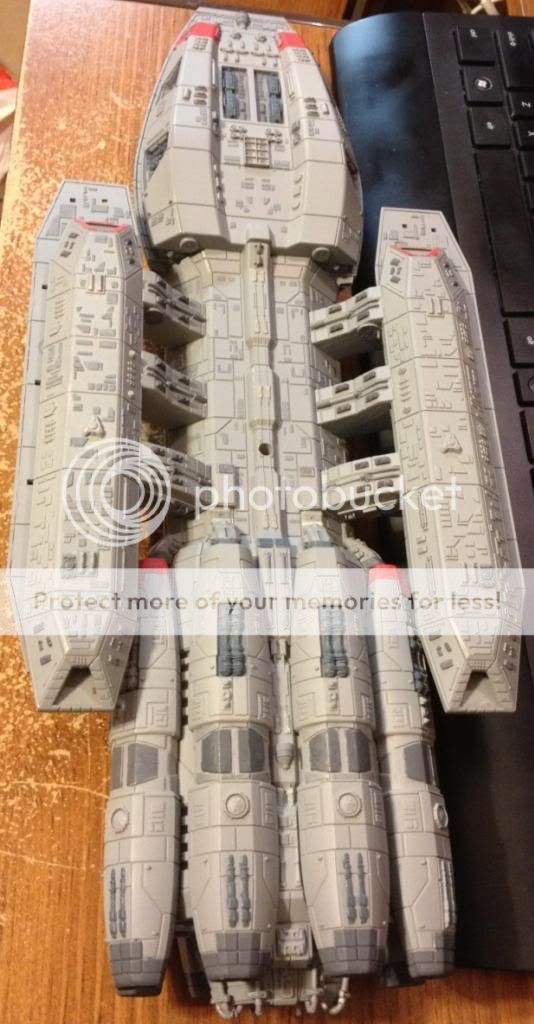
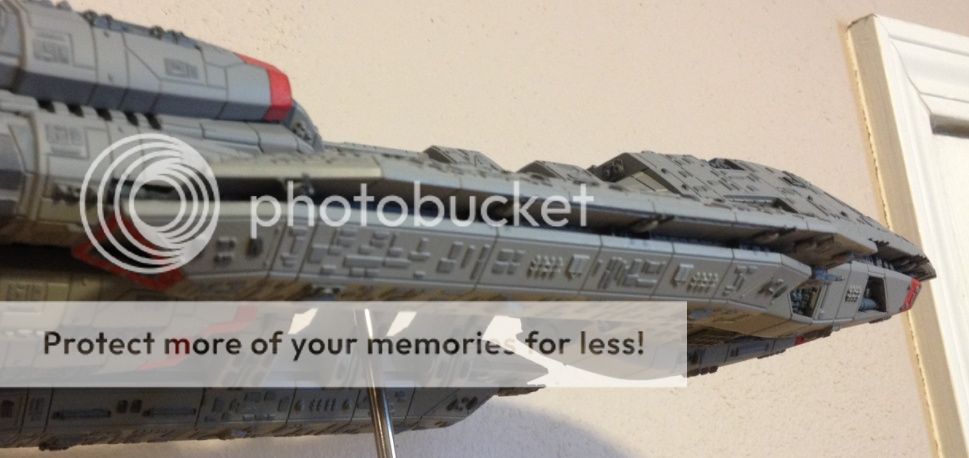
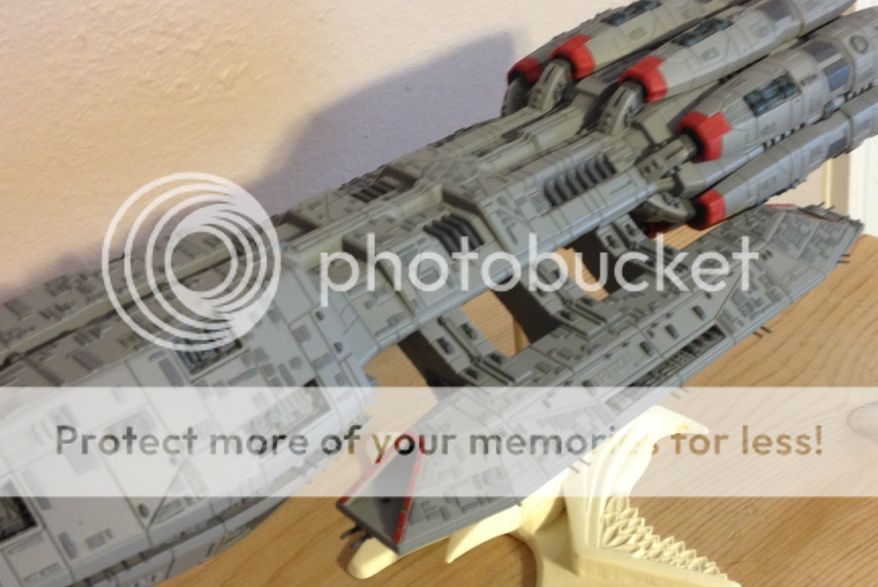
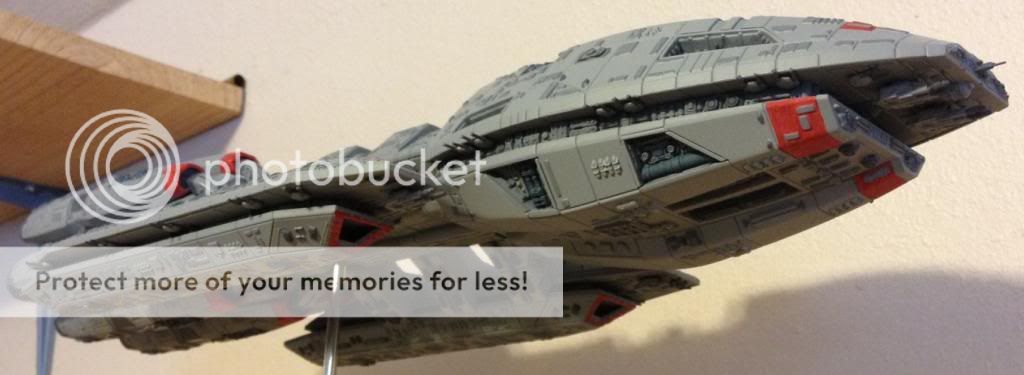
Battlestar Triton - Completed Acceptance Trials!

Griffworks

Well-Known Member
This last weekend (18th of May), I had absolutely nothing planned except to hang around the house w/my kids, as Wife was out of town helping chaperone her schools Senior Trip in Flori-duh. I had just finished a light cleaning of my office when I decided to do some clean up work on my Moebius Pegasus kit.

Well, that whole idea of just popping a few parts and cleaning them up didn't last long.... :rolleyes:

I've decided that, barring family matters (spending time w/the kids), finishing this build will be my priority. It's been so damned long since I finished anything that I started, that I wanted to see if I could do a project from start to finish w/o having the Oooh! Shiney!!! Syndrome kicking in. I guess we'll see how that works out for me.

I've been working on this build since Saturday afternoon (18 May), putting in about two hours a day. Mostly, it's been sub-assembly work, but I decided to add some extra greeblieage to this particular build and call her Battlestar Triton, BS-69. Why Triton? 'Cause I have the original PGMS Battlestar Galactica Photoetch fret set and not many of the other names on the set will work in that small area. I also like the name a lot.

Why BS-69? 'Cause I'm a Vert....
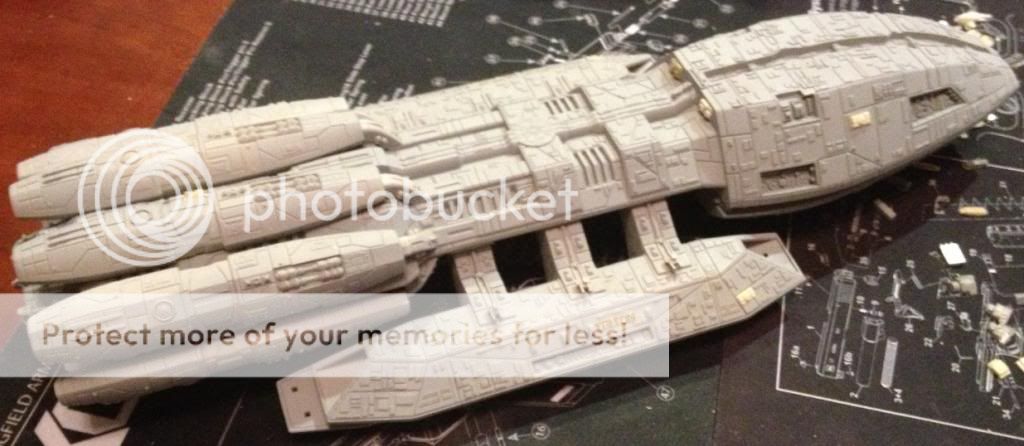

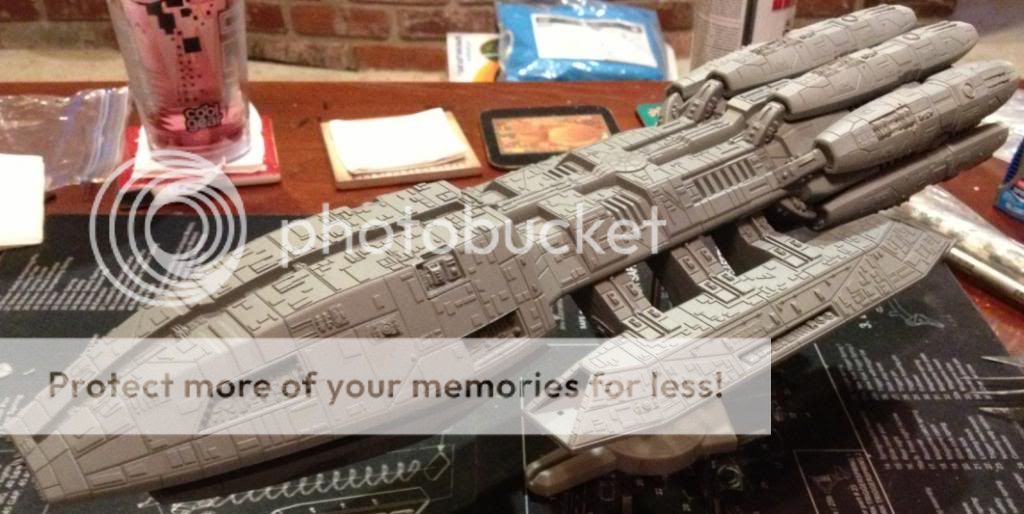
Teaser pic. She has a coat of primer, but at this stage all parts are simply friction held in place and I'm adding resin bits & bobs.

As with all silly SciFi modelers, I came up with a backstory for why I didn't build a hero ship, as well as she not being exactly screen accurate. I've decided that Triton had just come out of Drydock and was on a shakedown cruise when the Colonies were wiped out. She had received the upgrades that Pegasus would have received, had her yard time been uninterrupted. Mostly, this was done because I don't yet have the PGMS Battlestar Pegasus set for the exterior - mostly the arms - and wanted to spruce up those naked areas.
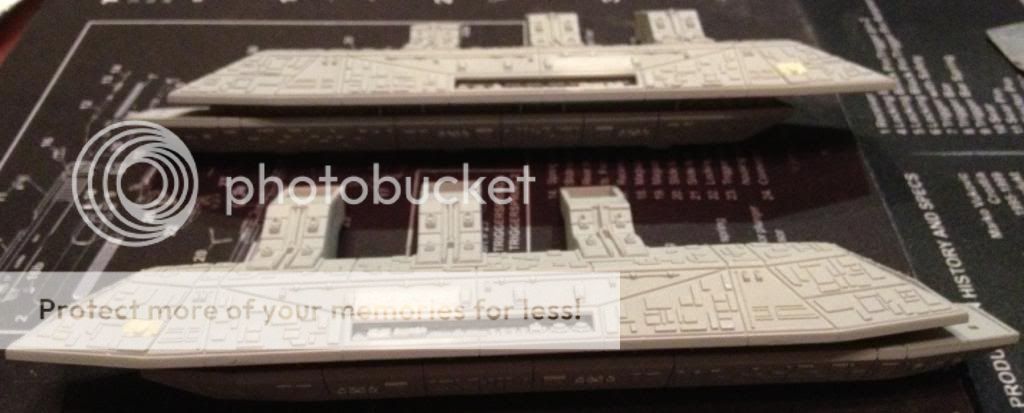


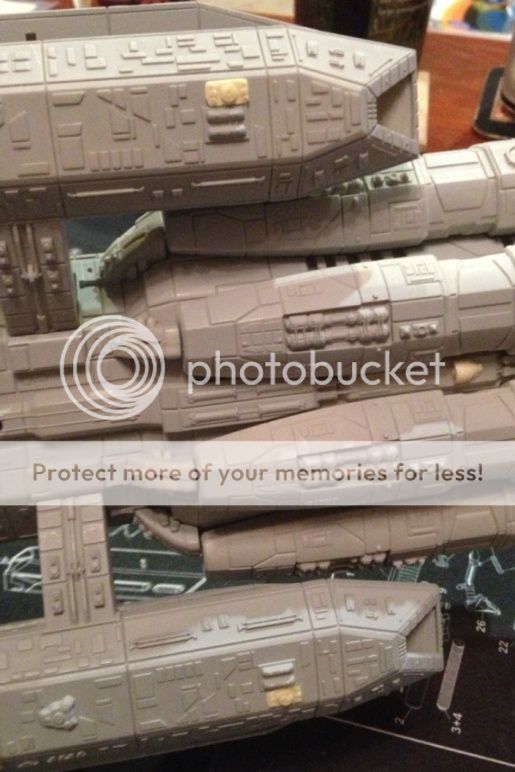
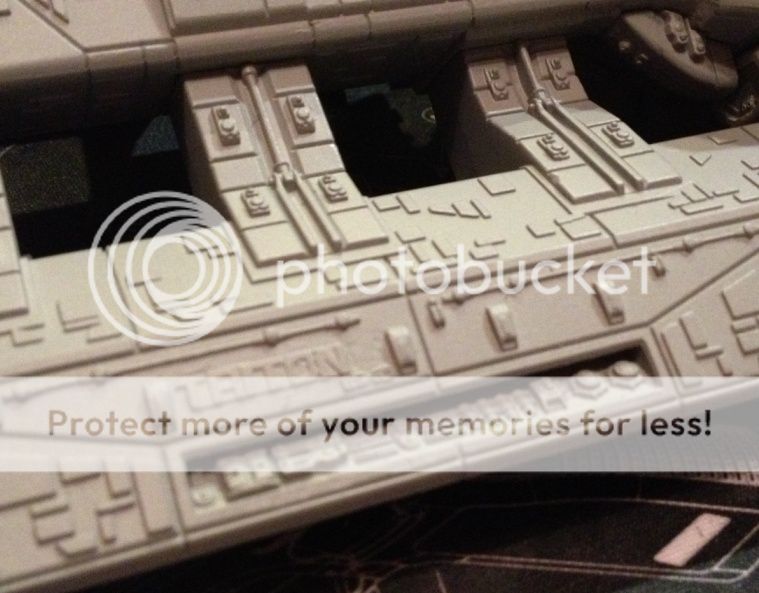
Here you can see that I had already removed the name Pegasus from the nameplate area. I used an Xacto and sand paper. The tan colored blobs on the two flight pods are resin pieces from the ARVEY Model Products for the TOS Battlestar Galactica accurization set. I had purchased a complete set, as well as a few extra's when they were still willing to "part out" a set, so have plenty extra's on-hand.
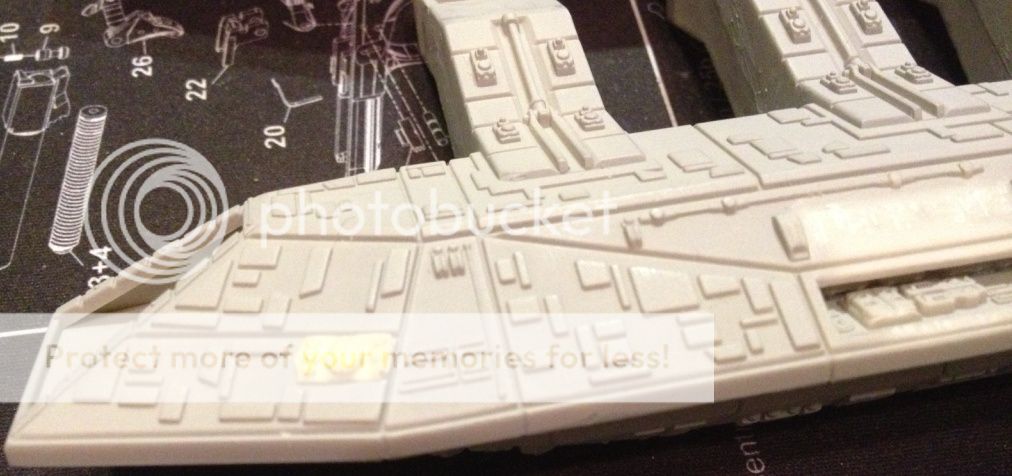
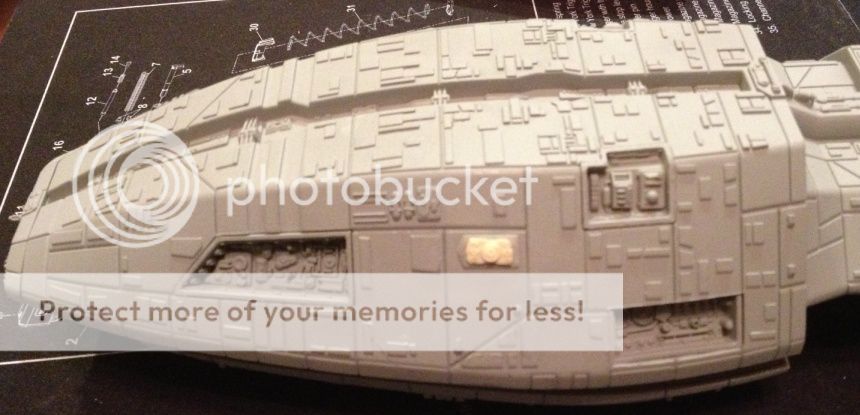


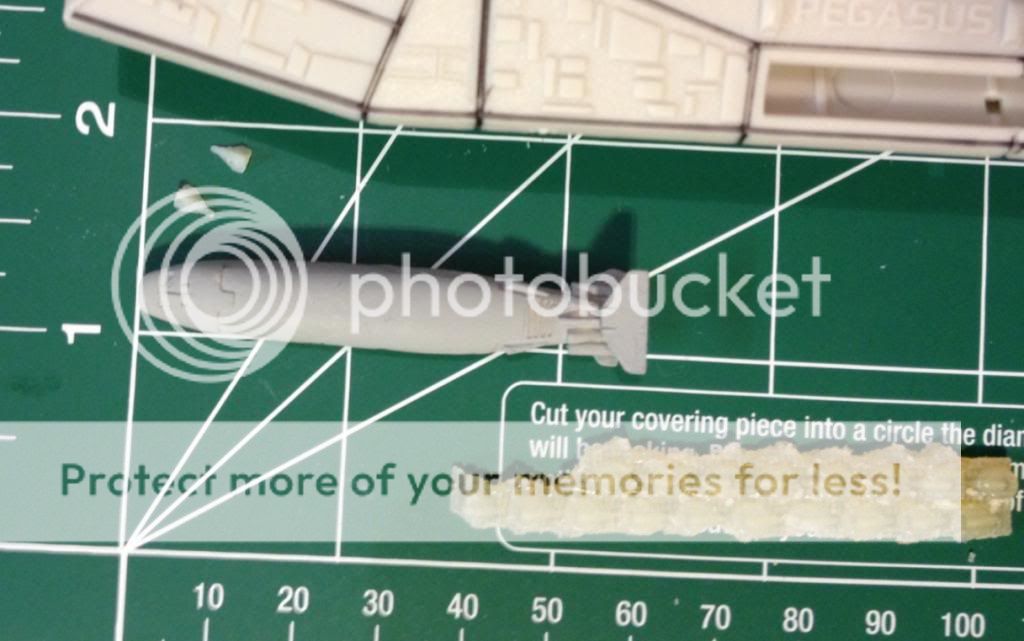
The tan pieces in the two above pics are what I'm calling antenna's. They're all over the TOS Galactica studio model and are also present on both the TNS Galactica and Pegasus. As you can see from the shot of the head, these parts are much smaller than what's on Pegasus. I only removed the detail pieces/parts and left the "base" of that particular part, as you can see.


The Triton nameplate. Those gun emplacements on the area where the "arms" join the flight pod - three on top of each - are meant to represent missile launchers. I've still not decided if I'm going to add more on the ventral surface, but would definitely like to add a few more main guns there. I also am thinking of adding some big-honkin'-guns to the top under inside area of the "mouth" area, replacing two single gun emplacements. They're meant to represent a part of the upgrade being that the Admiralty felt that the Cylon's likely upgraded their base ships, as well, so it was a good idea if the Colonial Fleet went for a bit of overkill with some super-rail guns.

More to follow, to include the super rail guns. My plan is to finish this the weekend of 1 & 2 June, if not sooner.

Any constructive comments/criticism appreciated.
 
Re: Battlestar Triton

Hadn't meant to hit "Submit Reply" above, mea culpa. Just a tad excited about all of this....

OK, more pics. This is all with just one light coat of primer on her, up to this point. Going to finalize the additional parts this afternoon, shoot another coat of primer and let it cure 'til the evening, then hit it with her main coat, I hope. I need to go thru my paints and look at what all I've got to use, tho....


She's still in sub-assemblies at this point - engines and flight pods aren't glued on yet. I'm going with a fairly basic paint job, not going to use the clear parts as clear. Nothing fancy going to happen w/this build, really.


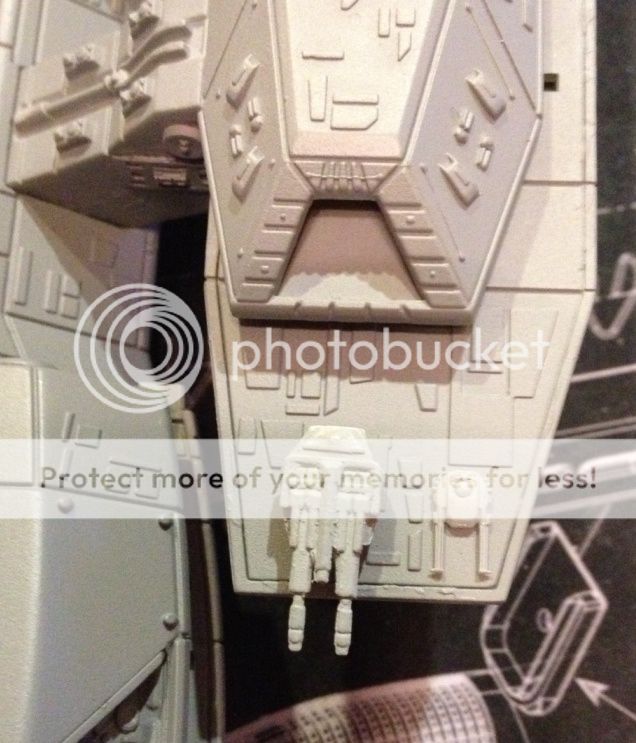
Here's those mega-rail guns I was on about earlier. My thinking is that they're limited on their elevation and lateral movement, as they're not nearly as... limber... as the standard, main guns. They give just enough movement so that they can be aimed without having to litetrally point the battlestar directly at it's target, tho the battlestar still needs to be pointed in the same general direction. I think - not great w/geometry - that I'm envisioning only about a 40 degree range of movement up or side to side. It's enough so that the ship can still do some small amount of evasive maneuvers while still delivering a pounding to any Cylon basestars.

The big honkin' mega-rail guns are some I purchased from BamBamProductions a while back off of eBay. I've picked up a couple different lots of these from him, so have more than I need. I think they look somewhat in keeping w/the design style of Pegasus and her "upgraded" technology. My thinking is that they're mostly automated, tho have gun captains in there who make minor adjustments and can take over if needed.

Again, these guns aren't glued in yet. I'm still not 100% sold on them, tho really like the way they look, thus far. Need to hit them w/some primer in a bit so they'll show up a bit better.

I was able to purchase another set of guns from Moebius, so will be able to add however many extra Pegasus-type guns I want to this build. When they come in, of course.


More later....
 
Re: Battlestar Triton

Went thru my paints last night. My compressor has a leak in a seal somewhere, so can't use it at the moment. However, I still have plenty of Tamiya paints. I really liked the color on my Fantastic Plastic Colonial Defender buildup, as I felt it does a good job of matching up to what we see on-screen of Pegasus, at least, to my eye. So, I used Tamiya rattle can AS-7 Neutral Gray (USAAF) as the base coat. However, I new, having only one can, that it wouldn't likely cover the whole thing. To that end, I saved the engines to last, knowing that I could fairly easily pop those off and things would be all good - provided I can find another can of the stuff locally. :eek:

If not, I'll just have to wait 'til I do to finish her.


Main coat applied. You can see on the aft section of the engines where I still need to hit with some more AS-7.


http://i763.photobucket.com/albums/...a/Battlestar Triton/Triton-13_zps7cffe1f4.jpg

Port flight pod. I like how the color blends in the added pieces/parts. Particularly the "antenna" that I added. Given the level of detail of the kit parts for the inserts, I think the detail on the antenna part doesn't stand out at all bad.


Chin guns, w/the big ole honkin' mega rail guns in place. Finally got around to putting some primer on them. None of these are glued in just yet, but I've decided to go with the mega rail guns.


... and I've decided to add one emplacement to each of the forward flight pods, as well. Overkill? Mega-Battlestar? :D


Closeup of the port flight pod. Strange how the primer didn't really bring out just how bad a job of sanding to remove any flaws in the area of the old ships name, yet the base coat does. :(


I plan to pour over the episodes of BSG with Pegasus, as well as the references online and also trying to do as many screen caps as I can from those ep's. I know there are several of the raised panels that appear to be a slightly different color, so I'll be trying to figure out what colors work best there, as well. Basically, this is a sort of "dress rehearsel": for when I get around to building one of these up as Pegasus. As such, I'll be trying to match at least the colors to The Beast, even if I'm not going to the same lengths for the detail.

I see much masking in my future.... :(
 
Re: Battlestar Triton

Looking good so far.

Here's a shot of the Pegasus that might be helpful.


-Mike J.
 

Attachments

  • BSG_4x00_Razor_0271-Ar.jpg
    BSG_4x00_Razor_0271-Ar.jpg
    208.1 KB · Views: 517
Re: Battlestar Triton

Thanks. I've got that, actually, but I do appreciate the help. I've not yet started pulling reference images myself from my DVD's, but have a few already in my references stash. I've also been saving some of the images from here: Battlestar Pegasus by ZOIC

Again, appreciate the assist and the kind words. Hope to get more done on Monday and Tuesday.
 
Re: Battlestar Triton

Got the base coat on the last of the guns done today. Been a jacked up week, so not much more than that at this point, altho I did get some initial masking started tonight, as well.


Hope to get the masking completed tomorrow afternoon - we have a mid-morning wedding to attend - and then get started on the painting.
 
Re: Battlestar Triton

Gaaah! I wish I'd remembered about that from the MiniSeries (Triton reported destroyed) and known about that registry number before. Shoulda done some research! My bad. :(

Thanks for the link, regardless. I keep forgetting to go thru BattlestarWiki to look at stuff.

Who to say that reports of Triton being destroyed weren't wrong? Maybe the CO of Triton pulled a Commander Cain from TOS and moved to take on two basetars, which esss-sploded. It just looked like Triton was destroyed and she jumped at the last second.... :D

Yeah, I know. :)
 
Re: Battlestar Triton

That's the spirit. Certainly the crews of Galactica and Pegasus thought they were the only ones left. Unless they show a particular ship breaking up, then anything's possible.
 
Re: Battlestar Triton

I know, right?!? In the fantasy world of modeling, what's adding a bit more to the fantasy. :)

Man, this model shoulda been finished last Sunday and it's still not done! Lousy, stupid AMS! There are more pics than I link to here, but these are the highlights, to my thinking. I'm hand-painting all of the details, as I've already mentioned. It's helped me to discover why Pegasus is called The Beast!


(click the pics to see larger images)

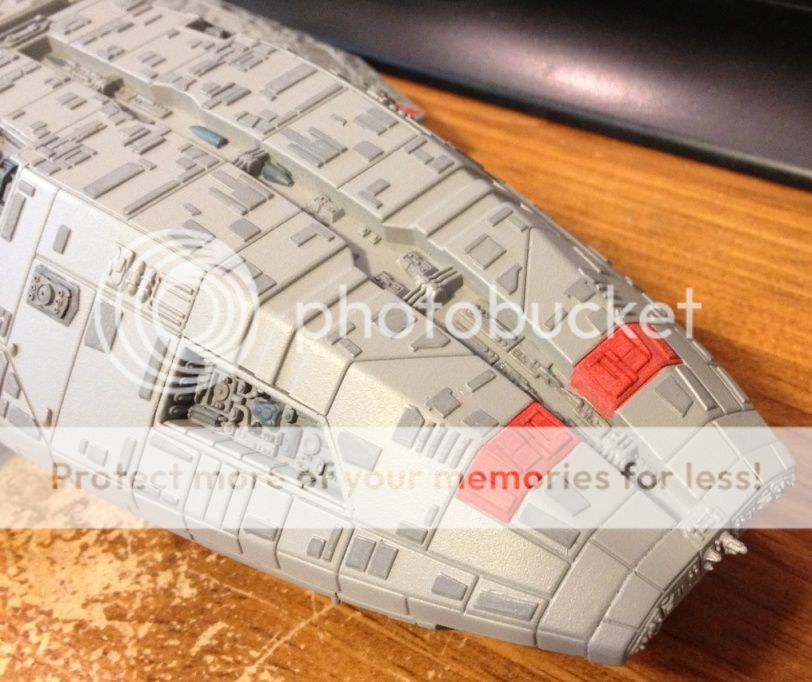
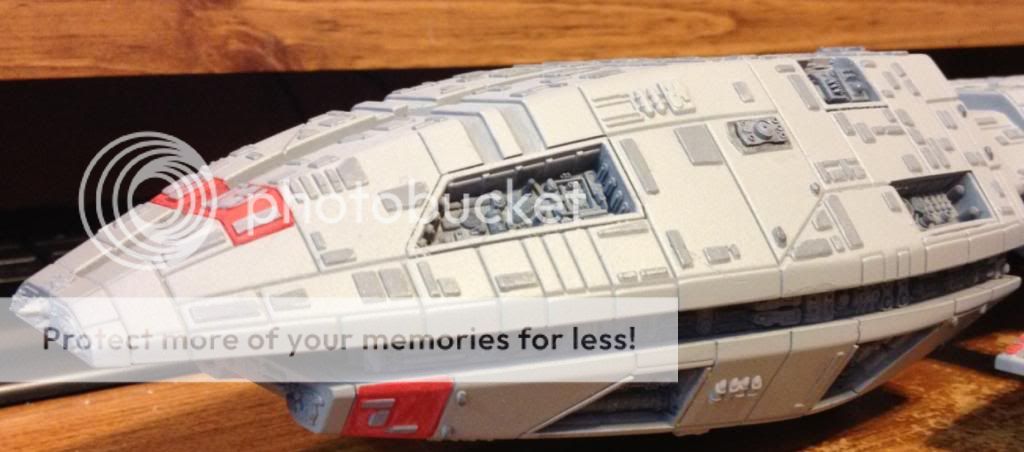
Nose stripes are on. I used Tamiya XF-7 Flat Red after masking the area off. Well, except for the "trench" area.


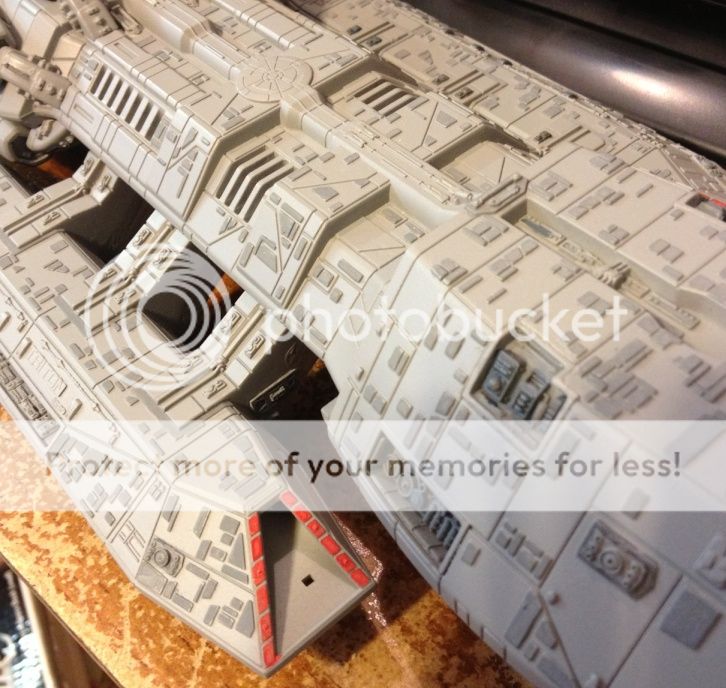
Flight pod stripes are hand-painted. And all those lil' squares are hand-painted, as well. That's why it's taking so frakking long to finish The Beast.


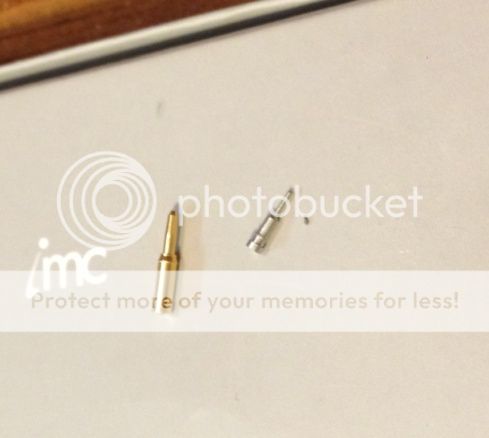
Two electronics connecting pins that I intend to use as additional antenna in the nose section. Yeah, I should've added these before all this painting, but I didn't know where these were at the time.

All of this has definitely taught me a lesson - have a frakkin' plan in place before you start the painting! A large part of that plan for my next build - Pegasus - will be to pre-paint all of the sub-assemblies. :hammer:

More later.


Last edited:
Re: Battlestar Triton

Been a busy week of job hunting, so slow week of modeling. Of course, ti's compounded by the fact that this is all hand painted detail. Masked off several of the larger areas to mitigate over-paint, but that'd make this build take about 100 times longer if it was done to each individual raised plate detail. So, hand painted it is....

Recessed areas are very roughly painted with XF-53 Neutral Grey to bring out some of the details a bit better for contrast. Darker areas are either XF-24 Dark Grey or XF-18 Medium Blue for further contrast. And again, raised detail panels and inside of the "trenches" are painted XF-53. The red is XF-7 Flat Red. I opted to paint the underside of the 'Gator head w/a red stripe, as well as the front of sublight engines to further highlight the fact that she's not Pegasus.
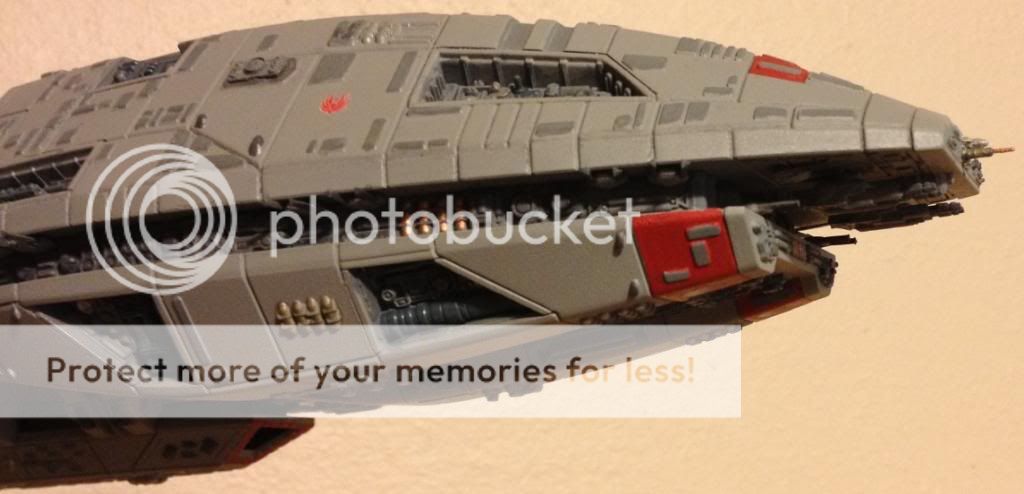
Plus, like bowties, I think it looks kewel. ;)


Close up of the 'Gator head.
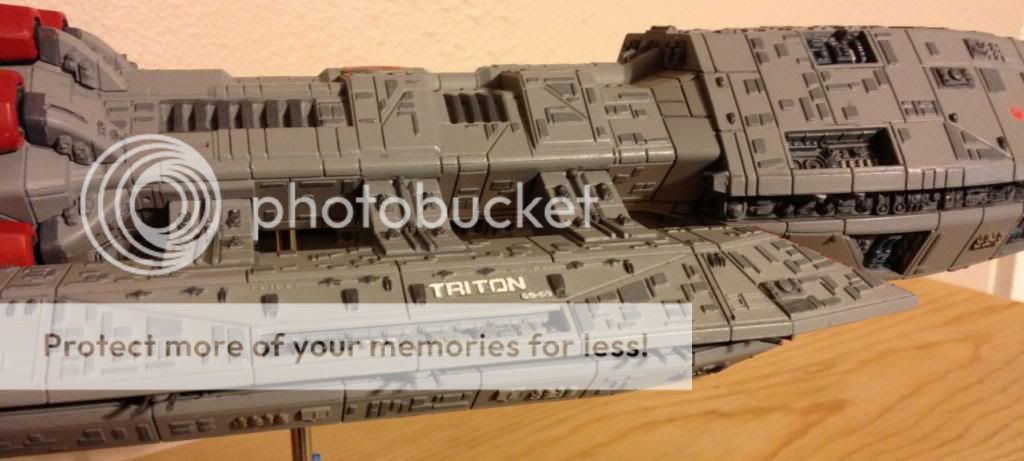


Main hull raised detail panels are complete, started working on the starboard flightpod underside.

Hope to finish the red detailing tomorrow, as well as the rest of the hull plates - after doing yard work in the morning before it gets ungodsly hot out. Nice way to lounge around, sittin' w/ a beer on the workbench while painting and listening to music - currently the Heavy Metal soundtrack. :D

Definitely gotta do touchups after I'm done, as I've already got paint rubs in a couple of areas.

I don't think I'll be doing anything additional to the sublight engines, tho will do some minor contrast painting for the Jump Drive section. Nothing major, tho.

Then I get to see if I can get the decals to set correctly for the name plates - then the guns! :twisted:


Last edited:
Re: Battlestar Triton

Been painting the last several days. Finally completed the hull plates and most of the other raised detail. Decided to paint the raised hull plate details on the engines - silly me.

I also added an electrical connector piece as an additional antenna. :D


Still haven't decided if I'll just ignore the open hangar's of the Flight Pods or what I'll do there. Been considering adding some sort of doors to those huge, open hangar bays - where an errant nuke would make one of these battlestars have a really bad day. :eek: I'd really have to add some thin sheet stock to raise the level of the flight deck up so that it's flush w/the bottom portion of the opening, tho, if I go with open bays.

Hoping to perhaps at least complete the painting of the engine surfaces, as well as all other surface details before I go to bed tonight. Then I'll add the guns for the Bigga Badda BOOM factor. :D
 
Re: Battlestar Triton


She's now armed! Detail painting on the guns was completed last night, so I decided to arm her up. I added two additional guns to each Flight Pod, each just fore and aft of the regular broadside emplacements, which gives her the original full complement of KEW emplacements she originally had, while also give her a bit more punch for broadside fusillades against a Basestar. I also pulled out one of my TOS Galactica Helmet emblems from my storage for use as a stand for now. The kit stand is too light weight and doesn't give nearly as much support as I'd like. Plus, it has "Battlestar Pegasus BS-62" plastered all over it.


Just need to paint some more detail areas, but plan to mask them off, first. Those areas will be the liquid/gas canister/containers that are all over the hull of the ship. I'm going to paint them a variety of colors with Testor's metallics - silver, bronze and platinum, mostly.


I also sort of toyed around with doing some wash/shading between the main hull plates. Mostly, I did it on top of the port Flight Pod, port side of the main hull and the gator head. Basically, I used some dirty water I'd been cleaning my brushes in to directly fill in the sections between the main hull plates. It didn't turn out as good as I'd hoped on camera phone, but looks a bit darker when seeing it "in real life".


Some of the areas I'd painted seem to have a bit more shine to them than they do when looking directly at them, as well. Not sure if that's a result of a non-even mix of the little bit of thinner I'm using for the hand-painting or what. They show up best in the pics, tho it looks even from most angles.


She'll need weathering, specifically trying to get a dark wash between the large hull plates to make them stand out much better. I'd thought about using a technical pen in black, but that tends to look a bit too shiny for my tastes.

I also need to paint the engine exhausts gloss white, let 'em cure for at least 24 hours, then paint over that with one or two coats of Tamiya Clear Blue.

And finally, I'll see if I can get the decals to fit over her name plate. If that fails, I'll try my hand at painting some flat white over them.

Still prolly just leave the landing bay flight deck decals off. I know it'll look stupid, but it'll remind me how stupid I was for not considering that in for the first damned place!


Re: Battlestar Triton

It's been slow as Heck, painting all the little details, plus still job hunting. I've finished all of the hull plates on the main hull, flight pods and engines, as well as most of the jump engine area is mostly done. I've started painting the metallic paints - Testors brand Steel, Aluminum, Brass and Jet Exhaust as an added for a pretty decent variety. I've also been working more on the areas between the big hull plates, trying to darken it moderately, but it's looking like I'm going to have to go with a severely thinned down flat black paint instead of using the drek that's in the bottom of my rinse bowl - I've been collecting it at the end of a painting session into another bowl.

Anyhow, starting to get into the home stretch! Not much painting left.


Beauty shot showing off the underside big KEW guns.


I also decided to forego using the decals for the name plate Triton and went with painting Testors Flat White for the name plate. I used a toothpick after slightly thinning some paint I left on a pallet, keeping it wet with a little extra thinner, then adding more paint to it as the paint dried out too much. Anyhow, it didn't turn out as well as I had hoped, but also doesn't look nearly as bad as I'd feared it might. Lesson learned, tho - if I choose to do this again, it will be done in such a way that I take even more time with it, working in layers of thinned paint.


Outboard view. Sorry about the crappy focus. Doesn't look quite as bad as a Three Foot model. :)


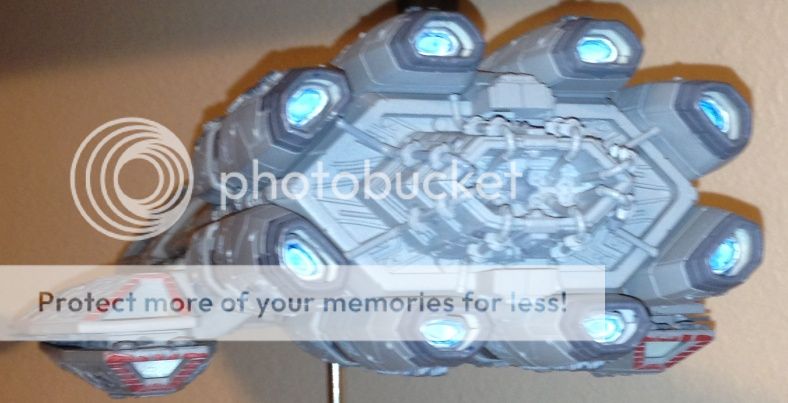
I painted the inside of the engine exhaust areas Testors Gloss White, letting it cure for a full 24 hours. After it fully cured, I used Tamiya Clear blue in an attempt to simulate the engine glow. I used the flash on my iPhone to take this pic, which I think shows it off nicely. Under normal lighting conditions, it just looks like gloss white covered in clear blue paint. :)


Last beauty shot for now.
 
Re: Battlestar Triton

Spent most of my free time yesterday doing a dark wash specifically for the panel line spaces between the hull plates. After letting it dry all night, it looks like I need to go just a little bit darker so that the lines stand out better. It's sort of like doing grid lines on a Starfleet ship from Star Trek. :)

While I've decided to not do the flight deck decals in the flight pods (at least, until such time as I make the decision to go back and revisit this kit by building some sort of flight deck interior), I also recently rolled the dice and ordered some generic BSG decals from J-BOT and won! I contacted Jim in advance, inquiring about what the sheet looked like and he emailed me a couple of somewhat small, but still large enough to make out, decal sheets. He made me one sheet with some custom names and Jim charged me what I consider to be a reasonable price - USD$20, shipped. I had the sheet w/in two weeks from Canada.

The J-BOT sheet I received has all the custom names I requested (6 total, those for the Defender-class in two different sizes), as well as 7 large Phoenix's like on the Pegasus, 2 circle-types - one in a purple color for Columbia as seen in the flashback portion of "Razor" - , 1 for Galactica, 4 different sets of museum-window type decals for NuGalactica, 5 different colored Phoenix w/in a circle sort of like for Pegasus, but smaller, a bunch of different sized Phoenix's w/o a circle and 3 different font sizes of letters and numbers, two sizes of which are two different sets that contain enough to do multiples of most common names. I'm prolly going to put the names of my Defender's on the main hull and down on the lower hanging flight pod w/the smaller-sized font.

Anyhow, a couple of those small extra Phoenix decals will go on the side of the gator head, sort of as we saw the "golden" Phoenix on the sides of the Pacifica during the flashback section of "Razor". My thinking is that she's just completed acceptance trials and this is what the Colonial Fleet was going to start doing with all of her large warships once they've completed a refit/refurb.

.
 
Re: Battlestar Triton

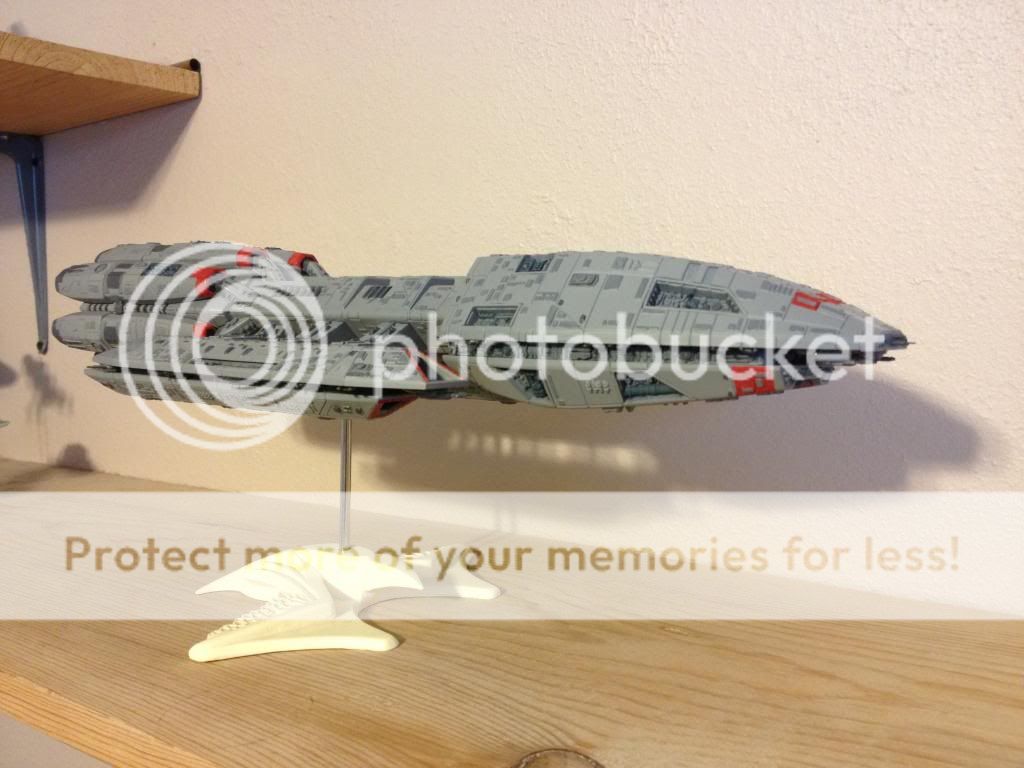
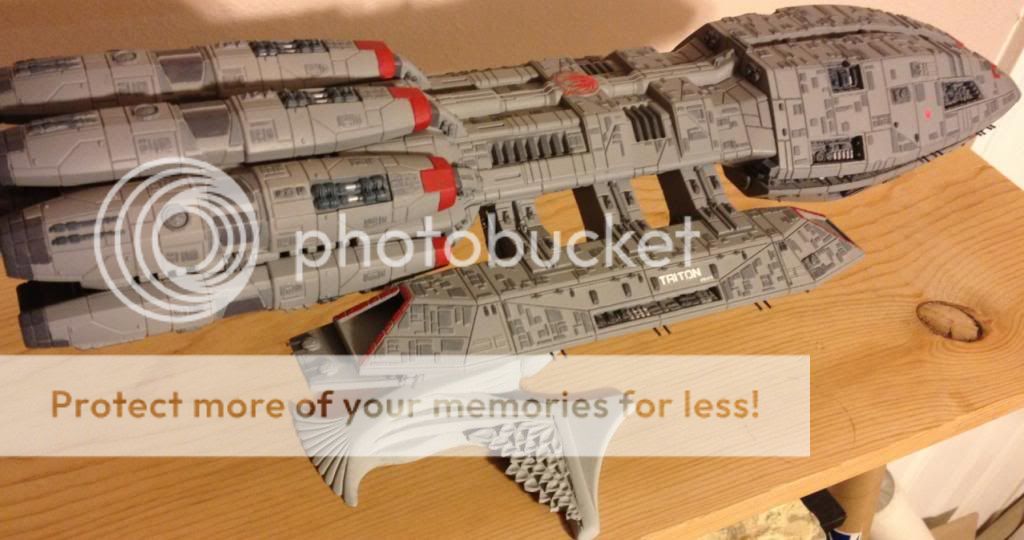
Battlestar Triton has completed her acceptance trials and is now on the line with her escorts as Battlestar Group 69.


I might still give her a bit more grime, but she's good enough for me at this point to call her finished! First model I've worked on from beginning to end w/o a major lapse between start and completion - I've been averaging a couple of years in-between, for those who don't know me....

The base coat is Tamiya rattlecan AS-7 Neutral Gray (USAAF), with the other colors hand-painted from Tamiya acrylics. I started off wanting to see how painting all of those individual raised hull plates would look with an ever-so-slightly-darker color and liked it, so kept going. Little did I know that it would then take me almost three weeks to get that done! It would have gone faster, but there are days that my carpal tunnel kicks in pretty hardcore and I can only work for short periods of time.


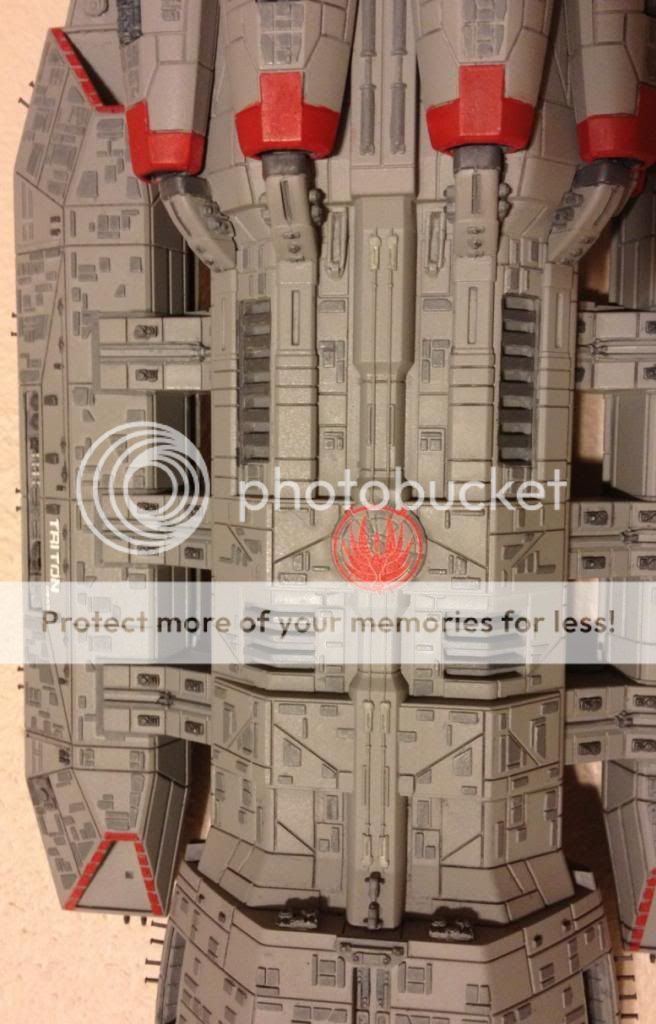
The decals are all from J-BOT Decals[/URL], from a custom sheet I ordered a little while back. It's actually a generic sheet w/a couple of custom names I requested. He has a really kewel sheet that includes a number of the Colonial Fleet Phoenix symbols in a variety of colors. The main, larger red Phoenix on the back, the two smaller red on either side of the gator head and the two white on the bottom of the chin are all from his sheet. There are a variety of sizes and colors on the sheet. I used Microscale Micro Set on the decals over a Testor's gloss coat, then sealed it all with Testors Dullcote.


The large Phoenix that goes on the back just doesn't quite look right, color-wise. It comes off as more of an orange-ish red. As I've remembered now, I've always had problems with decals. My big meat hooks just don't do well with moving around tiny decals.

Then I remembered one of the things I discovered way back - I get a toothpick, wet it and then can fairly easily move the decal as needed. :rolleyes:


I added the two white Phoenix emblems to the chin area, as well as the sides of the gator head, because I wanted to show a slight change in Colonial Fleet policy wherein they're stamping the Phoenix to where it can be seen from at least three sides of a Fleet ship. I dunno if that really makes sense, but the real reason is that I wanted them there to sort of off-set the red strips on the bottom chin. :)


I also added two more turrets to the chin area, directly underneath the two on the upper inside of the "mouth". I was watching "Razor" yesterday and noticed an additional two turrets firing in those areas that you don't normally see. There are also some firing somewhere from the flanks, either built in to the main hull or maybe those dark gray "things" that are in two positions on each of the top and bottom areas of the arms. I'm thinking, tho, that they're trying to show some more KEW turrets somewhere on top of the Flight Pods, but w/o actually showing turrets.


The nameplate of Triton is from the ParaGrafix™ Modeling System[/URL] set for the Moebius Models TNS Galactica. I had wanted the name Triton for a battlestar for a while and decided to "cheap out" on going this route. I didn't do my homework for the registry number, which should be BS-39, but oh, well. I chose BS-69 'cause I'm a Vert. :twisted:

I used a toothpick to put Testor's flat white paint on the letters and numbers. It was slow going, as I put it on in a couple of really light layers. Looks like crap and I learned that lesson - I should've used the decals.

Overall, I think she turned out alright. The Triton build was meant to get me back my Modeling Mojo by focusing on this one model and FINISHING it. My original timeframe was to attempt to have it done in about two weeks time - FAIL!


Next up, the battlestar Atlantia, BS-01, Flagship of the Fleet. I've already got the new kit and am going to start hacking on her flight pods tomorrow to install the decking, build the internal flight deck and add the Catalyst Creations accurate arms that I purchased last week. But that's all a story for another thread.... :twisted:

.
 
Oops, sorry! I hadn't been here in a couple weeks, obviously.... :(

She's right about 17" / 43.18cm long. Very nice sized kit! Lots of fun to build.


Okay, so it had been bugging me for a while, so I went back and added decals for the upper Flight Decks. Since I never opened the flight decks up all the way thru, I just went with the kit decals. I first closed off the square hole caused by the gun emplacement with Tamiya Putty, Basic Type. I got them as filled in as I could, given the tight confines, then after sanding it all smooth I masked off the front bays only - I didn't have to make any adjustments to the aft sections.


I then shot some primer on both of them, gave it time to cure, then used the same color as the base coat. After that cured, I shot some gloss coat on those two, as well as the two at the rear. Once that had time to cure, I cut the kit decals down a bit, measuring - unsuccessfully in one instance - so that they fit snug to the read and the front of the space I was left with. I used Microscale Micro Set liberally, as these kit decals are pretty thick. They snugged down alright, but it still could have been sooo much better.


Anyhow, after that had all had plenty of time to set, I sealed it all in with a shot of dullcote into each of the base, as well as on the outside to make sure any glossiness was good and gone.


She is now officially, 100% DUN!

Well, until I get a couple of other BSG projects finished, then I'm thinking seriously about going back to Triton, stripping her down and adding both the Catalyst Creations Pegasus Upgrade Arms and opening up each of those flight decks.

Yeah, I'm an idiot. Where's muh sign? :oops:
 
Back
Top