You are using an out of date browser. It may not display this or other websites correctly.
You should upgrade or use an alternative browser.
You should upgrade or use an alternative browser.
Bandai 1/144 Millennium Falcon GROUP build awakens! OPEN TO EVERYONE! :)
- Thread starter Roboted
- Start date

Unes
Active Member
Nice work!
How did you do your streaking? I'd love a close up of your favorite patch
thx astroboy
")
the streaks have been made with oilpaint by "502 Abteilung / Starship Filth" and a fine brush.
thx for your interest.
/Unes
This is a genius use of the stickers. Anyone using this technique for masking?
https://www.youtube.com/watch?v=Sh3_bEU-K2A
https://www.youtube.com/watch?v=Sh3_bEU-K2A
astroboy
Master Member
This is a genius use of the stickers. Anyone using this technique for masking?
https://www.youtube.com/watch?v=Sh3_bEU-K2A
very interesting! Now....not to be one of "those" guys but in regards to the falcon, the paint lines don't actually follow the shape of the panel. They don't ever follow the little notched out bits
That looks great! What base color did you use? AS-20?
SB
very interesting! Now....not to be one of "those" guys but in regards to the falcon, the paint lines don't actually follow the shape of the panel. They don't ever follow the little notched out bits
Now that's interesting! I knew the 32 incher didn't but presumed the CG model did. That makes painting this thing a whole lot easier...
astroboy
Master Member
I'm not sure either. I haven't paid a lot of attention to the CGI versionNow that's interesting! I knew the 32 incher didn't but presumed the CG model did. That makes painting this thing a whole lot easier...
Sent from my SM-N910W8 using Tapatalk
Unes
Active Member
That looks great! What base color did you use? AS-20?
SB
Thx StevenBills
Yes...Tamiya AS-20 Insignia White
A new picture...

Last edited:

Guns Akimbo
Sr Member
Nice!
But your oil streaks are reversed on the underside.
But your oil streaks are reversed on the underside.
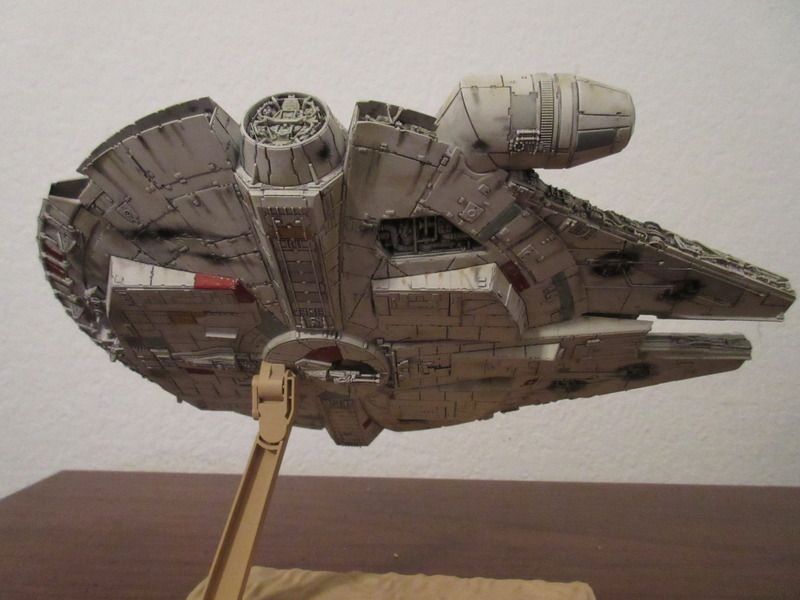
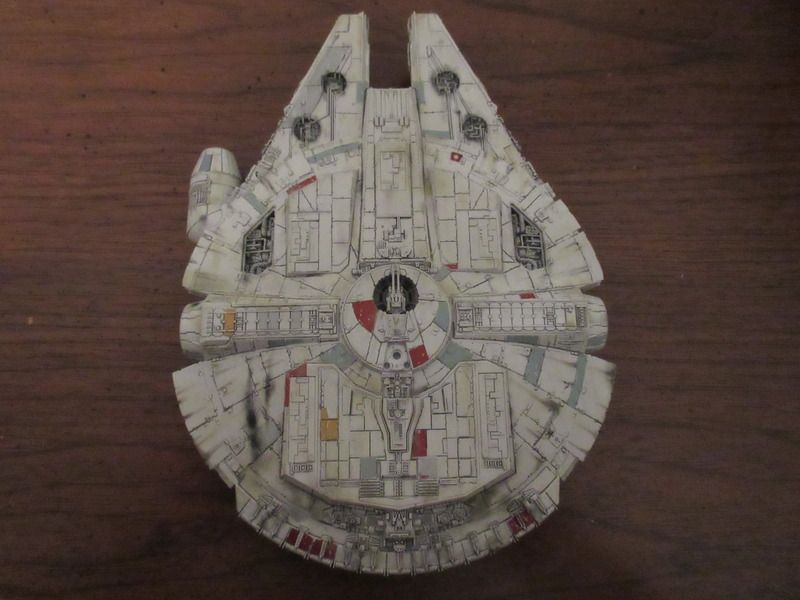
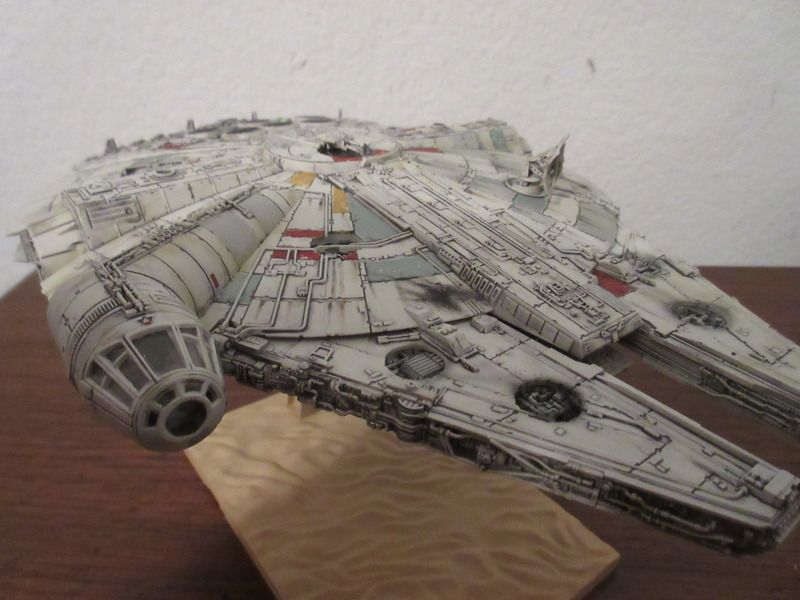
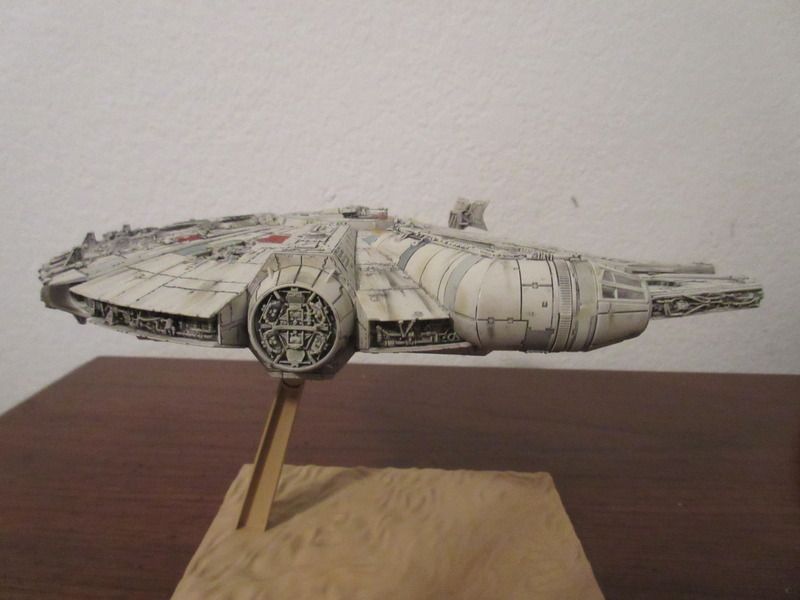
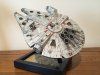
Here is my contribution.


Just as a quick tip for anyone looking for a simple solution to sprucing up the base for the Falcon, it turns out that a 10x15cm photo frame fits the supplied Bandai piece very well. Just drop a few slivers of plastic in the sides, hot glue from underneath, and voila!

Attachments
Unes
Active Member
Just as a quick tip for anyone looking for a simple solution to sprucing up the base for the Falcon, it turns out that a 10x15cm photo frame fits the supplied Bandai piece very well. Just drop a few slivers of plastic in the sides, hot glue from underneath, and voila!
http://i.imgur.com/Ey69sVV.jpg
Ah..nice idea! :thumbsup
Looks very good.
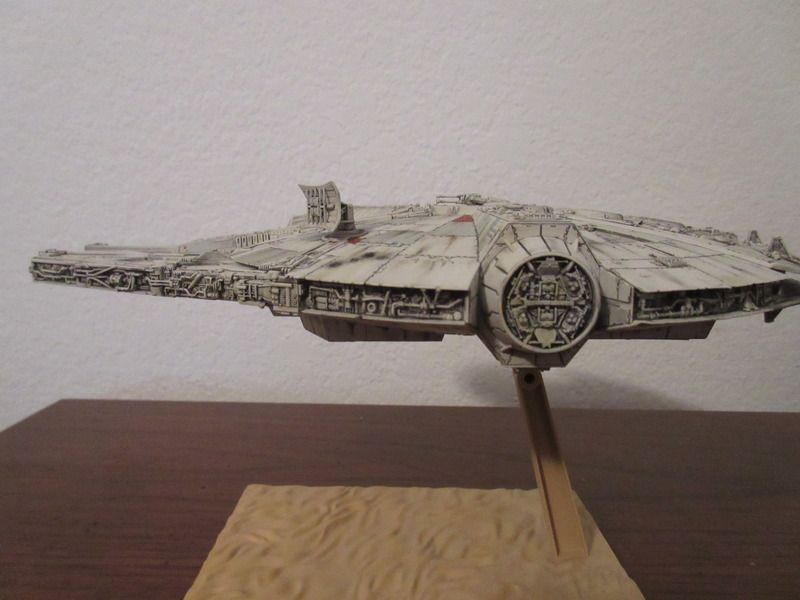
Here some pictures in closeup:


I've been a lurker around RPF for a while. I do mostly radio control stuff, but I was a big model maker 30+ years ago when I was a teen.
I have the Bandai R2-D2 and X-wing and just received my Millennium Falcon today. My plan is to do the Falcon LAST, after I work on learning my first ever airbrush.
When I opened the box of the Falcon, I was astonished at the level of detail! All the tiny pipes that are separate pieces are just incredible.
In all of threads and videos I've seen usually show painting in layers with pre-shading and weather washes and some detail painting.


But what about painting every pipe and fitting as individually as possible? I know not every bolt and rivet can be individually painted, but I'm wondering if there are layering and other techniques that can help achieve that look?
I know it's not "canonical" to the movies, but Han Solo's line about making a lot of modifications himself keeps coming back to me. I'd love to detail these tiny parts and paint in some non-symmetry to know that parts had been collected from different places and times.
I was thinking about all this add day - and while sitting in line at the drive-thru at KFC, I saw this crazy gas meter installation;

The variety of colors and textures was really cool! Why in the heck are those bolts on the left BLUE?!?!?!? Look at the difference between the pipes and the fittings and the flanges, etc. This the kind of look I'd love to replicate. I know it's an insane amount of work, but I'm in for the long haul. If this takes a year, I'm OK with that. It's the planning and making that I love.
So - Am I totally insane? Do you folks have some pointers and suggestions?
Thanks,
Oldcrow
I have the Bandai R2-D2 and X-wing and just received my Millennium Falcon today. My plan is to do the Falcon LAST, after I work on learning my first ever airbrush.
When I opened the box of the Falcon, I was astonished at the level of detail! All the tiny pipes that are separate pieces are just incredible.
In all of threads and videos I've seen usually show painting in layers with pre-shading and weather washes and some detail painting.
But what about painting every pipe and fitting as individually as possible? I know not every bolt and rivet can be individually painted, but I'm wondering if there are layering and other techniques that can help achieve that look?
I know it's not "canonical" to the movies, but Han Solo's line about making a lot of modifications himself keeps coming back to me. I'd love to detail these tiny parts and paint in some non-symmetry to know that parts had been collected from different places and times.
I was thinking about all this add day - and while sitting in line at the drive-thru at KFC, I saw this crazy gas meter installation;
The variety of colors and textures was really cool! Why in the heck are those bolts on the left BLUE?!?!?!? Look at the difference between the pipes and the fittings and the flanges, etc. This the kind of look I'd love to replicate. I know it's an insane amount of work, but I'm in for the long haul. If this takes a year, I'm OK with that. It's the planning and making that I love.
So - Am I totally insane? Do you folks have some pointers and suggestions?
Thanks,
Oldcrow
astroboy
Master Member
That is a very good question. A big one, for sure. I would say that if you want it. To look like the one you saw on screen, don't approach it like that. I thought about it when I was going to do mine, but ultimately I wanted it to look like the movie falconI've been a lurker around RPF for a while. I do mostly radio control stuff, but I was a big model maker 30+ years ago when I was a teen.
I have the Bandai R2-D2 and X-wing and just received my Millennium Falcon today. My plan is to do the Falcon LAST, after I work on learning my first ever airbrush.
When I opened the box of the Falcon, I was astonished at the level of detail! All the tiny pipes that are separate pieces are just incredible.
In all of threads and videos I've seen usually show painting in layers with pre-shading and weather washes and some detail painting.
View attachment 637877View attachment 637878View attachment 637879
But what about painting every pipe and fitting as individually as possible? I know not every bolt and rivet can be individually painted, but I'm wondering if there are layering and other techniques that can help achieve that look?
I know it's not "canonical" to the movies, but Han Solo's line about making a lot of modifications himself keeps coming back to me. I'd love to detail these tiny parts and paint in some non-symmetry to know that parts had been collected from different places and times.
I was thinking about all this add day - and while sitting in line at the drive-thru at KFC, I saw this crazy gas meter installation;
View attachment 637880
The variety of colors and textures was really cool! Why in the heck are those bolts on the left BLUE?!?!?!? Look at the difference between the pipes and the fittings and the flanges, etc. This the kind of look I'd love to replicate. I know it's an insane amount of work, but I'm in for the long haul. If this takes a year, I'm OK with that. It's the planning and making that I love.
So - Am I totally insane? Do you folks have some pointers and suggestions?
Thanks,
Oldcrow
I would also say that at this scale, it could end up looking a bit too busy. That being said, I would LOVE to see your outcome!!!!
So by all means, GO FOR IT! It could look really badass
Sent from my Nexus 7 using Tapatalk
Dedalus5550
Sr Member
Nice!
But your oil streaks are reversed on the underside.
See, I get what you're saying, but now I wonder. Seems like the streaks really should sorta go the way Unes has them. What I mean is that on a real ship, the streaks should start at a pretty small point--the point of a leak--then spread OUT as the material leaks down. Now I realize that with his falcon, the streaks kinda fade the wrong way, but what about the overall shape. I also would agree that if we focus on what the ship/model looks like in the film, that has to take precedence. But I also wonder if it's not an issue of realism over accuracy. It might seem more realistic to do it the way the studio and/or CG model looks, but it might not be accurate compared to what would really happen. The same can be said about the upper surface, and even more so as the slight curve would make streaks more likely to spread as they go in the direction of the edge. Of course, all this ignores the fact that a lot of these streaks outta happen more while the ship is running and flying and at least in atmosphere that would also impact the direction.
gercon8
New Member
Hello members of the rpf....
been working on my bandai falcon since last November (on and off) and was doing some paint work on the engine exhaust. Tried to put in on the hull to see how it looks and found that i could not snap it in place. Am i putting the wrong grills on the wrong spot? cant be cos it wont fit any other way. what could be wrong? is anybody else having same problem?
been working on my bandai falcon since last November (on and off) and was doing some paint work on the engine exhaust. Tried to put in on the hull to see how it looks and found that i could not snap it in place. Am i putting the wrong grills on the wrong spot? cant be cos it wont fit any other way. what could be wrong? is anybody else having same problem?
Similar threads
- Replies
- 11
- Views
- 1,022
- Replies
- 3
- Views
- 1,242
- Replies
- 2
- Views
- 879