AOTC helmet scratch build

nzjedi

New Member
I was having trouble finding a phase 1 bucket, the EFX didn't do it for me so I thought I might make one myself.

Starting from the beginning

I knocked out a very basic 3d model of the helmet
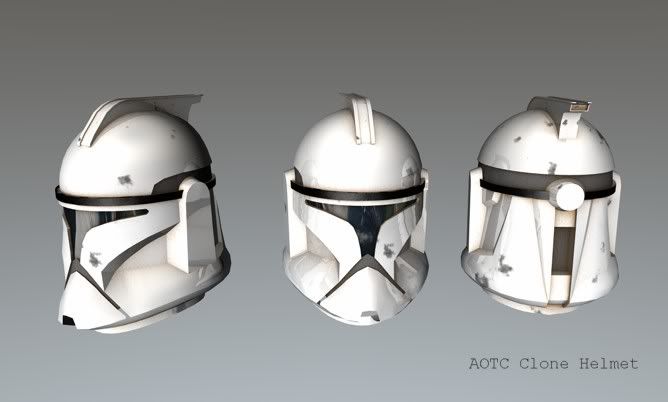
ep2WIP-1.jpg


I used the software "Pepakura Designer" to extract scaled reference parts. Then I set about using those basic measurements to model portions of the helmet.

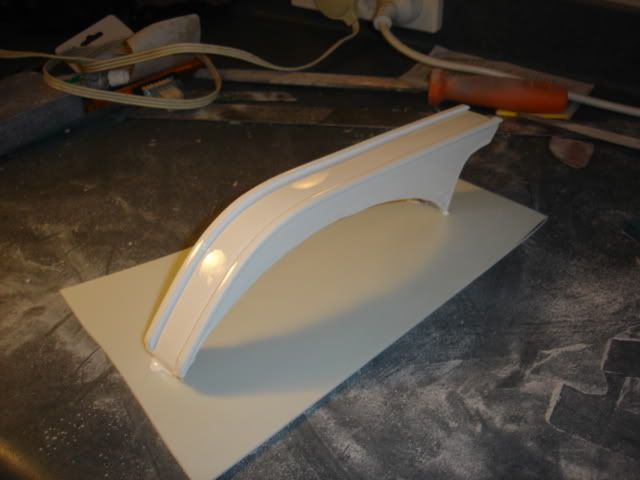
The fin structure, foam and styrene
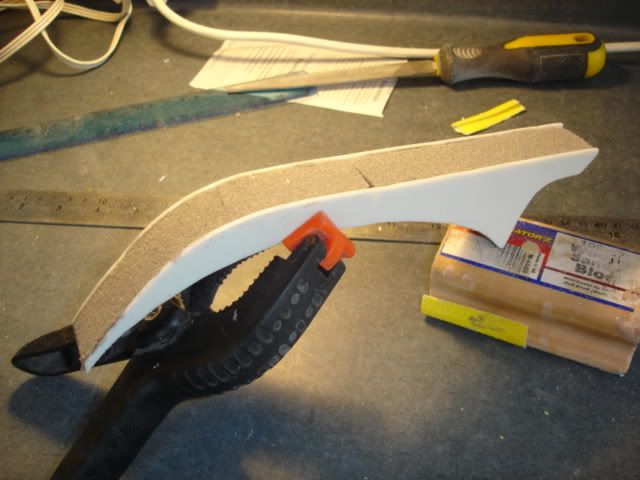
fin1.jpg


fin2.jpg


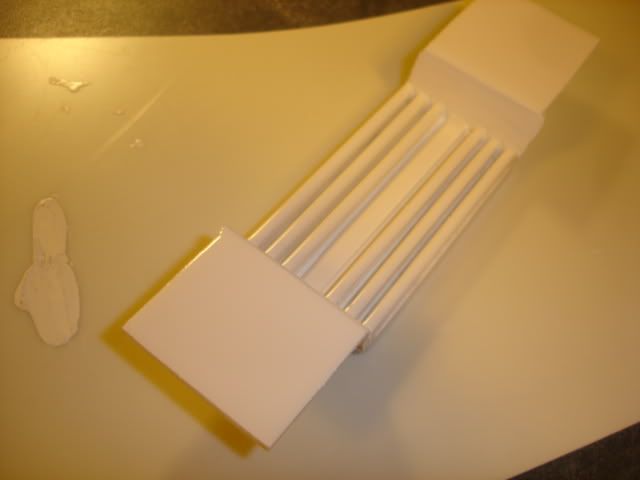
the rear "coin slot" detail, styrene
DSC00070.jpg


coinslot.jpg


The "power plug", turned on a lathe and detailed with files and styrene
plug.jpg


The "buck tooth/comm tip" PVC washers and styrene (a little rough at this stage)
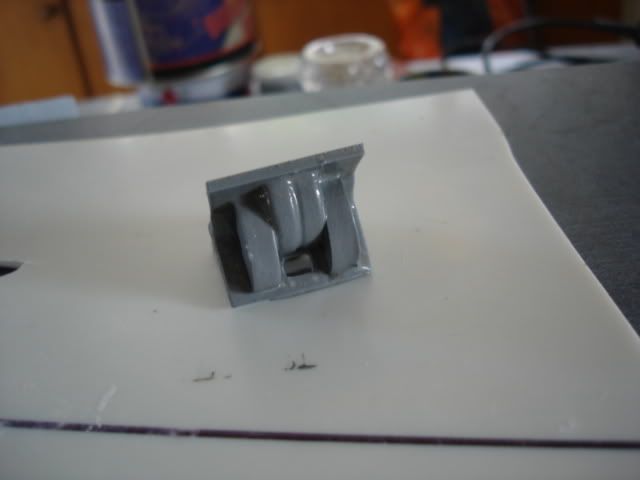
DSC000735.jpg


"skinning" the "hull" of the helmet with hand cut and formed styrene panels.
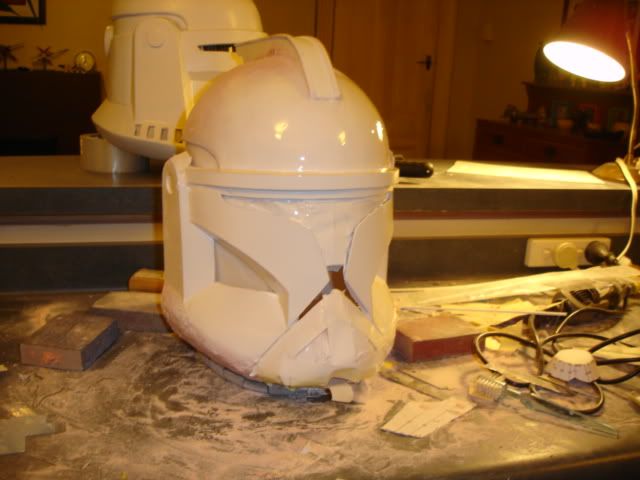
DSC00073.jpg


Putting it all together
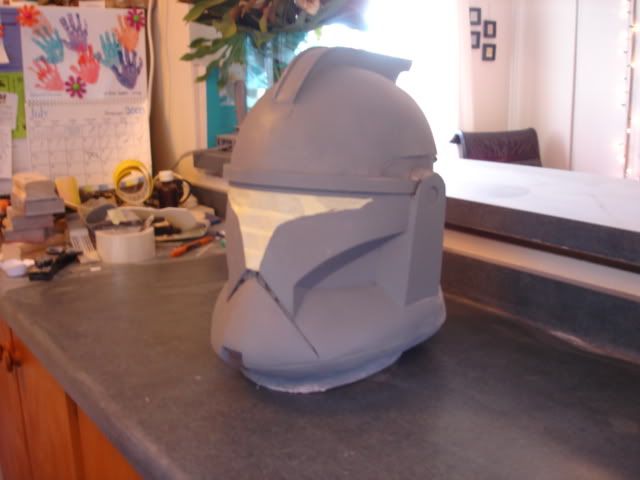
DSC00079.jpg


Slowly getting there with the shape but, still a lot to go
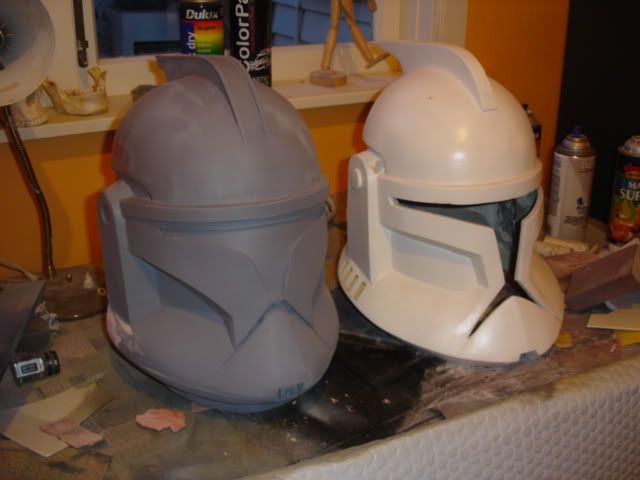
compareAM.jpg


Next will be sharpening up the lines and hardening all the edges, adding the lip the runs around the base and getting the neck ring sorted.
Thanks for reading
nz
 
Lookin nice so far!
Very neat to see the Pepakura technique being applied in a different way. Can't wait to see your finished helmet.
 
Thanks everyone for the kind comments (except Nate, who should be studying, not looking on forums) In answer to a couple of questions,

I use various products for surfacing depending on what type of detail the surface needs to hold, the fin was surfaced with polyester mastic

the dome is from a paper pattern but, I bollocks'd up the shape when I did the digital model. The correct dome shape is actually surprisingly difficult to get right in a 3d app, most likely because ILM was still using NURBs modelling techniques when they did episode2 (they've switched to Sub-D surfaces now apparently), whereas I used point modelling techniques to try to recreate the shapes. The correct dome shape would be easy with NURBs modeller (if you knew how to model with NURBs..which I suck at :p I'm very much a newb at 3d ). Its taken a whole lot of work to correct it. It was bad enough that I almost scrapped the project and started again but, I got it pretty much sorted in the end.
 
Last edited:
That still looks pretty frakking cool! In spite of your horrible, horrible 3D modeling skills. :) I've got a dozen or more 3D programs, have hardly touched them. One of these days....

What's polyester mastic? I remember the term mastic, but I don't have my art dictionary handy. Sounds familiar.

And which helmet is it sitting by, the all white one?
 
And another thing.... Is it possible to import 3D models into Pepakura? Might be easier to model some shapes in other programs and then use Pepakura, if it can deal with the geometry.
 
Polyester mastic is polyester resin with the addition of fillers like chalk, talc, ceramic etc
The white helmet sitting beside it, is an animated style clone wars helmet I sculpted a while ago. Pepakura can only import 3d files, it has no modelling capabilities and very limited editing capabilities. It's essentially a UVW editor. I do the majority of my 3d work in cinema 4d, it doesn't have full NURBs support, hence the trouble with the dome. A person could do the correct dome shape using C4D, I was just lazy.
 
Last edited:
Polyester mastic is polyester resin with the addition of fillers like chalk, talc, ceramic etc
The white helmet sitting beside it, is an animated style clone wars helmet I sculpted a while ago. Pepakura can only import 3d files, it has no modelling capabilities and very limited editing capabilities. It's essentially a UVW editor. I do the majority of my 3d work in cinema 4d, it doesn't have full NURBs support, hence the trouble with the dome. A person could do the correct dome shape using C4D, I was just lazy.

Get yourself SplinePatch, it enhances C4D a lot ! Or get yourself MOI3d, insanely easy usage of NURBS. I´ve been working on and off for a year now with C4D 9.1 on a version of the McQuarrie Concept Vader helmet. Exact organic modeling in C4D can get a little bit frustrating, I believe there have been people tweaking a model to death. Especially when trying to optimize for Pepakura. But then again, it´s a lot that you can accomplish with it once you learned your way around.

So now we are at least three members using Cinema4D (yay for Maxon !) ;)

Oh, I of course can only say "AWESOME !" about your project !!!
 
I'm running c4d r11 at the moment. I just got spline patch a months back, I must admit it changed the way I model almost instantly. When I say I'm a newb at 3d, I mean Im new at working with 3d professionally, my next mission is to get comfortable modelling in maya and solidworks. When I use pepakura to help make something, the shapes themselves are not all that important, the important information you get from pepakura is the scale and proportion relationships between shapes, that's where the ability to sculpt comes in.
 
Last edited:
ah HAH! I knew I'd forgotten something.... again.... like Metasequoia... I've got a semi-decent understanding of Google SketchUp, but for slightly more "serious" modeling, I've been planning on learning Hexagon. Although I've got Carrera 6, Shade, and a few others. Hexagon looked relatively "fast and easy." Or maybe I just found snazzier looking tutorials.
 
My advise would be don't really bother learning the obscure modelling applications out there until you've learned one of the bigger ones. The reason I say this is, if you start working using a 3d app for anything from animation, engineering, design etc etc, when you're not using an industry standard it's harder to find work. Depending of course on what type of work you do. I've missed out on jobs in the past because I don't know Maya.There are a lot of truly awesome lesser known apps out there but if you want to work in a studio its best to have a real solid base in an industry standard. Kind of like signing up as a mercenary and saying, I don't really use machine guns but I'm, awesome with ninja stars.. :p I think you can get a free fully functioning version of Maya for learning purposes on their website.
 
Last edited:
Back
Top