You are using an out of date browser. It may not display this or other websites correctly.
You should upgrade or use an alternative browser.
You should upgrade or use an alternative browser.
Another Zvezda Star Destroyer
- Thread starter Madhatter
- Start date
INVAR
Sr Member
Analyzer
Master Member
Thanks for your thoughts on the subject guys. Seems the general consensus is to apply a filter so that's what I shall do, even though I quite like the contrasting colors. I'll save it for a different ship
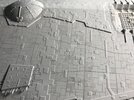
The light and shadows on all the detail really goes a long way in making it look great so that even a bland paint job can look like there is way more going on
Although knowing your work with the Space Battleship Yamato stuff, you really make things your own in a good way instead of trying to slavishly mimic the existing color schemes etc...
If you prefer the contrast I would say stick with it.
My suggestion was advice if your trying to capture the look of the studio model
After all, who is to say this is not a Star Destroyer that has seen a lot of battles and has had many plating repairs done to give it those various colors
Madhatter
Sr Member
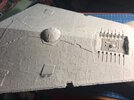
as promised:
the effect is a lot more subtle in the plastic than in this photo
the effect is a lot more subtle in the plastic than in this photo
joberg
Legendary Member
AbsolutelyI like it better this way. It looks ‘larger’ and more to scale.
Madhatter
Sr Member
Thanks mate
Still need to do washes, dry brush and pencil in some panel lines which will hopefully add to it. I'm going to research some proper weathering patterns and attempt to apply them. The operative word here being attempt. Ordinarily I would say that painting is not my strong suit, gowever, so far, I am really happy with the progress I've been making. Now my main concern is ensuring I can actually get everything put together. Dry fitting has revealed quite an array of potential issues. One of the downsides to adding all this extra stuff
Still need to do washes, dry brush and pencil in some panel lines which will hopefully add to it. I'm going to research some proper weathering patterns and attempt to apply them. The operative word here being attempt. Ordinarily I would say that painting is not my strong suit, gowever, so far, I am really happy with the progress I've been making. Now my main concern is ensuring I can actually get everything put together. Dry fitting has revealed quite an array of potential issues. One of the downsides to adding all this extra stuff
modelerdave
Sr Member
Gotta be honest, I definitely prefer this version of your paint scheme. The whole model is fantastic!
Lunajammer
Well-Known Member
The level of detail is almost incomprehensible and that's when we see it coming together. When painted and on display, I fear the uninitiated will easily discount much of that amazing detail as "kit provided." Even if you're there to explain it at a show, it could be under appreciated. Regardless, you have a fan base here.
Madhatter
Sr Member
Hi all
Well, I have finally sorted out my last remaining hurdle and it's onto the final stretch - more or less. Yep, I have finally sorted out my mounting device and at long last, I will be able to slip the ship on and off it's mount (I'm not sure how many times I would want to but for transportation this will be invaluable)
all I have to do is attach the sleeve onto the bottom of the ship and we're good to go. I've got it so I have 4 separate power lines which I will be able to distribute to hangar bay lights, engines, superstructure and floodlights.
It's by no means pretty but it works which is more important. The wires will travel down the back side of the armature into the base. Once I have the last bit of wire covered, I'll paint it all black


As I said, not the prettiest stuff ever but I had to make do with what I had
Anyway, that's it for now.
As always, thanks for looking
Si
Well, I have finally sorted out my last remaining hurdle and it's onto the final stretch - more or less. Yep, I have finally sorted out my mounting device and at long last, I will be able to slip the ship on and off it's mount (I'm not sure how many times I would want to but for transportation this will be invaluable)
all I have to do is attach the sleeve onto the bottom of the ship and we're good to go. I've got it so I have 4 separate power lines which I will be able to distribute to hangar bay lights, engines, superstructure and floodlights.
It's by no means pretty but it works which is more important. The wires will travel down the back side of the armature into the base. Once I have the last bit of wire covered, I'll paint it all black
As I said, not the prettiest stuff ever but I had to make do with what I had
Anyway, that's it for now.
As always, thanks for looking
Si
Similar threads
- Replies
- 17
- Views
- 848
- Replies
- 5
- Views
- 1,108
- Replies
- 19
- Views
- 1,194


