Another Sandcrawler Hero side paint up!

Guy Cowen

Sr Member
What can I say but after the amazing work that Dave & cutThumb did on their Cooper Crawlers that I couldn't resist getting mine started.

I've put the Snowspeeder to one side for a while as I have been missing what I love best, Painting. I wont be covering the build of the Crawler as the other guy's did much better jobs than I have. Its virtually built after 2 days of working on & off & I'm just going through the task of track clean up. I'm not going mad on amendments to the build as its not a studio scale replica but just a great sandcrawler.

I will document the painting as much as I can & hopefully this will start this weekend. Its already seen some primer here & there :cool

Pics to follow
 
Last edited:
Re: Another Sandcrawler hits the bench

Go for it Guy! Cleaning those tracks is a bit devilish though, I listened to the whole first series of Hitchhikers Guide to the Galaxy before I finished mine completely!!! Bit gutted you put the scratchbuild on hold as I really liked the cockpit build but I can understand it if you want to get it perfect. Breaks as good as a rest sometimes. I am really looking forward to seeing your paintup work though!
 
Re: Another Sandcrawler hits the bench

good luck with it . Can see that kit with a great sandy/ desert base would great..post lots of progress pictures.
 
Re: Another Sandcrawler hits the bench

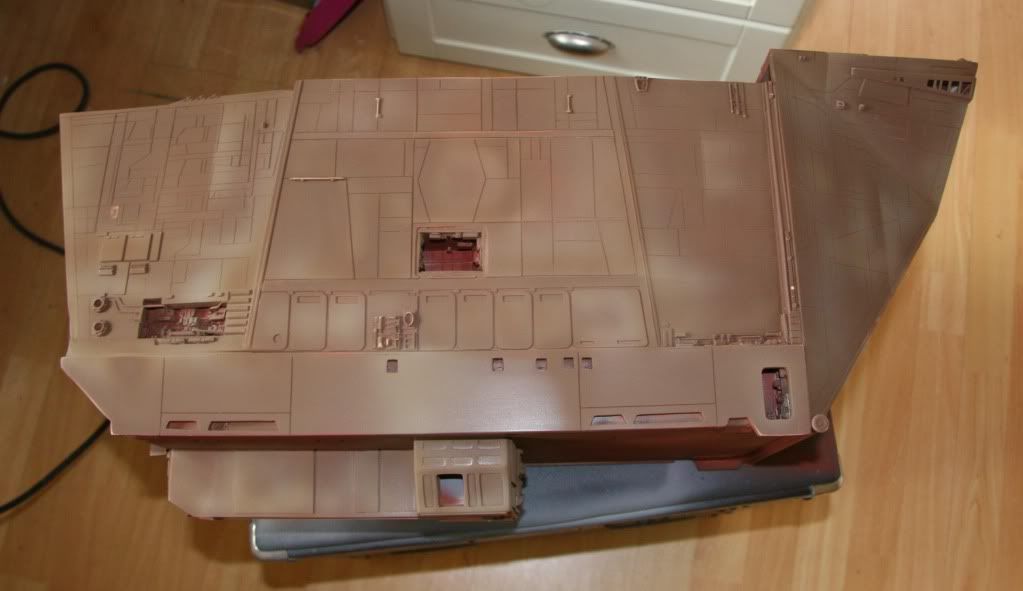
Ok, painting never started as I'd of hoped but I am getting there quickly. Only a few small bits to add & she will be seeing her base coat tomorrow with a bit of luck. That means I will be up all night painting & weathering.

I decided not to follow the ILM model with added bits too much as it is an idealized version after all, more time adding & less time painting is not my chosen path with this build.

sc3.jpg

sc2.jpg

SC1.jpg


It will need a little more clean up & the primer really pulls out the problem area's. This was an awkward build but with a bit of thinking cap action goes together well enough not to look like monkey did it.

uuh uuh ahh ahh!
 
Re: Another Sandcrawler hits the bench

What a clunky odd looking kind of machinery. Truly alien and weird.

Looking really good before the paint job. Looking forward to seeing your progress.
 
Re: Another Sandcrawler hits the bench

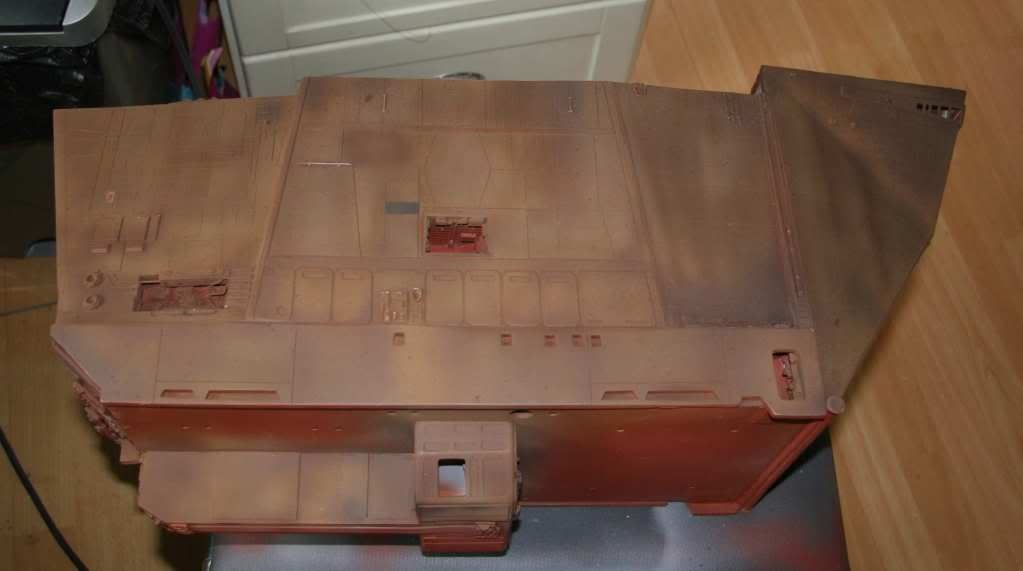
Been working like a trooper today, I've been practicing how I'm going to paint it on the non hero side, It doesn't bother me as it will only be displayed hero side on. I decided to try all the different mediums & styles. Its a bit OTT but like I said I have rushed through this so I can understand how best to paint it. I didn't use any ref pics for the detail like with my E wing so tomorrow when I start on the real paint work & follow the ref material it should come together pretty well? I hope?

I did decide to hand paint the rust & white marks like the real prop, Its possible that using latex masking my send it too far from the prop look to it. although it would look a ton better I want to keep it close if i can. The orange in these pics not what it looks like to the eye I can assure you.

MySC2.jpg

Please don't judge this as a finished article, this is my test palette & it was all done today so I'm rushing with eagerness.

I will do a step by step on the real work.
 
Re: Another Sandcrawler hits the bench

You've got the sand streaking and the mixed hull colours spot on Guy! I know what you mean about the colouring, proper strong daylight washes down the strength of a colour really quickly.
 
Re: Another Sandcrawler hits the bench

I'd love to have that sitting in my display cabinet, it looks fantastic. Can't wait for the finished article. If someone in the UK built these on commision i'd be bankrupt.
 
Re: Another Sandcrawler hits the bench

Just for Julien, I got up really early & started the Hero side.

Started at 10.AM & just taking a break to soak up some lunch.

OK, there is a ton of layers on this thing so I hope I've not forgot any.

I started by another light sanding of the base coat than added Medium grey in an anti pre shading manor. All colors are Tamiya acrylic by the way.

Grey.jpg


After this I moved onto to a mix of my own, Flat earth/orange. I went a little heavier than the other side & misted all aver after shading was done.
flatearth.jpg


Next, I used a stock Red brown, & gave a goad few light coats all over the beast then using a 220 grit between coats pad gave it a good rub down. I don't care about drying times as the coats are that light that they dry pretty damn quick & are workable within 10 mins. I do keep a hair dryer on hand for a little extra zap.
Redbrown.jpg


After a wipe over with tissue to remove the dust from sanding I strt with the German Grey patches & then some panels. The panels on the ILM model aren't any one color & are more of a mix of spots & washes, so I will attempt this as I go along.
Germangrey-1.jpg

GG.jpg

Germangrey.jpg


Wen the white sand streaks go on it will grey down the dark weathering so I switch to black so as not to make the weathering too light at the end of the weathering. I will do controlled weathering with oils & other paints after I type this all up.
Black Tamiya through the Air brush, I tend to rub down as I go as well with this sort of black. I also use the airbrush to do quite a lot of splatting with the black & german grey, they are a little out of scale from the ILM model but It aint studio scale so I dont care!!!!!
Moreblack.jpg


Once the basic black is done I give it a mist with Deck Tan, then move over to a toothbrush & splatter all over with Deck Tan but concentrate on the edges with more splats.
Tanspot.jpg

tanspot2.jpg


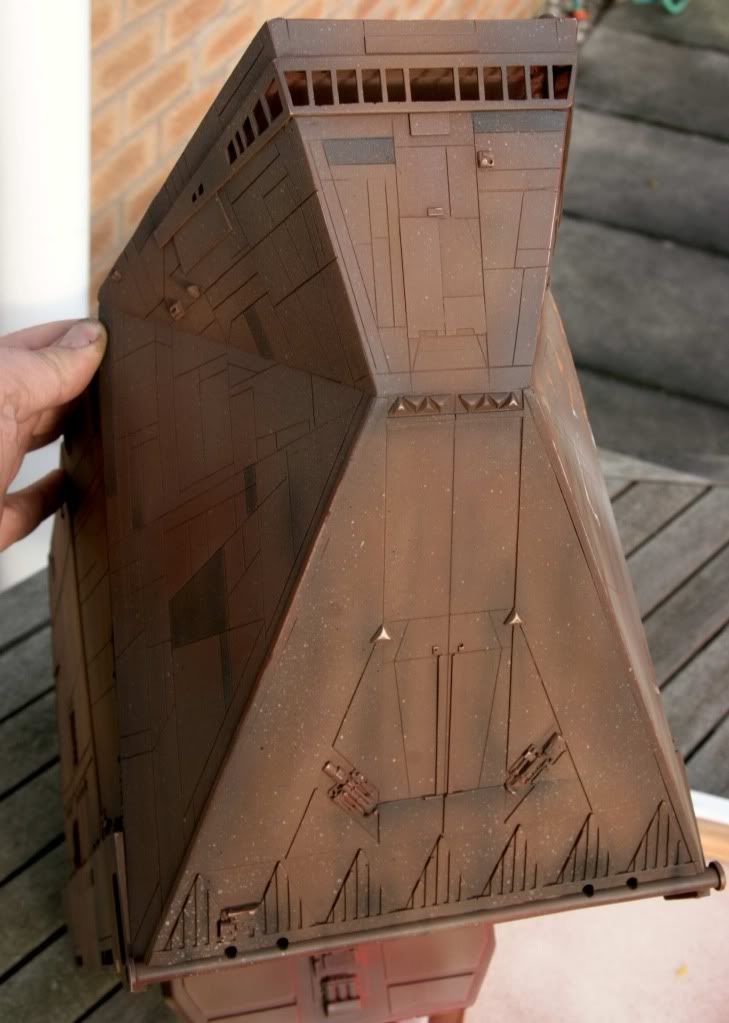
Then another swift sanding followed by a very wet coat of a mix of Red brown/Red/orange, this is to bring back the walnut look to it & it gives it a very nice antique furniture look. This were its at right now.
Brownredorange2.jpg

Brownredorange.jpg

Brownredorange3.jpg


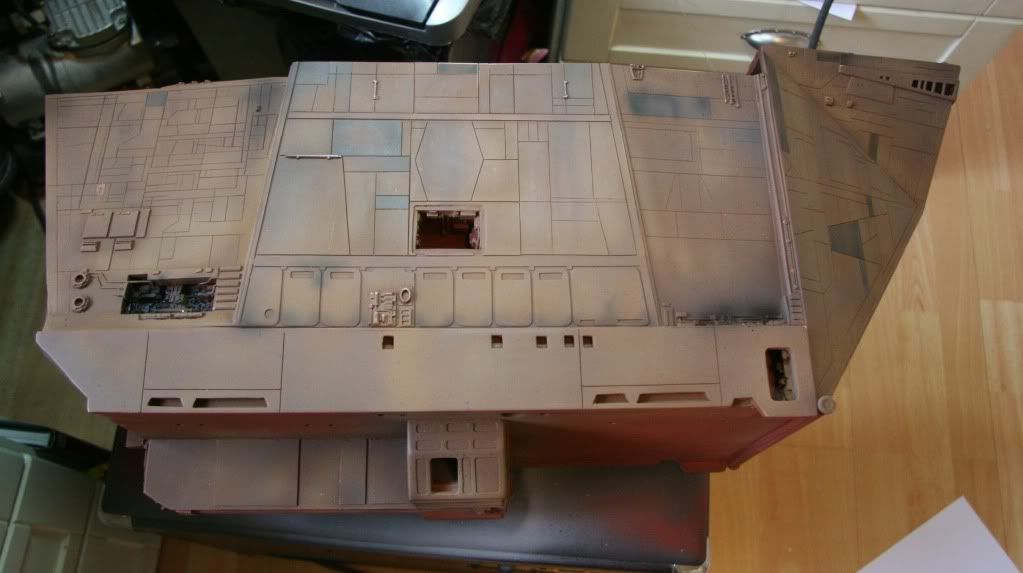
I am using just the one pic from SAg to do the basic painting of the Hero side as there are so many pics that I have that are under different lighting etc that its impossible to tell whats right. I also have some of my own that I took in Sydney without a flash so they're dark but a good ref for the actual color. I have lightened slightly as its about half the size of the original model.

I hope its looking ok, not bad for a morning work?
 
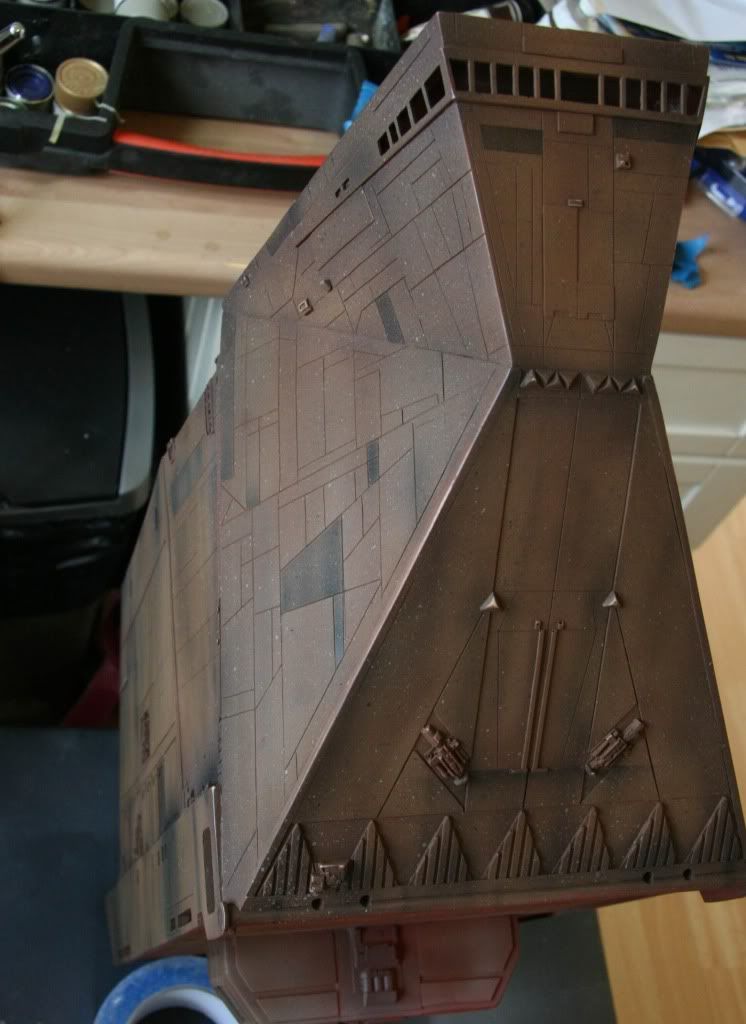
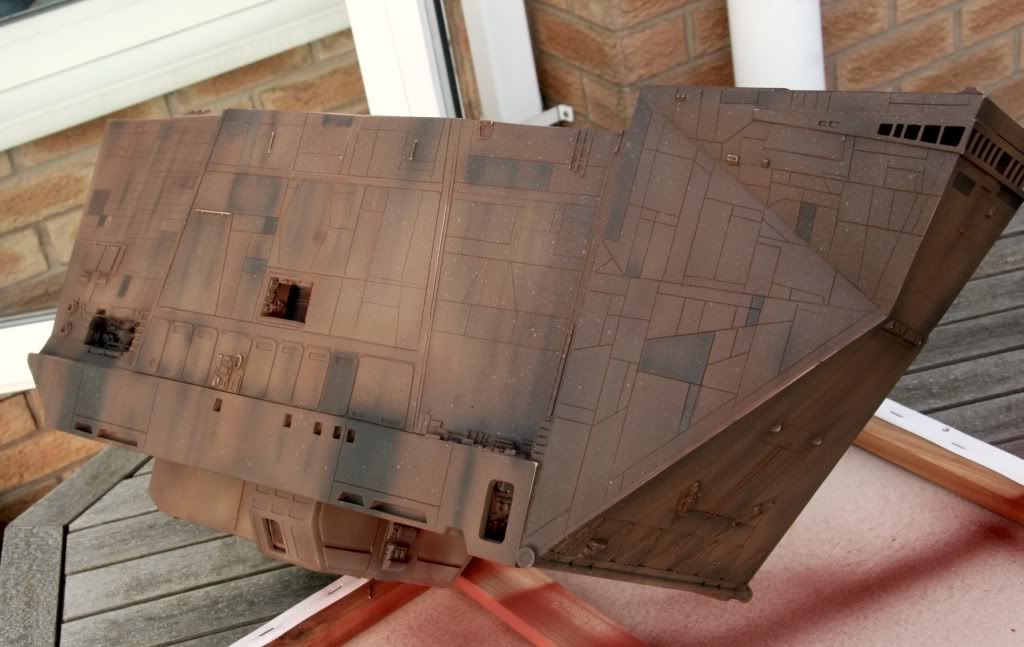
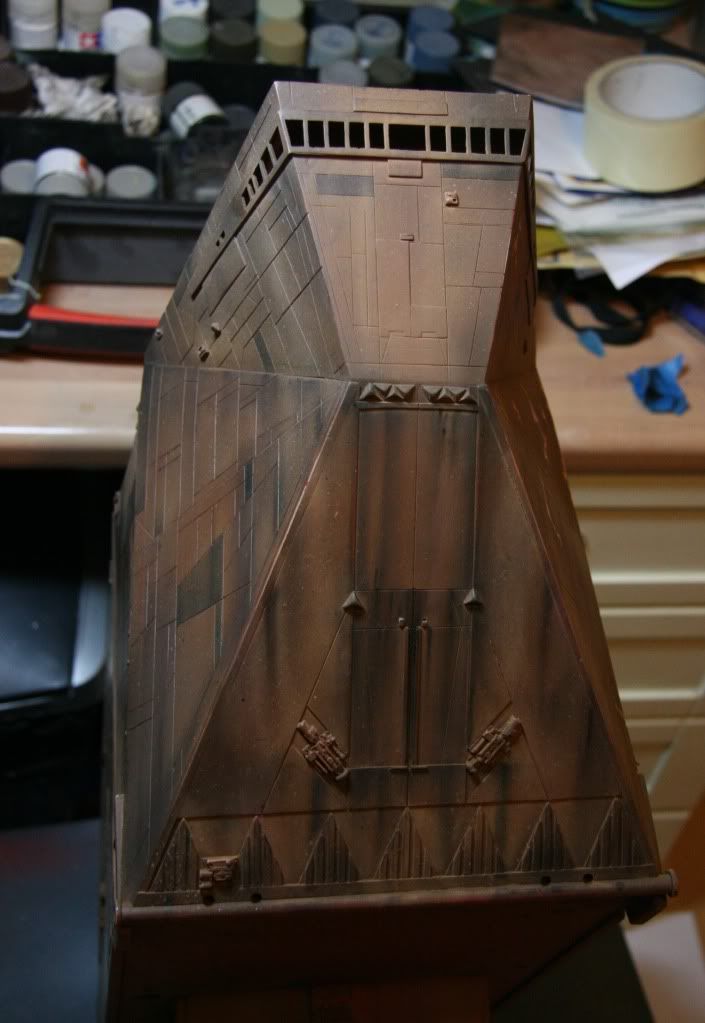
Thanks, Just got most of the oil streaks on it & its really taking shape now. Rust & white chipping next.

streaks.jpg

Streaks2.jpg

Streaks3.jpg

Streaks4.jpg


The lighting has changed a lot today so some pics are with flash some without, indoor light on off etc etc.
 
Wow Guy the SC is looking great! Looking forward to the finished model, Thanks for showing the photos!

Randy Neubert / VoodooFX
 
Back
Top