superjedi
Sr Member
Hi all,
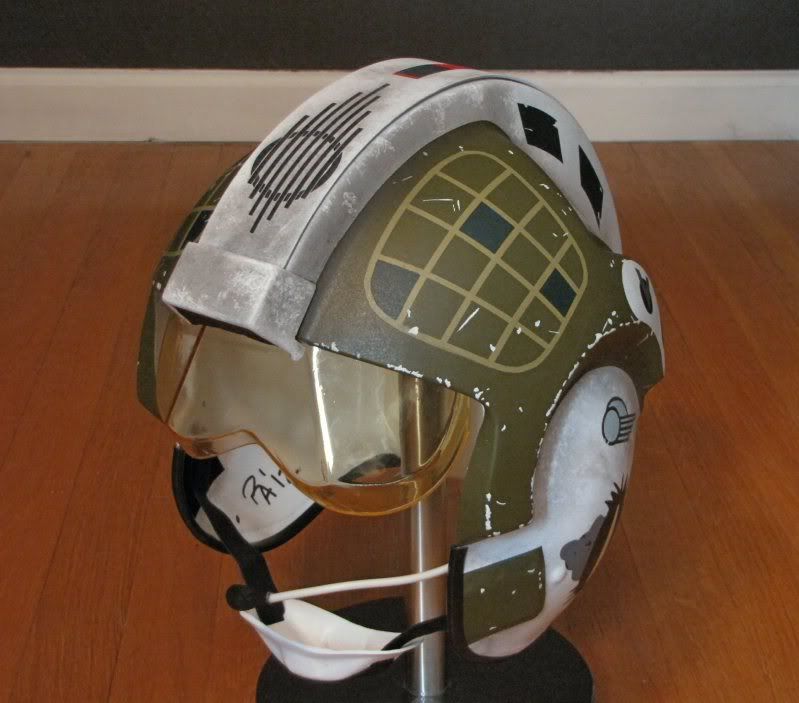
I recently picked up a Richie's Armor X-Wing helmet. I ordered it assembled
but unpainted, and I'm finishing it as Gold Leader from Star Wars (no "Episode IV. . . A New Hope. . . blah blah blah :lol).
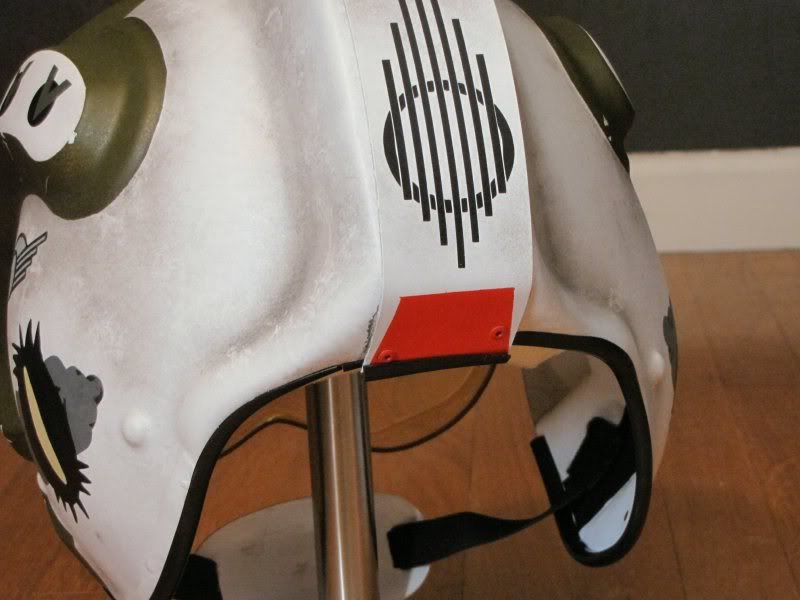
The helmet is really nice! Very crisp detail and it looks like Richie has changed the visor mounting method from the last time I got one of his helmets. It sort of pivots up and down rather than sliding. But it works great, and it's secured with four rivets.
This is the third RA X-Wing helmet I've had in my hands and he makes great stuff!
I began prep by peeling off the black trim around the bottom opening, and then simply removing the chin cup and microphone, which are held on with velcro. Easy peasy.
I masked the visor on the outside AND inside to prevent any overspray, and masked off the remainder of the helmet interior. Richie puts in some nice custom shaped foam padding and I didn't want to get any paint on it.
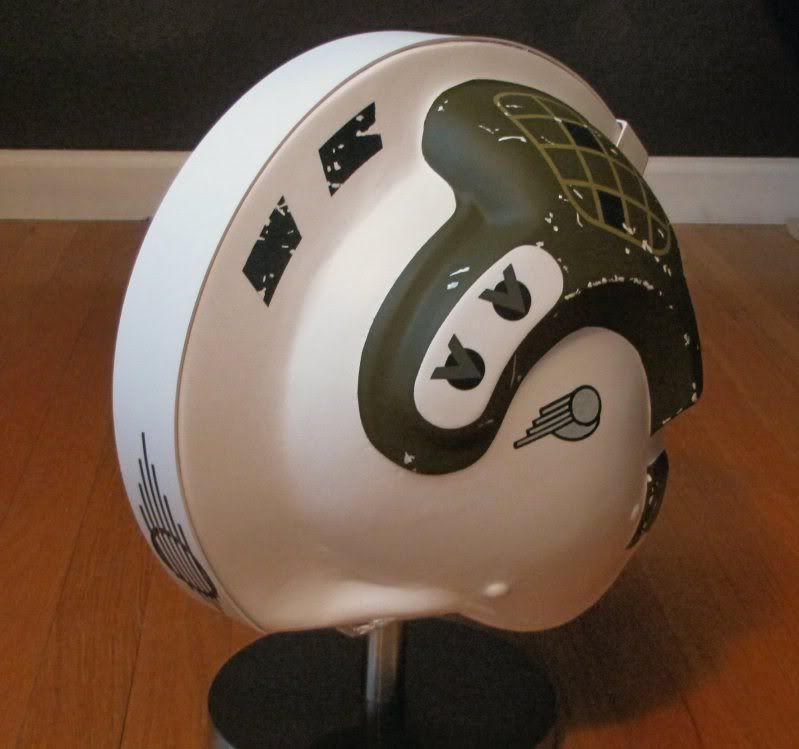
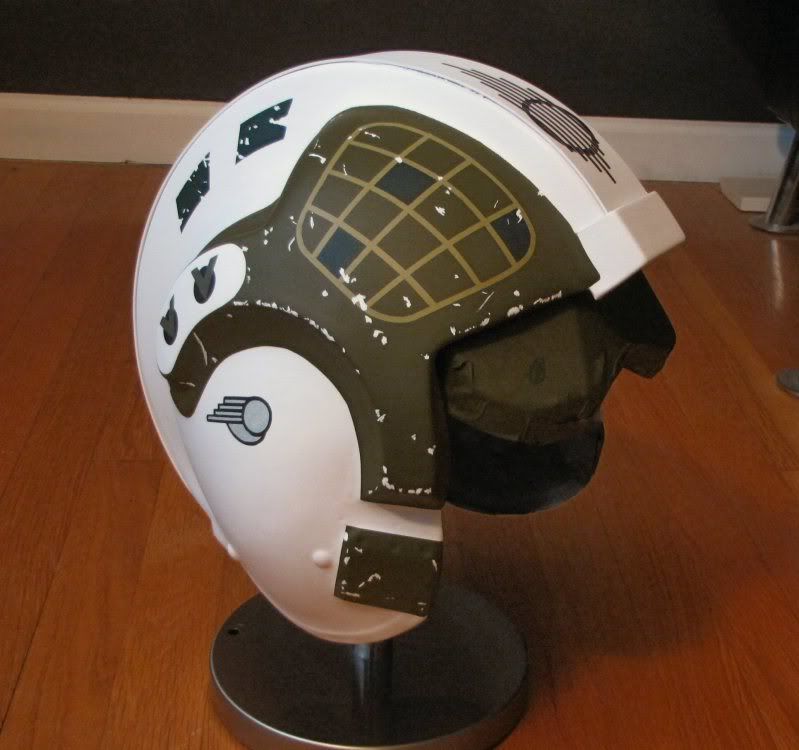
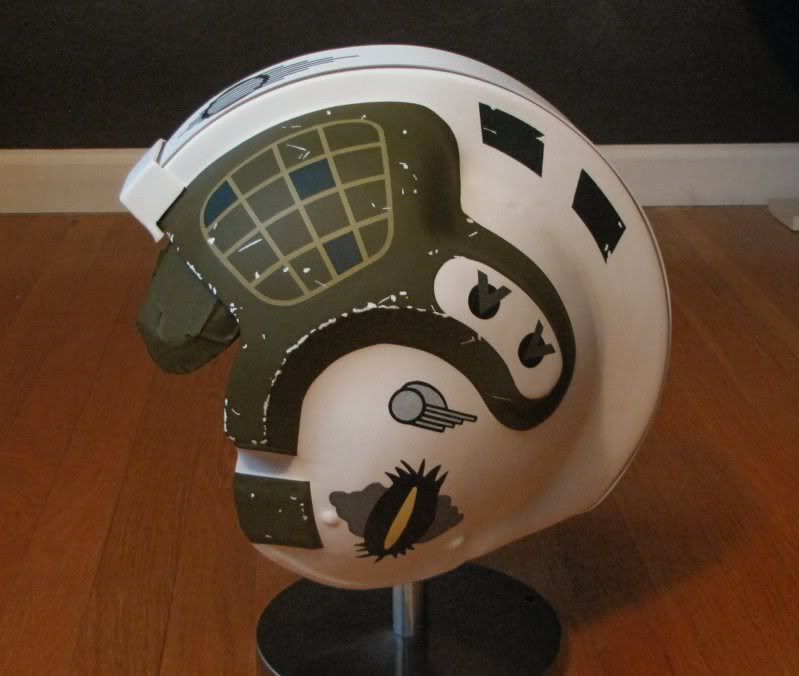
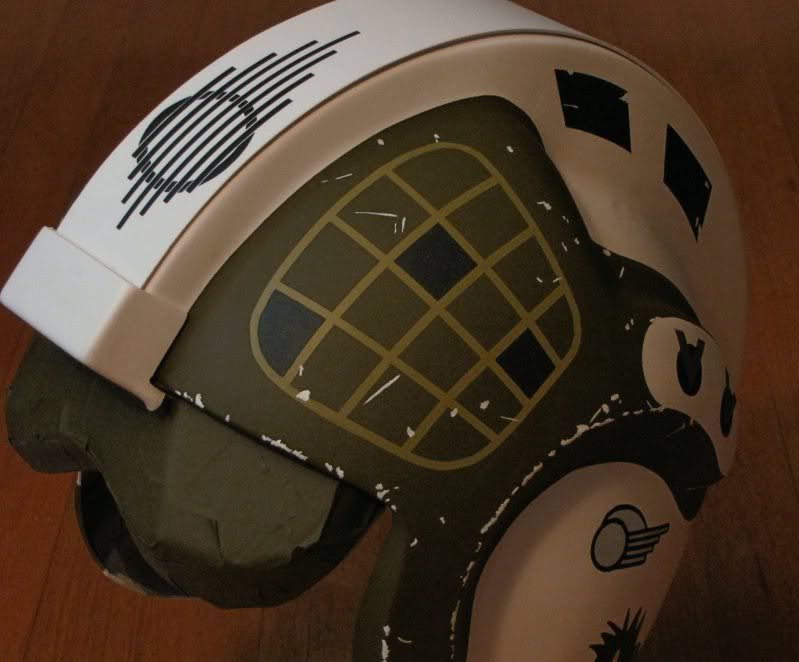
The photos show 2 steps in one. I gave the entire helmet a base coat of Rustoleum satin white. Just a couple of light/medium coats to give the color coats something to bite into rather than painting on bare white plastic.
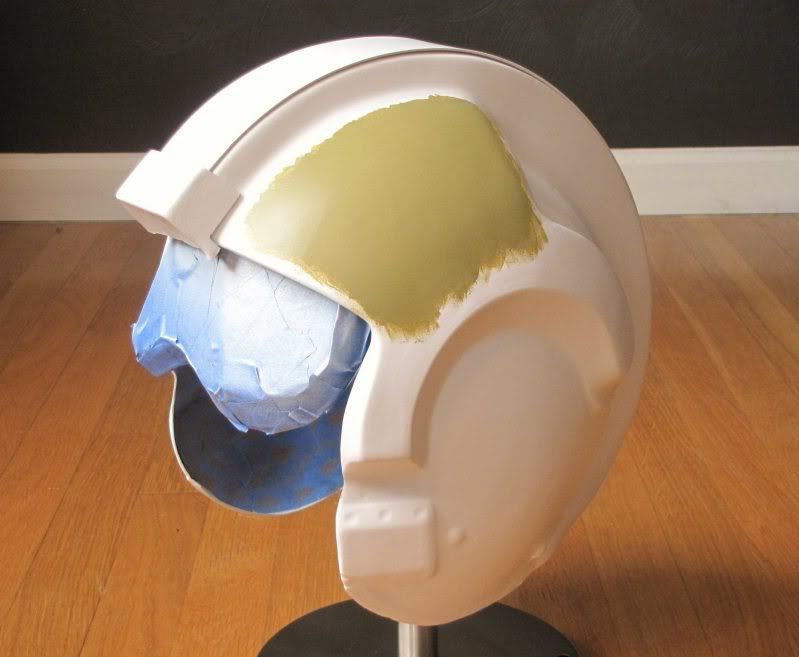
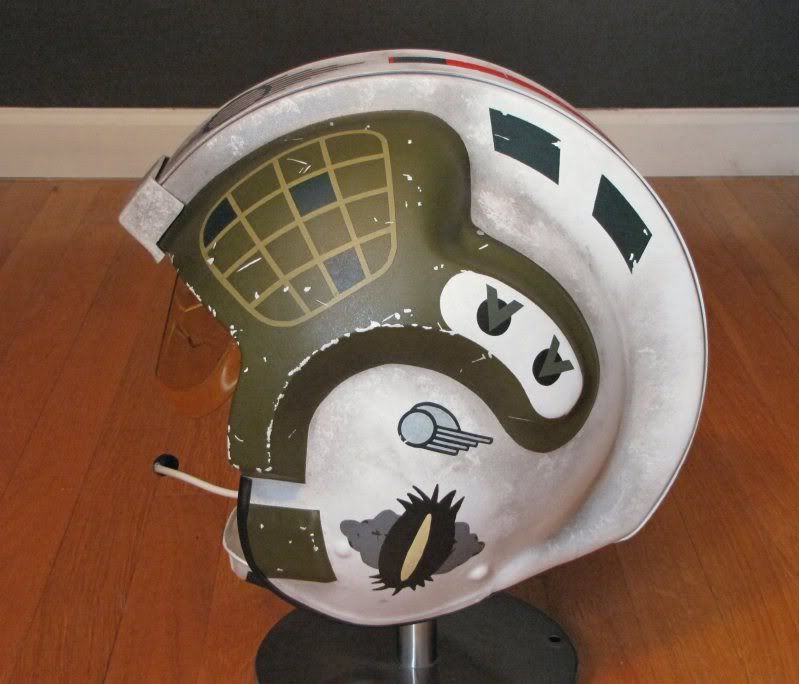
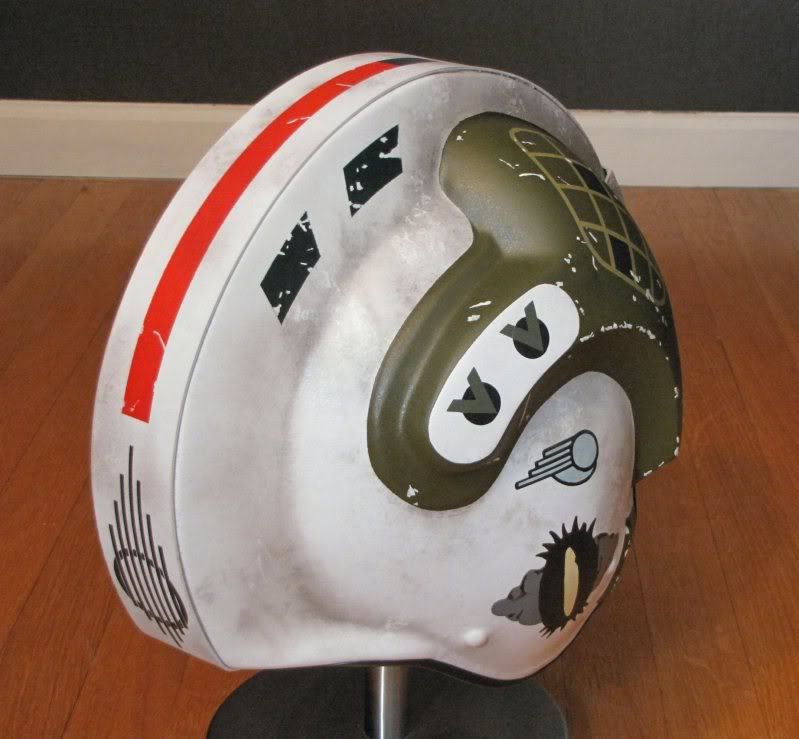
On the forehead panels, I used some MM Acryl Panzer Dunkelgelb. I just used a dense foam sponge to apply it. I wasn't concerned with the edges as most of this will be covered with dark green.
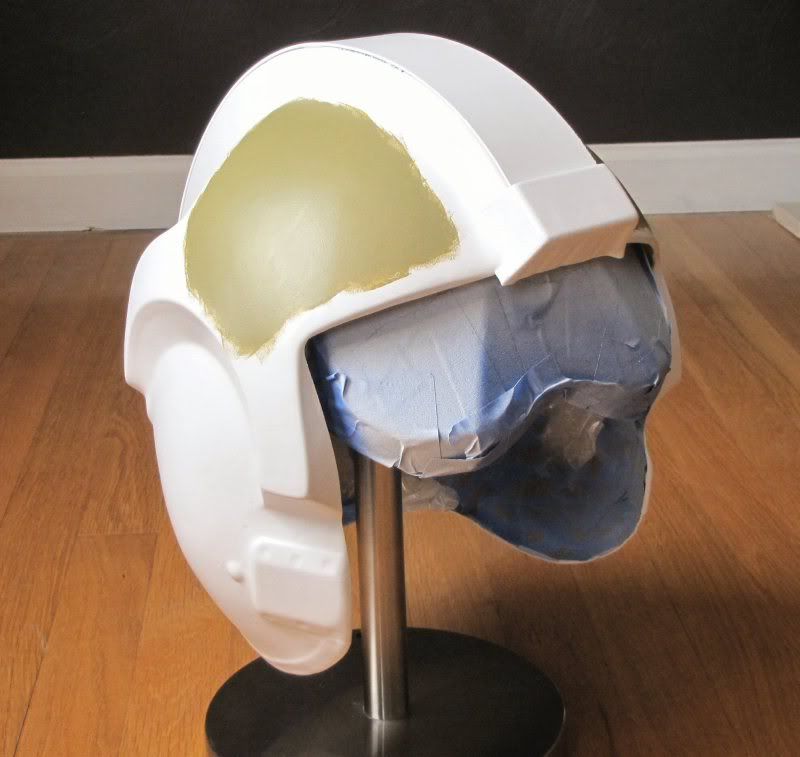
The Dunkelgelb will wind up being the color of the grid lines on Gold Leader's helmet. I'll mask off the grid and spray my dark green over it. When I remove the masking tape, voila! Grid-ness.")
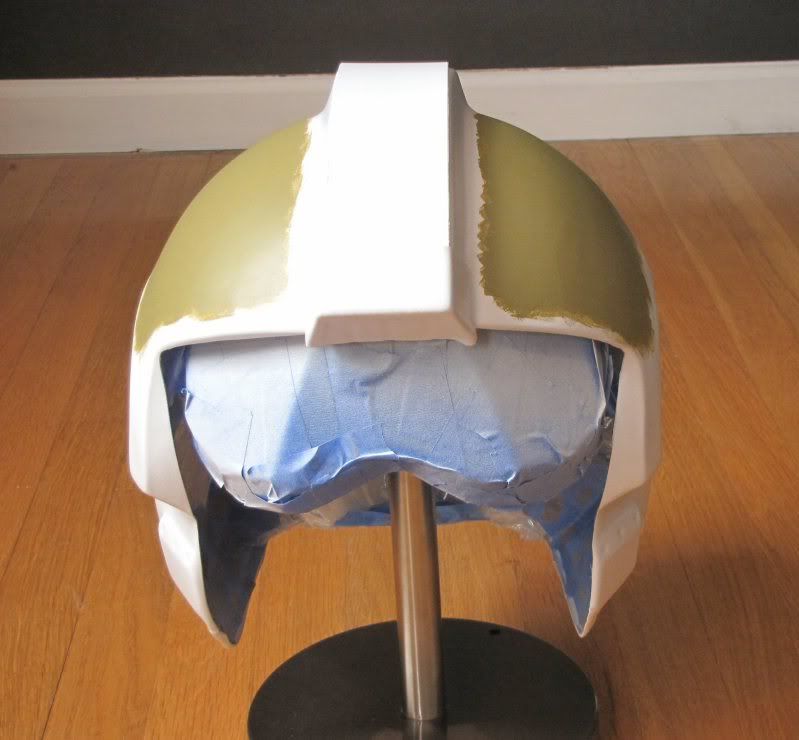
This isn't really a complex paint job. The main colors are the Dunkelgelb, and the dark green that will cover the ram's horn areas and the small squares further down on the cheeks.
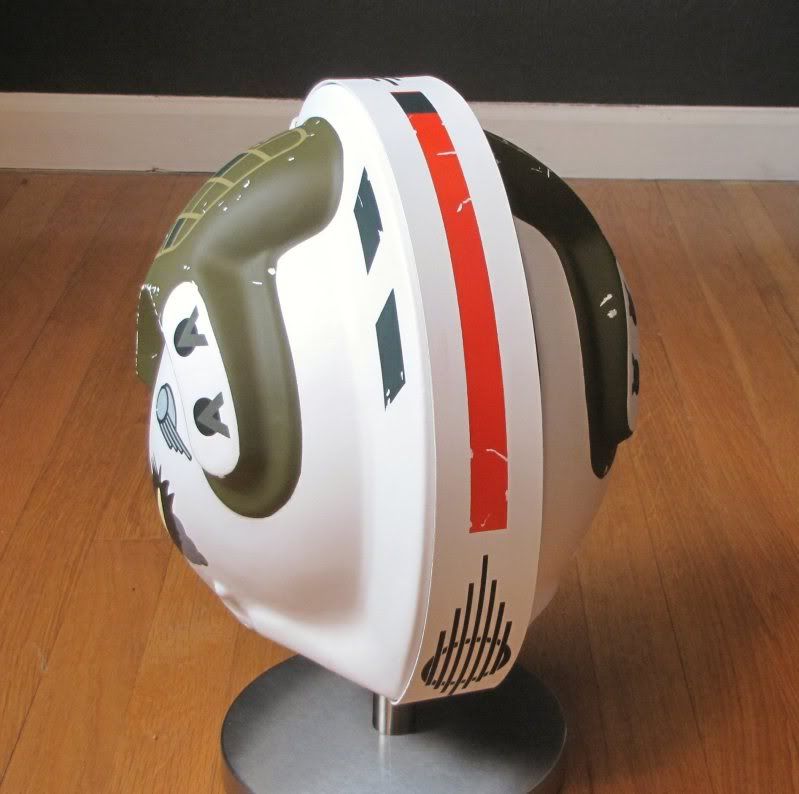
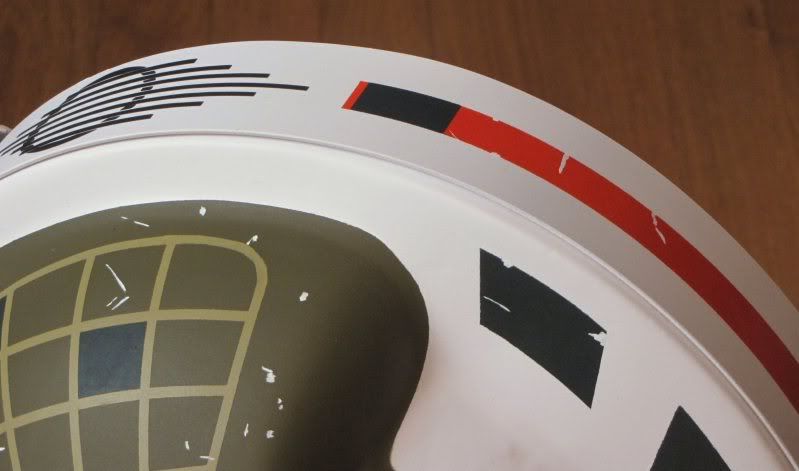
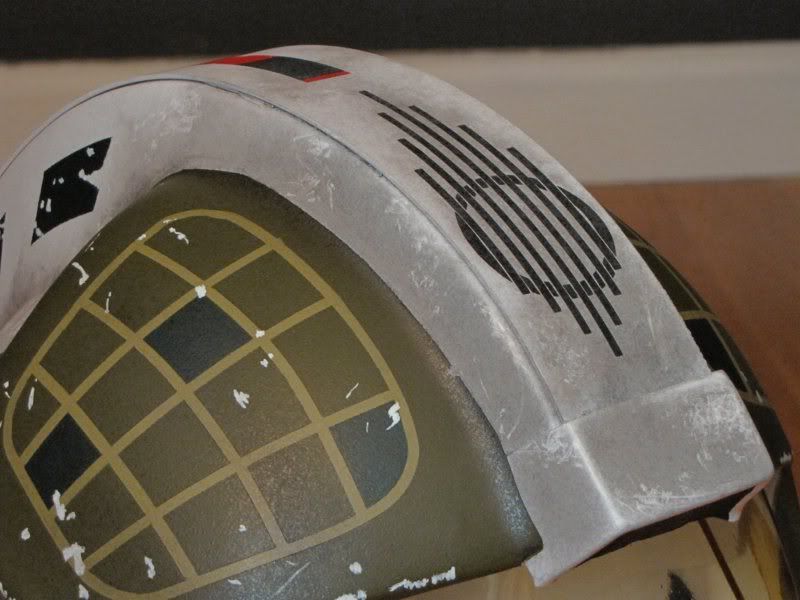
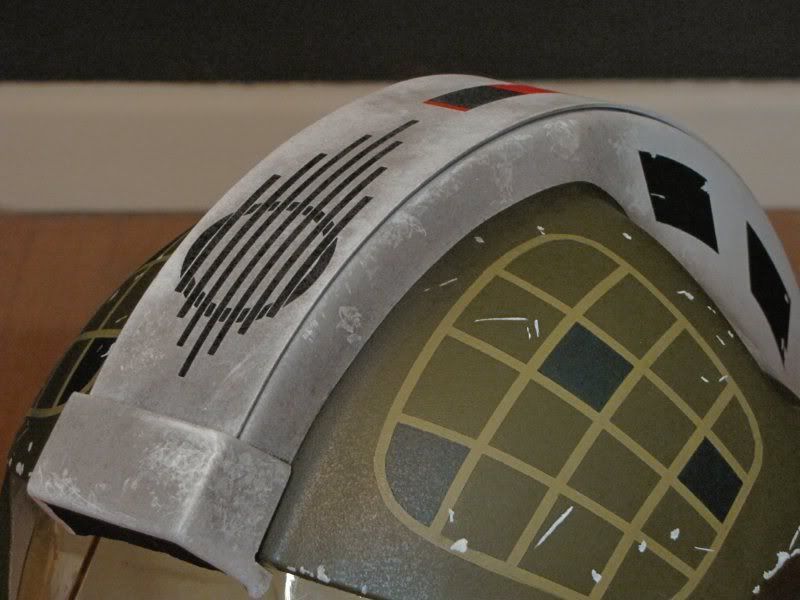
I picked up a set of vinyl decals from DeLucks Designs, and I can't wait to get them on the helmet. They should really make the design come to life. Thanks, Scott! Your decals are top quality as always.
More to come.
I recently picked up a Richie's Armor X-Wing helmet. I ordered it assembled
but unpainted, and I'm finishing it as Gold Leader from Star Wars (no "Episode IV. . . A New Hope. . . blah blah blah :lol).
The helmet is really nice! Very crisp detail and it looks like Richie has changed the visor mounting method from the last time I got one of his helmets. It sort of pivots up and down rather than sliding. But it works great, and it's secured with four rivets.
This is the third RA X-Wing helmet I've had in my hands and he makes great stuff!
I began prep by peeling off the black trim around the bottom opening, and then simply removing the chin cup and microphone, which are held on with velcro. Easy peasy.
I masked the visor on the outside AND inside to prevent any overspray, and masked off the remainder of the helmet interior. Richie puts in some nice custom shaped foam padding and I didn't want to get any paint on it.
The photos show 2 steps in one. I gave the entire helmet a base coat of Rustoleum satin white. Just a couple of light/medium coats to give the color coats something to bite into rather than painting on bare white plastic.
On the forehead panels, I used some MM Acryl Panzer Dunkelgelb. I just used a dense foam sponge to apply it. I wasn't concerned with the edges as most of this will be covered with dark green.
The Dunkelgelb will wind up being the color of the grid lines on Gold Leader's helmet. I'll mask off the grid and spray my dark green over it. When I remove the masking tape, voila! Grid-ness.
This isn't really a complex paint job. The main colors are the Dunkelgelb, and the dark green that will cover the ram's horn areas and the small squares further down on the cheeks.
I picked up a set of vinyl decals from DeLucks Designs, and I can't wait to get them on the helmet. They should really make the design come to life. Thanks, Scott! Your decals are top quality as always.
More to come.