ABC warrior construction thread

oota goota, I'll take some pics of the arm this weekend and postt to my photobucket page for viewing. The upper part of the arm is primarly made of tubing and a tension cable, while the lower part, from the elbow down, is made of PVC. This will allow for the articulation of the arm with your hand at the elbow and with allow pulls for movable fingers. The hands are completed, with the exception of installing the fingers.
 
oota goota, I'll take some pics of the arm this weekend and postt to my photobucket page for viewing. The upper part of the arm is primarly made of tubing and a tension cable, while the lower part, from the elbow down, is made of PVC. This will allow for the articulation of the arm with your hand at the elbow and with allow pulls for movable fingers. The hands are completed, with the exception of installing the fingers.

That is wicked! Can't wait to see the build progress. Did you check the new pics on the resource thread? Vince Vader posted some insane pics of the robot, really useful for helping to stay accurate.

I'll post your photo bucket link in that thread too

game on!
 
fantastic work Smoek I just had a look through the album. I really like the way you've tackled the armour pieces for the thighs, biceps, forearms etc. Can you tell us a little about how you approached it?

Can't wait to see the finished result!
 
Oota goota, in an effort to keep the armor as light as possible I used 5mm Foam Board as a base. For the arm and leg armor my process is as follows:
1. Cutout the shape
2. On the back side, draw a line every 6mm, in the direction of the bend
3. On the line drawn, cut through the back of the board and through the foam, making sure you do not cut through the front facing of the board.
4. Bend the board to the desired shape and apply hot glue to each of the cuts on the back side and hold until kool.
5. Apply automotive body putty, with fiberglass to the back side of the piece.
6. Apply automotive body putty, without fiberglass to the front and edges of the piece.
7. Sand to desired finish
8. For additional details, add foam and plastic shapes
9. Paint and finish as desired.
10. To attach the Bicep and Leg Armor I made clips that will snap around the tubing in the area.

I hope this helps
 
nice receipe! It's a really nice way to approach those forms. It's making me rethink the way I am going :). While I don't need things to be especially light I want to avoid molding and casting too much

thanks for the inspiration!
 
I figured that was the least expensive way to make the armor without creating a mold and doing a vac-formed piece.
After viewing the VinceVader's pics, I'll have to redo some of the areas I've already completed, I was using the 1/9 model and available movie pics as a guideline. Nobody said that this was going to be easy. :behave
 
Last edited:
I figured that was the least expensive way to make the armor without creating a mold and doing a vac-formed piece.
After viewing the VinceVader's pics, I'll have to redo some of the areas I've already completed, I was using the 1/9 model and available movie pics as a guideline. Nobody said that this was going to be easy. :behave

yup me too, those pics made me re-assess how I am going to build things, they've been really valuable.. i am lucky that I am in the early stages of my build :)

I'm using the 1/9th model too. What do you think about all the extra mechanical stuff on the back of the foot/ heel of the model? Was it there on the movie prop? I should ask this on the resource thread too....
 
I can't make out anything it's just too grainy, and but I'll just take ya word for it. :p:cool:

Sent from my SGH-T989 using Tapatalk 2
 
LOOK AT THAT BAD BOY! awesome work blaxmyth that's a really nice sculpt you've done and the paint job looks fantastic well done!

would love to see more pics dude if you've got any :)
 
Yeah, I'm really pleased to see it looking so menacing with the darkened eye sockets. I made the eyes by plaster casting some large marbles, then pouring 5-minute epoxy into the hemispheres and embedding the LEDs. I sanded the centre of the eyes and left the milky plaster film around the outside. I'll ask him to send me some more pics from different angles.

Thanks for the kind words!
 
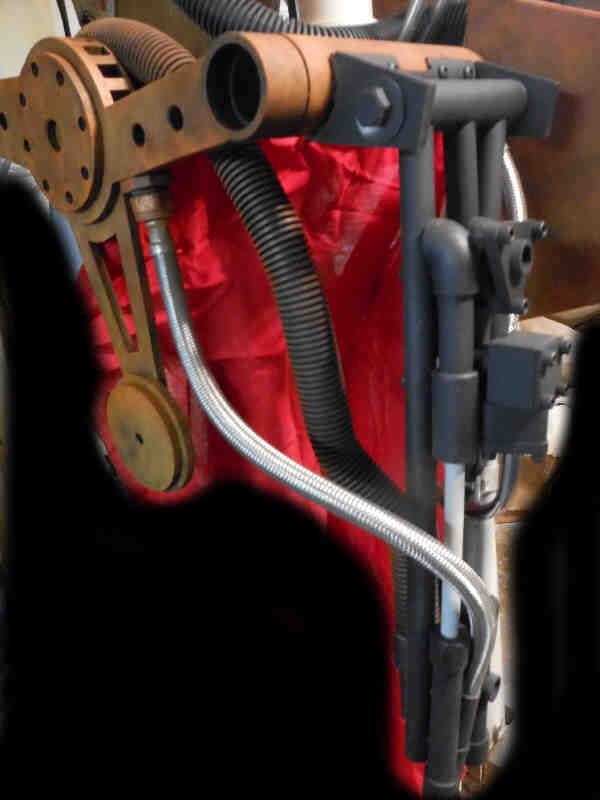
After seeing the reference pics from VinceVader, by the way thanks Vince so much for the references, I went back to the drawing board and reconstructed my thigh assembly. Got the right side done and now need to do the rust. Left side should be a lot easier.

 
Back
Top