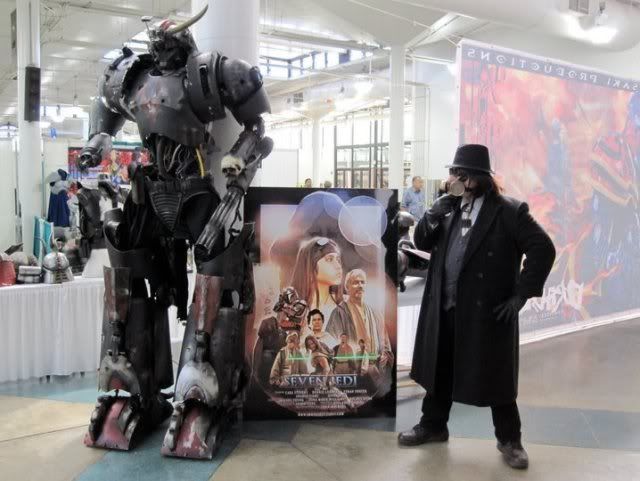
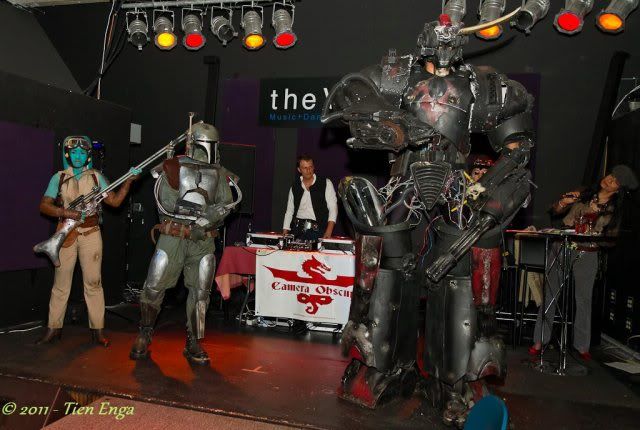
ABC warrior construction thread

I'll go first! My construction thoughts go something like this

armiture - Steel pipe with scaffolding joints
Feet - mdf, pipe, resin details
knees - mdf and possibly vac formed 'knee caps'
thighs - vac formed pieces - possibly generic for each leg
groin/ butt - mdf
chest - plywood frame clad in plastic and metal
back - plywood frame clad in plastic, mdf boxes etc
shoulder pads - 1 style ply frame, plastic cladding or possibly vac formed
biceps - vac formed generic for both arms
forearms - vac formed generic for both arms
Hands - mdf, aluminium
Head - mdf with cd tray for back part of head which would be vac formed

Finish - Possibly graphite powder and resin coating (i have never tried this)
misc pipes and cables dressed in to match film robot

Also need to make an ABC graphic for a badge on the left shoulder pad. Should look like stamped steel

Additional components might be:
a helmet
more body armour (eg stomach) to make it less like a stripped down robot and save a bit of hassle with cables
a hammer

okay that's pretty much as far as I have got. Getting a vinyl kit in the post. will probably tackle a shoulder pad first just to get going
 
Gezz man bet me to the punch seem like you have gone a lil further in thought then me. if you need help graphic wise i am a graphics artist...shameless plug...

Ok Oota how do you want to break this down for ideas many points also who it's built will determin (typo) how it will be displayed like standing, sitting , storage mode like in the first shoot of him in the movie kinda like he is in a kind of ball or tucked in.. i mean we can talk this till we figure out every aspect .. I think this could be a epic thread .. I have some ideas on certain parts of the body only good pictures i have found is some one has done on here . I will ask them if i can use there pictures in this thread before dropping and photos or photo shopping them to show what i mean..

ha ha yeah sorry just thought what the hell I might as well start a thread :)
Yes I think will be a rather long thread by the end. I'm sure it will take me years to make this thing....

That's a good question about posing the robot. I think mine will be pretty static but I'd like to have either:
* a sense of movement but not as much as the vinyl kit
* a 'de-activated' look maybe slumped over a bit, lots of rust and dust etc

Another thing to find out is who made the original movie prop? I have checked the credits to try and find out who the original sculptors were but it's not clear to me
 
Okie dokie geez i need to learn how to spell. O well .. I did some digging about 15 mins worth imdb and looked at the credits and chased down each company listed searched there site i got nodda so next step was I fired off a email to each company asking them what roll they played in the movie and why. Saying I looking for some screen used props if they had any that was not on the market yet.. so here is the fx companies listed for the file with what they did:
Special Effects

Asylum Models & Effects (specialty props)
Computer Film Company, The (CFC) (additional digital compositing)
Digital Fauxtography
FB-FX (costume armour)
Manex Visual Effects (MVFX)
Mass. Illusions
Pacific Title and Art Studio (visual effects opticals)
ReelEye Company (special effects contact lenses)

Ah HA!!! as i was typing this out i did a google search to look for a photo to show you how the legs were done in the static prop and BAMM there is the all the info on the artist who made the orginal scale model used for the movie. His name is Chris Halls here is a link to that page I found on him and the making of the prop.. @ gold stars link ok after all that I forgot what my was going to say so give me a min to figure it out and then we can start break this puppy down ..


Here is another link on him using his real name and bio link

I think the reason no one could find any real info is cause no one knew what it was called we all just called it ABC warrior when he named the one in the file "mean machine" so here is the link to him. link
 
Last edited:
Nice work!

So Chris Halls (Cunningham) designed the robot and built a scale model. Presumably Asylum Models & Effects made the full scale prop? Or Mass Illusion?

The credits have Joss Williams as Robot supervisor, about 4 robot engineers and 1 robot electronics technician.

It would be great to try and track down someone who built to talk about process and materials. The body all looks like fibreglass to me...
 
That's a good question about posing the robot. I think mine will be pretty static but I'd like to have either:
* a sense of movement but not as much as the vinyl kit
* a 'de-activated' look maybe slumped over a bit, lots of rust and dust etc

looking at the picture of them building the standing version it's nothing but A frame style leg setup till it gets to the knees and tilts backwards with a same setup on the top. It's hard to tell from the picture since it was so small but i bet it was some sort of four link set up. no matter on how you make it you should make it with the joints so you can take it down for moving or storage..

Ok on to my ideas how I would do this project as I said before if I good working base or have a buddy sculpt one up from scratch.. My version will be metal out of metal instead of glass. Going off the model I will use a process called "flow forming" for each piece i will have to make a wooden or bondo buck. this way will cost me more in the long run but it will be a one off when I'm finished. I think Me and Oota are on the same page as far as making the head open to show the wires and stuff. my idea on this would be to use a Servo on rod setup and instead of having to use a r/c controller for it I would just wire it in like it was the used in the movie using a micro switch and stepper. if you look at what appears to be a breadboard you notice there is a little switch looking button on the side. so just put it on the back side of that you can hide it in the larger cup looking thing just make the center point little circle the hidden switch see the attached photo..
ABCWarriorbuttonideas-1-1.jpg


I'm going to make this kinda of a all in one on the above question about head tray opening. I agree with you on a cd/dvd style of set up. I think it will break down to the amount of space and weight which is TBD .
largeservotray-1.jpg
opendvdplayertray.jpg
 
I really like your idea of a button in the temple opening the back of the head. Brilliant! I vote option 1

I have considered making a buck and vac forming the head completely...dunno yet not sure how well that would go.

Kustom can you tell a bit more about flow forming? sounds interesting I am not familiar with it
 
Nice work!

So Chris Halls (Cunningham) designed the robot and built a scale model. Presumably Asylum Models & Effects made the full scale prop? Or Mass Illusion?

The credits have Joss Williams as Robot supervisor, about 4 robot engineers and 1 robot electronics technician.

It would be great to try and track down someone who built to talk about process and materials. The body all looks like fibreglass to me...


To answer your above question I would want to say Asylum but after doing more reading I think since he designed the org. comic book mean green from the start i want to believe he was brought is as a contractor for the job and he worked alone at the start. And then another fx company came in to assist him.

Flow forming is using a power hammer or rivet gun with special heads on it to form sheet metal in a buck of some sort. instead of hammer and dolly ways. it will make the parts cleaner in the end vs getting all the dings out after shaping the piece.. here is a link to a video that show it being done. I was lucky to attend a workshop so i learned him. link
 
To answer your above question I would want to say Asylum but after doing more reading I think since he designed the org. comic book mean green from the start i want to believe he was brought is as a contractor for the job and he worked alone at the start. And then another fx company came in to assist him.

yeah it's not clear I think. A job that big I reckon you'd need a few different fabricators, especially if you have to work with a engineering team


Flow forming is using a power hammer or rivet gun with special heads on it to form sheet metal in a buck of some sort. instead of hammer and dolly ways. it will make the parts cleaner in the end vs getting all the dings out after shaping the piece.. here is a link to a video that show it being done. I was lucky to attend a workshop so i learned him. [URL="http://www.youtube.com/watch?v=9K6c3_DMXjQ" said:
link[/URL]

That's amazing! it looks really effective and your finished product would be MEAN!. I didn't catch what material the buck was made from but it would have to be very hard I imagine.

Would you do an internal buck or external one?
 
I based alot of my custom build off the ABC robot reference shots, heres my custom built

Hey that's a great build jediscout. I was wondering what happened to that build, you've got a thread on the rpf right?

It's freakin' huge! The leg pieces look great, care to share how you made it?
 
Hey that's a great build jediscout. I was wondering what happened to that build, you've got a thread on the rpf right?

It's freakin' huge! The leg pieces look great, care to share how you made it?

Thanks! yah its been a work in progress for over a few years now, as all the parts are either found or donated. Its in its like seventh incarnation. Always upgrading when i find new parts. Alot of vaccum cleaner parts, nerf guns,real saw blades, 12 volt craftsman drill, kids toys,various rubbish bins, planters, hair dryers.and various tubes,wires and cords. I kinda wanted ABC mixed with the giant samurais cyborgs from Sucker Punch.
It sits up on 4 ft stilts. and yes this costume is wearable, i did a fashion show in it last year, but i had legs strap malfunctions.

273042_2118958021986_1486850131_2465024_3066142_o.jpg

265932_2118957861982_1486850131_2465023_643439_o.jpg
 
dude that is just killer and you wear it . Well if I'm making parts for mine and ask for a piece here are there I think i can help you out....

The forms can be made from wood or kitty hair bondo depends on the size of the piece and how many parts will be made from it.
 
So I have started trying to work out dimensions.

According to the measurements that Zorg provided on Sir Rounds thread the width of the head across the brow is roughly 143mm. If you take that measurement and apply it as a ratio across the shoulder pad you get about 350mm. The width of the chest is about 560mm.

Anyone got any other measurements? I make the total height of this beast to be about 270cm

I'm waiting for my vinyl kit to arrive :(
 
I'm waiting back to find out if my buddy is getting the head if you can wait I plan on making a blue print from it. :0

Hey that will help alot for accuracy and hell yeah I'll wait for a blueprint! Very generous of you to share it by the way.

I'll be making the head last I think
 
So oota did you get the foot done yet it's been 24 hours? what is your plan of attack on them you going to do some tracks or flat bottom? I've been working on the moving parts till i can get a head to look at. cheapest and fastest way to make a tilt and pan neck joint for movement is using a Caster :) that is how i plan on attacking the neck on mine.. just 2 cents
 
So oota did you get the foot done yet it's been 24 hours? what is your plan of attack on them you going to do some tracks or flat bottom?

ha ha!! sadly its all just in my head at this stage

I'll definitely do tracks of some sort but I'm not sure how articulated I am going to make it. I think if I can just get the basic bits all made I'lll be doing well :)


I've been working on the moving parts till i can get a head to look at. cheapest and fastest way to make a tilt and pan neck joint for movement is using a Caster :) that is how i plan on attacking the neck on mine.. just 2 cents

That's a good idea using the caster. I'm looking forward to seeing how your build progresses
 
This thread is more than 9 years old.

Your message may be considered spam for the following reasons:

  1. This thread hasn't been active in some time. A new post in this thread might not contribute constructively to this discussion after so long.
If you wish to reply despite these issues, check the box below before replying.
Be aware that malicious compliance may result in more severe penalties.
Back
Top