Ridire Firean
Sr Member
Hey @Rennek ! I wanted to eloborate (a little anyway, this isn't a full on tutorial) on how to hide a seam between two TCSS parts.
Again, after clocking your two parts by sanding the female side down, you can begin to diminish the appearance of the seam by sanding over it until you are far enough down in the diameter of the two parts that most of the finishing/deburing bevel has been removed. The bevel is what really makes the seam evident. I wish the parts came with crazy sharp edges and a warning label instead, but oh well.
Taking a look at.... two randomly assembled sets of TCSS parts ( Waves hand: FJK, these are not the pictures you're looking for. Waves hand: Move along. )... I decided to tackle redoing a polish job and see how much I could hide the seam on one of the first randomly assemebled set of TCSS parts.
Here are the two RANDOMLY ASSEMBLED SETS OF TCSS PARTS...
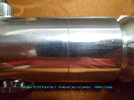


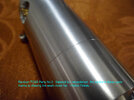
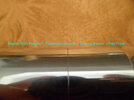

Here is the first set of randomly assembled TCSS parts after Stage 0.5 ( I started with 100 grit sandpaper, but it wasn't cutting down the seam fast enough, not photographed) and after Stage 1 with 80 grit sandpaper. In this step you want to make the transition between the two parts as flat as you can. I sand down the length of the two joined parts, then at a diagonal one way, then across that at a diagonal the other way, then I wrap the sandpaper around the part and twist it in my hands over and over and over and over again moving slowly from one end (pink duct tape side) to the other end. It gives the parts a turned look. I separated the two parts, washed them with soap and water, dried them and reassembled them...
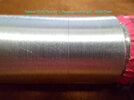
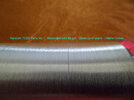
After stage 2, this time with 100 grit sandpaper, the two parts begin to look like you didn't make a mistake by going crazy with that 80 grit paper in Stage 1. I followed the same sanding procedure as in Stage 1, including the wash/dry before the pics. Here are the results...


Stage 3 was completed with 320 grit wet, wet/dry sandpaper. The same sanding procedure was used as in Stage 1 and Stage 2, with the addition of a circular clockwise, then counter-clockwise sanding motion up and down and around the piece to remove the deeper sanding marks missed in Stage 2. Then I sanded down the length of the piece a second time , then wrapped the piece and twist sanded it again, then washed and dried before the pics...


Moving right along to Stage 4, I sanded the two joined parts with wet 600 grit wet/dry sandpaper following the procedure in Stage 3 including the wash/dry...
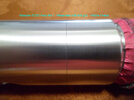

In Stage 5 I used wet 1200 grit wet/dry sandpaper, then disassembled, washed and dried yet again before reassembling for the photos...


Here's the piece after Stage 6 in which I used wet 2000 grit wet/dry sandpaper, washed them separately, dried them, reassembled them and took the pics...


Geez, posting all this is almost as much work as sanding was yesterday! O.K. Stage 7, the first polish...


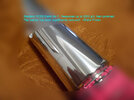
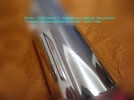
Since my final polishing heads were old and dirty, it had left lines in the piece that weren't attractive, so took out some copper polish and went at it with a rag. After that didn't work, I tried a little car polish and wax. Still not satisfied with the outcome, I Then I tried a different dirty old final polishing head and it produced a finer finish. I guess that makes this Stage 8 and 9...
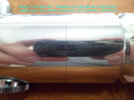
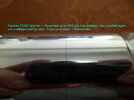
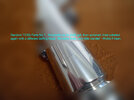
And there you have it. That's about as close to a disappearing seam line as I can get with these parts.
I hope this helps you! Good Luck on your seam!
Again, after clocking your two parts by sanding the female side down, you can begin to diminish the appearance of the seam by sanding over it until you are far enough down in the diameter of the two parts that most of the finishing/deburing bevel has been removed. The bevel is what really makes the seam evident. I wish the parts came with crazy sharp edges and a warning label instead, but oh well.
Taking a look at.... two randomly assembled sets of TCSS parts ( Waves hand: FJK, these are not the pictures you're looking for. Waves hand: Move along.
Here are the two RANDOMLY ASSEMBLED SETS OF TCSS PARTS...


Here is the first set of randomly assembled TCSS parts after Stage 0.5 ( I started with 100 grit sandpaper, but it wasn't cutting down the seam fast enough, not photographed) and after Stage 1 with 80 grit sandpaper. In this step you want to make the transition between the two parts as flat as you can. I sand down the length of the two joined parts, then at a diagonal one way, then across that at a diagonal the other way, then I wrap the sandpaper around the part and twist it in my hands over and over and over and over again moving slowly from one end (pink duct tape side) to the other end. It gives the parts a turned look. I separated the two parts, washed them with soap and water, dried them and reassembled them...


After stage 2, this time with 100 grit sandpaper, the two parts begin to look like you didn't make a mistake by going crazy with that 80 grit paper in Stage 1. I followed the same sanding procedure as in Stage 1, including the wash/dry before the pics. Here are the results...


Stage 3 was completed with 320 grit wet, wet/dry sandpaper. The same sanding procedure was used as in Stage 1 and Stage 2, with the addition of a circular clockwise, then counter-clockwise sanding motion up and down and around the piece to remove the deeper sanding marks missed in Stage 2. Then I sanded down the length of the piece a second time , then wrapped the piece and twist sanded it again, then washed and dried before the pics...


Moving right along to Stage 4, I sanded the two joined parts with wet 600 grit wet/dry sandpaper following the procedure in Stage 3 including the wash/dry...


In Stage 5 I used wet 1200 grit wet/dry sandpaper, then disassembled, washed and dried yet again before reassembling for the photos...


Here's the piece after Stage 6 in which I used wet 2000 grit wet/dry sandpaper, washed them separately, dried them, reassembled them and took the pics...


Geez, posting all this is almost as much work as sanding was yesterday! O.K. Stage 7, the first polish...


Since my final polishing heads were old and dirty, it had left lines in the piece that weren't attractive, so took out some copper polish and went at it with a rag. After that didn't work, I tried a little car polish and wax. Still not satisfied with the outcome, I Then I tried a different dirty old final polishing head and it produced a finer finish. I guess that makes this Stage 8 and 9...


And there you have it. That's about as close to a disappearing seam line as I can get with these parts.
I hope this helps you! Good Luck on your seam!
