A Little Bit Of Discovery - FINISHED

PHArchivist

Master Member
Fun kit...

Will try to break my habit of the past few years of starting forever-unfinished build threads (this one is almost done; and will BE done).

Enjoy...

72351476728__5544744F-C7E8-4E0C-8534-A591C4EE5BF1.jpg


72438893026__01C05017-3D36-49B4-9B86-F82AA989BFB2.jpg


72438894072__614D3AF4-B7AC-40A1-A975-E1AD84E4691E.jpg


72438895500__D6D9A82B-B6DA-4B0B-A74F-A494C08B8B00.jpg


72445701714__A4DE8C42-93D7-43EA-994E-01573926550B.jpg


72445702949__D185A510-A976-47AC-B806-64B8C39A1F0F.jpg
 
Last edited:
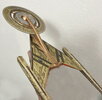
Funny - the gold base coat does not look as mottled or "sparkly" in person.

But I think that helps with the finish of Discovery as - being a digital model, under so many varying digital lighting scenarios - it always looks a bit different in every shot...

72446074564__42C684D8-159C-4BBB-A460-7D63F7767F2A.jpg


72446075577__EB69036D-6B36-4130-BD04-8BE81BF767CC.jpg


72490122994__769EF92E-0B0A-4FF7-ACA3-C65214D2DF89.jpg


72490249714__833BE172-E022-4428-A31E-54E788906510.jpg


72498279326__34E1A77F-1664-4A0D-BACC-9557AFE2E5FB.jpg


72498280476__43FE227E-2976-4B60-A006-6060922ED77F.jpg
 
I've taken some creative liberties with the application of copper paint; both to correct errors and simply because I wanted to.

Again, Discovery is a bit of an enigma, and looks very different in so many different shots of the series.

And there is no physical model to compare to.

So I took some liberties, mostly on the nacelles...

72550023290__FF1505DB-20D6-4AF4-882F-D8DD05368A13.jpg


72550121699__9A8CFFAF-9736-40A9-AA4E-4CD4ACB6A035.jpg


72550265021__70300C63-E0E8-4455-BEA7-4F8EE7A65BA4.jpg


72550269878__E72BD7A4-7988-4AAB-B61C-9235C5E749D9.jpg


72550271442__4522D89D-C82D-4241-B80B-4295556ED6DC.jpg


IMG_4178.jpg


IMG_4179.jpg
 

Attachments

  • IMG_4180.jpg
    IMG_4180.jpg
    1.2 MB · Views: 34
Not sure what is happening with this gap.

Best I can tell, I have both pieces installed properly, but there is an unacceptable and grossly large gap.

Anyone else build this kit and run into this?

I will spray some clear packing tape (no texture) with copper, and cut some 5mm x 3mm squares to cover the gaps...

IMG_4609.jpg


IMG_4608.jpg
 

Your message may be considered spam for the following reasons:

If you wish to reply despite these issues, check the box below before replying.
Be aware that malicious compliance may result in more severe penalties.
Back
Top