A Daft Trooper-(TK takes on DP!)

The SKB drum case was far, far much larger than I anticipated. Back in the mail with yer! Just gonna walk into some music store with the helmet on and find one in shop that fits.

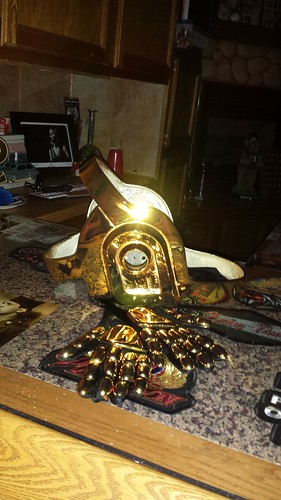
The lid also returned...which means I can finally put the proverbial nails in this project. C'n'C re-tinted it to match my gloves (if you are just following this thread now, what happened was that my first chroming had drips, runs, and orange peel. He re-did it, but used a lighter gold color. Not to finish short of my goal of just...FINISHING this helmet to my contentedness, I sent it back with my finished gloves to ensure the proper color, here are the final results.)


C'n'C the final take by TK9336, on Flickr

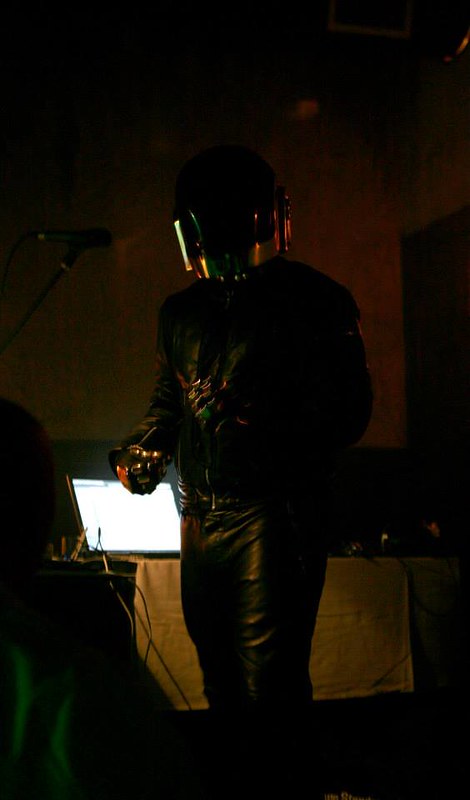
Here's a picture flash in the dark, showing the truer nature of the color. I sound like a broken record every time I get this helmet back once it's shiny...it's damn photogenic! How can you be mad at that? I tried and well, I am just happy I can FINALLY finish this lid. Move onto Star Wars again, and Daft Punk when I feel my wallet need another emptying.


C'n'C the final take by TK9336, on Flickr

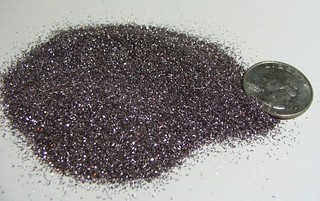
And for a SECOND time my glitter purchase has been refunded, once from the US, and from the UK. I called a local art academy that carried the Martha Stewart hematite glitter and he checked with all three of his suppliers, and nobody makes this anymore. After many googl'ing sessions, I finally found the damn thing. Here is the link for you folks inclined to recreate the boots, your welcome :) There are 10 left as of now (1 oz bags, one bag is probably enough to do a pair of boots, but I like to play it safe and got 3; in case someone here needs to PM me for some extra if your doing a pair and they've run out.)

HEMATITE ULTRAFINE


Hematite Ultrafine Glitter by TK9336, on Flickr

I am going to cross my fingers, and pray that this is also still in stock and not user error for lack of updates. I'll be right back to post that it shipped after I'm wearing my lucky Stormtrooper shirt, and Imperial underwear. Right after that I will go to check if the planets are aligned, the meaning of life still adds of to 42. Might leave some reindeer dust out on the lawn as well. Seriously...why the hell is this glitter so hard to find...is it made with unobtainium?

I am doing the wire hair tomorrow, tutorial and pictures as always.
 
THE GLITTER GODS THAT BE ANSWERED MY CALL!

I've been busy day and night finishing everything for Dragon*Con, and won't be posting that often...most of it will come after Dragon*Con. I will share my YSL boot conversion though!

NOTE: On glitter. I used glass glitter, which from my research is higher end in the glitter world, and lasts longer than plastic. Additionally, black glitter often called "onyx" has a very slight purple tint that I didn't want to deal with. I have a found a suitable black called "midnight" which contains a little silver to be shiny. The thing is, you really can't mix glitter colors...they aren't like watercolors. The finish of mixing hematite (what I used) and this midnight would result in a weird salt and pepper finish. I wanted a consistent finish throughout. I will be the first one to tell you I am not 100% satisfied with the color, but seeing it is pretty darn to graphite in color, I am happy with it. In the glitter world of colors, there is black: Midnight and onyx, Hematite, and then many different silvers. All of the silvers are too light in luster to compare to the dark graphite finish of Daft's. Hematite is the only go between, albeit it is lighter in color. Now if you want to take a chunk of graphite and make it glitter, go for it. This works for me until I, or someone else finds something better. The search continues...

There were a few techniques I learned, this being my baptism with mod podge (super elmer's glue) and glitter.

My first take was using a sponge applicator and putting on generous amounts of glue as a base coat. Then, dump generous amounts of glitter on, tap, and let it sit (to dry...wait 15-20 minutes). I wasn't patient, so I just kept adding. It gave a pretty smooth finish throughout. However, globbing on too much glitter and glue at once...well gravity did it's work. on the heel it would sad. Now it wasn't blatantly obvious, but for a perfectionist like me...well it still bugs me.

The second shoe I went more conservatively. I mixed the glitter and mod podge together and painted it on using a paint brush. This was much slower, and left a bump'ier finish. When doing this, keep in mind the ratio you add glue to glitter. I liked having a thicker glitter glue mix, opposed to a lighter one. I say that because I eventually just added glue dumped glitter on because it worked before. I used the brush on approach to fill gaps, to which to that end, it worked.

Remember however, this stuff does dry clear, but put a big ol' glob on, it will take a much longer time to dry clearly. Sometimes, it would dry to be a opaque finish...not what we're looking for in our case. To fix that, I just brushed more on. Respect the cure time! It does get tacky, SO DON'T TOUCH IT! You will pull glitter off, and glue leaving a weird hole. We don't want that.

To do this, you need these:
- Giorgio Brutini Men's boots
-4oz of Hematite Glitter
-Paint Brush
-Mod Podge (Glossy)
-Newspaper, or work mat
-Sponge applicator (dollar tree/Walmart)
-Masking tape (for taping off heel, and sole)
-X-Acto knife (for cutting along the soles and masking tape to break the glue seal that covers the medium.)
-Disposable cups, plates, spoon (if you want a little bit of control putting the glitter on.)

Also, have patience.

Step 1: Mask off shoes
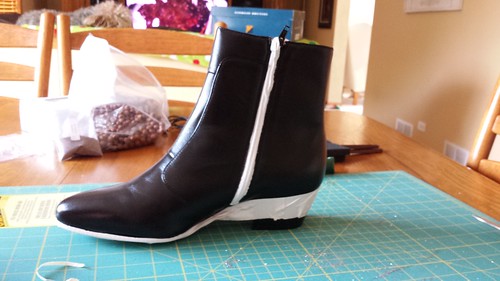
DP YSL Boot Conversion by TK9336, on Flickr

Step 2: Add glue and glitter (in this picture I went really lightly. Now these can work with a bunch of light coats...however medium coats work just as well. I was trying to get a feel for it.) REMEMBER: you can use the glitter that falls over, just use a cup to reuse.
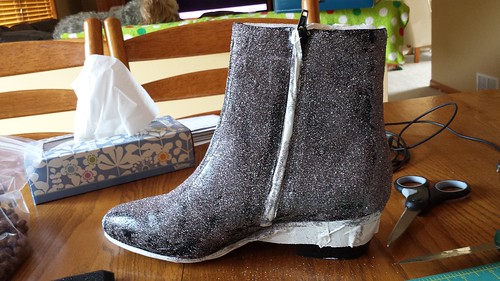
DP YSL Boot Conversion by TK9336, on Flickr

Step 3: Rinse and repeat Step 2 until the shoes are covered completely. ALLOW CURE TIME: 15-20 between coats (med-light).

Step 4: Fill in the gaps you may have missed, or couldn't resist the temptation to touch them.
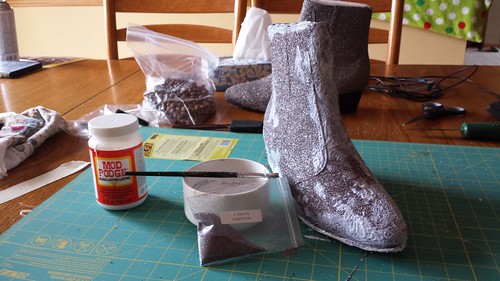
DP YSL Boot Conversion by TK9336, on Flickr

Step 5: ALLOW FOR CURING. See anything you missed? Fill it, and let it dry.

Step 6: Optional; cover the entire shoe in mod podge. Mod Podge is unique in that it is a glue, and sealer. Of the tutorials I've seen, people do this to keep all the glitter on. Which it does well, but it will knock down the shine. If I had the choice, I would skip doing it again.

Step 7: Spray with a clear acrylic sealer (GLOSS). It will take down the shine much less than the covering the shoes with a thin coat of mod podge. I used one thin coat of Mod Podge, and two light coats of sealer.

Step 8: LET IT DRY! Overnight would be best.

Step 9: Using your xacto knife, go around the base of the sole, and zipper. There will be a film of the glue (which now is dry, and clear.) If you peel off your masking tape without cutting it, it will peel and stretch off the leather. You cut to prevent that and then push in the recess where the leather meets the shoe. It will leave a clean appearance.
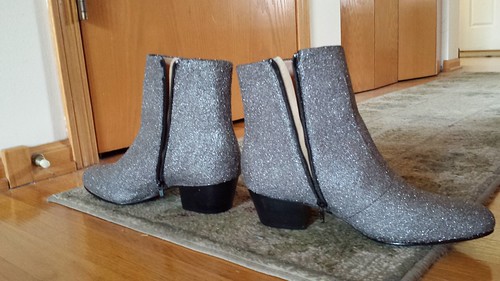
DP YSL Boot Conversion by TK9336, on Flickr

Mine aren't perfect. But they are wearable and get the point across they are part of the RAM costume. Mine globbed in a few areas, which resulted in this project taking all day, instead of 4 hours. I was learning on the fly. Remember, it's all fixable...but doing right the first time will save you time. That said: HAVE PATIENCE. I got over excited. Take your time...it's worth it. Now when I do my buddy's shoes, they will be very neat, and smooth as opposed to mine. I hope this was helpful! I just wish I could find that perfect color of glitter...if you find it, lemme know!


Daft Punk - Random Access Memories by TK9336, on Flickr
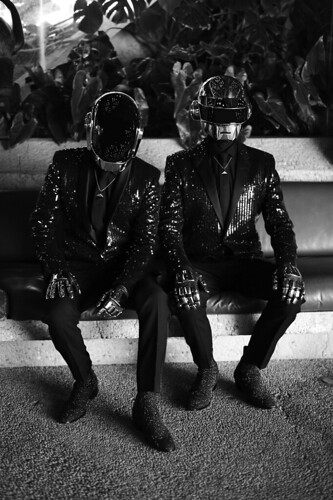

Daft Punk - Random Access Memories by TK9336, on Flickr


Daft Punk - Random Access Memories by TK9336, on Flickr

Now while the prior pictures show a dark, grey, almost black glitter finish, this picture throws me through a hoop. We have to remember, on the professional magazine shoots, there will be post editing. Pick your battles my Daft friends...
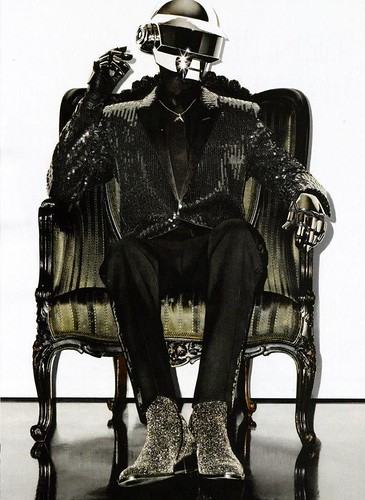
Daft Punk - Random Access Memories by TK9336, on Flickr

In the search of alternative glitter: here is what I have found...and would love to get samples to show the differences, and even re-do my shoes. Anyways, I would love to see your attempts!

1: #610 Onyx (sticking with the glass glitter)
Fine Glass Glitter, Fantasy Film, Fantasy Fiber, Adhesives, Tools and more from Art Institute Glitter : Cottonwood AZ
2: #188 Black Vinyl Pearlescent Ultrafine Ultrafine Pearlescent Glitter from Art Glitter
3. #700 Exotica Microfine Transparent Microfine Glitter in Transparent colors, from Art Glitter

<Drumroll please>
...
#511 Graphite Microfine Opaque Microfine Glitter in Opaque colors, from Art Glitter (If I had the choice to do this AGAIN, I'd use this is in a heartbeat. Hint, hint, wink, wink, somebody please try this! I might get this just for sharts and giggles.) Color wise, it is very close to hematite, but for comparison purposes, I would love to see it done.

- - - Updated - - -

I've been busy day and night finishing everything for Dragon*Con, and won't be posting that often...most of it will come after Dragon*Con. I will share my YSL boot conversion though!

NOTE: On glitter. I used glass glitter, which from my research is higher end in the glitter world, and lasts longer than plastic. Additionally, black glitter often called "onyx" has a very slight purple tint that I didn't want to deal with. I have a found a suitable black called "midnight" which contains a little silver to be shiny. The thing is, you really can't mix glitter colors...they aren't like watercolors. The finish of mixing hematite (what I used) and this midnight would result in a weird salt and pepper finish. I wanted a consistent finish throughout. I will be the first one to tell you I am not 100% satisfied with the color, but seeing it is pretty darn to graphite in color, I am happy with it. In the glitter world of colors, there is black: Midnight and onyx, Hematite, and then many different silvers. All of the silvers are too light in luster to compare to the dark graphite finish of Daft's. Hematite is the only go between, albeit it is lighter in color. Now if you want to take a chunk of graphite and make it glitter, go for it. This works for me until I, or someone else finds something better. The search continues...

There were a few techniques I learned, this being my baptism with mod podge (super elmer's glue) and glitter.

My first take was using a sponge applicator and putting on generous amounts of glue as a base coat. Then, dump generous amounts of glitter on, tap, and let it sit (to dry...wait 15-20 minutes). I wasn't patient, so I just kept adding. It gave a pretty smooth finish throughout. However, globbing on too much glitter and glue at once...well gravity did it's work. on the heel it would sad. Now it wasn't blatantly obvious, but for a perfectionist like me...well it still bugs me.

The second shoe I went more conservatively. I mixed the glitter and mod podge together and painted it on using a paint brush. This was much slower, and left a bump'ier finish. When doing this, keep in mind the ratio you add glue to glitter. I liked having a thicker glitter glue mix, opposed to a lighter one. I say that because I eventually just added glue dumped glitter on because it worked before. I used the brush on approach to fill gaps, to which to that end, it worked.

Remember however, this stuff does dry clear, but put a big ol' glob on, it will take a much longer time to dry clearly. Sometimes, it would dry to be a opaque finish...not what we're looking for in our case. To fix that, I just brushed more on. Respect the cure time! It does get tacky, SO DON'T TOUCH IT! You will pull glitter off, and glue leaving a weird hole. We don't want that.

To do this, you need these:
- Giorgio Brutini Men's boots
-4oz of Hematite Glitter
-Paint Brush
-Mod Podge (Glossy)
-Newspaper, or work mat
-Sponge applicator (dollar tree/Walmart)
-Masking tape (for taping off heel, and sole)
-X-Acto knife (for cutting along the soles and masking tape to break the glue seal that covers the medium.)
-Disposable cups, plates, spoon (if you want a little bit of control putting the glitter on.)

Also, have patience.

Step 1: Mask off shoes

DP YSL Boot Conversion by TK9336, on Flickr

Step 2: Add glue and glitter (in this picture I went really lightly. Now these can work with a bunch of light coats...however medium coats work just as well. I was trying to get a feel for it.) REMEMBER: you can use the glitter that falls over, just use a cup to reuse.

DP YSL Boot Conversion by TK9336, on Flickr

Step 3: Rinse and repeat Step 2 until the shoes are covered completely. ALLOW CURE TIME: 15-20 between coats (med-light).

Step 4: Fill in the gaps you may have missed, or couldn't resist the temptation to touch them.

DP YSL Boot Conversion by TK9336, on Flickr

Step 5: ALLOW FOR CURING. See anything you missed? Fill it, and let it dry.

Step 6: Optional; cover the entire shoe in mod podge. Mod Podge is unique in that it is a glue, and sealer. Of the tutorials I've seen, people do this to keep all the glitter on. Which it does well, but it will knock down the shine. If I had the choice, I would skip doing it again.

Step 7: Spray with a clear acrylic sealer (GLOSS). It will take down the shine much less than the covering the shoes with a thin coat of mod podge. I used one thin coat of Mod Podge, and two light coats of sealer.

Step 8: LET IT DRY! Overnight would be best.

Step 9: Using your xacto knife, go around the base of the sole, and zipper. There will be a film of the glue (which now is dry, and clear.) If you peel off your masking tape without cutting it, it will peel and stretch off the leather. You cut to prevent that and then push in the recess where the leather meets the shoe. It will leave a clean appearance.

DP YSL Boot Conversion by TK9336, on Flickr

Mine aren't perfect. But they are wearable and get the point across they are part of the RAM costume. Mine globbed in a few areas, which resulted in this project taking all day, instead of 4 hours. I was learning on the fly. Remember, it's all fixable...but doing right the first time will save you time. That said: HAVE PATIENCE. I got over excited. Take your time...it's worth it. Now when I do my buddy's shoes, they will be very neat, and smooth as opposed to mine. I hope this was helpful! I just wish I could find that perfect color of glitter...if you find it, lemme know!


Daft Punk - Random Access Memories by TK9336, on Flickr


Daft Punk - Random Access Memories by TK9336, on Flickr


Daft Punk - Random Access Memories by TK9336, on Flickr

Now while the prior pictures show a dark, grey, almost black glitter finish, this picture throws me through a hoop. We have to remember, on the professional magazine shoots, there will be post editing. Pick your battles my Daft friends...

Daft Punk - Random Access Memories by TK9336, on Flickr

In the search of alternative glitter: here is what I have found...and would love to get samples to show the differences, and even re-do my shoes. Anyways, I would love to see your attempts!

1: #610 Onyx (sticking with the glass glitter)
Fine Glass http://www.artglitter.com/retail/glitterpages/rggfine.htm
2: #188 Black Vinyl Pearlescent Ultrafine http://www.artglitter.com/retail/glitterpages/rufpearl.htm
3. #700 Exotica Microfine Transparent http://www.artglitter.com/retail/glitterpages/rmft.htm

<Drumroll please>
...
#511 Graphite Microfine Opaque http://www.artglitter.com/retail/glitterpages/rmfo.htm (If I had the choice to do this AGAIN, I'd use this is in a heartbeat. Hint, hint, wink, wink, somebody please try this! I might get this just for sharts and giggles.) Color wise, it is very close to hematite, but for comparison purposes, I would love to see it done.
 
Just got my Thomas helmet back from c n' c and not crazy about the finish in several spots ! Are you happy with your redos from them ? Not sure I can live with it .
 
Yeah the re-dos are more than recommended. I am having tarnishing on my GM gloves already :( Definitely get. Go to Coat of Chrome next time! NO problems with Don over there!

Thanks Made007!

Ok, I am finally back from Dragon*Con. I know you missed me! Right?!

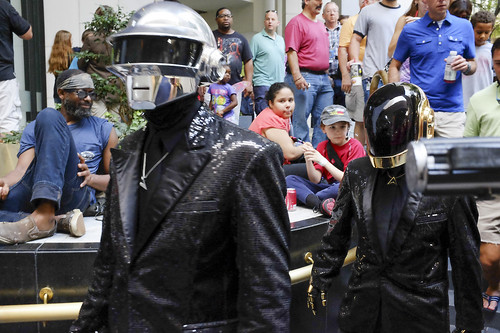
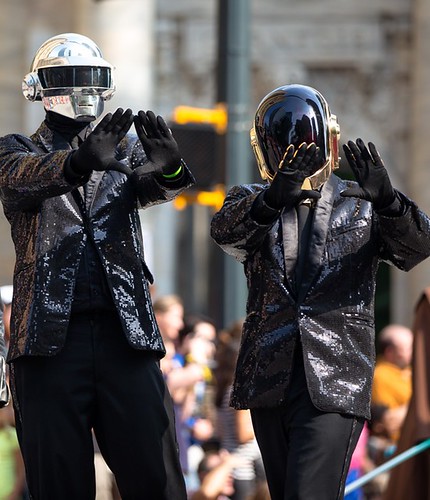
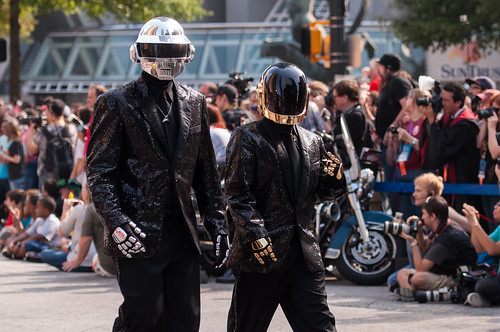
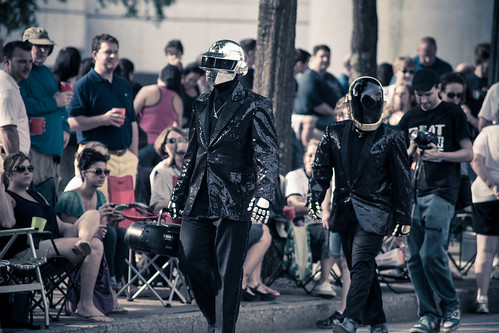
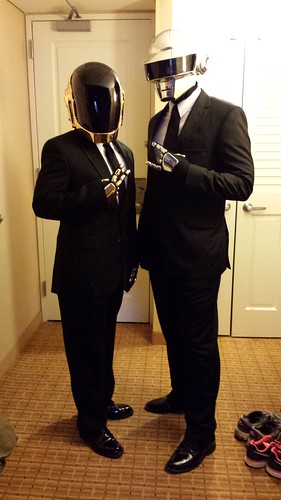
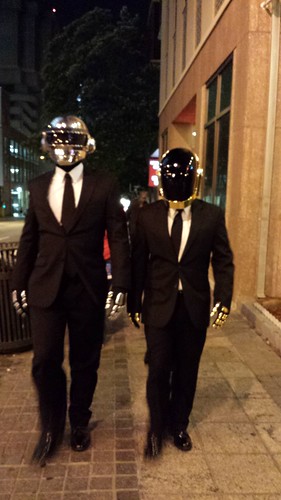
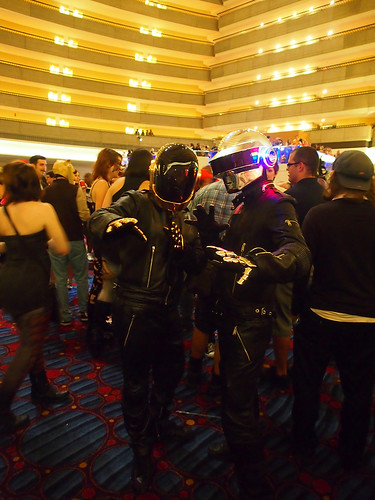
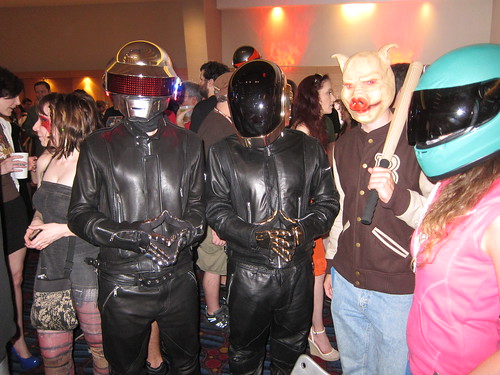
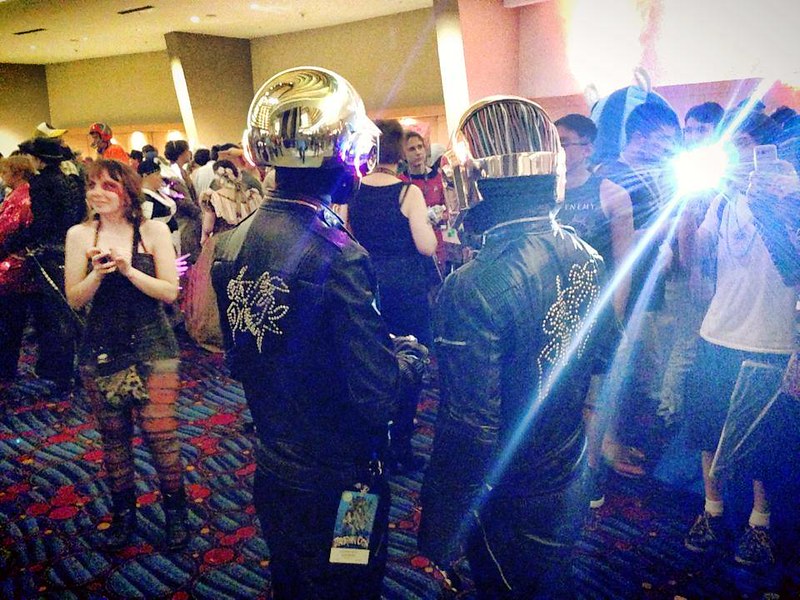
Anyways, before I make a long winded beginning to end post to that nicely wraps on this ENTIRE thread...here are some glamor shots. I helmet mashed eras with my sequin tuxedoes, but don't fret...a RAM helmet will be here eventually. I couldn't resist NOT wearing the sequin tuxs I had made with the utmost accuracy in mind. Let's start with my my buddy and myself:

-I am wearing the first finished Sorenzo HAA helmet.
-My friend on my suggestion is wearing a Volpin HAA cast. (With his with a little work, can get any era Thomas helmet done. We we're going to do the basterdized Discovery lights, and HAA mouth slit, as opposed to the Discovery smile.)
-I was wearing Guy-Man. I am 5'7.4" tall.
-Cam was wearing Thomas. He is 6'3" tall.
-The shoes are glittered Giorgio Brutini's. I actually redid the shoes THE NIGHT BEFORE the con. Cam found AMAZING screen capture matched glitter. Much better than my glass glitter.
-Both gloves are HAA style. The pulled pieces came from FIREWIRE.
-GM was chromed at Creations'n'Chrome. The hand plates are now tarnishing and I want to know why. I've worn them for 3 days!
-TB was chromed at Coat'of'Chrome. Absolutely no problems to report.
-I wore my GSTQF BASED leathers Sunday night with Harrison of Volpin props. My V1 jacket needs to be changed in a bunch of places but the way to tell that is to stand next to the original. My pants waistband needs to be re-done as well.
-I wore the RAM Tuxedos with Cam on Friday afternoon, Saturday in the parade into afternoon, and just in the morning Sunday. We wore the suit and ties Friday night, Saturday night, and wore the Discovery styled suits (Stormtrooper neckseals, and GM ruffled shirt) late Sunday night. We need to get normal tuxedos for more canon official appearances, but the final look was very sharp. The thing about doing a Daft Punk costume with both helmets, is that you HAVE TO MATCH the other. We're talking EXACTLY down to the shoes. Both Cam and I have been with the military one form or another and wore our shiny dress shoes and matching gov't issue ties.
-Balaclavas are important. After this I will need to remove the UnderArmor logo. It takes away from the impression.

THINGS TO FIX:
-Glitter shoes did not last all weekend without cracking. I need to find a super glue spray adhesive since mod podge peels off in sections. My shoes had this problem more because I used glass glitter which is hard, and brittle. The plastic glitter we used bends much more, even though my friend still had some small tears. I am always trying to find better ways to do these things, so if you know how to solve this, post!
-My Adidas Jabbars we're ok. I lost black paint as predicted. The VHT vinyl dye needs to cure a week ahead, instead of a couple days is my guess. I have found a contact that has the incredibly rare shoes as originals. He wants an arm and a leg for them, of course. Maybe.
-The helmet padding in my GM needs another layer of foam on the top of the helmet so my HAA cast sits where you can see my neck. I was close, but not perfectly canon. Thankfully, it's an easy fix with industrial velcro. The padding I found was motorcycle helmet padding for just the top and it works PERFECTLY. GM is actually comfortable to wear, and breathes well.
-I need a longer gold chain. Off to da Wal-mart and big box stores!

Huge thanks to Thom Wall of Sorenzo props.

Without further ado:


Dragon*Con 2013 by TK9336, on Flickr


Dragon*Con 2013 by TK9336, on Flickr


Dragon*Con 2013 by TK9336, on Flickr


Dragon*Con 2013 by TK9336, on Flickr


Dragon*Con 2013 by TK9336, on Flickr


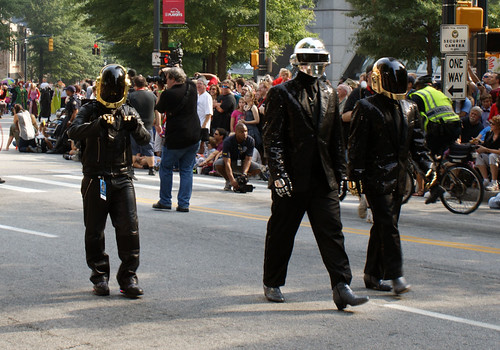
Strutting downtown Atlanta by TK9336, on Flickr

In these pictures you can see through the visors. Both visors are going to be redone completely. They work in all the other pictures though.


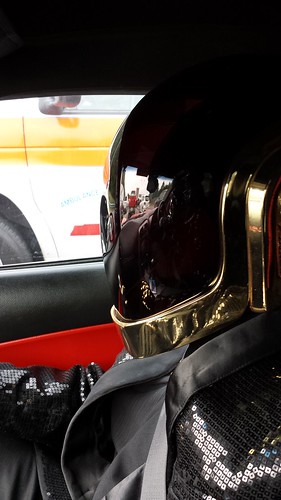
Driving the Corvette, Electroma 2013 style. by TK9336, on Flickr


People thought the Daft+Corvette was pretty neat! by TK9336, on Flickr

With Harrison of Volpin Props:

Dragon*Con 2013 by TK9336, on Flickr


Dragon*Con 2013 by TK9336, on Flickr

I was awestruck, not gonna lie! I need to make fixes in my suit, and pictures like this can show why. I can't wait t see the pictures his wife took, especially back to back!


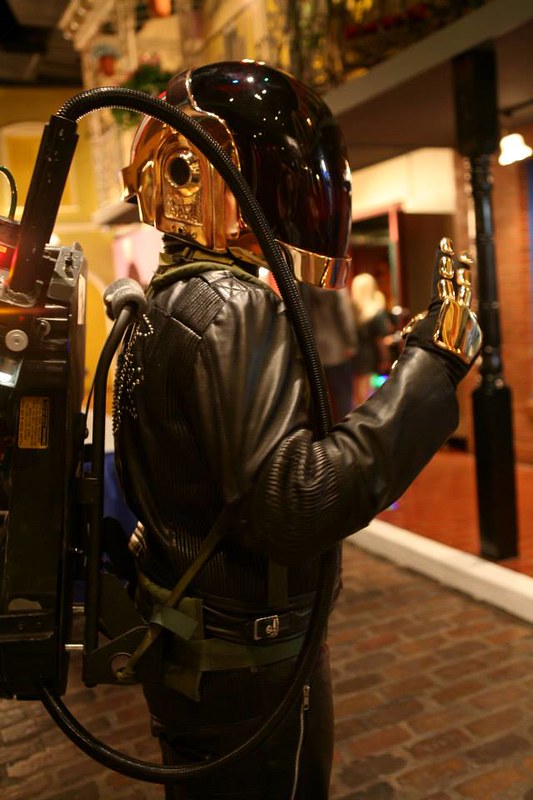
Dragon*Con 2013 by TK9336, on Flickr Can any one identify this fellow? I loved his idea to use the Discovery backpack as a boom box.


Dragon*Con 2013 by TK9336, on Flickr

I still have some stuff to fix, primarily the visor (which I have a new one to dye with a 1:1 ratio of black to dark green to do what Pedro did with his to great success.) Thank you to everyone who has chimed in one way or another to help me on this great journey. Best 21st birthday, EVER!

- - - Updated - - -

Yeah the re-dos are more than recommended. I am having tarnishing on my GM gloves already :( Definitely get. Go to Coat of Chrome next time! NO problems with Don over there!

Thanks Made007!

Ok, I am finally back from Dragon*Con. I know you missed me! Right?!

Anyways, before I make a long winded beginning to end post to that nicely wraps on this ENTIRE thread...here are some glamor shots. I helmet mashed eras with my sequin tuxedoes, but don't fret...a RAM helmet will be here eventually. I couldn't resist NOT wearing the sequin tuxs I had made with the utmost accuracy in mind. Let's start with my my buddy and myself:

-I am wearing the first finished Sorenzo HAA helmet.
-My friend on my suggestion is wearing a Volpin HAA cast. (With his with a little work, can get any era Thomas helmet done. We we're going to do the basterdized Discovery lights, and HAA mouth slit, as opposed to the Discovery smile.)
-I was wearing Guy-Man. I am 5'7.4" tall.
-Cam was wearing Thomas. He is 6'3" tall.
-The shoes are glittered Giorgio Brutini's. I actually redid the shoes THE NIGHT BEFORE the con. Cam found AMAZING screen capture matched glitter. Much better than my glass glitter.
-Both gloves are HAA style. The pulled pieces came from FIREWIRE.
-GM was chromed at Creations'n'Chrome. The hand plates are now tarnishing and I want to know why. I've worn them for 3 days!
-TB was chromed at Coat'of'Chrome. Absolutely no problems to report.
-I wore my GSTQF BASED leathers Sunday night with Harrison of Volpin props. My V1 jacket needs to be changed in a bunch of places but the way to tell that is to stand next to the original. My pants waistband needs to be re-done as well.
-I wore the RAM Tuxedos with Cam on Friday afternoon, Saturday in the parade into afternoon, and just in the morning Sunday. We wore the suit and ties Friday night, Saturday night, and wore the Discovery styled suits (Stormtrooper neckseals, and GM ruffled shirt) late Sunday night. We need to get normal tuxedos for more canon official appearances, but the final look was very sharp. The thing about doing a Daft Punk costume with both helmets, is that you HAVE TO MATCH the other. We're talking EXACTLY down to the shoes. Both Cam and I have been with the military one form or another and wore our shiny dress shoes and matching gov't issue ties.
-Balaclavas are important. After this I will need to remove the UnderArmor logo. It takes away from the impression.

THINGS TO FIX:
-Glitter shoes did not last all weekend without cracking. I need to find a super glue spray adhesive since mod podge peels off in sections. My shoes had this problem more because I used glass glitter which is hard, and brittle. The plastic glitter we used bends much more, even though my friend still had some small tears. I am always trying to find better ways to do these things, so if you know how to solve this, post!
-My Adidas Jabbars we're ok. I lost black paint as predicted. The VHT vinyl dye needs to cure a week ahead, instead of a couple days is my guess. I have found a contact that has the incredibly rare shoes as originals. He wants an arm and a leg for them, of course. Maybe.
-The helmet padding in my GM needs another layer of foam on the top of the helmet so my HAA cast sits where you can see my neck. I was close, but not perfectly canon. Thankfully, it's an easy fix with industrial velcro. The padding I found was motorcycle helmet padding for just the top and it works PERFECTLY. GM is actually comfortable to wear, and breathes well.
-I need a longer gold chain. Off to da Wal-mart and big box stores!

Huge thanks to Thom Wall of Sorenzo props.

Without further ado:


Dragon*Con 2013 by TK9336, on Flickr


Dragon*Con 2013 by TK9336, on Flickr


Dragon*Con 2013 by TK9336, on Flickr


Dragon*Con 2013 by TK9336, on Flickr


Dragon*Con 2013 by TK9336, on Flickr


Strutting downtown Atlanta by TK9336, on Flickr

In these pictures you can see through the visors. Both visors are going to be redone completely. They work in all the other pictures though.


Driving the Corvette, Electroma 2013 style. by TK9336, on Flickr


People thought the Daft+Corvette was pretty neat! by TK9336, on Flickr

With Harrison of Volpin Props:

Dragon*Con 2013 by TK9336, on Flickr


Dragon*Con 2013 by TK9336, on Flickr

I was awestruck, not gonna lie! I need to make fixes in my suit, and pictures like this can show why. I can't wait t see the pictures his wife took, especially back to back!


Dragon*Con 2013 by TK9336, on Flickr Can any one identify this fellow? I loved his idea to use the Discovery backpack as a boom box.


Dragon*Con 2013 by TK9336, on Flickr

I still have some stuff to fix, primarily the visor (which I have a new one to dye with a 1:1 ratio of black to dark green to do what Pedro did with his to great success.) Thank you to everyone who has chimed in one way or another to help me on this great journey. Best 21st birthday, EVER!
 
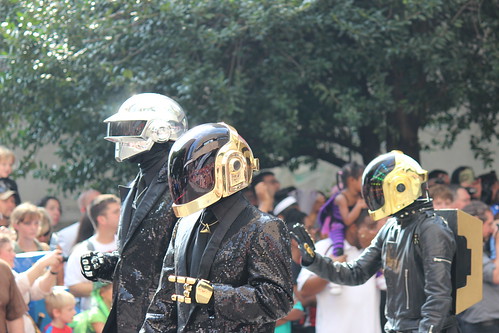
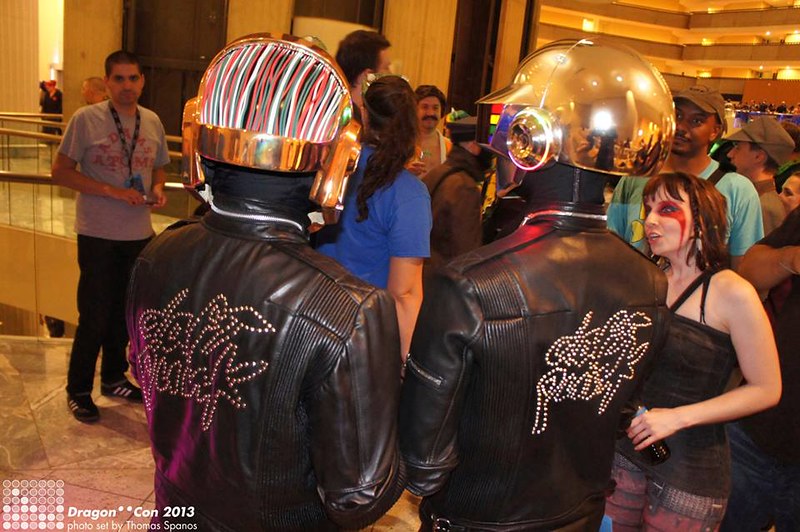
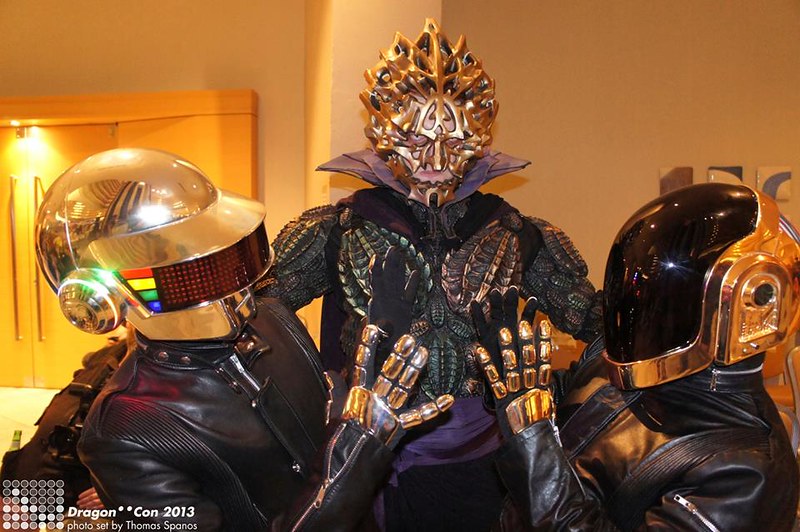
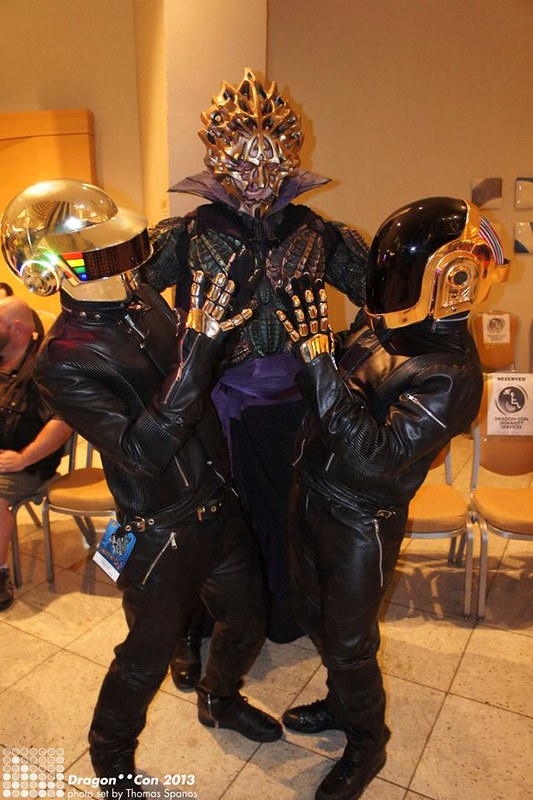
My mentor and good friend Thomas Spanos caught up with me Sunday night of Dragon*Con and took some great photos of Volpin and myself. You can totally tell where I need to fix my leather jacket, but this was the first time (I'm not totally sure) both Thomas and Guy lids were both in leathers.


Dragon*Con 2013 by Thomas Spanos by TK9336, on Flickr


Electroma 20 by TK9336, on Flickr


Dragon*Con 2013 by Thomas Spanos by TK9336, on Flickr


HAA Era by TK9336, on Flickr


Dragon*Con 2013 by Thomas Spanos by TK9336, on Flickr

HUGE thank you to Thomas, and Volpin for letting me roll with him Sunday night. Your a scholar and gentleman!
 
Volpin sent this to me today. I have to say it's totally in character and to quote "very Daft Punk style."


Daft Punk - Dragon*Con 2013 by TK9336, on Flickr


Dragon*Con 2013 - Tumblr by TK9336, on Flickr

And now, to get back to work because right now my gloves are tarnishing for some reason, and I need to replace the bad visor in my helmet. Going to have electronics done for Halloween for some cool photos. Again I can't thank you enough Volpin...too much awesome!
 
Last edited:
Fantastic work! Nice leather jacket regardless of the flaws, one of the best complete DP outfits I've seen. That last picture is so legit!
 
WOW!!!!!!

Congrats Kevin, you certainly did me proud, these pictures are top class. So glad that my first completed helmet looked so good.
Now its time to finish my own :)
 
Thank you guys!

Glad I could right by you Sorenzo! I have say watching your build pics you have my itching to do my own lid! All images are yours to use man! I should have some more after a Harley-Davidson shoot this October 6th! The sucky part though is that I really need a permanent Thomas local to me, which means having to build another leather suit, and additional costumes!

I have electronics to put in, I just need to do the chin lights. For D*C 2014, Homework/Discovery will definitely be in the works. Backpacks, gauntlets, the whole she-bang!
 

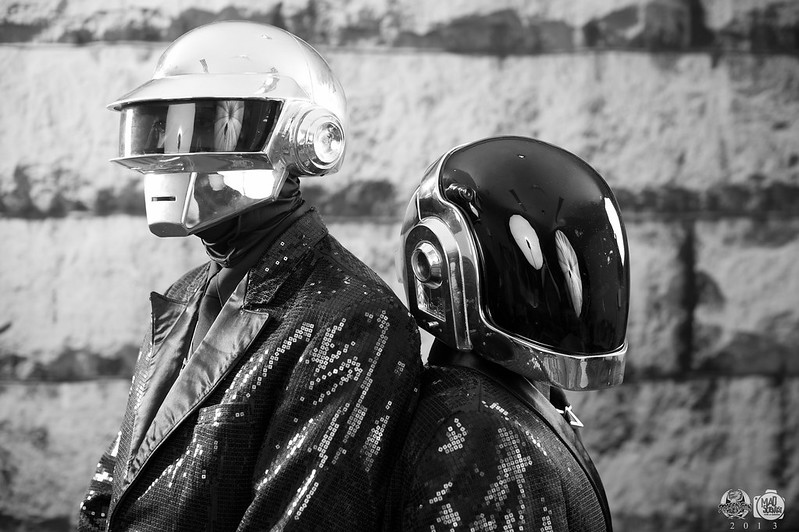
B&amp;W by TK9336, on Flickr
by Bryan Humphrey of Mad Scientist with a Camera! (yes, you can see right through Thomas' visor...long story, but that is a motorcycle visor held in there by gorilla tape. Gotta love last minute desperation!)

I got some excellent, mind numbingly awesome news last week while I was feeling like pure death from some illness that hit me from out of left field...

So, my friend Alex (who also, surprisingly enough loves Daft Punk) has a buddy who works at Columbia Records. Once I started sharing pictures from Dragon*Con, namely the black and white one that was us in the suit and ties walking down Peacetree Marketplace in Atlanta, Alex started re-posting and sending them out to his friends. Well, the B&W among others were sent to his friend who is a photographer at Columbia Records in LA. After getting a request from the photographer to get photos from the Columbia photographer I saw Alex tried calling me 5 times in a row, I figured I muster up the strength to talk. Before I called I got this message over facebook from Alex: "OK well long story short. My Columbia friend has been showing coworkers your pics, and actually circulated around. Eventually it came across one of the members Guy I believe. Exact words were " wow, very impressive! if I ever need a double, I know who to find." This was said sometime this week."

Yeah I basically danced around like Charlie's grandfather did in Gene Wilder's Wonka and Chocolate Factory once he heard he got a golden ticket. I can't wait to get out to LA now. Seriously, I am still glowing. I just wish I got that directly from Guy-Man, but we can all dream! (Maybe they will want me for something, the FIRST PLUS TO BEING MY SIZE! YAY!) Well no more doubts on being Guy-Man sized. Now to just get a slightly smaller helmet and I am so on the money it's not even funny. Some would say the lid I have is perfect already, but I think deep down it is a inch too big.

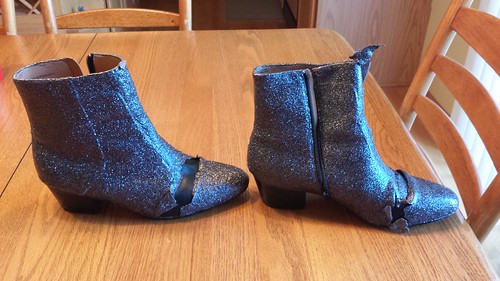
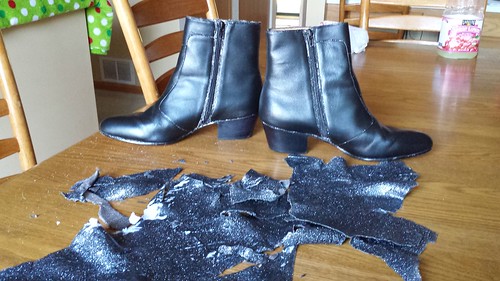
In the meantime I am thinking about using 3m spray adhesive for the glitter on the boots. Mod Podge creates a film and the whole thing can be peeled off if cracked. Which it most certainly did. It also makes my glitter appear silver, instead of gunmetal black. I might make a concoction of black and gunmetal grey glitter. Some before and after:


Modpodge'd glitte boots after Dragon*Con 2013 by TK9336, on Flickr


Modpodge'd glitte boots after Dragon*Con 2013 by TK9336, on Flickr

So, my battle with daft shoes seems to continue, forever.


Star Wars/Daft Punk - Daft Trooper by bigsby.b, on Flickr

Also-

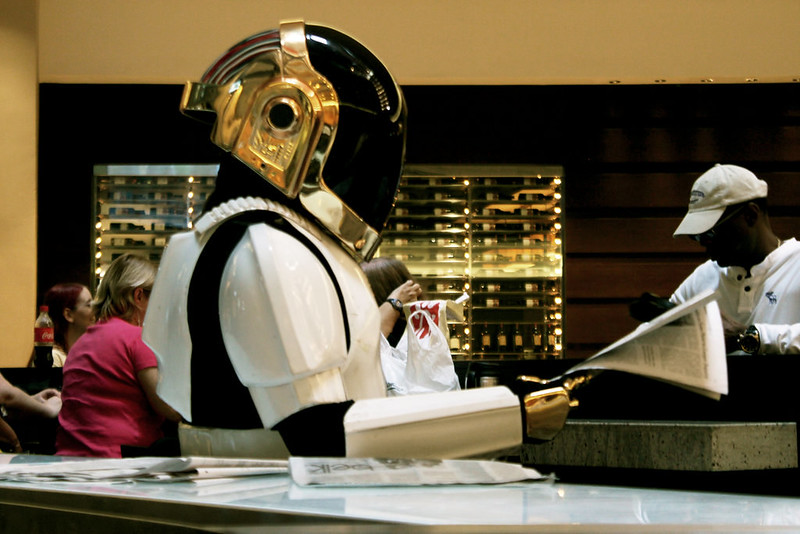
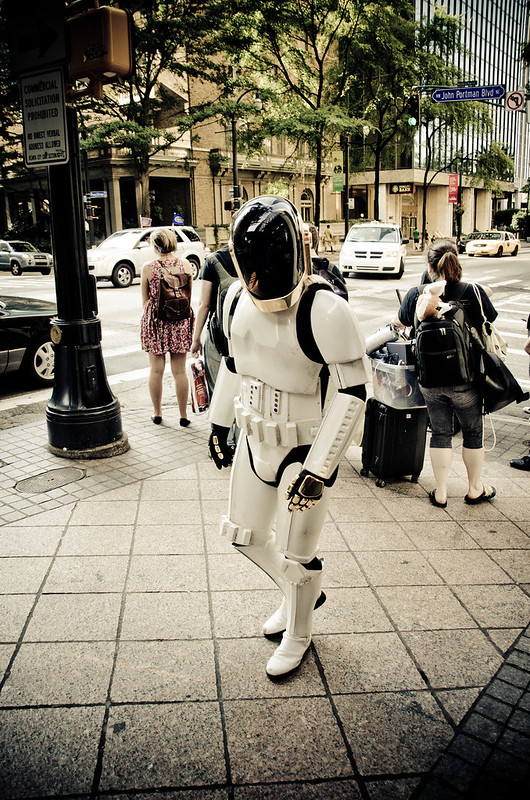
My for fun mashup...and the title of this thread! A full custom mash-up will be going to CVII, with leds in the armor, and helmet. Soon. Like, when I get another job to fund it soon. LOL!
 
I had an mention on Fashionably Geek! TOO COOL! THANK YOU STEFEN!

Daft Punk Cosplayers Wow the Crowds at Dragon Con [Cosplay]

Some more great pictures by JWC, shown on his blog!

JWC Takes Pictures: Daft Punk Cosplays at Dragon * Con 2013

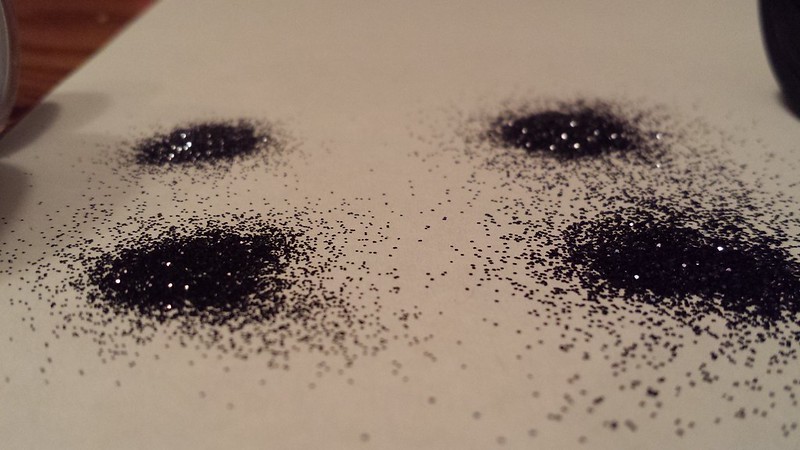
In the endless quest to color match Daft's RAM boots, I did some comparisons between glitters.

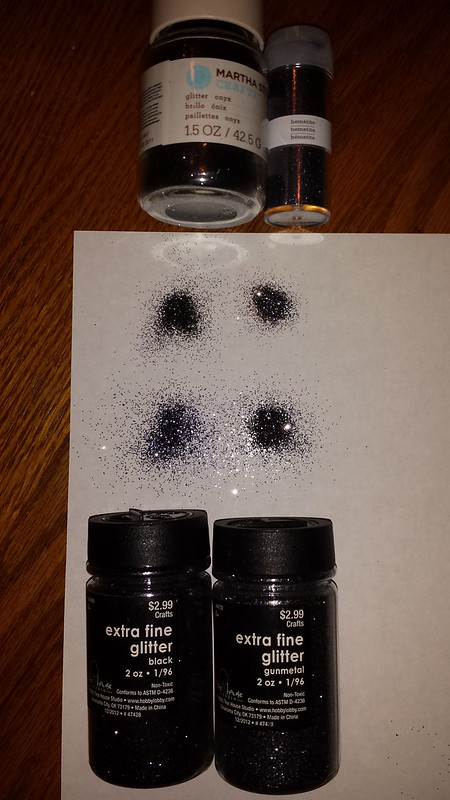
These were the culprits. On top are Martha Stewart brand glitter and on bottom is Hobby Lobby's brand.

Not all Glitter is created the same! by TK9336, on Flickr

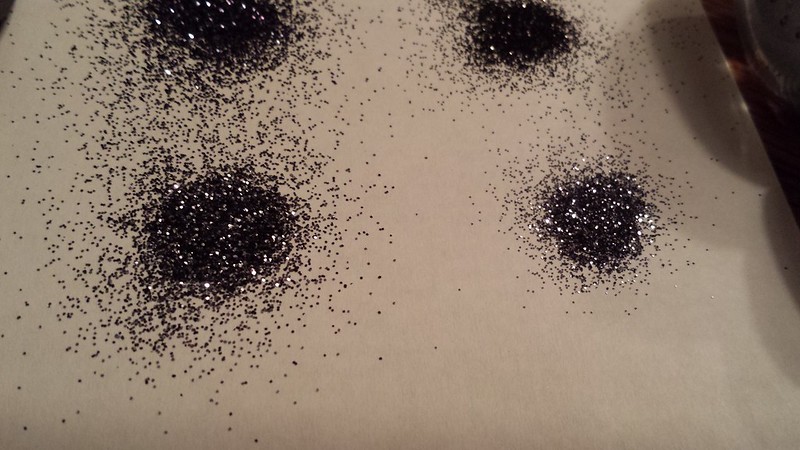
Martha's black ultrafine vs. HL's ultrafine. Martha's is more refined and much smaller in size. From a foot away it looks like a powder.

Not all Glitter is created the same! by TK9336, on Flickr

Martha's Hematite ultrafine vs. HL's ultrafine gunmetal. Same idea here with size, but it really isn't a color, it's a mix of silver and black, on a really small scale.

Not all Glitter is created the same! by TK9336, on Flickr

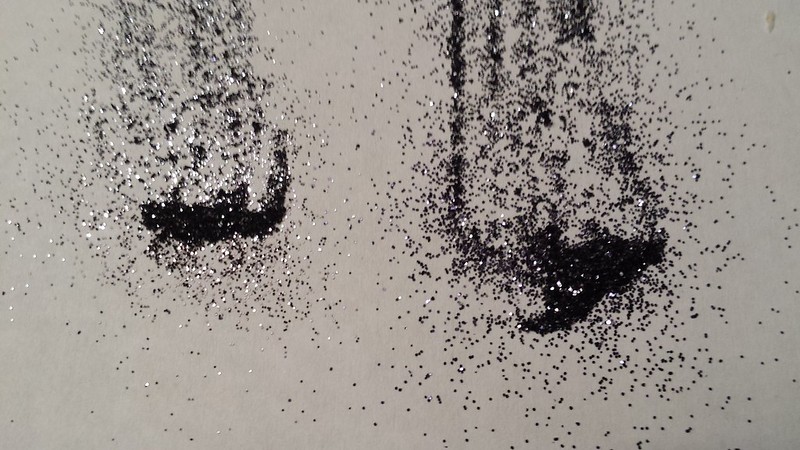
I ended up mixing both for curiosity sake.

Not all Glitter is created the same! by TK9336, on Flickr

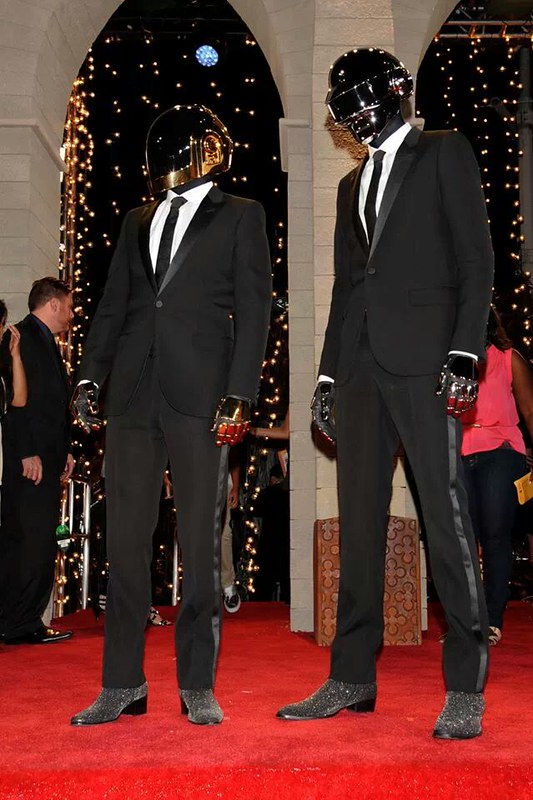
I really, really like this picture of Daft from the VMA's because it shows their RAM boots in natural light. I think Martha's hematite is the ticket. Maybe a little black mixed in...what do you think?

Daft Punk at the VMA's! by TK9336, on Flickr

I am using 3M Super 77 spray adhesive this time around. Now that the boots are really broken in from Dragon*Con the glitter, being smaller this time too, will rest in the recesses. Modpodge creates a big seal...my boots literally molted out of the glitter skin once it got broken in!

Also, some pictures of my lame half arsed Daft Trooper at Dragon*Con! Thanks to the photographers Lou and DrukGyalpo on deviantart!


Daft Trooper! by TK9336, on Flickr


Daft Trooper by TK9336, on Flickr

Going to attempt dying a new visor tomorrow using iDye Poly!

- - - Updated - - -

I had an mention on Fashionably Geek! TOO COOL! THANK YOU STEFEN!

http://fashionablygeek.com/costumes/daft-punk-cosplayers-wow-the-crowds-at-dragon-con-cosplay/#u1tYdUYxhMJ1tcYP.01

Some more great pictures by JWC, shown on his blog!

http://jwctp.tumblr.com/post/60115984151/daft-punk-cosplays-at-dragon-con-2013

In the endless quest to color match Daft's RAM boots, I did some comparisons between glitters.

These were the culprits. On top are Martha Stewart brand glitter and on bottom is Hobby Lobby's brand.

Not all Glitter is created the same! by TK9336, on Flickr

Martha's black ultrafine vs. HL's ultrafine. Martha's is more refined and much smaller in size. From a foot away it looks like a powder.

Not all Glitter is created the same! by TK9336, on Flickr

Martha's Hematite ultrafine vs. HL's ultrafine gunmetal. Same idea here with size, but it really isn't a color, it's a mix of silver and black, on a really small scale.

Not all Glitter is created the same! by TK9336, on Flickr

I ended up mixing both for curiosity sake.

Not all Glitter is created the same! by TK9336, on Flickr

I really, really like this picture of Daft from the VMA's because it shows their RAM boots in natural light. I think Martha's hematite is the ticket. Maybe a little black mixed in...what do you think?

Daft Punk at the VMA's! by TK9336, on Flickr

I am using 3M Super 77 spray adhesive this time around. Now that the boots are really broken in from Dragon*Con the glitter, being smaller this time too, will rest in the recesses. Modpodge creates a big seal...my boots literally molted out of the glitter skin once it got broken in!

Also, some pictures of my lame half arsed Daft Trooper at Dragon*Con! Thanks to the photographers Lou and DrukGyalpo on deviantart!


Daft Trooper! by TK9336, on Flickr


Daft Trooper by TK9336, on Flickr

Going to attempt dying a new visor tomorrow using iDye Poly!
 
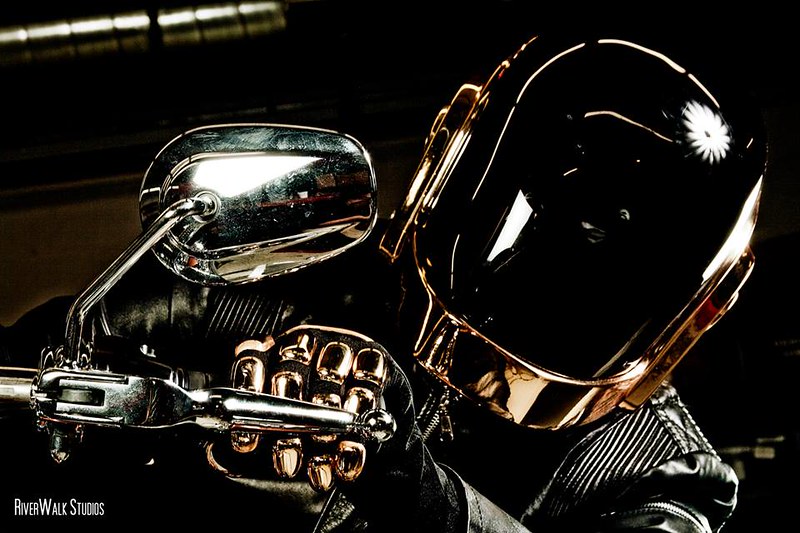
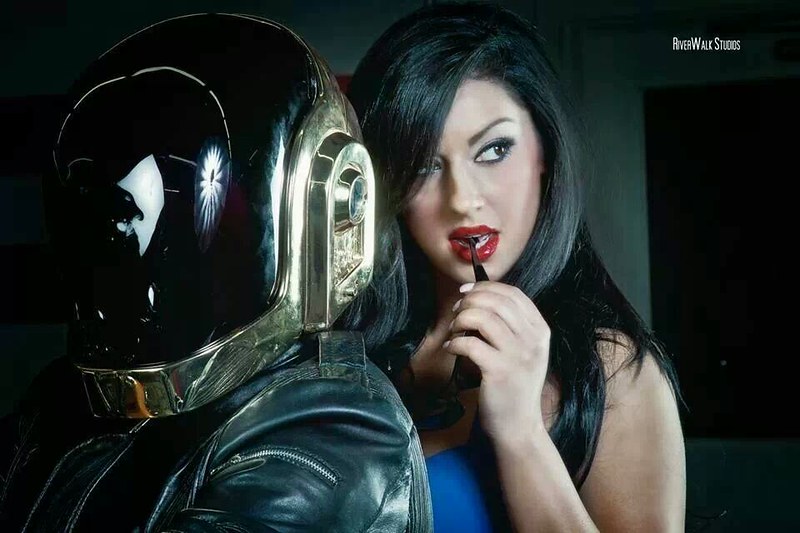
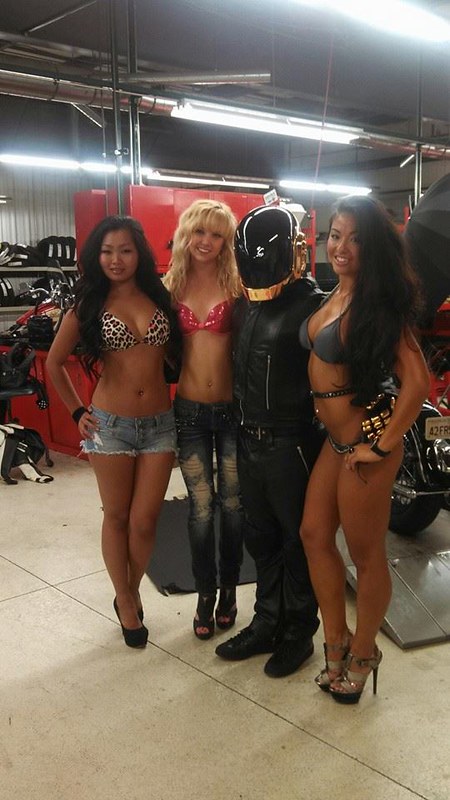
Last weekend I had the opportunity to partake in a photoshoot with Wild Fire Harley-Davidson. I had dyed my new visor but since my dremel died I didn't have the means to trim it to shape. So I used my old one. The images weren't going to be sold, and it was fun to get my Guy-Man surrounded by attractive, smexy ladies. I asked RiverWalk Studios for a teaser to see how the pictures turned out and here are the two I was sent:


Teasers from the Harley-Davidson/Daft Punk Photoshoot by TK9336, on Flickr


Teasers from the Harley-Davidson/Daft Punk Photoshoot by TK9336, on Flickr

I also, finally, finally, FINALLY GOT AN ORIGINAL PAIR OF ADIDAS KAREEM V2 HI TOPS! The SAME shoes Daft Punk wears. They are some of the rarest sneakers out there. I found a pair via Chris.jones on the RPF. This is the only pair I have ever come across in the two years I have been searching. They arrive a week from now. SO PUMPED!
 
I also the holy grail of my Human After All costume. Actual Adidas Kareem V2 Hi Tops in all black. Thanks to Chris' friend Michael over on the RPF I was able to finally get a hold of one of the rarest sneakers made by Adidas. To say I am over the moon is an understatement!

Once I get a new jacket that fixes some of the errors that is present on my current HAA jacket, my HAA will be totally complete. (Still not sure how I want to do the foam panels on the back of Guy's lid yet.)
10337931553_dd8e09309b_c.jpg

Adidas Kareem V2 Hi Tops by TK9336, on Flickr

8372194012_dd74c2e192_c.jpg

Daft Shoes @Flynn's Arcade by TK9336, on Flickr

10337918863_750080914e_c.jpg

Adidas Kareem V2 Hi Tops by TK9336, on Flickr

8136337055_1a620b69f6_c.jpg

Electroma 110 by TK9336, on Flickr

10337767276_65df87957d_c.jpg

Adidas Kareem V2 Hi Tops by TK9336, on Flickr

daft-punk_whitewall-magazine_5 by TK9336, on Flickr

7975583570_f2260b8dac_c.jpg

Daft Relaxing by TK9336, on Flickr

10337737154_77bf35793b_c.jpg

Adidas Kareem V2 Hi Tops by TK9336, on Flickr

7975582603_dfe7862d32_c.jpg

daftpunkadidasproof by TK9336, on Flickr

10337725725_1cf5ea77eb_c.jpg

Adidas Kareem V2 Hi Tops by TK9336, on Flickr

Still waiting on getting my electronics back from Georgia. Not sure if I want to get a felt toe bumper sewn on or not, I kinda wanna leave it as original as possible. My converted Jabbars you can see in my Dragon*Con pictures will be available to be bought. They are US Size 9. Looking for $100 for the pair. Only worn one night, at Dragon*Con and at the photoshoot I did for two hours. Before that, they were deadstock (not produced anymore by Adidas, but still unopened in the box.) Send a PM if interested.
I have no updates for my Discovery build yet. New job is sucking the life outta me lately.

- - - Updated - - -

I also the holy grail of my Human After All costume. Actual Adidas Kareem V2 Hi Tops in all black. Thanks to Chris' friend Michael over on the RPF I was able to finally get a hold of one of the rarest sneakers made by Adidas. To say I am over the moon is an understatement!

Once I get a new jacket that fixes some of the errors that is present on my current HAA jacket, my HAA will be totally complete. (Still not sure how I want to do the foam panels on the back of Guy's lid yet.)
10337931553_dd8e09309b_c.jpg

Adidas Kareem V2 Hi Tops by TK9336, on Flickr

8372194012_dd74c2e192_c.jpg

Daft Shoes @Flynn's Arcade by TK9336, on Flickr

10337918863_750080914e_c.jpg

Adidas Kareem V2 Hi Tops by TK9336, on Flickr

8136337055_1a620b69f6_c.jpg

Electroma 110 by TK9336, on Flickr

10337767276_65df87957d_c.jpg

Adidas Kareem V2 Hi Tops by TK9336, on Flickr

daft-punk_whitewall-magazine_5 by TK9336, on Flickr

7975583570_f2260b8dac_c.jpg

Daft Relaxing by TK9336, on Flickr

10337737154_77bf35793b_c.jpg

Adidas Kareem V2 Hi Tops by TK9336, on Flickr

7975582603_dfe7862d32_c.jpg

daftpunkadidasproof by TK9336, on Flickr

10337725725_1cf5ea77eb_c.jpg

Adidas Kareem V2 Hi Tops by TK9336, on Flickr

Still waiting on getting my electronics back from Georgia. Not sure if I want to get a felt toe bumper sewn on or not, I kinda wanna leave it as original as possible. My converted Jabbars you can see in my Dragon*Con pictures will be available to be bought. They are US Size 9. Looking for $100 for the pair. Only worn one night, at Dragon*Con and at the photoshoot I did for two hours. Before that, they were deadstock (not produced anymore by Adidas, but still unopened in the box.) Send a PM if interested.

I have no updates for my Discovery build yet. New job is sucking the life outta me lately.
 
Last edited by a moderator:
Guy in a stormtrooper uniform is one of the coolest things i've ever seen! Get a Boba Fett of Rocketeer Jetpack on him and he'd be unstoppable.
 
Just give me time Lovelyandy! I know people who have both, so...in time! I think the Rocketeer backpack would look SICK with the motorcycle leathers!

I am going to move towards sewing a glitter fabric on the shoes instead of glue and tossing it on. Still waiting on my contact in the 501st to get back to me, but I am pretty hopeful.

I have some more teasers to share!


Harley-Davidson Shoot by TK9336, on Flickr


Harley-Davidson Shoot by TK9336, on Flickr


Untitled by TK9336, on Flickr


Harley-Davidson Shoot by TK9336, on Flickr

I am also working on getting a motorcycle shop to make new leathers for me (since my jacket has errors big and small.) I'm pretty excited because all the tools used by leather professionals and have the hallmarks of a tough motorcycle jacket! Estimates right now is at about $800. If it comes through I will be selling my current jacket to break even for that (which is pretty darn good in it's own regard, I'm just a perfectionist, and purist.)
 
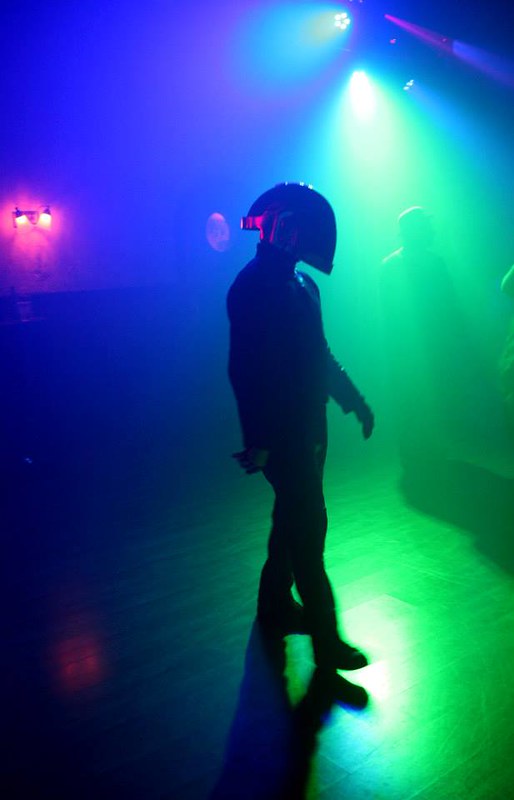
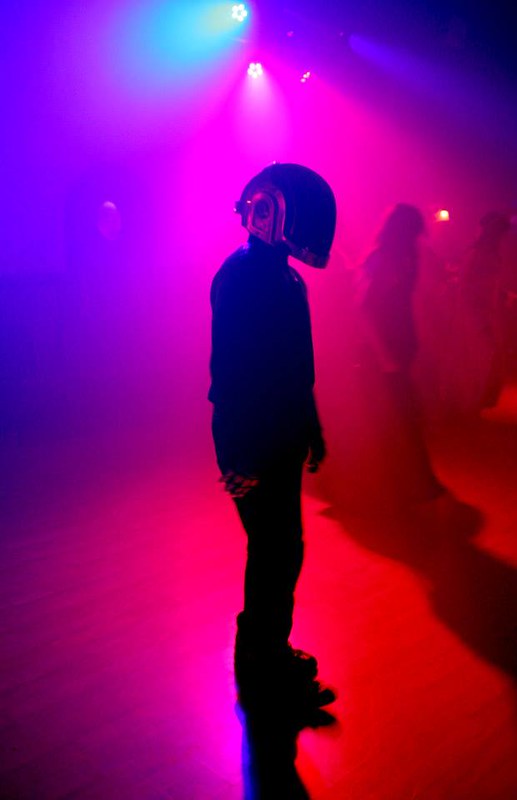
I have no real news to share. Still waiting on a motorcycle shop to get back to me about making a tough version of the HAA suit. No RAM shoes to update with. I plan on finishing this Moguai Guy-man first, and get going on making these Discovery backpacks. But I do have some photos to share because I am a dork and this thing always looks cool behind a lens.


Le Knight Club? Nope, just me spreading the Robot Gospel! by TK9336, on Flickr

Have fun this Halloween!


Harley Photoshoot by TK9336, on Flickr

The things I come across randomly on facebook...


Face Swap! by TK9336, on Flickr

Face swap!


C'mon...don't taze me bro! by TK9336, on Flickr

Don't taze me bro!

Stay daft.
 
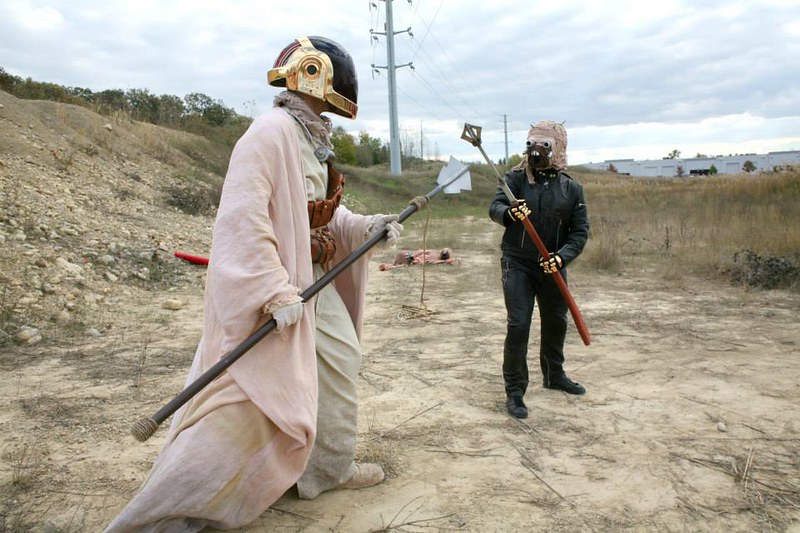
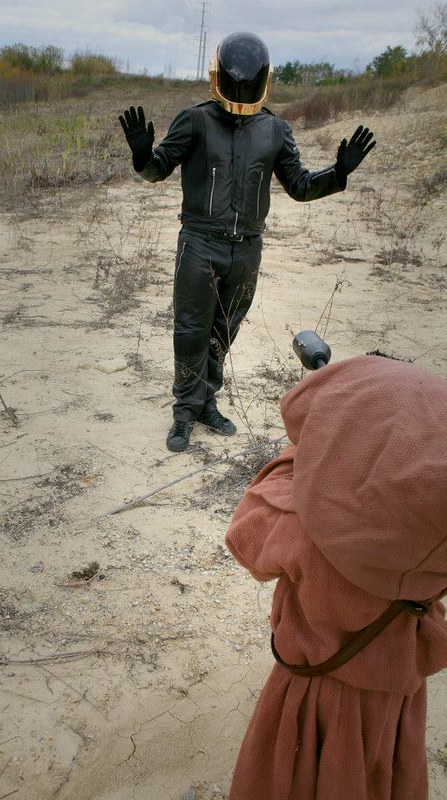
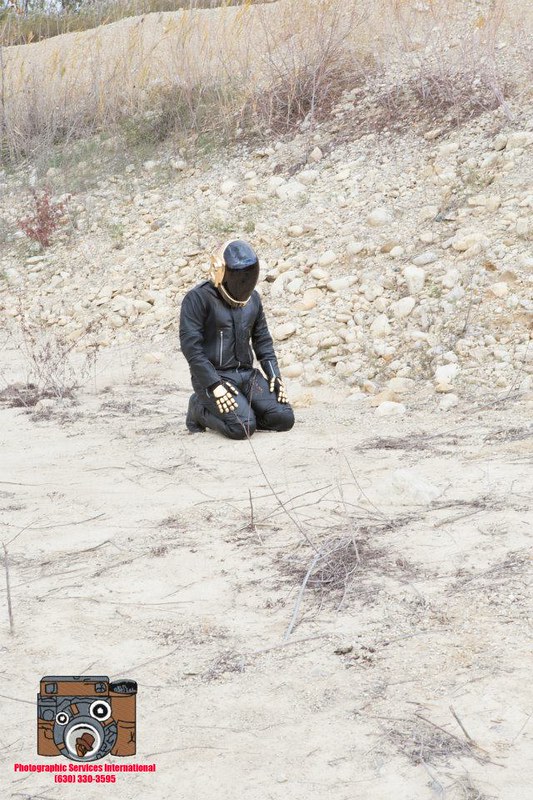
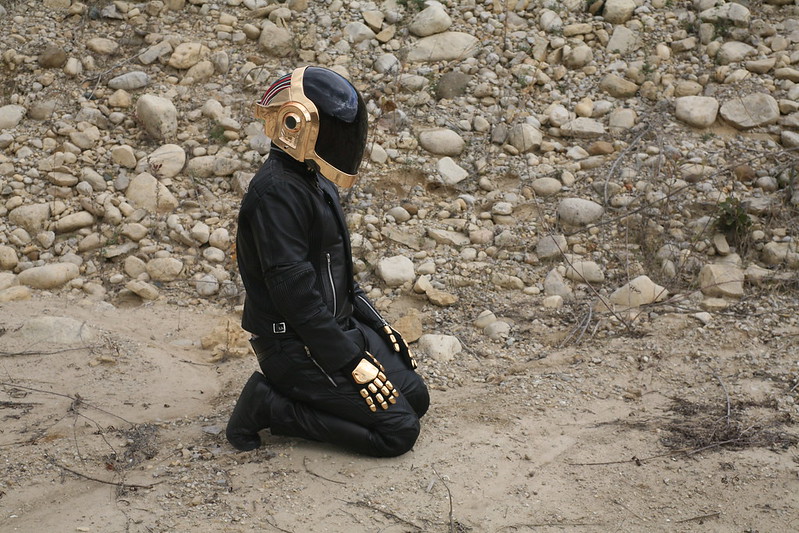
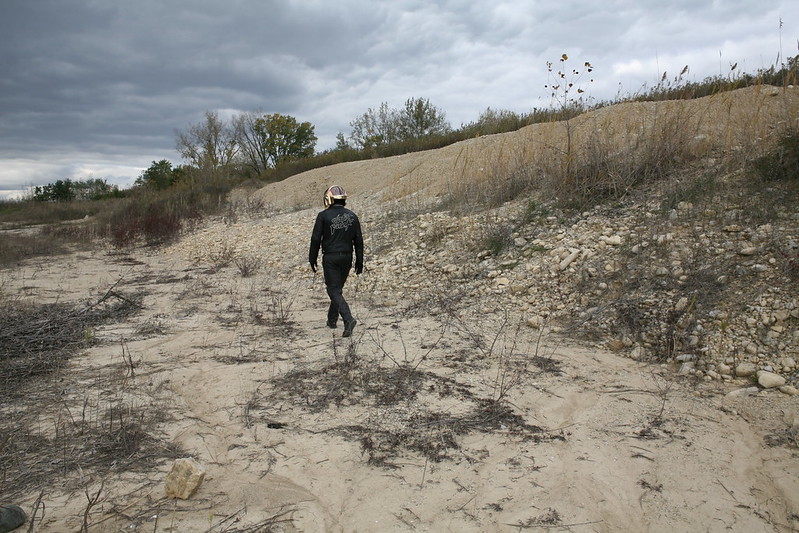
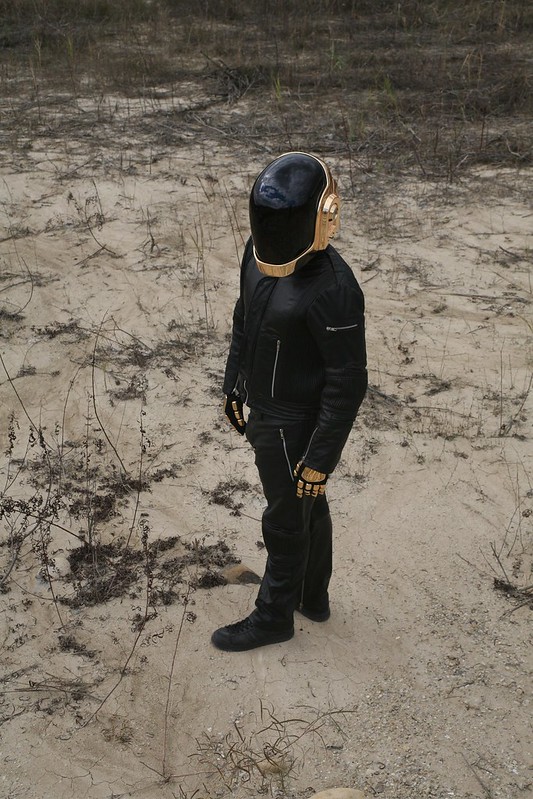
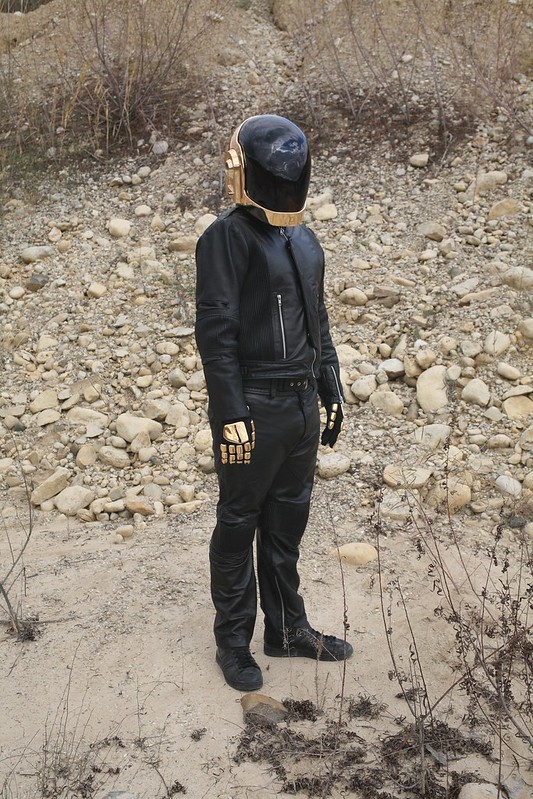
Finally getting a chance to post my "ELECTROMA" style pics. Not completely alike to SoCal, but they turned out pretty well. All taken during a massive Tusken Raider photoshoot, Daft Punk ain't got time for dat! Just kidding. Thanks to my photographer, Hawk Worley. Next time, I'll light myself on fire! I still want to make that circuit board face. I wonder if it's just a large regular component they cut apart...but alas:


DAFT PUNK : &quot;ELECTROMA&quot; Photoshoot 2013 by TK9336, on Flickr


DAFT PUNK : &quot;ELECTROMA&quot; Photoshoot 2013 by TK9336, on Flickr


DAFT PUNK : &quot;ELECTROMA&quot; Photoshoot 2013 by TK9336, on Flickr


DAFT PUNK : &quot;ELECTROMA&quot; Photoshoot 2013 by TK9336, on Flickr


DAFT PUNK : &quot;ELECTROMA&quot; Photoshoot 2013 by TK9336, on Flickr

A sharp eye will note I am wearing the real Jabbars. I am not happy about the size of helmet, but other than that...this HAA impression is complete. V1 jacket still...but one day I shall have V2...and it will be EPIC! (It's in the works. Of course, it takes forever -__-)

Stay Daft my friends.
 
Back
Top