Searun,
Building ANY Studio Scale model is challenging and difficult to say the least ( I take a lot of breaks to do other work).
I keep the forefront thought that what we’re doing is simply building MODELS and in the scale of things in life, it is not too important. It’s supposed to be fun too but ( you know) a lot of the time it’s not.
We do it purely out of love of subject and creativity.
We should probably start a thread titled “ Best Advice for Studio Scale Modellers” for anyone thinking of entering this arena.
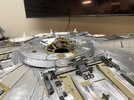
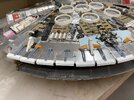
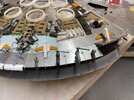
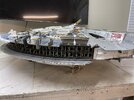
Absolutely magnificent Searun!. Such a treat to see the updates & how you are progressing. I can't imagine how hard it is to work in aluminum & brass plate, but boy the results say it all!.
I wondered about weight?. I'm picking its going to be a pretty weighty model?.
Thanks eagle1.Absolutely magnificent Searun!. Such a treat to see the updates & how you are progressing. I can't imagine how hard it is to work in aluminum & brass plate, but boy the results say it all!.
I wondered about weight?. I'm picking its going to be a pretty weighty model?.
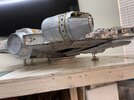
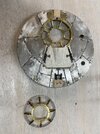
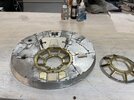
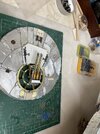
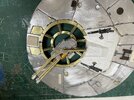
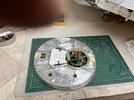
80 lbs. is my estimate when all structure is bolted together. Disc weight by itself was 40 lbs. after skinning, when I was able to step on the bathroom scale while holding it.
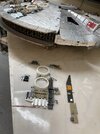
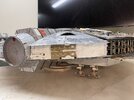
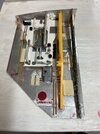
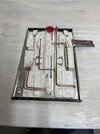
It is very interesting that cutting & nibbling .032” aluminum is the easy part with good shears. Most of the armor labor, as with styrene, is making patterns, layout, notching, addressing kit part bench marks and fussing with segment lines. Then there is rework to get things perfect. You certainly appreciate this.
^^
Agreeing 100% with you PyramidrepWe can always look for "tricks-of-the-trade" in terms of techniques/materials, etc...but the main challenge is the mental/physical work and efforts involved.
Big, iconic projects are marathons and, as you said, it's nice to step away and do something else to re-charge mind and body!
I employed the same strategy when I spent 31/2 years building the 2001 Space StationV. I would've gone out of my mind if I had worked on that behemoth straight for that length of time without some kind of break!