5 Foot Falcon-My Journey Begins

sd68

New Member
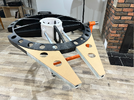
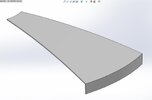
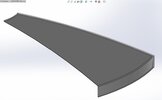
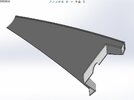
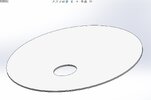
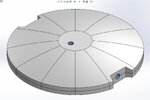
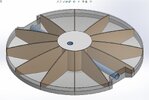
I am finally able to see a dream come true with all the new technology available to allow something at this scale to happen a reasonable cost in time invested and material. My hats are off to all the purists/artists who have created masterpieces by collecting all the required kits needed to bring those spectacular models to fruition. I am late to the game unfortunately and don't want to turn this into a 16 year long crusade like my R2 unit or a similar length build for both my life-size Stormtrooper and Boba Fett displays. I have began by putting a criteria on minimal investment for the maximum detail and least amount of weight possible. To that end I will be 3D printing in both FDM and resin formats. The frame is starting with an 8"x10" 6mm Birch drum shell with 1/2" Baltic Birch top/bottom along with Baltic Birch plywood frame members. The subframe is 2"aluminum airline piping for both horizontal and vertical mounting. The components for the completed shell currently weight in at 26 pounds total including the 3D printed shell. I have just started to complete the assembly in Solidworks in the attached files. The 3D printing aspect will be new to me from an FDM standpoint so I look forward to feedback from the members as to how rigid PLA is as a material and if extra reinforcement may be necessary. I am 57 now and hope to have this completed by my retirement but all the best laid plans can get sidetracked at any time. Hopefully I can stay the course and have something that both I can be proud of and be able to share with my kids and grandkids and our love for Star Wars and its most iconic ship.
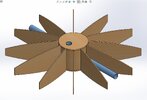
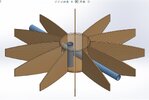
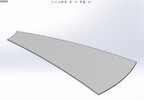
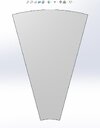
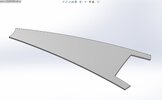
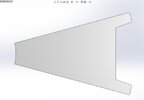
Core 1.jpgCore 4.jpgCore 2.jpgCore 3.jpg30 Degree Section A.jpg30 Degree Section A2.jpg30 Degree Section B.jpg30 Degree Section B2.jpg
 
Last edited:
“Crazy” per bwayne64 above is appropriate for the start of a 5 ft. studio scale using any construction method. Your choice of a solid mounting will pay dividends for lifting and moving when things get heavy.
I personally feel the wooden rib disk & high quality plywood frame method readily allows flexibility in changes required for dialing in all your key side wall thickness dimensions: disc, mandibles, jaw boxes, FALGAL sections, etc. For me, the constant checking against Andre’s outline plan and side view drawing measurements was critical time and time again. Note his team checked used many important key kit parts to validate photogrammetry results. The expertise needed for CAD & 3D printing will help somewhat. That approach has my sincere admiration for those that learned and use this technology. However, there is no easy way to accurately build this wonderful design without significant dedication and homework.
 
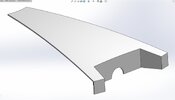
Worked on revising the 30 degree sections to include the sides as well to avoid a separate wraparound piece and strengthen the overall part. I thickened the plates from 1/8" to 3/16" with a 1/16"D x 1/8" rabbet on the edges to capture the birch frame members. I know this will increase weight but will help ensure the location of the frame members and lock everything together and I am more confident in that overall thickness as well. My question to the FDM users out there is what orientation would be best to print these panels. I am assuming as flat but I may be wrong with on edge being preferred. I have an Elegoo Neptune 4 Max on the way to do the FDM printing. I couldn't justify the cost of outsourcing these panels and opted to invest in the printer and material instead which I can definitely use on other projects. The new calculated weight for the core assembly comes out to 36lbs total with this new design plus the top/bottom discs. Receiving the shell and birch plywood yet this week so I hope to refine the thicknesses of the individual parts to actual and put together in a finalized 3D core assembly. From there I can produce templates and move forward with its construction over the next few weeks/months and all the while learning how to 3D print PLA parts.

30 Degree Section A1.jpg30 Degree Section A1-2.jpg30 Degree Section B1.jpg30 Degree Section B1-2.jpgDome Core Top_Bottom A.jpg
 
Thank you all for the welcome and I appreciate all the advice. Crazy. Yes. But my wife expects nothing less. I went the route of the wood frame from my own familiarity standpoint so I could move forward while other items have to be printed like the dome panels. I did purchase 3 panthers for the rear deck so it won't be all 3D printed. I'll see if I continue to do that if kits come up cheaply and can maximize their use. I am sure that is an addiction that would be hard to stop as well.
 
Back
Top