HaNDiCaPZaCH
Member
Hello everyone!
Some may know that for a while I've been panning to 3d print my own captain america shield. I was never really satisfied with my proof-of-concept wonderflex shield (found here: http://www.therpf.com/f78/avengers-now-stealth-captain-america-w-magnetic-shield-209989/ ) so I wanted to make one that would look better, but still have all the features I did like from my previous shield.
I'll be using my Printrbot Plus v2.1 for this build. Ive had it for over a year now and believe it is tuned in enough for this job. I plan to use a spool of white PLA filament bought from Printrbot's site.
On to the model!
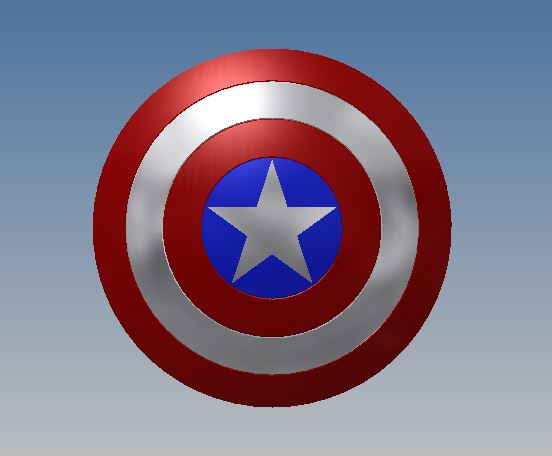

I've been working on this 3d model for over 7 months now, dialing in small details and adding features along the way. I am really happy with how it turned out.
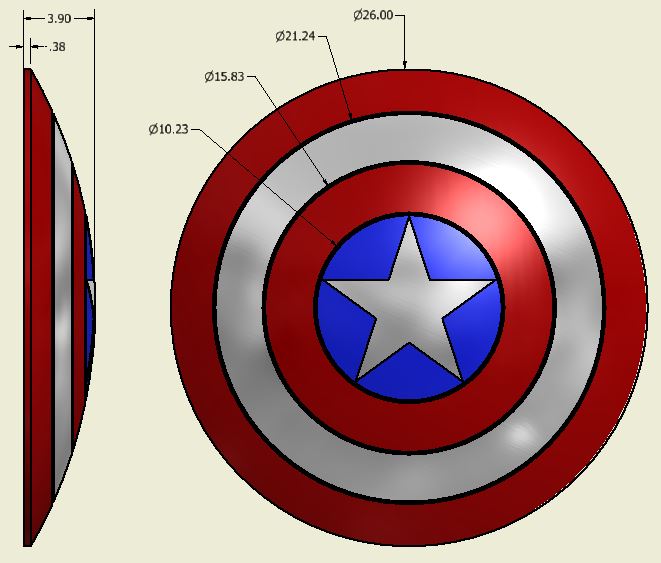
I went with a 26" diameter because it seemed like that was more common in the films. Plus, mocked up, it seems like a good size.
The depth is just under 4" and the blure center measures at ~10"

Shot of the inside

Brackets highlighted to show detail
For those familiar with my last shield, you know I like to use a magnet with my shield (look on my other thread for details). I have designed in a spot for a metal plate to be glued into the final shield (highlighted in blue below). I have also embossed a spot for a small nut (also highlighted in blue) to be glued in so that I may add or remove a post as needed to attach to the Captain America suit back bracket.

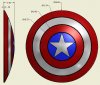
The model is all one piece, including the star. Here are some detail shots:


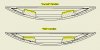
From the release of TFA, I always had a different opinion on the shape of the shield rings. To make this model my own, I decided to use that shape I had always imagined.
For the outer rings, I pictured them as a "V" shape holding the same curve on the outer edge. The inner rings, I pictured them as an overlapping, "stair stepping" type shape (pictured below):


Highlighted section show the "stairs"


Cutaway views
My plan is to cut the model into squares and print each square individually, then glue them all together. My printer has limits of 8x8x8 but just to be safe, I am going to cut the model into 6x6xheight.

I am so proud of this model. It was something I had put so much work into and was excited to finally bring it into reality. After hunting every little detail down and adding creative details that my mother would be proud of.... Then what happened? They went and changed it.
They went and changed the freaking shield...

.........Back to the drawing board.... More to come soon...
Some may know that for a while I've been panning to 3d print my own captain america shield. I was never really satisfied with my proof-of-concept wonderflex shield (found here: http://www.therpf.com/f78/avengers-now-stealth-captain-america-w-magnetic-shield-209989/ ) so I wanted to make one that would look better, but still have all the features I did like from my previous shield.
I'll be using my Printrbot Plus v2.1 for this build. Ive had it for over a year now and believe it is tuned in enough for this job. I plan to use a spool of white PLA filament bought from Printrbot's site.
On to the model!
I've been working on this 3d model for over 7 months now, dialing in small details and adding features along the way. I am really happy with how it turned out.
I went with a 26" diameter because it seemed like that was more common in the films. Plus, mocked up, it seems like a good size.
The depth is just under 4" and the blure center measures at ~10"
Shot of the inside
Brackets highlighted to show detail
For those familiar with my last shield, you know I like to use a magnet with my shield (look on my other thread for details). I have designed in a spot for a metal plate to be glued into the final shield (highlighted in blue below). I have also embossed a spot for a small nut (also highlighted in blue) to be glued in so that I may add or remove a post as needed to attach to the Captain America suit back bracket.
The model is all one piece, including the star. Here are some detail shots:
From the release of TFA, I always had a different opinion on the shape of the shield rings. To make this model my own, I decided to use that shape I had always imagined.
For the outer rings, I pictured them as a "V" shape holding the same curve on the outer edge. The inner rings, I pictured them as an overlapping, "stair stepping" type shape (pictured below):
Highlighted section show the "stairs"
Cutaway views
My plan is to cut the model into squares and print each square individually, then glue them all together. My printer has limits of 8x8x8 but just to be safe, I am going to cut the model into 6x6xheight.
I am so proud of this model. It was something I had put so much work into and was excited to finally bring it into reality. After hunting every little detail down and adding creative details that my mother would be proud of.... Then what happened? They went and changed it.
They went and changed the freaking shield...
.........Back to the drawing board.... More to come soon...


")