2005 'War of the Worlds' Tripod from Pegasus - WIP

ATAT-neck.jpg

I love it. That wire looks great. Thanks for all the kind words, means alot coming from someone with your talent!

The tripod is coming along nicely, can't wait to see it in all it's glory.
 
Thanks fellas! I hope you don't mind if I bump to the next page, I just don't want to bog down anyone's browsers with too many pics per page.
 
The paint work is mostly finished, being a combination of tints and washes over the silver base. Here's a shot of the cowl. I'll finish any minor paint touches later.

16a1.jpg


Here's the lighting setup inside - pretty simple as it's just the three lights.
I decided on a reed switch located near above where the capture baskets would hang (not that I plan on using the baskets).

I thought I would use a small magnet that when painted and in place would activate the lights and also serve to look like the reddish sphincta that pulls humans inside for a stern word or two. I'm not sure if that organic opening is covered by a hatch when in non-harvesting mode or not, it probably is, but I thought it might be interesting anyway even if it's not easily seen and can always be painted silver later on if I change my mind.

16d1.jpg


It was only as I was testing the reed switch's location that I realised if it was placed directly over where the 'sphincta' is then it would be inadvertently activated by one of the magnets that secures the cowl to the head, so I shifted it slightly to one side where it was free from any interference.

16b1.jpg


16c1.jpg


So still not fully assembled and the paint work not quite finalised, but here's a day shot and a size comparison next to my eh... husky

17aa1.jpg


And a shot to show the lighting in low light levels.

18a1.jpg


Next will be a base to secure the model, attaching the mandibles, tentacles, head spines and minor paint touches.
 
Last edited:
Awesome weathering... really looks like metal. Very cool!!!

Would love to get a tutorial on how you did that...

The picture with your dog is priceless. If they ever do a funny spoof kinda thing... it would be cool to see thousands or millions of those dog sized war machines running around, causing mayhem. Invasion of the little aliens.
 
Thanks Carsten, heh -great idea, can only imagine the communications between mini-alien attackers and command back home - "ok - which one of your intel guys screwed up? We got humans marked on our chart as six inches! SIX INCHES!!! Turns out their around 6'!!! We're looking real stupid here and dammit, got a chihuahua on my tail I can't shake!"


Thanks for the painting remark - it's really just a few washes and plenty of blotting. I keep meaning to learn air-brushing but my only time I tried it was uh... well I'm glad no-one was around to witness it.
 
LOL... great movie idea...

Anyway, I would love to see how you did the blotting... was it with a sponge or something else. What colors did you use to get that effect? I've used thinned black in the past, but it doesn't produce that scorched/used charcoal effect you got on yours.
 
I used just a little black in any wash compared to other colours, so for the initial wash the mix went something like:

1 part (Citadel) black
1 part (Citadel) brown ink
2 parts (Citadel) boltgun silver
3 parts (Citadel) tin bitz
30 parts water (with a couple of drops of washing-up liquid mixed in)

This is over Humbrol silver spray paint (which is over grey automotive primer), and all paints so far are acrylic.
The detergent really helps with the wash, reducing the water tension which could normally cause unwanted effects.
After each wash had been applied for a few minutes I dabbed off where I could and carefully wiped off more stubborn areas using an old t-shirt to start and q-tips for finer areas.
Further washes was a case of reducing the water-part ratio in the mix and applying to more selected areas. I tinted certain areas using a similar mix of colours, but less water and no black.
The skirt area around the cowl had a similar wash but with a tiny part of Tamiya red, I wasn't too keen on the result so knocked it back with more of a black/tin mix.

I think that's the thing with this kit, I've been quite conservative with the palette. I had lots of ideas when building about introducing red, purple or green subtle shades and hues here and there but couldn't bring myself to go through with it. I need to get another of these, to go crazy with lighting and be more experimental with the painting.
It's just frustrating there's next to zero high quality reference available, even good quality screencaps don't give much away I'm sure there are all sorts of subtle details going on.

Like I said, there's still a few little things I want to do, blending, tinting and accenting. Sometimes it's knowing when to step back though, and say "enough!" before it descends into a non-descript muddy mess.
 
WOW!!!

The attention to detail and and lighting is AMAZING!!!

Wanna see you're Tripod in a diorama of a battle damaged city... :)
 
Looks good.

I'm trying to remember a tripod from the 2005 movie and all I can see is Tom Cruise running around for 2 hours.
 
Great work on this! I've got one and it's just ready for lights at this point I worked on the real one at Stan Winston Studios. Our paint job had a few different tones of brown and gray in there and little goldish metallic bronze.
 
I was at Pegasus today, saw this kit for the first time and have to say it is really good looking. They told me their next kit will be the Nautilus (Jules Verne), I think it will be 15'' long and out in about 10 months.
 
Thanks folks, DJHammerhead, down the line I want to do a small base scene and I like the idea of some kind of carnage. I find the idea of dozens of N-scale figures running and screaming with occasional cotton-wool balls for 'heat-rayed' victims amusingly attractive too. You could have a blast with a lot of ideas which is why I want to be able to easily swap out the base for alternatives, but at the moment because of time I'm going to stick to deadly conservative and minimal as aesthetics go.

Skullbeast, be good to see how you got on with the kit and hear anymore about your experience at Stan Winston's Studios - what aspect of the tripod were you working on too? I didn't know there was much in the way of practical modeling, maybe the alien flopping out the tripod hatch at the end? Be cool to know more.

Terryr, it was 2 hours of Tom Cruise running about and 2 hours of Dakota Fanning screaming. You've obviously forgotten that part you lucky bugger.

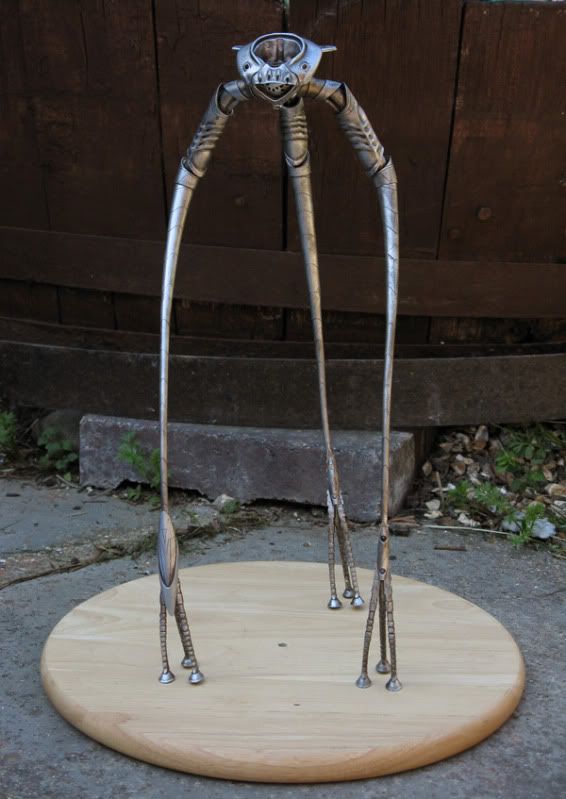
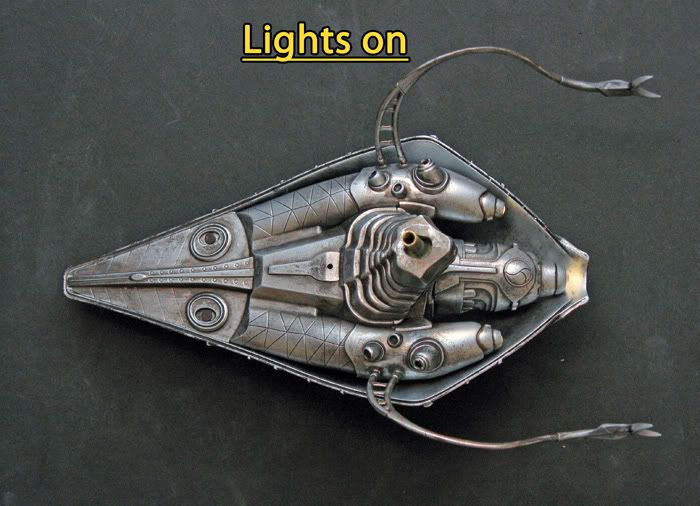
So only a small update, but I've got the base done which I wanted to do before attaching the tentacles and mandibles. You can see from the following pic that on it's own the tripod is a bit wonky in the legs. My ones rear leg had a bend to it's left and generally the whole thing wanted to lean that way.

19a2.jpg


I'm using a cheap chopping board which I've given a smaller circular styrene raised section and then drawn around the toes as I placed it in a more ideal pose.

19b.jpg


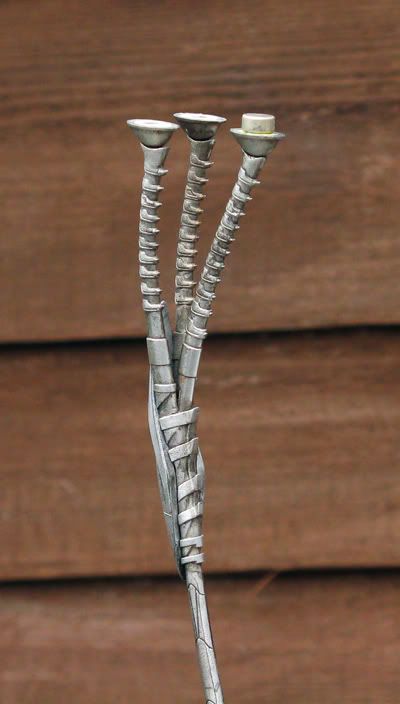
Initially the plan was to have one toe of each foot house a magnet and then have a pin and sleeve set-up for the remaining toes to lock the position but that was so much better as an idea in my head than a field tested theory as I found out. Much too fiddly, so I had two toes of each foot hold a magnet and a corresponding (stronger+bigger) magnet would be sunk in the base.


19c2.jpg


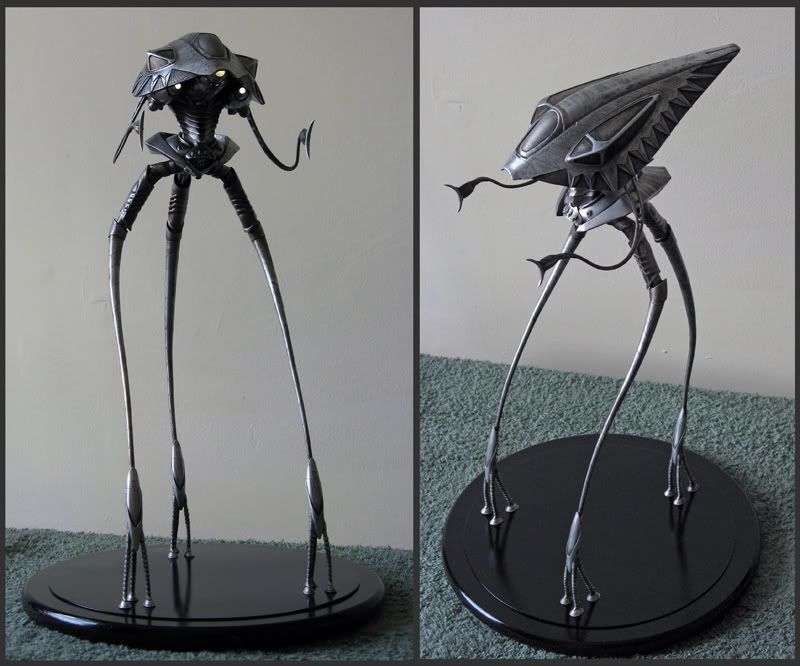
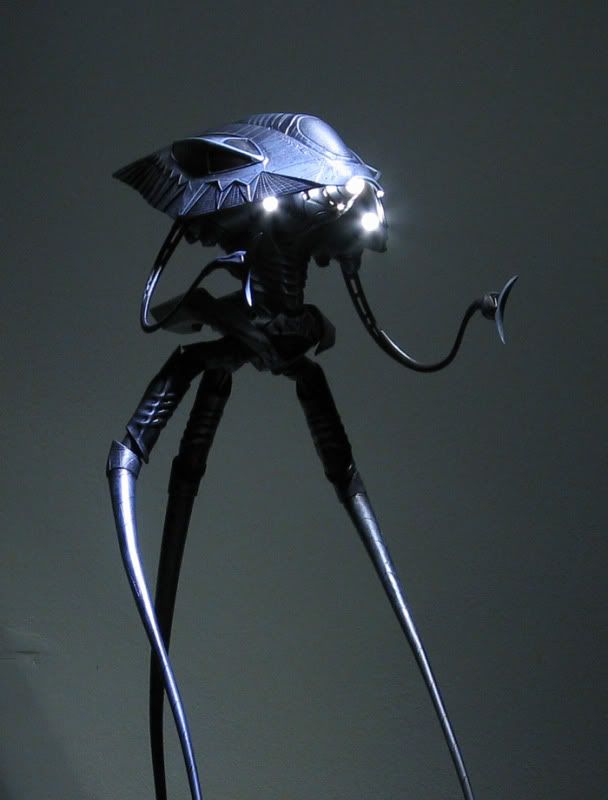
So with a shot of black gloss, everything's taken care of for a very minimal base -

21b2.jpg


21a2.jpg


The tripod is quite easily removed - I had prior reservations that the magnets would be too strong and stress the ankles when separating tripod from base but it seems perfectly ok.

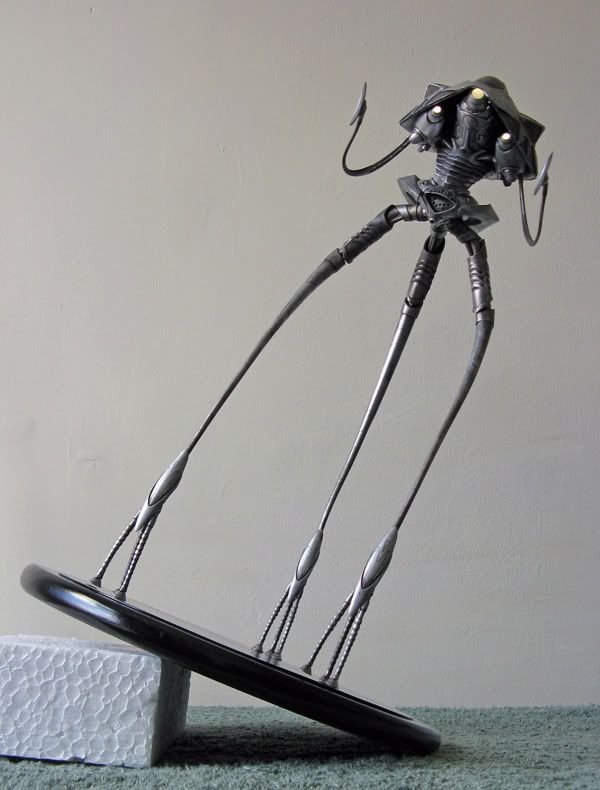
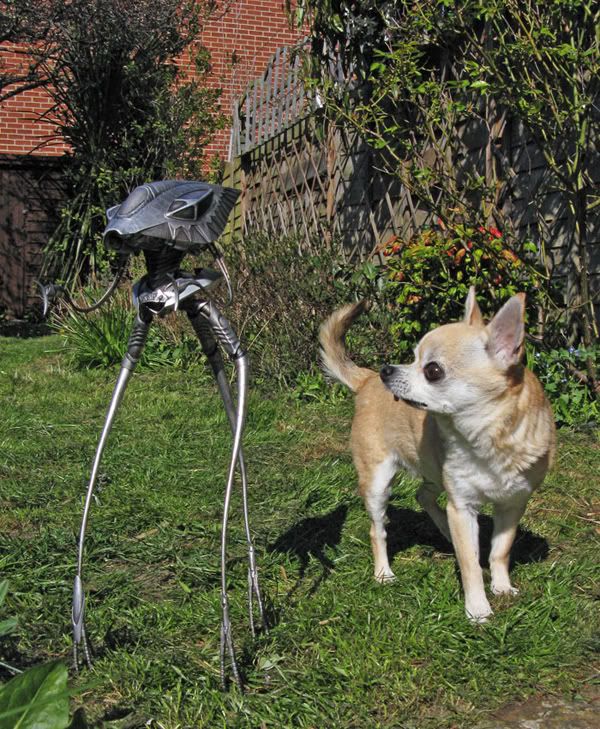
And here's one of it under strict Terran "Health and Safety" tests. Only the most stable tripods are allowed to cause mass destruction.

21d2.jpg


Yeah, it could have ended in tears
 
Last edited:
Love this. Great job. I got to start building the WOW kit I've got. But mine's a garage kit, not the licensed one. Hope it turns out as well as yours!
 
Back
Top