trekriffic
Sr Member
"DADA DADA DADA DADA DAT! BATMAN!!!"
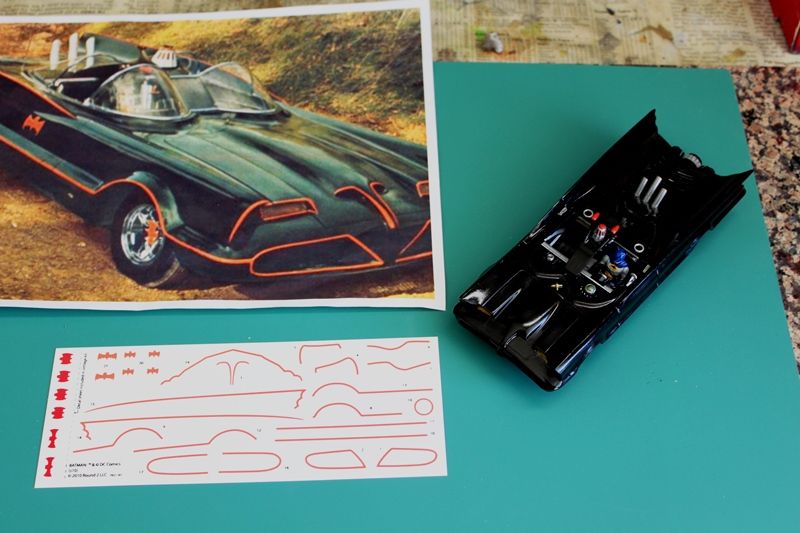
I bought the reissued 1/32 scale 1966 TV Batmobile a while back after Polar Lights reissued it. I had the original Aurora kit as a kid.
Since then Polar Lights has come out with a larger 1/25 scale version in both a snap together and glue version. I've been tempted to get it too but right now I'm husbanding my modeling funds to buy the aftermarket parts coming out for the 1/350 scale TOS Enterprise kit which is on its way to me now.
Anyway, I started this build on the Monday after Thanksgiving as a simple build straight OOTB... yeah... right...
The box is made from sturdy heavyweight carboard and looks much like the box I remember from my childhood.
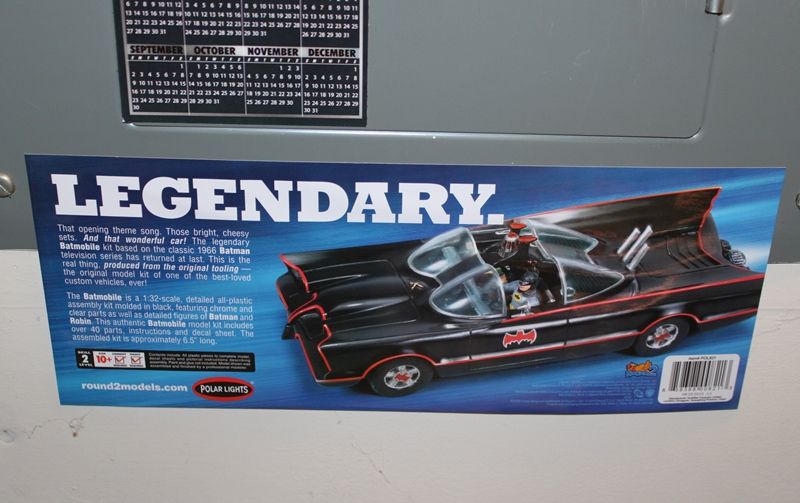
One nice thing PL has been doing with their reissued kits is to glue a peel away sheet on the underside of the box with additional artwork and a one word blurb describing some defining characteristic of the vehicle along with a paragraph or two about its capabilites and mission.
Here's what was on the underside of the Batmobile box:
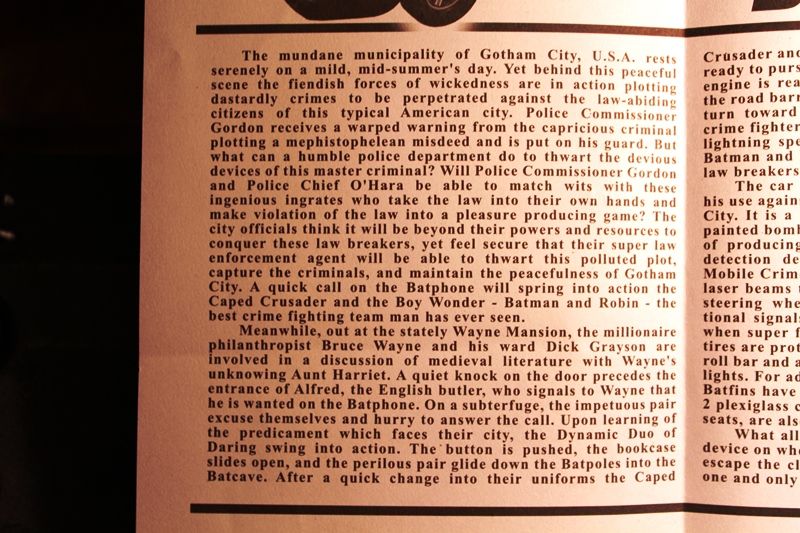
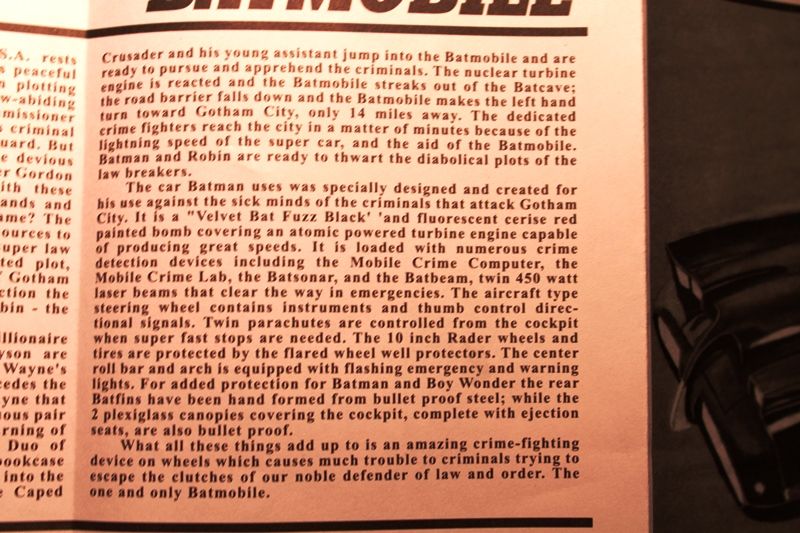
The back of the instruction sheet also has a two page background story about Batman and Robim and their spectacular nuclear turbine powered Batmobile:
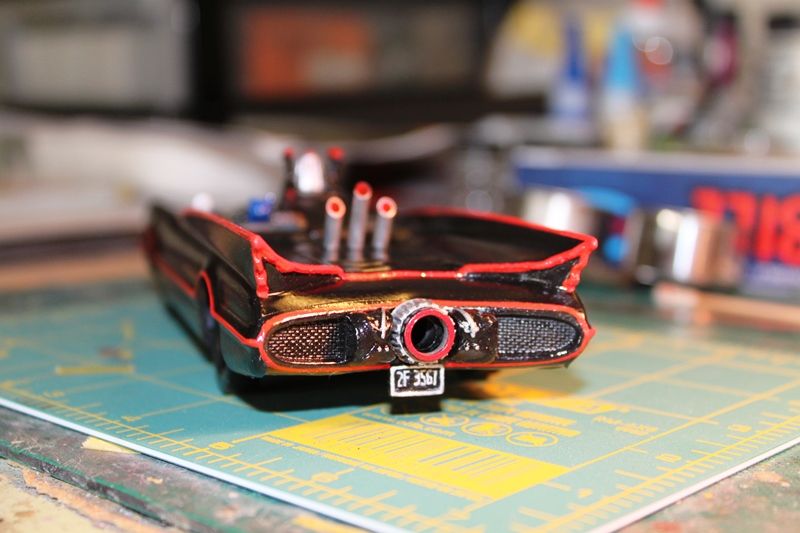
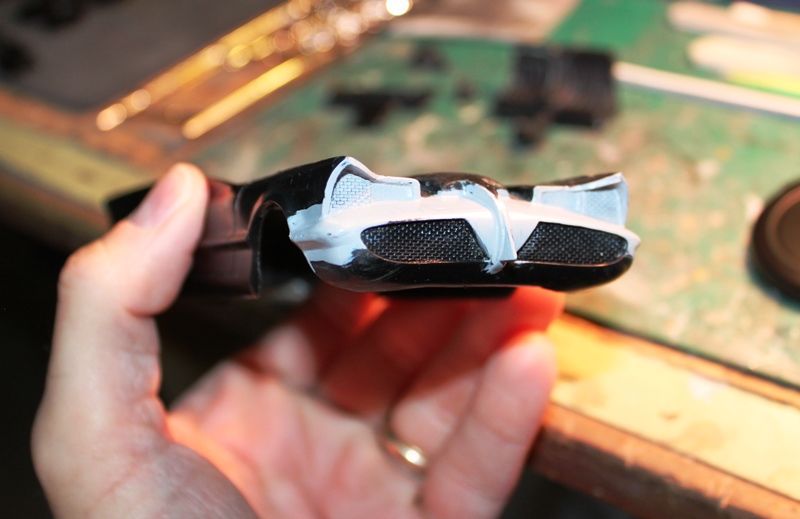
The first thing I did was attach the grill to the front of the body.
I must be more discerning now in my middle years because I don't recall this piece being so ill-fitting when I was a boy.
I must've spent a good hour puttying and filling gaps with AVES and Tamiya polyester putty before sanding and brushing on a coat of Mr Surfacer the next morning:
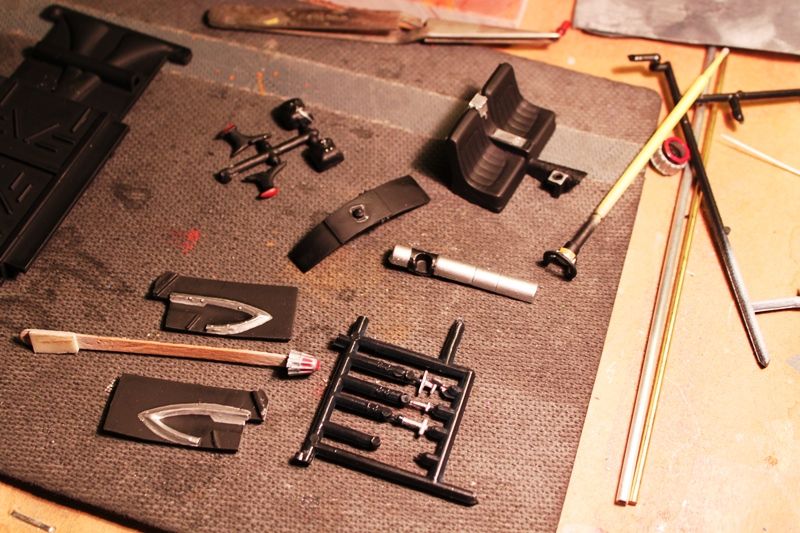
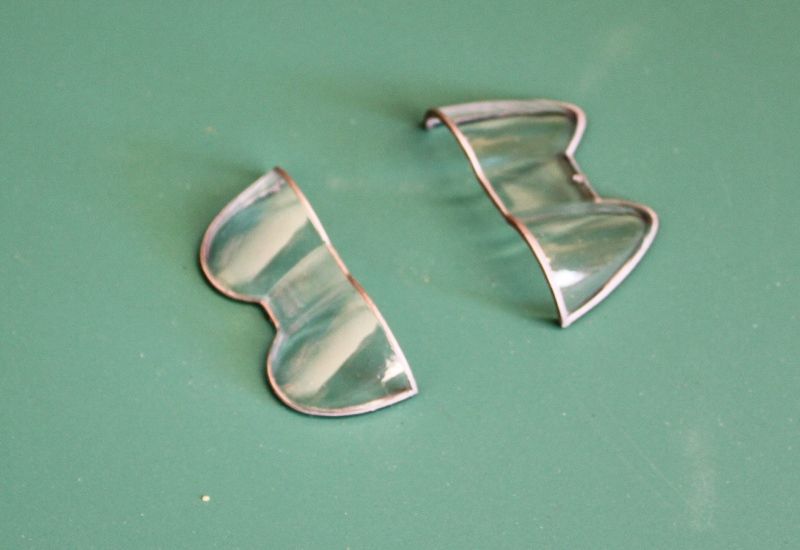
Several parts on the chrome parts tree had to be soaked overnight in Super Clean to remove the plating.
The seats for one are meant to be black leather along with the attached center console.
Same for the steering wheel although I will need to paint the center of it silver.
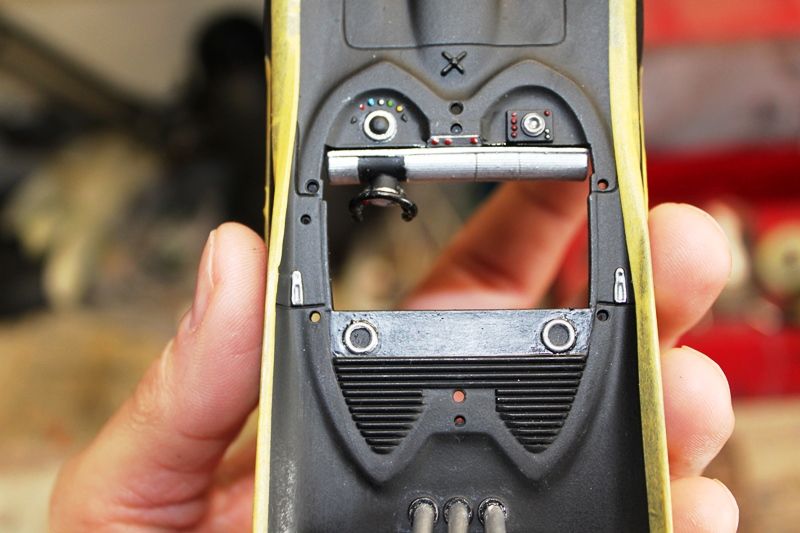
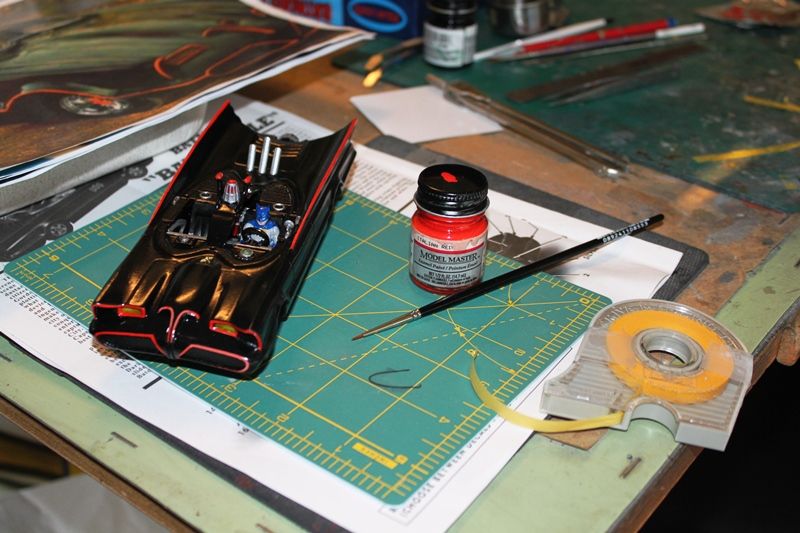
The dashboard, rollbar beacon, and turbine nozzle are silver (but not bright chrome) with red and black accents components.
The plastic is black under the chrome so I will go back in with aluminum and red enamels after spraying them flat black after a shot of Taniya grey lacquer primer.
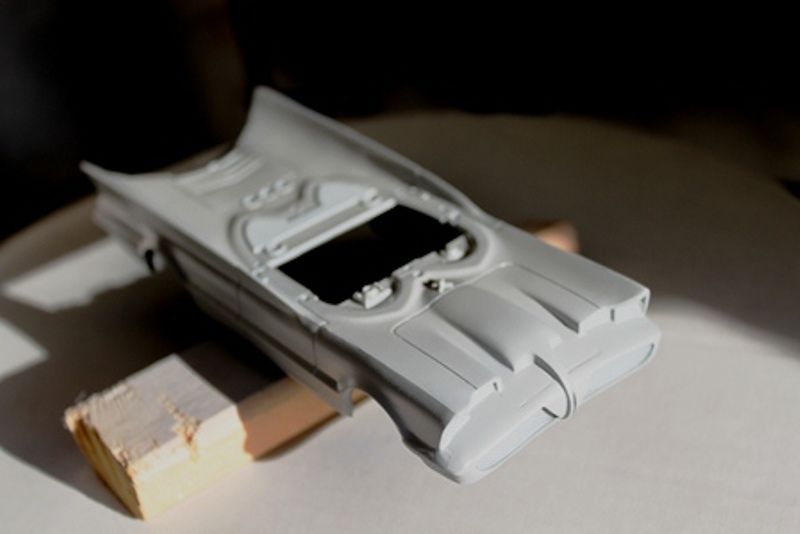
Here's the car body after priming:
You may (or may not) notice I cut off the blade from the front of the grill. Most of the photos on the internet show the car without the blade and that's how I remember it so... it just looks better to me without it.
Moving along...
Did I say I was going to build this one straight from the box?
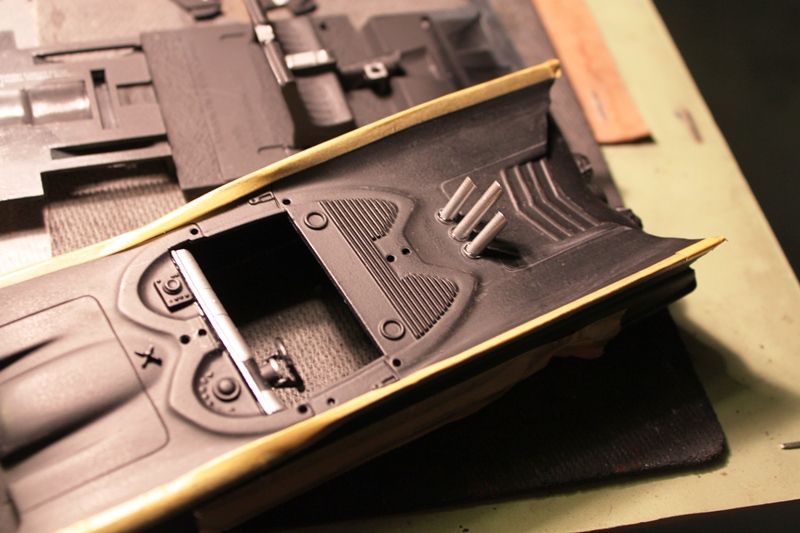
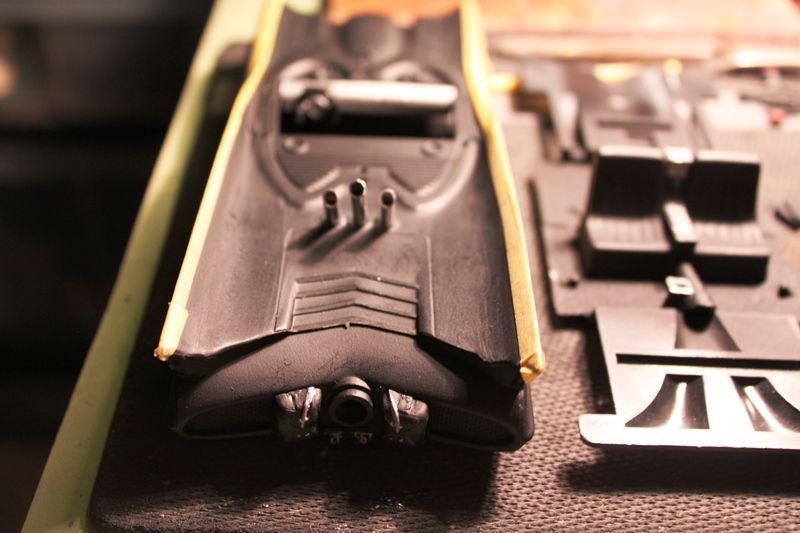
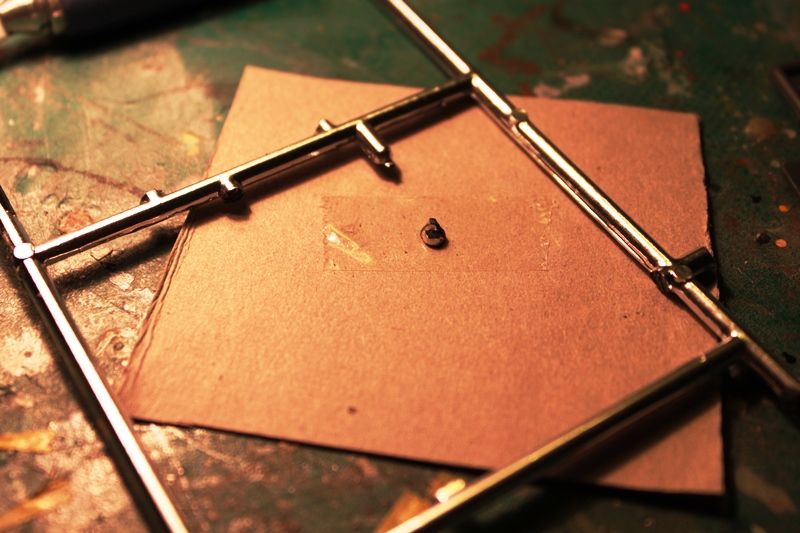
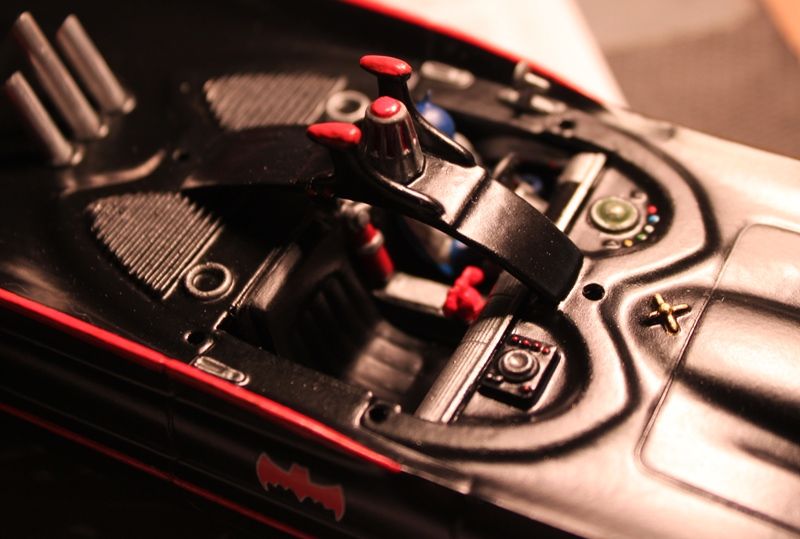
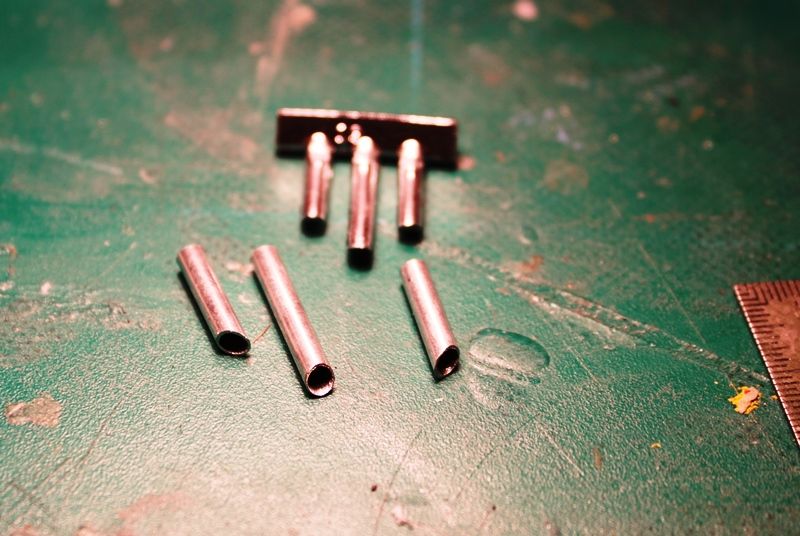
Sorry. Couldn't do that with the rocket lauch tubes.
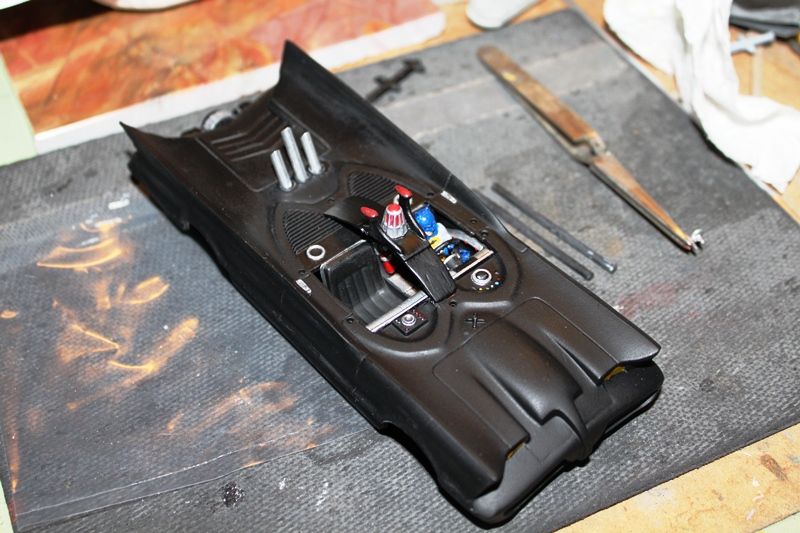
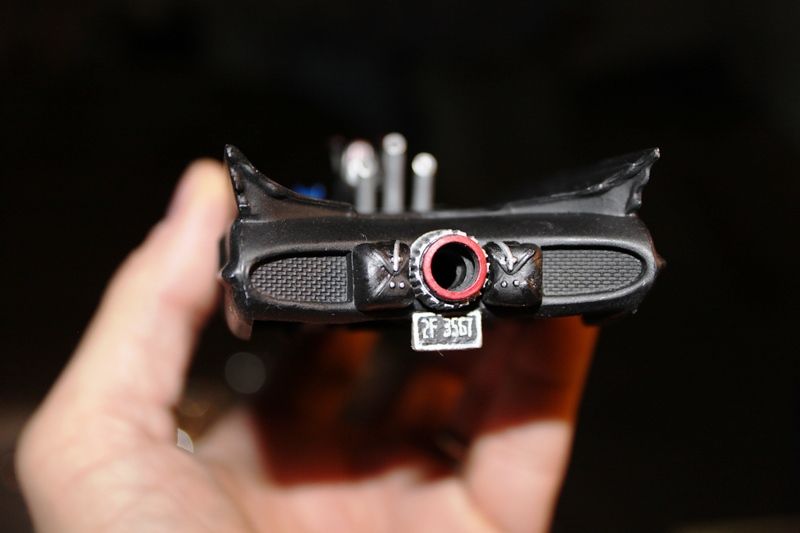
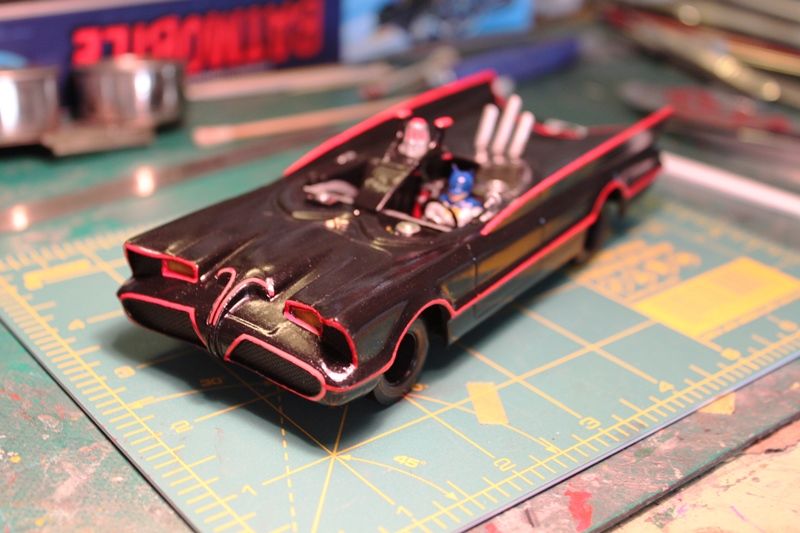
The kit part tubes are a one piece solid chromed plastic affair which just doesn't look right so I cut three sections of hollow aluminum tubing which I'll need to glue into the three holes behind the cockpit individually once the body is painted:
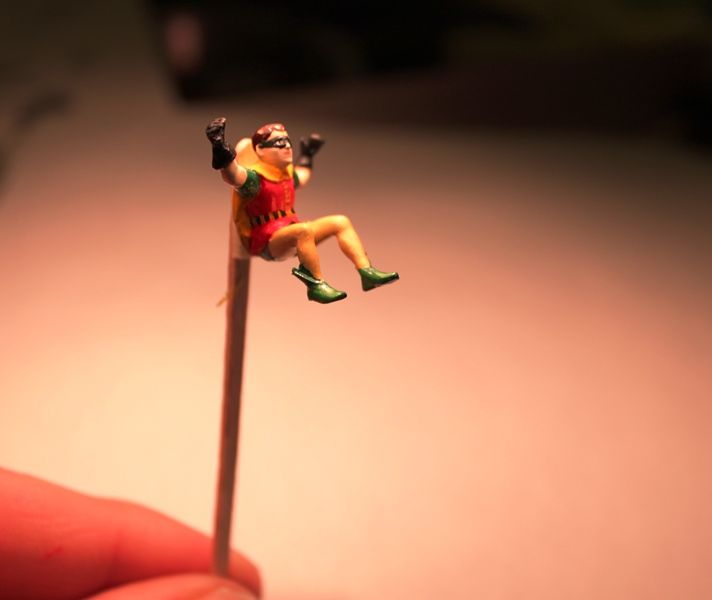
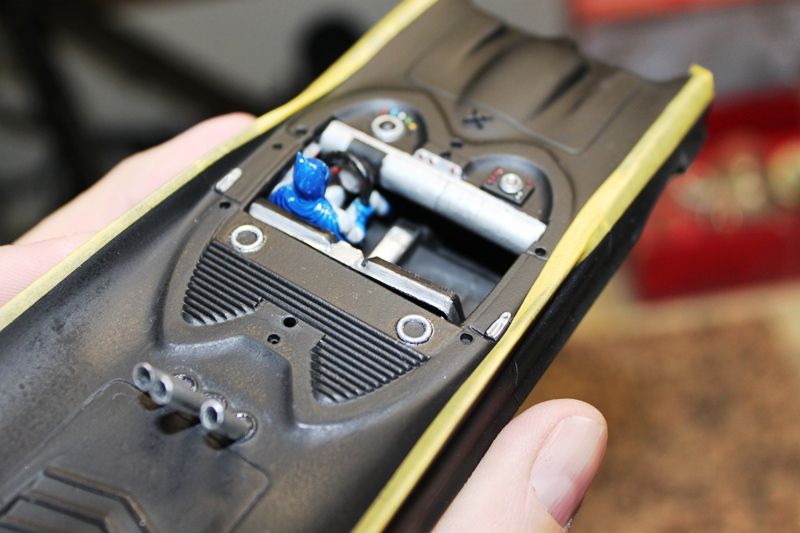
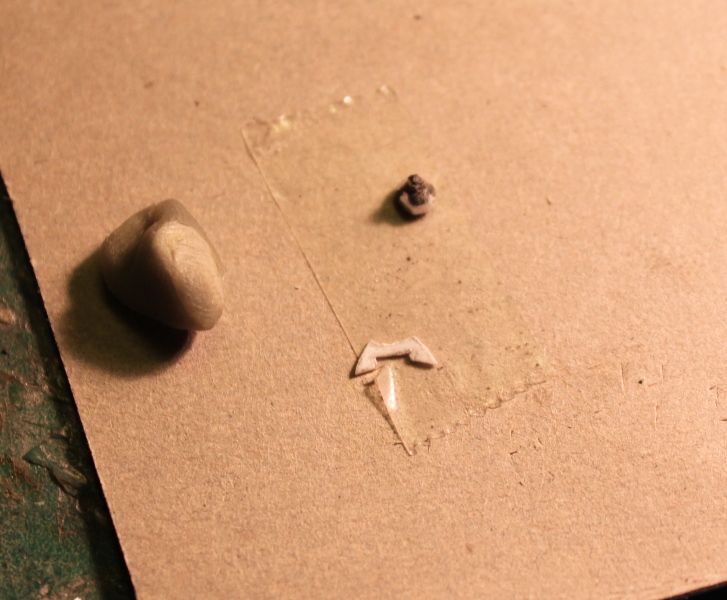
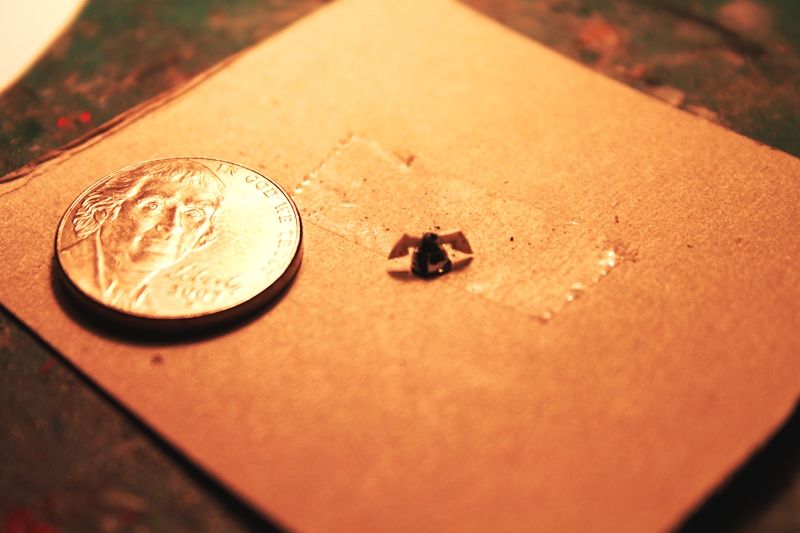
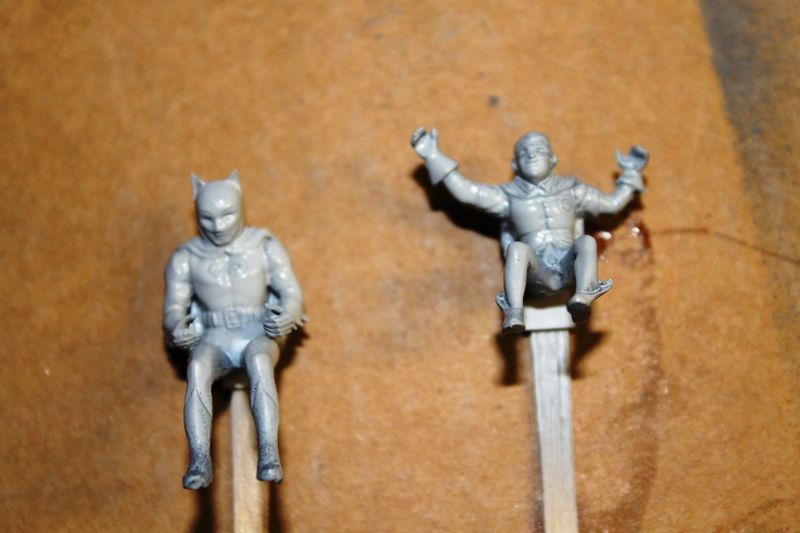
The Batman and Robin figures had to be assembled; Batman needed his arms glued on and Robin came with an upper and lower torso that needed to be glued together and puttied. Both figures had to be files and sanded along their sides to remove parting lines from the molding.
Here they are after priming:
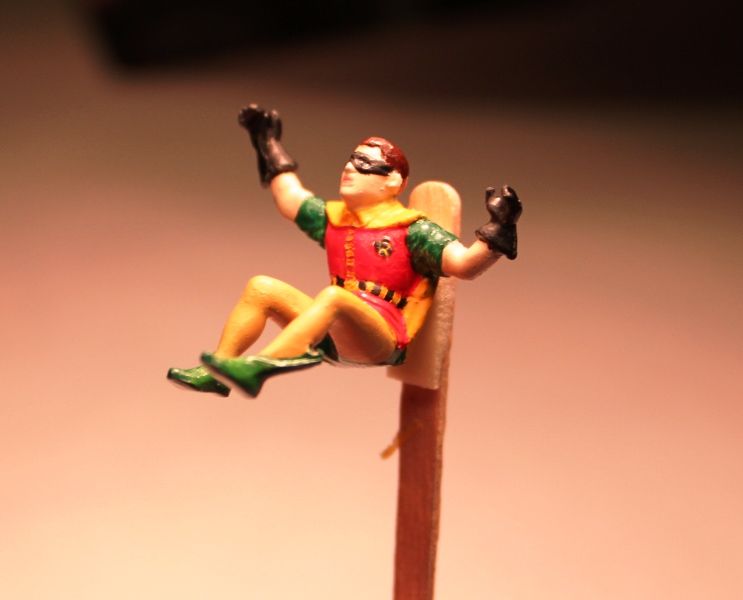
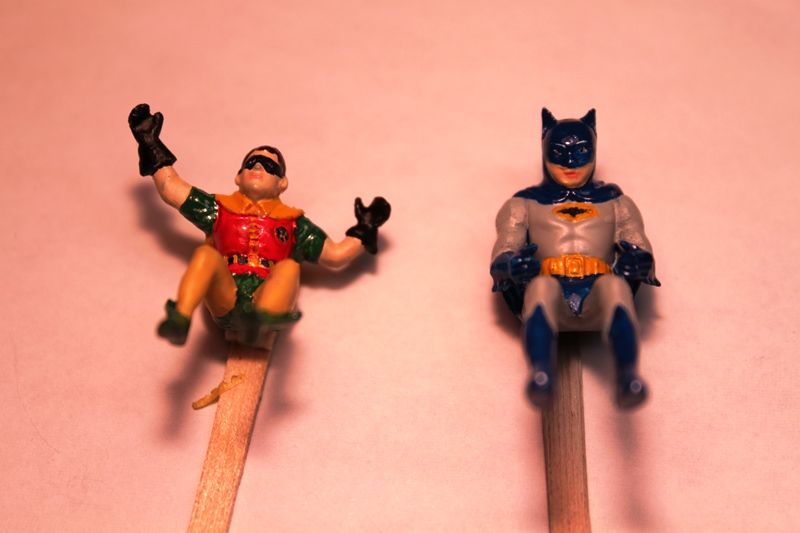
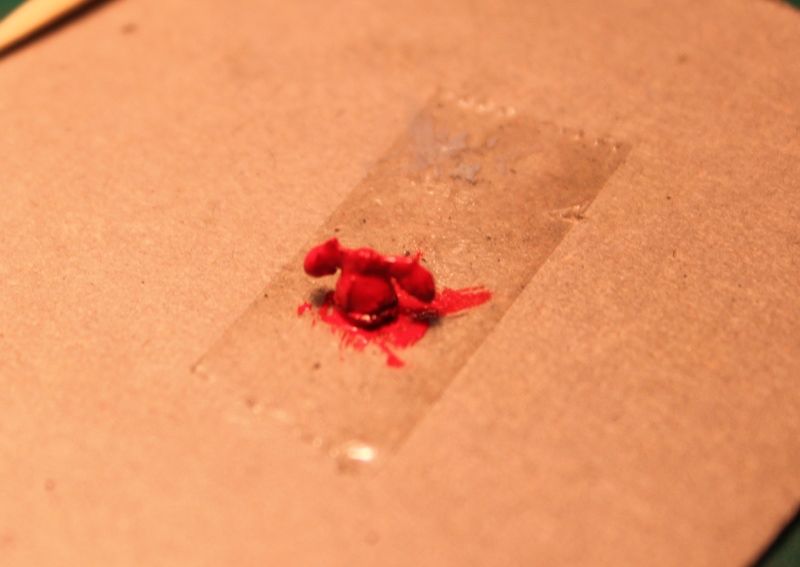
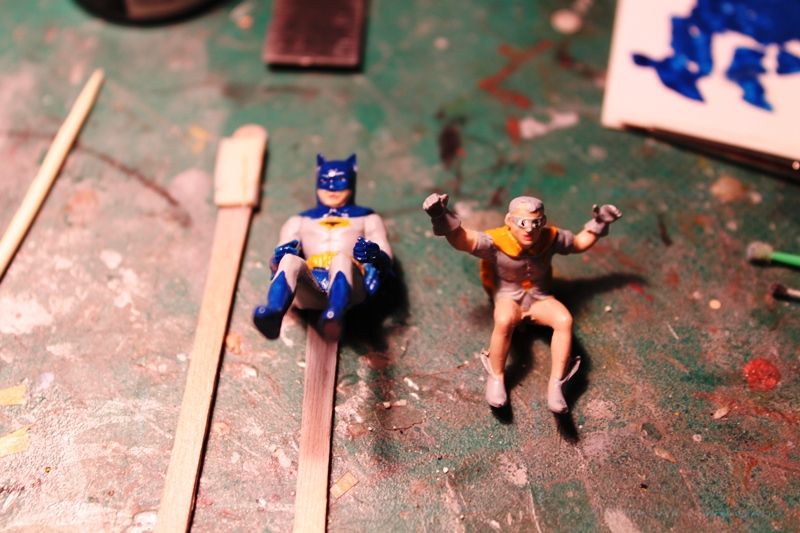
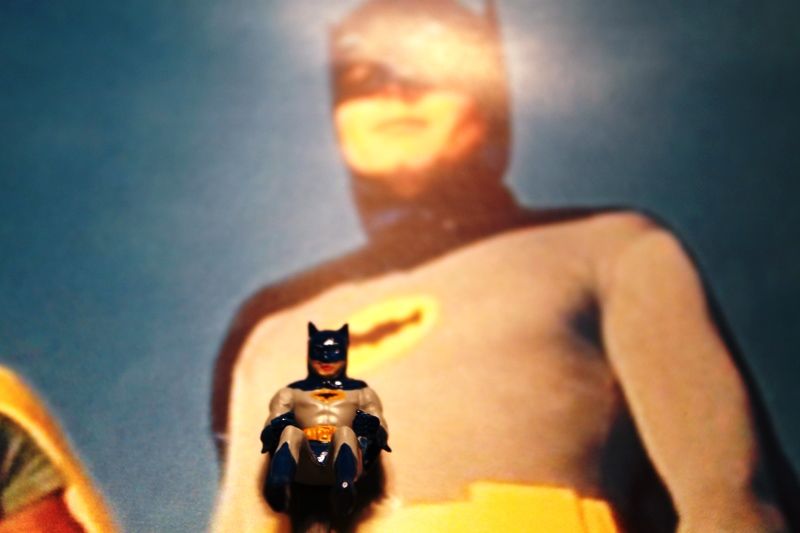
Batman was the first figure I finished painting; Robin is still a WIP as he has more colors to his costume:
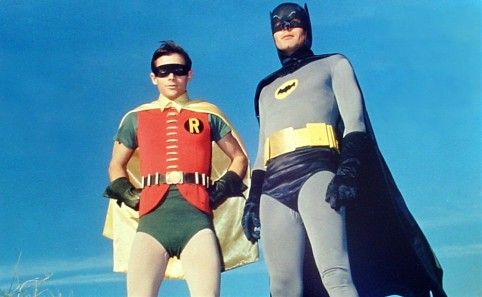
I printed a picture of Burt Ward and Adam West in their costumes off Gooogle images and am using that as a guide:
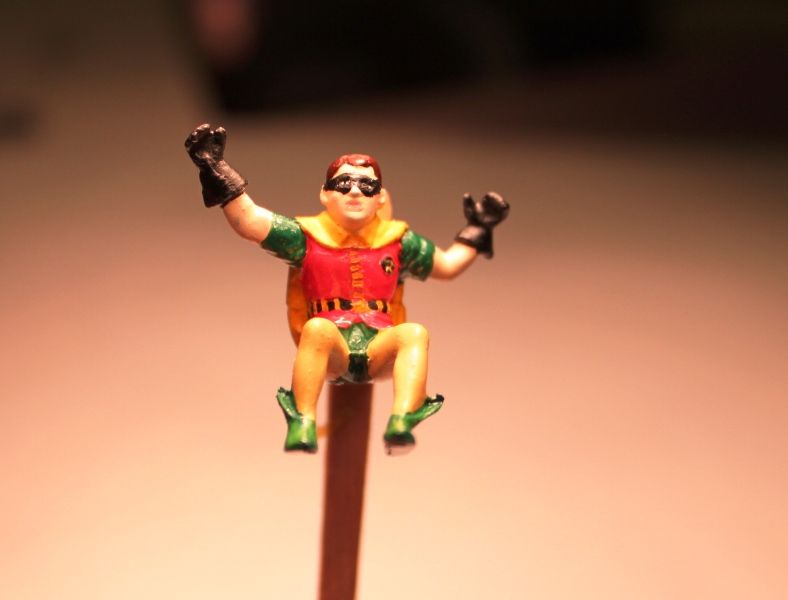
Closeup of the Batman figure:
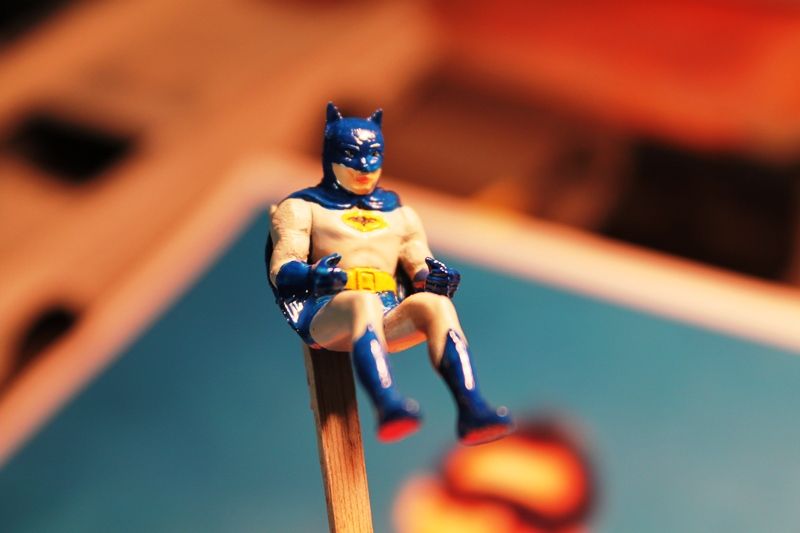
The figure is small but I was able to "dot the eyes" and give his cowl the characteristic grey "eyebrows" as seen on West's Batman.
To do the eyes I painted the whites first, trimmed a toothpick to a fine point, and dipped it in black paint before using a light touch to "dot" the pupils. Then I painted the cowling, cape, gloves, and boots with a mix of dark blue and purple enamels being careful when painting around the eye openings and eyebrows.
That's it for now.
Tune in tomorrow ... same Bat Time... same Bat Channel...
I bought the reissued 1/32 scale 1966 TV Batmobile a while back after Polar Lights reissued it. I had the original Aurora kit as a kid.
Since then Polar Lights has come out with a larger 1/25 scale version in both a snap together and glue version. I've been tempted to get it too but right now I'm husbanding my modeling funds to buy the aftermarket parts coming out for the 1/350 scale TOS Enterprise kit which is on its way to me now.
Anyway, I started this build on the Monday after Thanksgiving as a simple build straight OOTB... yeah... right...
The box is made from sturdy heavyweight carboard and looks much like the box I remember from my childhood.
One nice thing PL has been doing with their reissued kits is to glue a peel away sheet on the underside of the box with additional artwork and a one word blurb describing some defining characteristic of the vehicle along with a paragraph or two about its capabilites and mission.
Here's what was on the underside of the Batmobile box:
The back of the instruction sheet also has a two page background story about Batman and Robim and their spectacular nuclear turbine powered Batmobile:
The first thing I did was attach the grill to the front of the body.
I must be more discerning now in my middle years because I don't recall this piece being so ill-fitting when I was a boy.
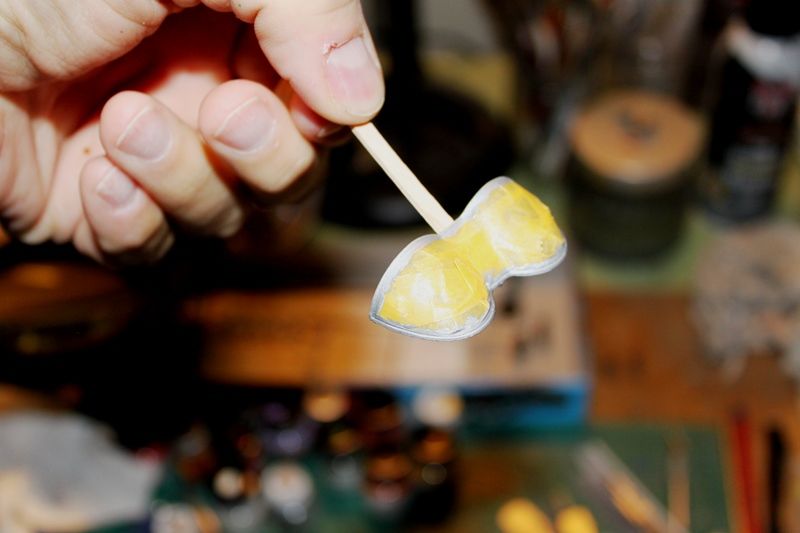
I must've spent a good hour puttying and filling gaps with AVES and Tamiya polyester putty before sanding and brushing on a coat of Mr Surfacer the next morning:
Several parts on the chrome parts tree had to be soaked overnight in Super Clean to remove the plating.
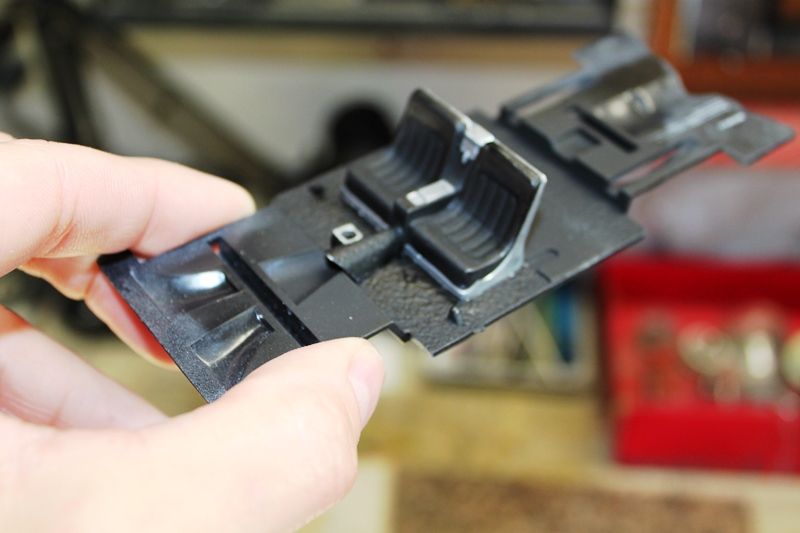
The seats for one are meant to be black leather along with the attached center console.
Same for the steering wheel although I will need to paint the center of it silver.
The dashboard, rollbar beacon, and turbine nozzle are silver (but not bright chrome) with red and black accents components.
The plastic is black under the chrome so I will go back in with aluminum and red enamels after spraying them flat black after a shot of Taniya grey lacquer primer.
Here's the car body after priming:
You may (or may not) notice I cut off the blade from the front of the grill. Most of the photos on the internet show the car without the blade and that's how I remember it so... it just looks better to me without it.
Moving along...
Did I say I was going to build this one straight from the box?
Sorry. Couldn't do that with the rocket lauch tubes.
The kit part tubes are a one piece solid chromed plastic affair which just doesn't look right so I cut three sections of hollow aluminum tubing which I'll need to glue into the three holes behind the cockpit individually once the body is painted:
The Batman and Robin figures had to be assembled; Batman needed his arms glued on and Robin came with an upper and lower torso that needed to be glued together and puttied. Both figures had to be files and sanded along their sides to remove parting lines from the molding.
Here they are after priming:
Batman was the first figure I finished painting; Robin is still a WIP as he has more colors to his costume:
I printed a picture of Burt Ward and Adam West in their costumes off Gooogle images and am using that as a guide:
Closeup of the Batman figure:
The figure is small but I was able to "dot the eyes" and give his cowl the characteristic grey "eyebrows" as seen on West's Batman.
To do the eyes I painted the whites first, trimmed a toothpick to a fine point, and dipped it in black paint before using a light touch to "dot" the pupils. Then I painted the cowling, cape, gloves, and boots with a mix of dark blue and purple enamels being careful when painting around the eye openings and eyebrows.
That's it for now.
Tune in tomorrow ... same Bat Time... same Bat Channel...
")