1:7 Scale Star Wars Astromech Series WIP

Troy Downen

Well-Known Member
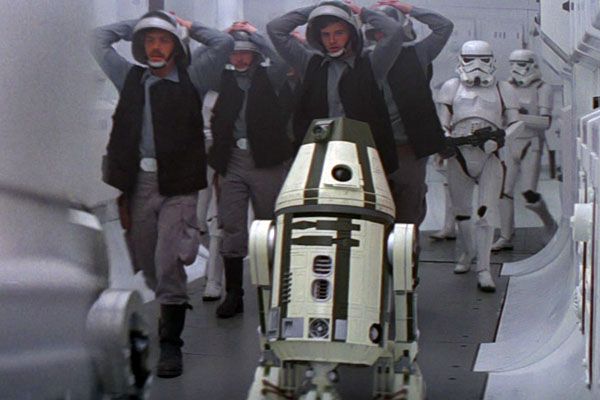
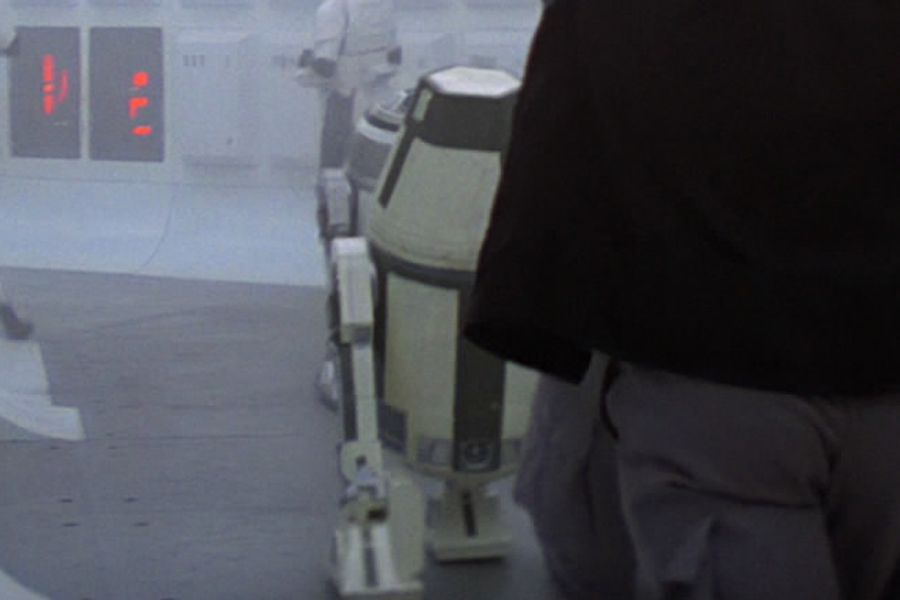
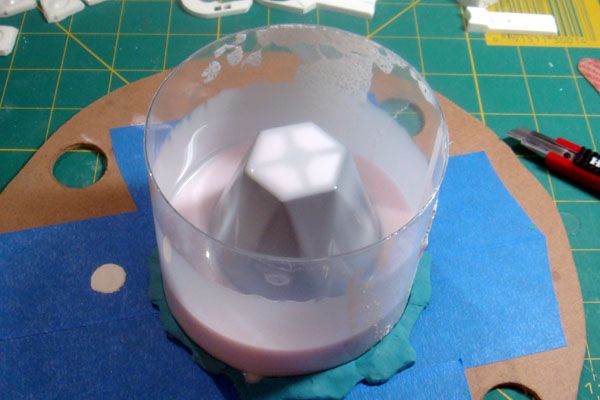
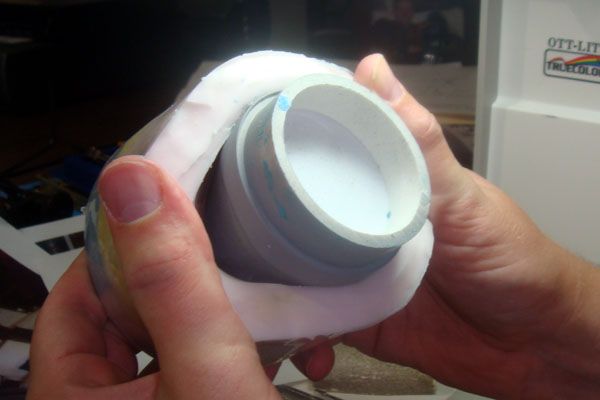
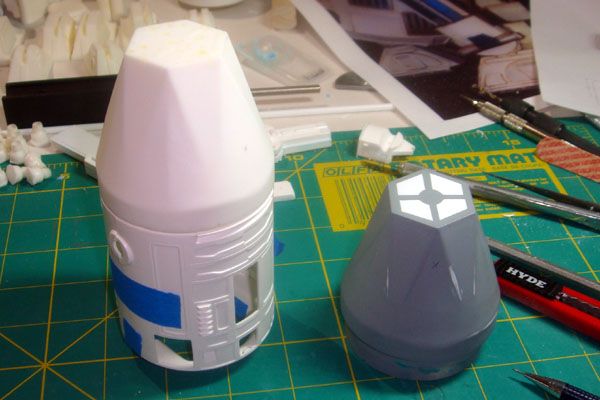
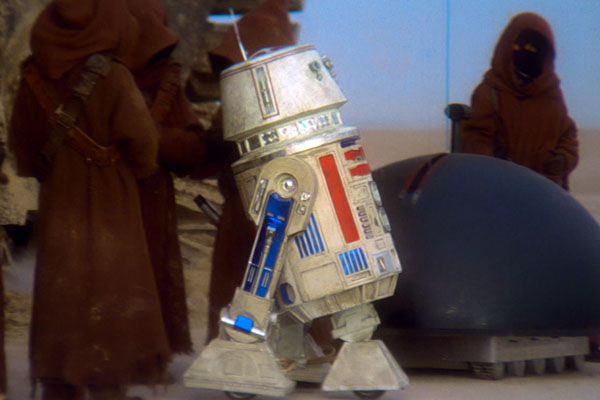
This is a build log for a series of 1:7 scale astromech droids from Star Wars. As I’m sure you know, R2-D2 was not the only astromech in the film series, nor was the R2 model the only R series of astromech droid in the films. My intent is to build several different astromech serial numbers of several different astromech models: R2 (the guy we know and love), R3 (clear dome), R4 (conical head) and R5 (cylindrical head).

I'm doing this (so I tell myself) to become familiar with the different astromech models so that I can move on to building a 1:1 scale model later this year. Yeah, hmmm…

The MPC kit of R2-D2 was first released in the late 1970s (the box indicates ©1977). Since little merchandise was actually available with the original Star Wars release in May of 1977, this kit may have been issued later (1981?) with the re-release of the movie. The kit was re-boxed in 1983 for Return of the Jedi, but it is one of the few original Star Wars MPC kits that have not been re-released since the Prequel Trilogy was launched in 1999.

BoxArt.jpg


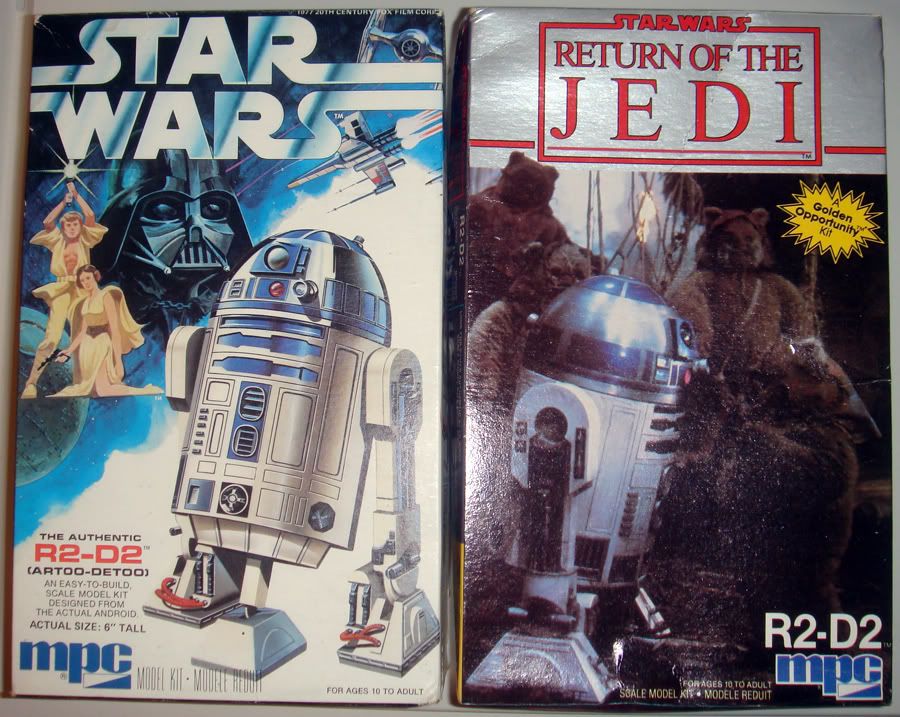
As with many modelers my age, I built one of the original issue R2-D2 kits, complete with sloppy tube glue fingerprints all over it. There would have been terrible brush strokes in the paint as well, but this kit came molded in appropriate colors of plastic including chrome plated sliver on the dome, so no paint was required. Much maligned as being inaccurate, I have never returned to this kit to re-build it as an experienced adult modeler. And that’s a shame, because it turns out that the MPC R2-D2 kit is a real jewel that just needs a bit of TLC to build into a beautiful and accurate astromech droid.

I pulled the R2 Builder’s Club astromech blueprints and, on a whim one evening I pulled out the MPC kit from deep within my kit stash and started taking measurements with my digital calipers. A short while later I came to the stark realization that the MPC kit is shockingly accurate in both dimensions and details. I suddenly had my next modeling project!

As a sidenote: if you’re looking for one of these kits to make your own astromech you’ll find several on eBay at any one time. But beware of what I consider as unreasonable prices for these kits; I’ve seen some eBay auctions starting at $100 or more! I would not suggest that you be prepared to spend that kind of money on these kits. Instead, be patient and you should be able to snag one for $20 or less plus shipping. I managed to acquire three of the kits over a period of a year or so at similar prices. Simply watch the auctions and you’ll eventually see some come up at the lower prices and not be bid up to astronomical levels.

ACCURACY AND SCALE

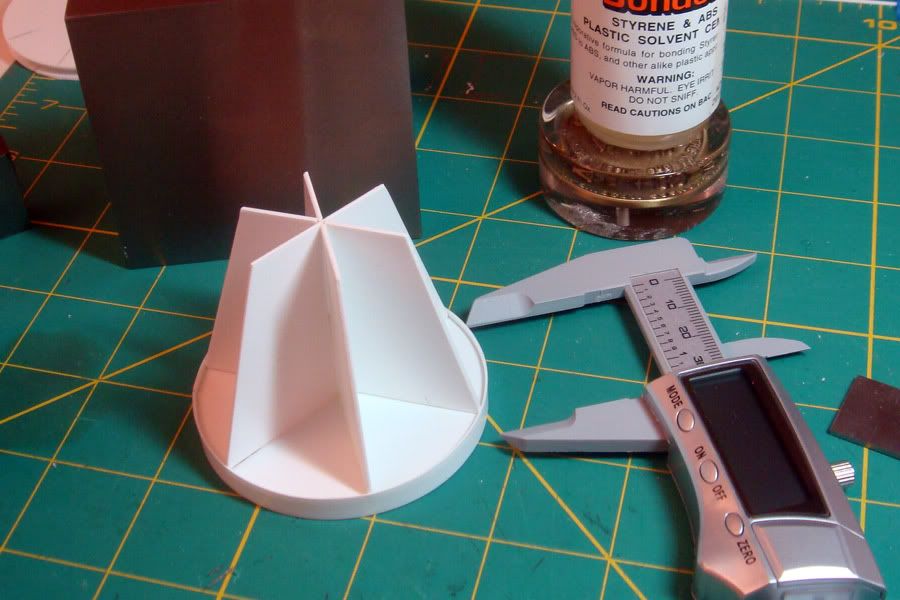
No scale is stated on the box or instructions for the MPC kit. Measuring at approximately 6 inches in height, most folks attribute the scale to be 1:6. Per the R2 Builder’s Club blueprints, this is incorrect. My extensive measurements of overall body shapes as well as details, compared to the blueprints, reveals that the MPC kit is nearly spot-on 1:7 scale.

The tables below are screen shots of my spreadsheet calculations comparing the model to the blueprints. You’ll see that the model is nearly 1:7 scale in every dimension. Note also the areas that are most in need of modification are all three feet and the battery boxes. The center ankle and leg in the kit is also a poor representation of the screen-used article, so those will need to be redesigned as well.

The first column in the table is the measurement from the Club blueprints. The second column is my measurement from the MPC kit. The next column is what the MPC kit scales to relative to the blueprints. The next-to-last column indicates what the MPC kit would need to measure to be exactly 1/7th of the Club blueprints. The final column indicates the percent error between the MPC kit and the club blueprints.

ScaleCalculations2.jpg


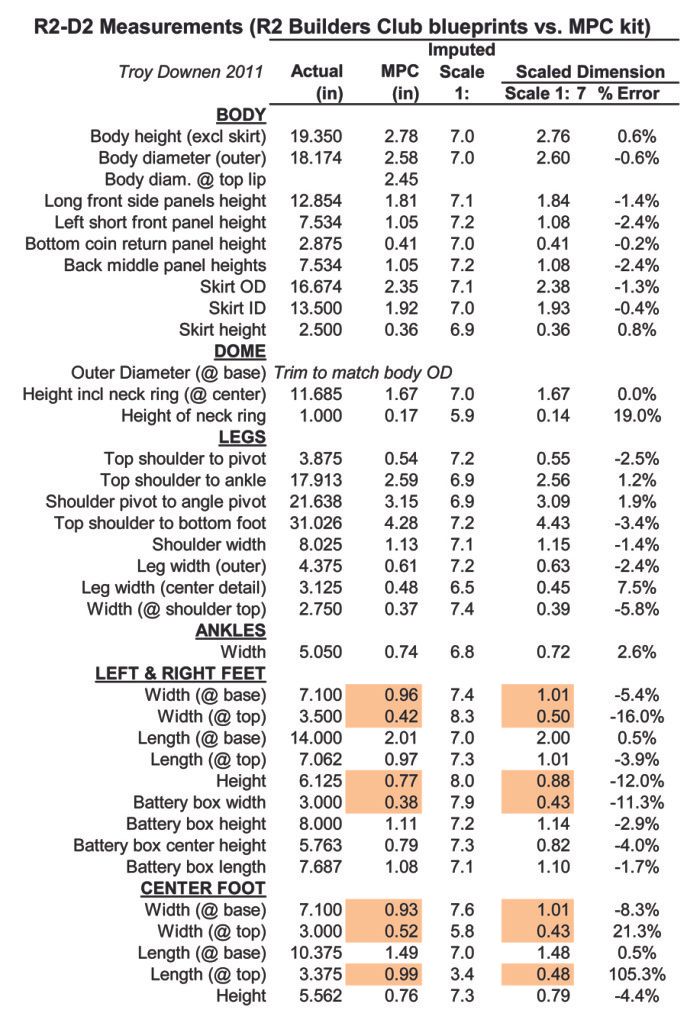
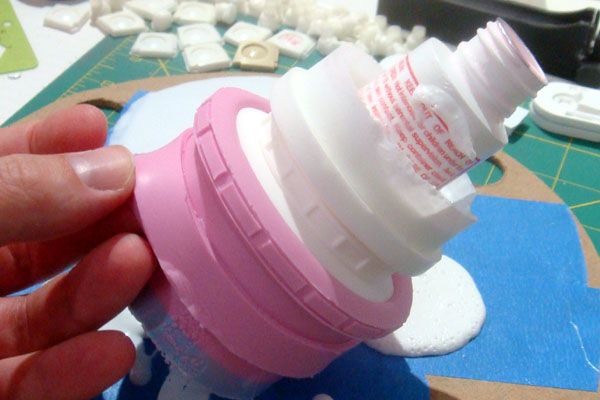
The base of the dome (the “neck ring”) is strangely bulged on the kit. I have no idea where MPC got the idea that this was accurate for R2-D2. However, the height of the neck ring is accurate, so the bulge can simply be sanded down.

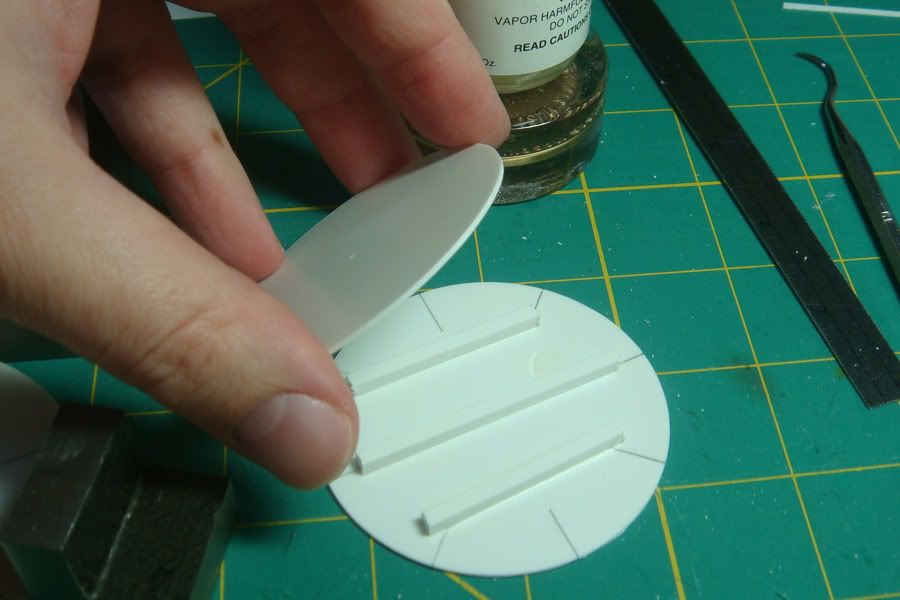
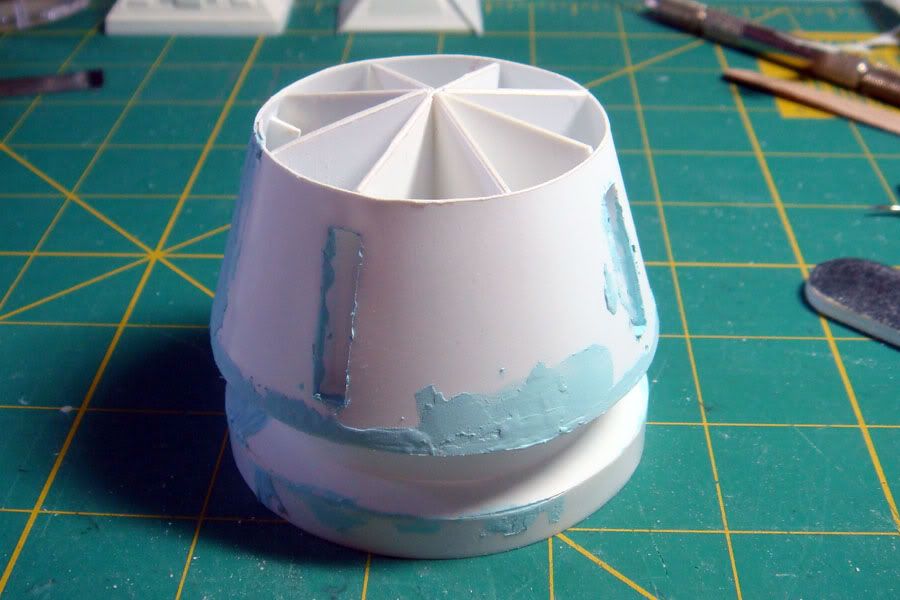
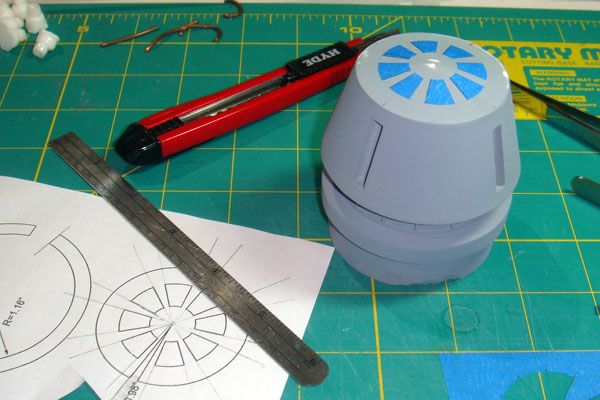
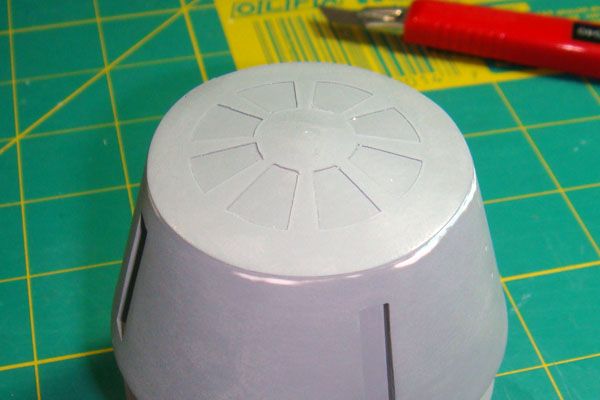
There are small details that will need to be redesigned throughout the kit: the radar eye is centered in its housing on the kit but should instead be off-center, the front vents on the body need sharper detail as do the power coupling and octagonal detail at the base of the body, plus there are some side vents on the body not represented by the MPC kit. All minor stuff and you’ll see how I approached it in this build.
 
R4 ASTROMECH HEAD

R4-M9astromech.jpg


The R4 astromech head is characterized by a hexagonal planview (i.e. top-down) cross section at the top of the head transitioning into a circular cross section at the neck ring. See the top of R4-M9's head from one of the opening scenes on the Tantive IV in A New Hope:

R4-M9headrear-1.jpg


In photos of screen-used units and even in the Hasbro toy representations of this astromech model it’s difficult to grasp exactly how this transition occurs; it’s very subtle. Fortunately HoosierTrooper (aka Cole) on the R2 Builder’s Club forums did some homework and posted some full-scale drawings representing this pattern. I took these, scaled them to 1:7, made some modifications and used them as templates for this styrene build.

The first step was to build a neck ring for the R4 unit. I assumed that this model would have the same height neck ring as the R5 unit, so I cut two circles from 0.040” thick styrene stock and sandwiched 0.10” supports in between.

neckringsandwich.jpg


This ring was skinned with 0.020” styrene carefully placed to have slight overhangs on the bottom and top of the neck ring. The bottom overhang will help to accurately center the head on the astromech body later, and the top overhang will center the internal support structure next.

An internal support structure was built from carefully measured plans to ensure a perfect fit with the neck ring as well as head wrap skins made from the triangles patterns developed earlier. The internal structure was laid out in a hexagonal pattern to support the shape of the outer skin.

R4headsecondprototype.jpg


The head wrap skin was cut from 0.020” sheet styrene and butt-joined into a cone. A strip of 0.010” was glued to the back side of the butt join for added strength.

The head wrap was lightly scored at the top of the head to facilitate bending the topmost part of the skin at the six corners of the hex shape. To accurately represent the subtle transition from hex to circle, the skin was only scored and bent about one-third of the way down to the neck.

The top hex neatly fit within the outline formed by the skin, and the entire head was lightly touched up with glazing putty and sanded smooth. It turned out that this complex pattern was much easier to build than the R5 unit because of the relatively few parts that needed to be assembled and fit together.

Photos clearly show holo projectors at the top of the head plus the unmistakable radar eye. But other details are hard to discern (if there are any). I left the head unadorned, although I added panels at the top of the head, which you can see in my photos as white, unpainted areas on the top of the grey-primered master. More on how I represented these panels later.

I’m going to cast the holo projector and radar eye separately. This will enable me to make Imperial versions of the droids (2 holo projectors) and Original Trilogy vs. Prequel Trilogy versions (the radar eye is placed higher on the head in the PT than in the OT, plus the holo projectors appear to be boxed in OT droids and stand-alone in PT droids).

Here’s the R4 head master sitting in a tub of silicone RTV “goo” as I begin the process of making its one-piece mold:

R4headmoldmaking1.jpg


Here’s the R4 head master popping out of its one-piece mold prior to making the first resin copy:

R4headmoldmaking2.jpg


And the first R4 head copy sitting on the MPC kit body next to the master (primed grey):

R4headcast.jpg


I’m mostly using Micro Mark CR600 casting resin for these copies, with leftover Alumilite white also being used on occasion. The CR600 in particular has the beneficial quality of taking 5-7 minutes after mixing parts A and B before it “kicks” and starts to solidify. This is plenty of time to get it into the vacuum chamber and de-gas the stuff in the mold to avoid bubbles (or at least the majority of the bubbles). But one drawback is that the resin is stark white, which makes it difficult to discern details, particularly in photos such as those I’m showing here! So please bear with me; I’ll do my best to adjust the contrast on the photos to clarify the cast details.

Up Next: The R5 Astromech Head
 
Last edited:
Sweet... Can you tell me if the kit is identical in both boxes. I need an r2 foot for my narcissus build and I could save a few bucks getting the Jedi one. Looking good.
 
Great project. I'm doing a 1/48th Red 4 X-Wing right now and it has an R4 for the droid. The head I have is conical, I wasn't aware of that circle to hex transition. I may just take the easy way out and leave it circular on the top, due to the small scale.

Looking forward to more!
 
Sweet... Can you tell me if the kit is identical in both boxes. I need an r2 foot for my narcissus build and I could save a few bucks getting the Jedi one. Looking good.
Yes, the kits are identical; only the box art changed.

I've always liked MPC's R2-D2 kit, so it's nice to see someone else has an appreciation for it. Yes, it has it's inaccuracies, but even an out-of-the-box build will give you a very decent representation of the world's most famous astromech droid; with a little extra work you'll get a near-perfect miniature replica.

Troy, great research and nice work so far on your R4 unit. I'm really looking forward to seeing your continued progress on this project!
 
Jedimaster: yep, identical plastic in both boxes. Thx Zombie_61 for chiming in on that as well.

Devin: on your quarter scale droid you might use a drawing template to sketch the hex pattern on the top of your R4 unit. Then use that as a guide to gently swipe the edges with sandpaper to get the shape. The transition from hex to circle occurs approximately 1/3 to 1/2 of the way down the head from the top. Make sure that a point on the hex faces forward.
 
Troy, that's a great idea. I'm going to make a copy of the head I have anyway, as it's the only copy in an out of production set, so I'll make two and experiment with your suggestion. I should also double-check and make sure the studio model actually had the R4 with the trapezoid head.
 
Yes, the Fine Molds kit. The R4 is from Starship Modeler's Blue Moon line from back when they did the resin 1/48th scale Star Wars kits. I bought the set years ago, it's long out of production.
 
Shweet! I was thinking about doing something very similar since I made my 1/48 Droids. I do have 3D drawings of each Part of the Astrodroids that I drew up for my project that I can scale to 1:7 if you would be interested in 3D printed replacement parts...?

Lookin' forward to seeing more scaled droids!
 
Devin, I sure wouldn't mind having that R5 head from the Blue Moon set, but yeah that R4 head just isn't quite right. Casting a copy to play with is probably worth your while. It could turn out great!

I have plans to light one of the R2 units and the "brain" of the R3 unit under the clear dome. Although R5-D4 actually had lights in his eyes in A New Hope, it's really tough to see them (see attached screen capture from a dark scene inside the jawa sandcrawler). There's probably a bigger bang for the buck with lighting the R2 and R3 units than there is with the R4 and R5 units.

Seven: I appreciate the offer. Not sure what I might need at this point. The front vents on the main body are still left, but SLA probably wouldn't reproduce those delicate fins inside the vents very well. I'll keep it in mind, though. Thanks!!
 
R5 ASTROMECH HEAD

R5-D4Astromech.jpg


The R5 head consumed a great deal of time; I knew that it would be the most difficult head to scratch build. I’ve been using modified versions of the Dave Everett / R2 Builders Club styrene plans to build this head. First to come was the internal structure with three boxes built into the profile frames. I’ll cut these out later after I glue the skin into place.

R5headprototype.jpg


After cutting and wrapping the neck skins, I approached the main head wrap skin. I knew that the joint between the upper neck skin and the lower head wrap would be delicate, so here’s a trick: I placed rolls of Milliput on the upper neck skin at the joint where the head wrap skin would intersect the neck…

R5headbuild1.jpg


…then I pushed the head wrap skin down on the internal structure, resulting in the Milliput “oozing” out at the joint just a bit.

R5headbuild2.jpg


Milliput has a workable time of about 1 hour (you might need to occasionally moisten it with water) after which it begins to cure. The box says full cure in 4 hours, but I tend to leave it overnight. At full cure, you’ll have a rock-hard compound which has also adhered to the surfaces it was applied to (hence the name “epoxy” putty). For the R5 head it helped create a solid joint between the neck and head wrap skins that I can sand and count on not warping or deforming while I’m creating molds for casting copies.

As for the head boxes, I could see through the top of the head the location of the three boxes. A 1/8 inch drill bit was used to drill a line of holes to outline the box interior…

R5headbuild3.jpg


… then I played “connect the dots” with an Xacto blade to enlarge the hole. A small file was used to clean up the sides and square the corners. In the photo you can see that I’ve smeared blue 3M glazing putty into areas where a bit of tidying up is required.

R5headbuild4.jpg


In this photo I’m detailing the R5 neck band. This pretty much finished up the R5 head master, so it’s ready to get covered in silicone!

R5neckdetails.jpg


Here I am “rolling” the silicone mold away from the first resin R5 head copy:

R5headcast.jpg


A few things to explain on this one: First, the pink-colored mold is one-piece, made from high-tear strength silicone rubber (this is from Micro-Mark, but Alumilite makes a similar product). This stuff can be stretched and deformed to a great extent without harming the mold. It’s great for projects such as this where there are undercuts in the master that require a great deal of flexibility in the mold to extract the resin copies. As you can see here, I can basically peel back the silicone mold to reveal the resin R5 copy. In this photo the mold has been rolled back about half-way to reveal the neck band. I can roll it back a bit further and then pop the resin copy out of the mold once those three side grooves on the R5 model have been partly exposed.

Second, you’ll note the bottle sticking out of the middle of the resin copy. This is my low-tech way to make the cast hollow inside. The bottle, which I salvaged from the recycle bin, is permanently cast in the part. I’ll cut it down when I trim the head to fit the astromech body. Making the heads hollow saves expensive resin (it would probably take more than twice the amount of resin to cast the heads if they were not hollow) and it also makes the heads lighter. I was concerned that solid resin heads would make the final astromech models too top-heavy and subject to easily falling over. This hollow space will also more easily permit me to light the models (if I decide to run fiber optics and LEDs in the models) and might permit me to somehow construct a way for the heads to rotate and be positionable on the final model. Maybe. We’ll see…

A quick note regarding how I finally managed to achieve the panel detail on the top of the R4 and R5 heads: I tried a number of different approaches, including scribing the detail and gluing thin sheet styrene, but nothing looked right or subtle enough. What finally worked (extremely well, I feel) was to cut out the panels in blue painters masking tape and attach them to the masters…

R5headpanels1.jpg


… I then sprayed the masters with 4-5 light coats of gray primer. It was just enough to build up a 0.01” (or slightly less) thick layer on the head. When I removed the tape – viola! Nice, subtle recessed areas representing the panels. These have been duplicated perfectly in the cast resin copies and should work well to help with painting the panels. Note that I got this tip from Steve Neill here on the RPF forums - a true master modeler!!

R5headpanels2.jpg


All of the R4 and R5 heads are now cast for this project (three of each plus a few bad pulls that I might let the jawas have later). I’ve had a setback with the R2 and R3 domes. More on that later.

Up Next: Holo Projectors and Radar Eyes
 
Looks great. I wish I'd see these kids when I was younger. I found the casting materials from Micromark to be easier to use than some others I tried.
 
I've just found this thread and I love it already. I never thought about making a new head for the body before. I might have to get this kit myself now and give this a try. I love the R5 head and would love to see Red Leader's droid R5-K6.

If you want some good astromech references you can't beat this website
Star Wars Astromech Droids
 
Back
Top