FEET AND LEGS
Up to this point, the R4 and R5 heads and the holoprojectors have been 100% scratch-built. But the feet and legs from the MPC kit can be used as a basis for accurate versions via some heavy modifications.
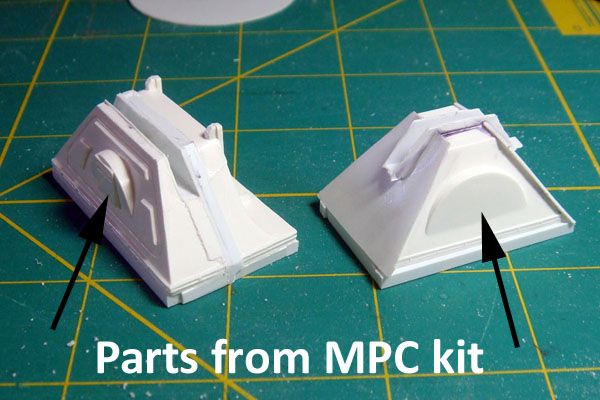
The MPC kit feet were terribly inaccurate, in both shape and size. Fortunately the left and right main feet are symmetric, so I only had to build one master for those in addition to the center foot.
First with the center foot: this is the worst. The taper of the front and back of the foot is entirely wrong, plus the foot is too narrow and too short. You can see in the photo how much the taper needs to change to adhere to the Club blueprints.
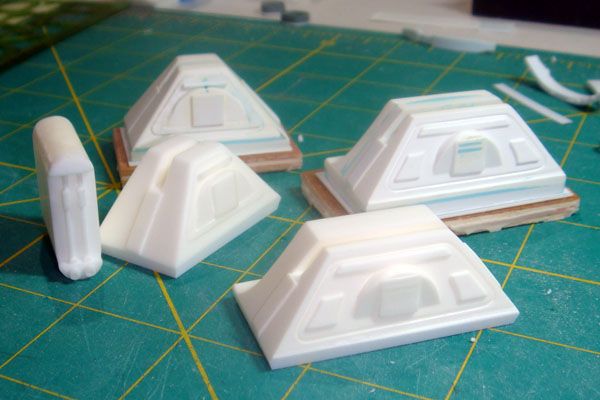
The sloped sides on both masters are really the only part salvaged from the MPC kit because I felt they had good half-moon detail that could be saved. The front and aft ends of each foot were rebuilt, plus a groove was added down the center of each foot for the leg to insert into. Also, 0.10” square stock was used on the bottom of each foot to make the feet taller. Here they are work-in-process (WIP):
And here are the final masters with detail added to the sides alongside cast resin copies. Note that the sides of the resin copies have been sanded to give that tapered shape to the bottom of the feet.
The battery boxes took a good deal of work as well, but I failed to get WIP photos of them. For the hydraulic cables connecting the battery boxes to the feet, I’ve cut 14 gauge copper wire and bent it to shape. Once painted, it’ll be perfect.
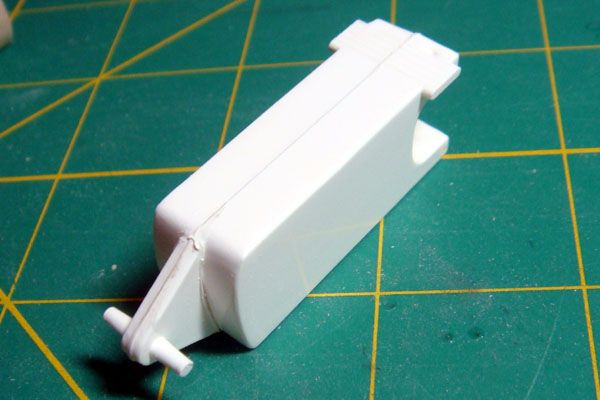
The center leg from the MPC kit was hopeless:
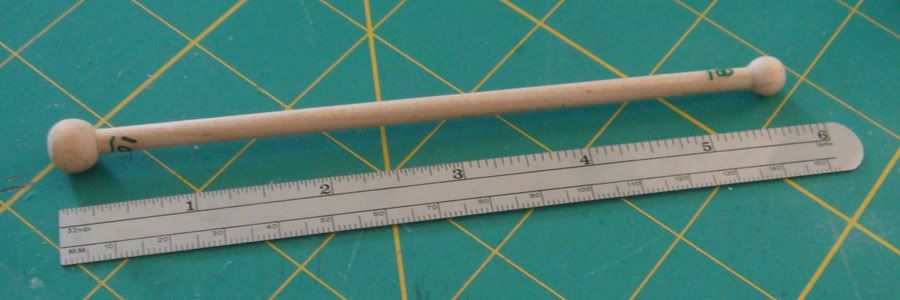
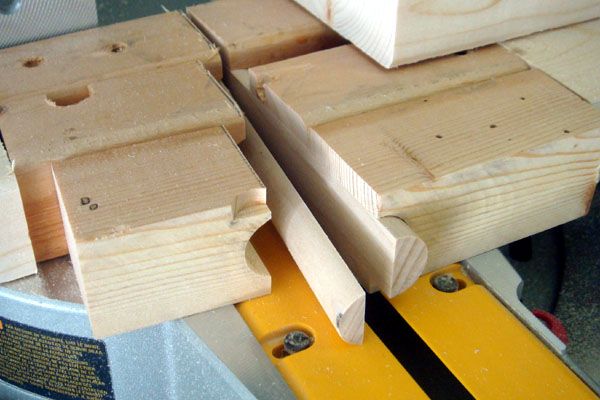
To scratch a new center leg, a wooden dowel was sliced lengthwise just slightly off-center (not an easy thing to do; check out the Rube Goldberg contraption I put together in my miter saw!):
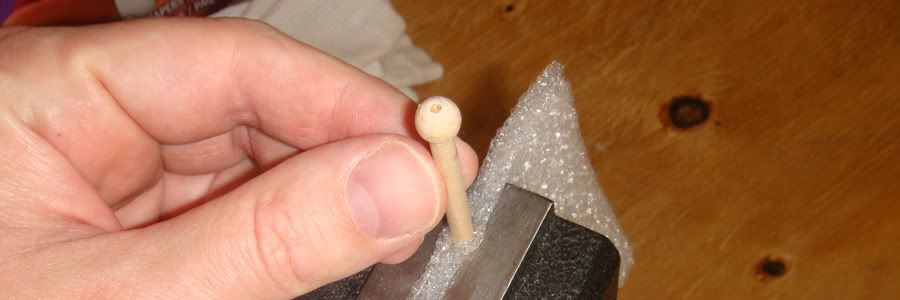
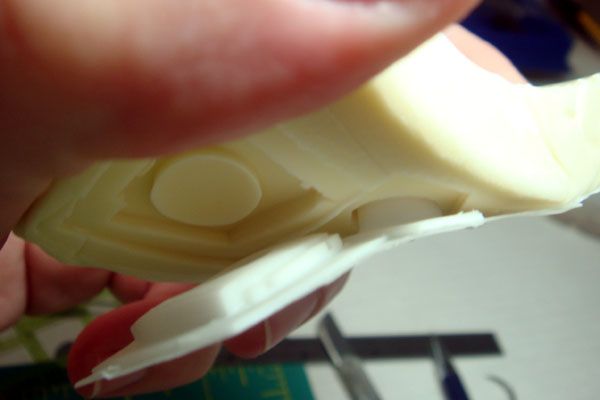
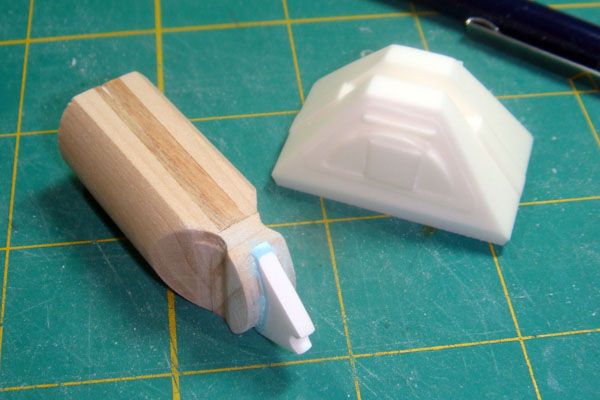
Rectangular stock was sandwiched between the half-cylinder pieces and a styrene triangle was epoxied to the end as the new center foot interface. Lots of sanding and putty later, a new center leg emerged (I still need to add the small ankle cylinders missing in this photo):
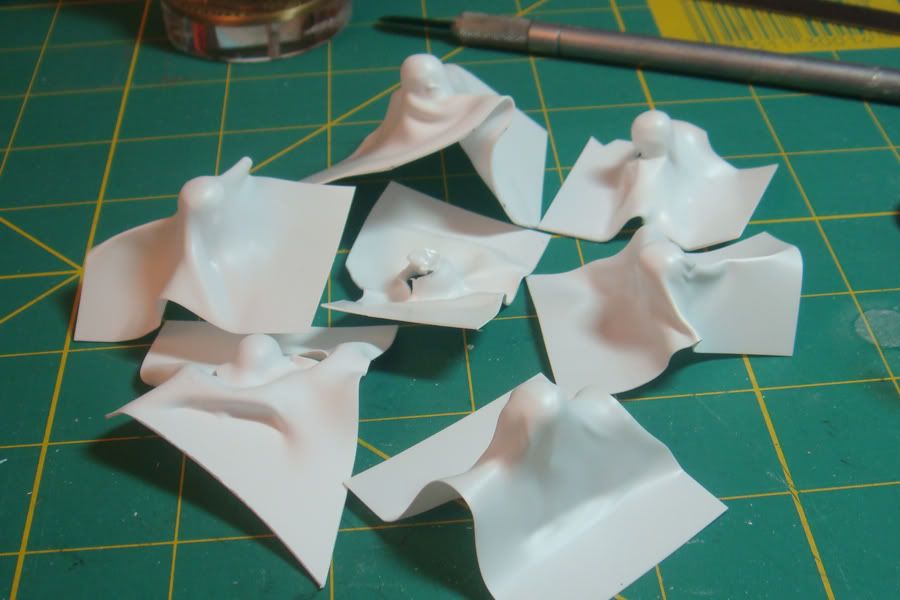
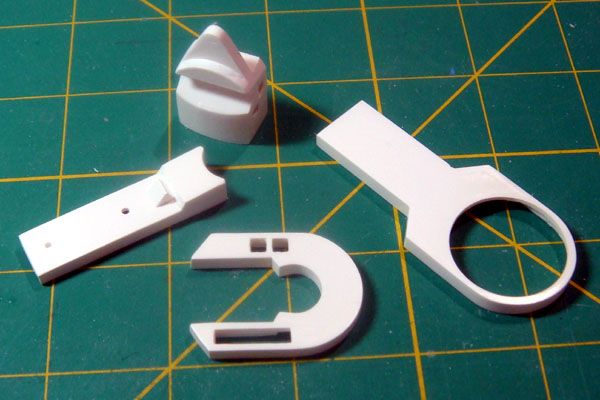
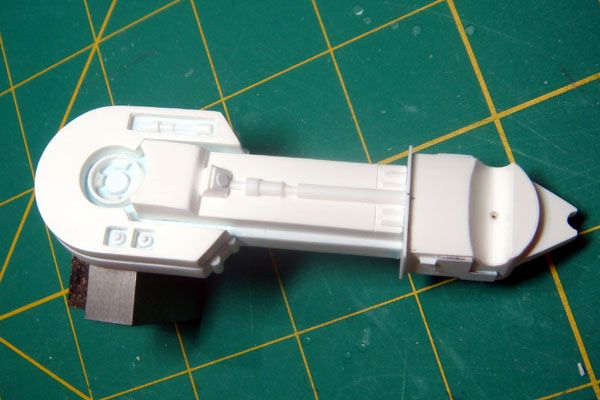
I tore apart the main legs from the MPC kit and salvaged the shoulder “horseshoe” as well as some of the ankle and the leg itself:
Liberal use of styrene tube, half-round stock and sheet permitted a reasonable facsimile of the main legs to be built. The point of rotation in the middle of the shoulder (“shoulder hub”) was a compromise (it should be recessed) but looks okay overall. Not shown in the photo are the ankle cylinders and wedge which I later added and are integral to the cast resin copies.
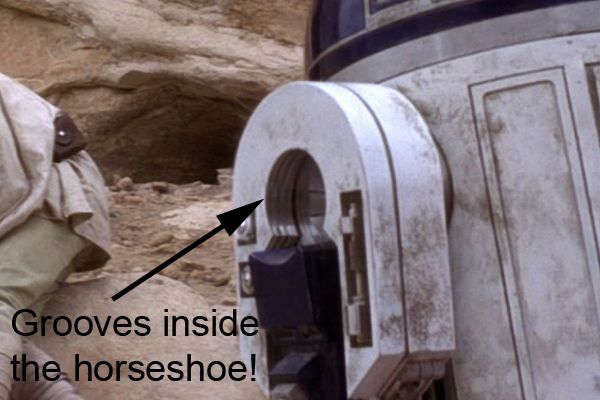
I only recently learned that there should be grooves on the inside of the shoulder horseshoe. All of that research and I missed it! If I had known a week earlier I could have built it into the model. Well, too late now!
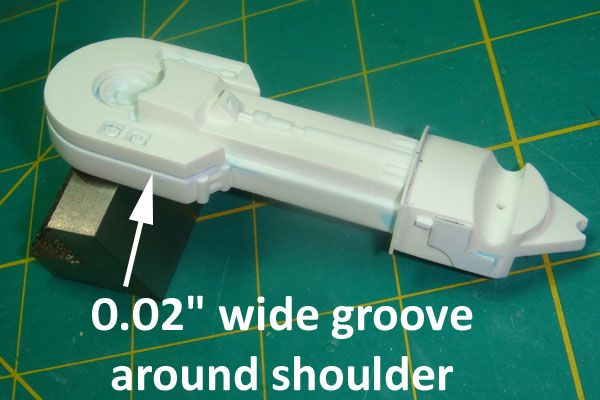
Despite missing that horseshoe detail, I’m particularly proud that I was able to get that thin groove around the top of the shoulder built to a reasonably thin scale and also a consistent width across the shoulder.
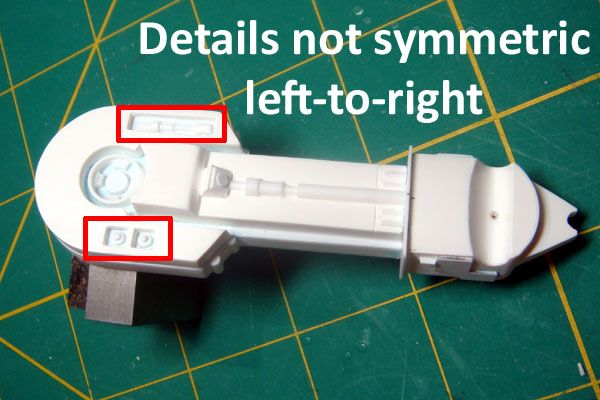
In fact, I’m darned proud at how well these legs turned out; far better than I had initially hoped. But – and here’s the big BUT – I cheated a bit on these. I realize that, technically speaking, the left and right legs are NOT symmetric due to the detail on the side of the shoulders…
However, I felt that my ability to get left and right leg masters built that were exactly the same length and consistent in features and details was pretty slim. I also looked through a lot of footage from the original trilogy and saw that on film the 1:1 scale astromech props were not consistent in which detail on the shoulders faced forward (that, or perhaps the film negatives were occasionally flipped?).
So - and this is just between you and me (shhhhh….) - I am going to use a single master to cast all of my left and right legs. I’ve noticed that Hasbro does the same thing on their 1:18 and 1:6 scale figures, and they’re the professionals, right? Frankly, 99% of the people who see these models won’t know the difference. And as for the other 1% (including me), well we’re all nerds who really should get a life anyway, right?
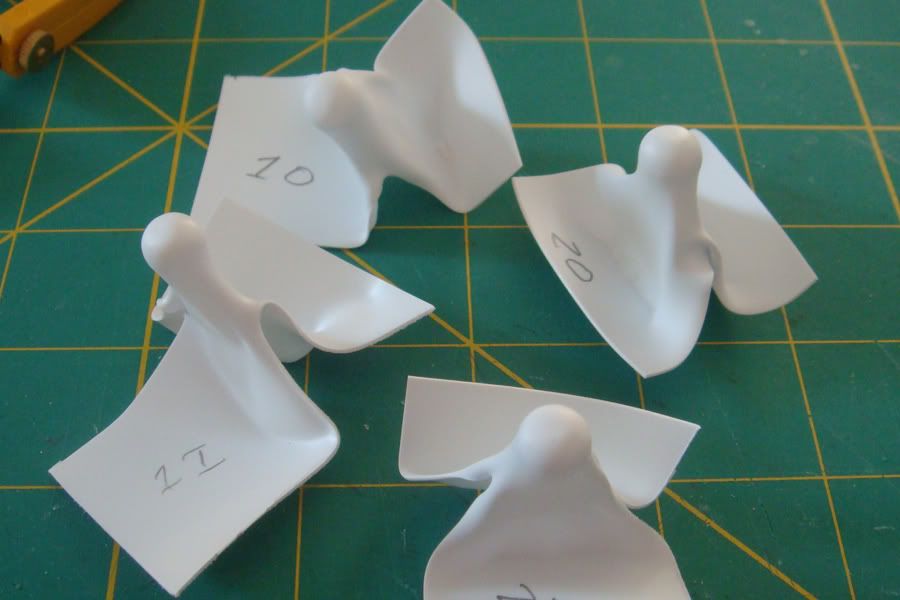
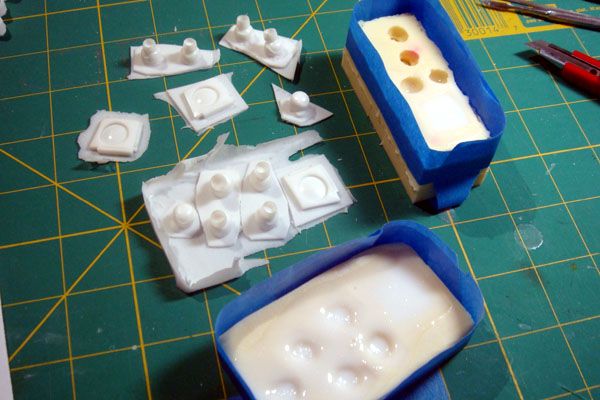
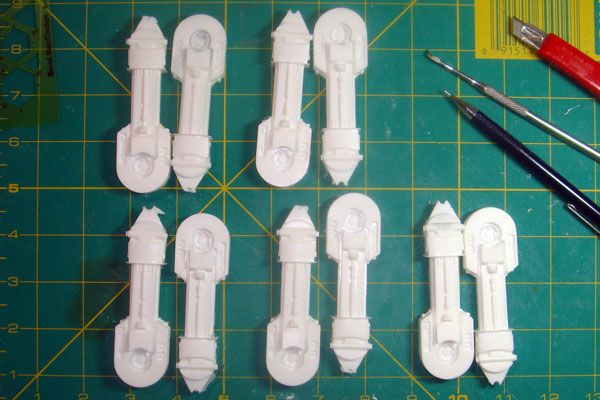
Look at all of those sexy legs! Five sets so far; about half of what I’ll need for this project.
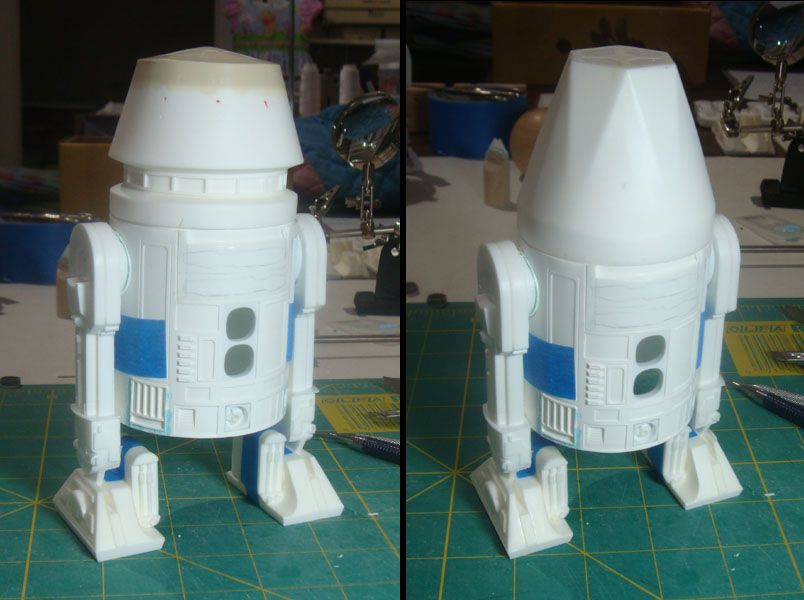
Hey, I taped things together and propped the R5 and R4 heads on the WIP main body and took these photos last night. The R5 head sits too high on the body, and the R4 sits a bit low. I’m still working on that head-body interface. But it’s starting to look like an astromech! Woo hoo!
Sorry for the glare in the photo - all of that white styrene and resin is reflecting right back at the camera!
Up next: The main body.