Been a while.
Thanks for sticking with me guys.
Life gets in the way sometimes
Hand and wrist have sucked SO bad the last 3 months
Dislocated my shoulder in my sleep, it takes a special talent to do that, it's probably a super power?
4 hours in emergency at 1am, that was fun.
But, i will survive, good title for a song that.
Plus……..
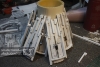
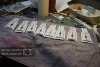
This scratch building really takes a long time man, especially when you have to make 8 of everything.
Mold it i hear you cry.
Would if i could but, i can't.
Anyhoo, less whinging, more modeling
Sooooooooo,
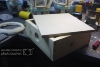
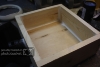
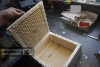
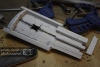
Last time i said i needed to make a VacForming table……………..
Drawdeid it
Cut, drilledeid and dry fit it,
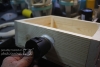
Stuck in me Vac adaptor
Used silicone bathroom sealer like glue before i final fit them, used extra along the inside seams just to make sure to seal all edges
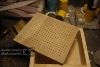
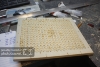
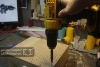
Drilled the top plate
Counter sunk the back face to give better air flow
SilliGlued the top and screwed it down
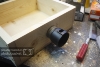
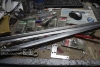
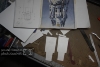
Hardware
45 ed the ends, drilled and countersunk the angle
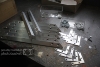
Screwed it up x2
Got me some clips and i'm ready to go…………………but
I haven't had enough time to test it yet.
I know
I know
Soooooooon
I got this concept from these wonderful people at Punished props, so props to them
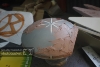
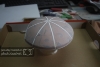
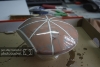
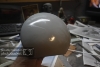
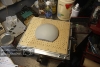
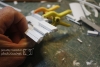
I did re-do my first thing to be vacced though, the side dome
Re-filled it, re-sanded, re-apoxied, re-sanded it and then re-primed it
Ready to go
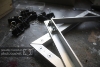
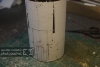
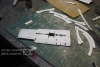
Started the movable flaps on the engines
Cut from a thermal cup package to get the curve i wanted
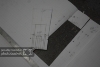
Drew to scale on paper, cut out 8 layers of paper, double side, on the tube bish bash bosh
Cut a slot and entry keyway with me dremel
Used square tube, solid bar and round tube to make the internal structure of the flaps
Currently half way through attaching the inner face of the flap in 1mm sheet on the 8 main assemblies
And that's it so far
I might be vac forming this weekend so stay tuned, might even do a proper video.
Cheers
Gagsterman
")