Skimming through my references while thinking about the finer details, and I figured I’d share some thoughts:
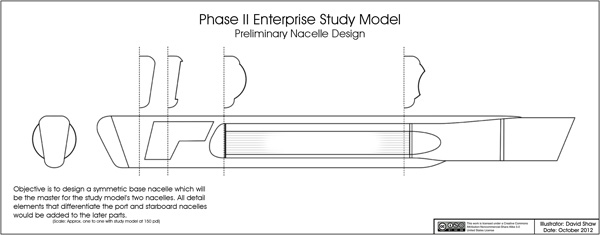
As Shaw noted during his extensive research on the PHASE II design, a great many fan-made models (both CG and physical) had tended to take elements of the TOS and/or TMP designs and apply them to the overall design seen in the PHASE II blueprints to fill in the gaps.
Of course, it wasn’t until Shaw’s research and his fabulous study model that we really got an accurate sense of what this ship was gonna look like. And, even now, there are still gaps in data which remain. The studio model was supposedly pretty far along when the project morphed into THE MOTION PICTURE, with paint and decals waiting in the wings. Yet, to this day, no photos of the model in its later stages have ever publicly surfaced. Just test assemblies of the unfinished masters.
Anyway, ever since Shaw’s work came along, his version has essentially been codified as the default PHASE II design, with variants appearing here and there as other artists have interpreted various aspects of it.
Here are two examples for comparison: The digital model (top) created to promote the Eaglemoss miniature replica of the ship, and the fan art (bottom) of VFX artist Marc Bell (
https://www.artstation.com/artwork/D5xdD9).
In this top view, you can see how the Eaglemoss model adds TMP-style running lights to the rear of the nacelles and to the saucer, whereas Bell’s model uses the round TOS bow light on the saucer, and has no lights on the rear of the nacelles. Both also use variations on the TOS’s saucer’s “rust ring”, but the Eaglemoss model has six concentric gridlines on the saucer (as per the Price/Loos studio model), while Bell’s model has only has five (as per the PHASE II blueprints). The Eaglemoss model also uses the TMP’s saucer’s number/spacing of radial gridlines, which does not match either the PHASE II blueprints or the studio model.
In this view, you can see how both models misinterpret the blueprints, and add raised rectangular shapes next to the upside-down “L” vents on the front of each nacelle, rather than the indented areas of the Price/Loos and Shaw models.
And of course, both models make the key mistake of slapping the TOS sensor/deflector dish (complete with antenna spike) onto the front of the secondary hull, which was not at all Jefferies’ intent. Bell’s model gets it closer, but still lacks the proper bowl design of Jefferies’ PHASE II dish, and adds that TOS-style antenna.
And, in this view, we can see that both models get the shape of the weapons assembly at the base of the dorsal wrong, pushing it much more toward the boxy look of the TMP Refit’s torpedo tubes, rather than the merged cylinders of Jefferies’ PHASE II design.
Also note the TMP-style rings on the lower saucer sensor domes of both models, the dark coloration of the rear of each nacelle grille trench on both models (which gives them a TMP look, rather than Jefferies’ concept of the grilles as a metallic silver-ish color), and the TOS-style red/green formation lights on the rear fronts of the nacelles, as well as the clusters of three marker lights (top/bottom/rim) on either side of the saucer.
For all intents and purposes, designs like these have basically ripped off—er…been inspired by the Shaw study model’s overall look and then made a few minor tweaks. Each version has its interesting points, although many of the little choices clearly move the design away from what was actually intended for the PHASE II model.
Still, it’s really neat to see these far more accurate versions of the design floating around out there. For a long time, there was just so very little info to work with in regards to this fascinating “What if?” ship (and show) that almost happened. Most fan-made versions of the ship would tend to use the Mike Minor production art (among other things) as a general guide, and then add in a bunch of TMP Refit elements to fill in the gaps.


