IG88 BOUNTY HUNTER DROID...build and showoff

mekroid

Active Member
Hi all :)...havent been on here for a while and figured its time to show one reason why....
I wrote this build diary originally on my home trooping groups site ...

galacticknights.co.uk

This was due to TDH losing the 'other bounty hunters section' where Id always evvisioned posting it :facepalm :darnkids.
Spent some time finally posting it on there last week ...
Rearranging it for reposting as well as the initial writeup itself has taken quite some time ....:rolleyes

So I figure its time for the RPF.....:)...here goes......
 
Greetings! :)

Well , a year and a half on I finally get round to doing this thread !


As some of you may know ,IG was born on the dark and stormy night of 27th feb 2011,..
.ok it wasnt that stormy ...just dark ...

It was a late finish as Crewe militaire was on the next day and this was his first gig in deployable form.


JD300042.jpg


It was something like 1am when I finished the weathering the night before the show

...So ,I'll attempt to explain how I had another large droid shaped 'accident'...may take a while .....here goes...are you sitting comfortably?
:)
 
P1010031-2.jpg


this is pretty much all the printed reference for the Igster ...basically there aint much about less than 5 usable shots in total .
As some will know , there are no shots of his back and the only shots of the droid as we know him are on the stardestroyer set .

The appearance of the white IG in the scrap room on Bespin had bothered me so I dug out my copy of 'the making of the E.S.B.'
Its a few years since I read up on it but I think it stated the Bespin scene was shot at the start of April and the stardestroyer scene shot in the 20's of the month . Also the IG in Bespin is NOT complete , non of the familiar greeblies are on the head .
Also the entire thing is sprayed white ...even the bandolier .Could this be related to Fetts white incarnation?
This also proved that the IG we know and love is painted and not a bare metal finish , also when I did get to play with a real DERWENT combustion chamber it was a very dull ,flat ,oxidized grey .
For those that dont know , a few years back IG's head part was identified as a combustion chamber /can annular burn chamber from the engine of a glouscester meteor , a british jet from the 40's/50's...not to ramble on into to much aviation history detail here .
I first found out about it when , during a troop at MAGNA science centre years ago a trooper I knew showed me what him and the group had noticed that day ,a derwent engine on display there as a cutaway !...I said 'so'...then he said 'turn your head sideways ' :confused.:confused....I dropped my lunch! .:love...it was full of IG heads! , 9 to be exact .
Deciding that they were to well fixed to pinch one of , I left the project for a while .
Thing was though , NOW we have the size !

Next , a trip to pester me old mate Arnie , blackmailed him into scanning a large ,front on image of IG from the back of an ESB poster mag.
This is then printed in colour on A3 and tiled and printed in black and white on a small pile of A4 paper ,the size having been determined by knowing the height of the derwent (IG head).
Stick these together and we have a damn good idea what everything else measures

While I was researching IG ,I went to see a contact at an aircraft salvage company (they didnt like it when I said 'scrap'...they are a 'SALVAGE' co..:rolleyes) and asked if they could identify any of IG's bits ....and when they stopped laughing....
The only real thing they said was that his 'limbs looked like aircraft jacks'
They did however rattle off LOADS of stuff they'd seen in places like the Falcon internal sets ...I wish I'd taped it !

2 conclusions I came to about the IG prop at this time ...1 ,it was made from predominantly available aircraft scrap/salvage parts and weighed a load ...and 2nd ...I believe it had been dismantled /disposed of after filming .
There has been no sign of anything IG related in any archive pictures I have seen so this is probably the case .
Basically Star Wars is the ultimate recycling film (whole original trilogy), things were rented for filming and returned to prop stores after , this is true for most of the weapons .

I needed a cheap, lightweight droid which like Roger would dismantle for storage and transport to gigs in a car so using original parts got kinda ruled out .
The only piece I would have had trouble building from scratch was the derwent and once I'd acquired a fibreglass cast from an actual one I was rolling on the project! :love
 
At the same time I started fiddling with the head I started at the other end as well with the feet .
As with Roger this was to be a free standing prop ,also I was short of room to build so being able to build him as he stood was appealing , ...so I needed feet .

P1010006.jpg


These I make as heavy as possible , the shell is MDF ...

P1010008.jpg


Then I started the 'justified ' joint for the ankle ..A compromise that looked like what is familiar but looked as though it would actually ,mechanically work .This was partly because I'm picky but also because I have an idea ...more later on that..

BTW the size for the foot was determined from the new hasbro IG88,..as you may know , like 2IB ,IG88 has no actual feet , the feet we know are devised by the toy co.
I measured them and multiplied by 6 (1/6th figure)

P1010040.jpg


P1010007.jpg


P1010057.jpg


Like I say ,to lower the centre of gravity and keep the figure stable I keep all the weight I can in the feet and from the knees up strip out as much weight as possible .So the feet get the side cavitys filled with plaster of paris mixed with a bit of external grade PVA glue ... goes hard as a bullet .

P1010094.jpg


these were filled in stages to aid drying and avoid expansion damage....
these then got left till later on in the build when I finalised the design of the full fake ankle joint . With this done the feet needed modification ..

P1010284.jpg


P1010285.jpg


P1010014.jpg


this made it look like a viable joint again .
Then ,topped up with plaster , it was time to contour the inside of the foot ..
 
P1010015.jpg


the basic shape was formed with a thin sheet of styrene wedged in there with an offcut of pipe that was the right , near enough , diameter ,held in place till the car body filler and resin mix(RONDO ,PLOD whatever you call it ) was set then peeled back .Any glitches were made good after , this was far easier than trying to get a good finish without moulding against something ,for a start its really awkward to get your hand in to sand this area!

P1010016-1.jpg


P1010017-1.jpg


In these you can see the finished surface in the foot and the fake ,sculpted gaiter

P1010022-1.jpg


The feet were then sanded inside and tidied up , milliput was used for the compressed areas between gaiter ridges.
 
I needed something to mount the head on... IG's neck is the bottom portion of the Derwent , its sliced off and then shaved down a few millimeters or so to allow the upper bit to sit down over the lower .I wanted to get the chest underway to see how the neck interacted with it .This was real knockabout construction , I wasnt happy with this but I knew it would be strong and do the job when painted with wood hardener or resin..


P1010021.jpg


the chest frame is held up here against the full size IG print ..when bits of this big print are fuzzy or difficult to interperet ,refer to the A3 colour image of the same picture , ...its like having a 'key' to the map which is the big print .I call these pictures the 'GOD image 'since all sizing comes from this.
heres the body template , this took a lot of brain work , straight at the back , angled at the front , if you want to copy this template details please feel free too..


P1010051.jpg


P1010053.jpg


This is a weird one ...
yes its my toilet!
you are seeing IG's body , upside down and from behind now the sections (gut and crotch) have been made from the template and placed together..

P1010056.jpg


...and a quick play with the head...

P1010020.jpg
 
heres the gut and crotch blocks....

P1010062.jpg


P1010058.jpg


underside of the gut block...

P1010054.jpg


topside of the gut , notice the edges come up higher...

P1010055.jpg


the square hole is in the back face ,this will later become a magnetically docking inspection panel to get at his lights ,batteries , my sandwiches ,etc
...The chest section gets skinned...

P1010066.jpg


P1010063.jpg


This was with mounting card as I was going to resin it afterwards ...ended up being wood hardener though ....does the job
(staple/nail gun from Aldi invaluable here)

Then this got worked up with filler where needed..

P1010084.jpg


the sandy coloured stuff is CELLULOSE BASED PLASTIC WOOD FILLER ..I like this as it dries hard and provides a good key for car filler etc and its light weight.

P1010126.jpg


body filler...

P1010096.jpg
 
While some of the bigger bits were going on , some needing playing with outdoors ,I started some of the detail pieces indoors ...
Dunno why , this was always one of my fave bits...

P1010028.jpg


its the detail from the left leg. the actual piece is some kind of manifold , Ive seen similar on a car exhaust at a scrap yard,a mate pointed out some welding equipment may have a similar structure as well.

P1010029.jpg


Mine is made from dowel offcuts and filler for the 'Y'shape and cat balls(toy kind NOT the cats own!)couple of old control knobs ,cotton reels and old soldering iron tips (which would go in the holes in the cotton reels )
heres the right leg thingy...

P1010048.jpg


this was scrap tube ,foamex and a top I found in the street!
Also around this time I started the tubes /cylinders around the waist
Hip cylinders...

hipcanisters.jpg


this is a shot from later when some detail had been added to the cleaned up finalised body, the crotch and gut now glued into one piece but the chest stays removable.
Then theres the familiar pairs of rams at the front , these were measured off the GOD image and produced from the nearest size pipe , which was pretty much on the nail.
the top and base piece is just a band of the same pipe ,slit and made up with filler , the end caps are styrene circles cut using an olfa circle cutter BACKWARDS so it cuts like a lathe tool...loads of small passes quarter at a time , much neater and faster than trying to cut them freehand .

P1010023.jpg


next , here is the first version of the little ribbed piped that hold the rams together...and what I replaced them with , rigid conduit ...again , found some of this .. in a skip I think...this was really rigid stuff , later I bought some of the other type with a slit up it that was really flexible for the small finishing pipes...

P1010038.jpg


The grey plastic pipes ,also sticking out of the rams at the side are styrene and are scrounged till roll centres from small supermarkets and shops , I had a load once having been given a box of till rolls ...get scrounging at yer local shops!..these are around the sisze of the average gun barrel (2/3different sizes),glue easily and are extremely useful ...and my favorite price! ...tight git that I am

P1010022.jpg


looks like its too thick here but there was a load of shadow I had to factor in...
at first I did make em to skinny using the next size down of plumbing pipe (ABS)but these pipes (in next pic)were to come in useful ...
lot of this game is luck and happy accidents!

both sets of rams being deglitched..

P1010023-2.jpg


P1010024-2.jpg


and before the deglitching , a trial fit on the body which had also been worked up...

gutandpipes.jpg
 
Right then ,...I found a temptation when building to fix things that shouldnt be fixed ...example : the rams on IG's front ...they dont attatch to anything and are extended to different amounts , basically its like hes got 4 syringes strapped to his gut!
I naturally prefered them symetrical ...but they arent ...
These cant possibly be any form of actuator for IG's movement ...personally I see them as an after market add on the way the IG86 is simpler and cleaner lined ,IG is an old droid ,knackered and with additions , the same way Syd Mead when designing the spinners and ground cars for Bladerunner came up with a look that was originally slick but then had been retro fitted with air conditioner systems to deal with smog(see Deckards ground car) but the smaller problem with the rams placement actually was a bigger convincer they would only be for a purpose other than powering IG's movement.
One sits higher than the other on the body ...I had to force myself to make them slightly asymetrical .
Its amazing the number of artists that incorporate the rams into the body mechanics ...and my personal pet hate ... flexing metal at the hip to allow movement in a way it could not possibly move!!
(personally I never liked any of the E.U. IG backstory ..the official site gives his height as 6 ft 6"!!!...not physically possible!... he is around 7 ft 6")

This kind of thing is what I mean when I say I wanted to have 'justifiable joints 'that at least LOOK plausible ...with that in mind I sweated for a time on the hip design .
A few artists had used the bellows gaiter idea and that solved the prob for me so instead of welding the hip to the crotch I opted to lose a small amount of hip armour and replace it with a fake bellows gaiter type thang .
Basically this is a 3 step stack of lozenge shaped foamex pieces...
Here you can see then 'F' pin...the big pin goes down into the thigh and the 2 grey ones go into the hip joint, the 'F' pin is then dressed with the fake gaiter .

P1010031-1.jpg


Note .. the red cylinder is a fast and furious car case from a car boot , I realised later it was the wrong size (too big)

P1010026-1.jpg


A later shot of thecompleted F pin and fake gaiter joint , this remains removable from the leg ...not telling why yet
here is the first test fitting of the new thigh/hip armour , notice the red line where the old part was ...

P1010034-1.jpg
 
IG build
chapter 2!
monsters from the IG!
...whistle yer own music here
LEGS !... yes, someone yelling that wakes me up as well!...unfortunately droid legs
Then onto thighs...and lower legs ..

P1010060.jpg


this is the top of the calf straight under the knee block , its the same pipe slit and layered to bring the diameter up then filled but kept with air spaces as from here up Im trying to shave off every bit of weight going.

P1010061.jpg


looking up the thigh 'bone tube'
then the calf bone

P1010009-1.jpg


...held against the God image , guesstimation came in to get a proportionately decent leg with a foot as IG originally had a flat board and no feet .

The hip area/thighshroud was a seperate piece from the thigh till after the thighs were finished and dusted with gunmetal paint where the shroud would cover..


P1010004-4.jpg


P1010005-6.jpg


the thigh bone tube is the same as the lower leg but with spacers and a piece of light weight plastic pipe round it allowing an amount of the bone to poke up into the hip unit so it would be a strong joint.
Looking up the complete thigh ...

P1010003-1.jpg


Then the complete ,test fitted thigh seen with finished hip unit pushed on ...

P1010001-1.jpg


quick peek down in the thigh..

P1010004-1.jpg


and a close up of the thigh greeblies ,

P1010033-2.jpg


made from car filler cast into a sweet top I found ...all together now ....
......'IN THE STREET!' :lol
(damn trainee tramp!)
 
And like the Duracell bunny ...this build went on ...and on...and on
Ahh boy!...
Here is a breakdown of the complete upper leg..

P1010002-1.jpg


on the left is something that will roll into this thread in a bit , the knee block ...So eventually the hip bone gets bonded to the... thigh bone ...the thigh bone's connected to the knee bone ...STOP singing ! ..get carried away sometimes..
While the hip and thigh will be one piece finally ,the hip joint (the F pin with the fake gaiter from earlier ,and the knee block both push into place and remain removable...there is a reason...trust me.

P1010005-1.jpg


thighs in first primer/deglitching stage, the rod things up the sides are aluminium tube from a battlestar class B&Q...(the big one!)the yellow ends (before primer )are some very hard foamex ..apparently the stuff shrinks slightly and goes hard with UV light and temerature changes , this was an old shop sign .I think the detail in the middle of each rod was till roll centres (plastic) with packing.

this next one shows how the curved top (to help with the illusion of movement capability)of the hip armour was done ,layers of foamex and filler.

P1010012.jpg


Now the knees!

P1010272.jpg


basically a piece of pipe the height of the knee unit with a longer piece of the same pipe slit along its length and forced up through it creating a pin that will fit in to the thigh or calf ...I actually ended up cutting out a strip and making it a dead fit as this reduced wobble when fully assembled .The brown is some drainage pipe I found ,foamex discs act as spacers .
Heres the start of the fake gaiter for the knee joint.. and for once it does kinda look like IG has these ,I needed them more obvious though..

q14.jpg


this is a 'pushmould'in car filler of the black gaiter part in shot being held contracted ..
..2 am driving round a roundabout ...yup!...you guessed it ... found it in the street!
on the left ,cast parts , on the right the mould , hair gel as release , bit fiddly but it meant I didnt have to wory about getting parts greasy .All parts were pulled when the filler was 'green '(set but not cured so it was rubbery )

P1010273.jpg


...and a test fit on the block , here you can see just how manky it was before clean up and deglitching

P1010271.jpg


...and the finished knee was in a shot earlier...
 
...YEEEHAH!...now on to IG's important little places ...

P1010020-3.jpg


the gut flange ,when you look at what it is ,two halves of a unit that meet at that point , like a gear box ,it seems logical to assume it would be on the backside as well , KOTOBUKIYA agreed so I did the same .Figuring out the variations in height from the surface for every piece of detail was a pain... but it seemed to add up in the end and I constructed front and back raised detail for the crotch out of foamex and styrene.

Under the big hip canisters is a stud detail that fastens them on ,I used aerosol nozzles cut down ,wouldnt normally as they dont like being painted but where they were there would be no wear and tear..

P1010010-7.jpg


P1010011-8.jpg


Here you can also see the holes with tubes in place for the hip joint , the 2 prongs of the F pin go into these (I got 2 near telescoping diameters of pipe from a mate )

P1010012-4.jpg


during final assembly after some basic painting , these canisters are bonded on to the stud pin thing , notice the dowels just poking out of the vertical face , these will be pushed through and glued last thing to lock the canisters on .

The detail in blue (2mm styrene sheet )may have a hole in the middle on actual IG ...bit unclear and easier for me not to.

P1010002-5.jpg


Fake clasp detail on straps made from foamex and sanded, BTW the big white tube is plastic and light weight and is the central roll in some kind of posh solar control film for windows , expensive stuff , chat up your local vinyl graphics people...also used as the outer thigh .

Now we're getting somewhere ...

P1010012-3.jpg


P1010013-4.jpg


same thing , couple o different lighting set ups , makes it easier to see .The white areas are where the fake hip gaiters will cover the F pins.

Upper body assembly test ...

P1010004-3.jpg


,The chest has been worked up , the ladder looking bit up the middle of it front and back has been done here , also , and he does have these ,...IG's armpits ...these have a round detail deep in them which is very speaker like ...Hmmmm
Yup I stuck an MP3 speaker in , wanted him booming the Imp march and the asteroid field !hehe ..another thing that hasnt come off yet due to my lack of electrical knowledge ...getting it sorted though.
Also there is the shoulder piece that goes out to meet up with the shoulder block ,this was a plastic lampshade , I really had to ration when this was used as it was perfect sized but there wasnt much of it and it was a toss up between that and thigh shrouds , eventually I got different thigh shroud stuff and freed up the shades.
 
P1010020-1.jpg


...do your own jokes for that one ! :behave

P1010016-2.jpg


and the other end looking more scrubbed!
close up of IG's butt wet with primer ,all surfaces blended together now with filler .

P1010025-2.jpg


I injected IG's butt with expanding foam to support the thin sheet styrene that made the curve under the crotch .... either that or hes just had a really embarrassing accident on my lawn :lol
 
Stop yer grinnin and drawp yer linen!....:D


....(I still dont get that aliens quote ... makes me larf though ...and its cleaner than the predator quotes I know ..)
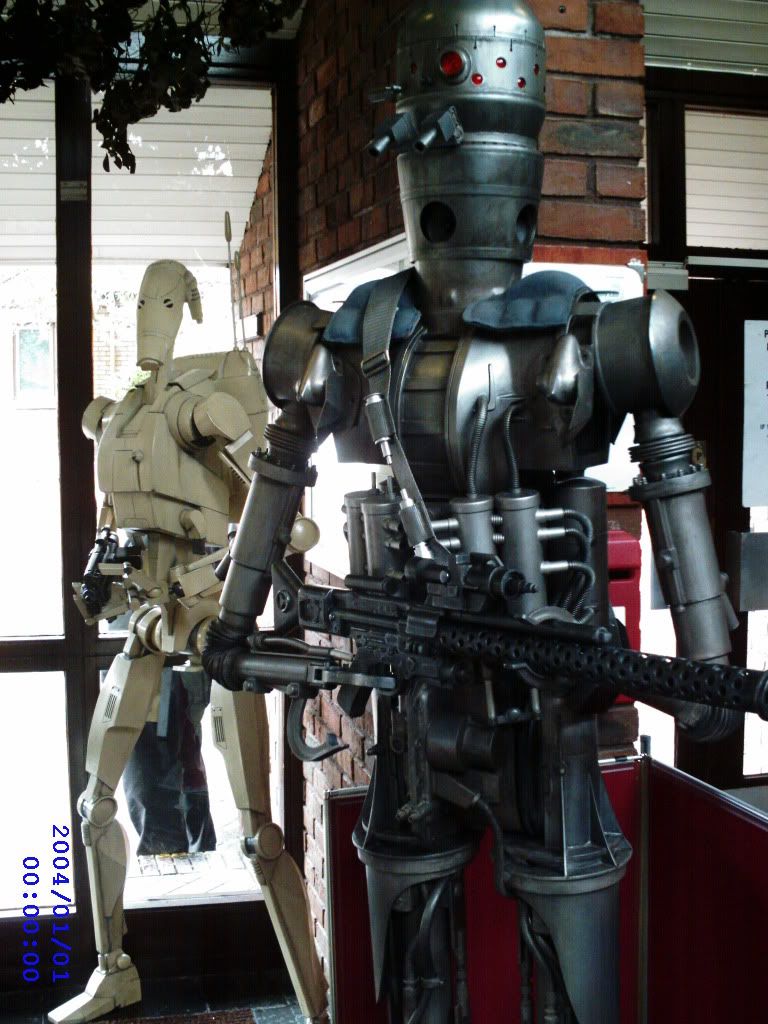
..Yup I'm back with another installment of IG construction ... bit of a marathon post this one methinks
Well done if you stayed awake this far ....
..This build thread will jump around a bit in picture chronology as ,to bring things to a managable length Ive tried to go through sections of the droid ,legs, body etc as individual units when in reality a lot was on the go at the same time .

...How long did he take ?.
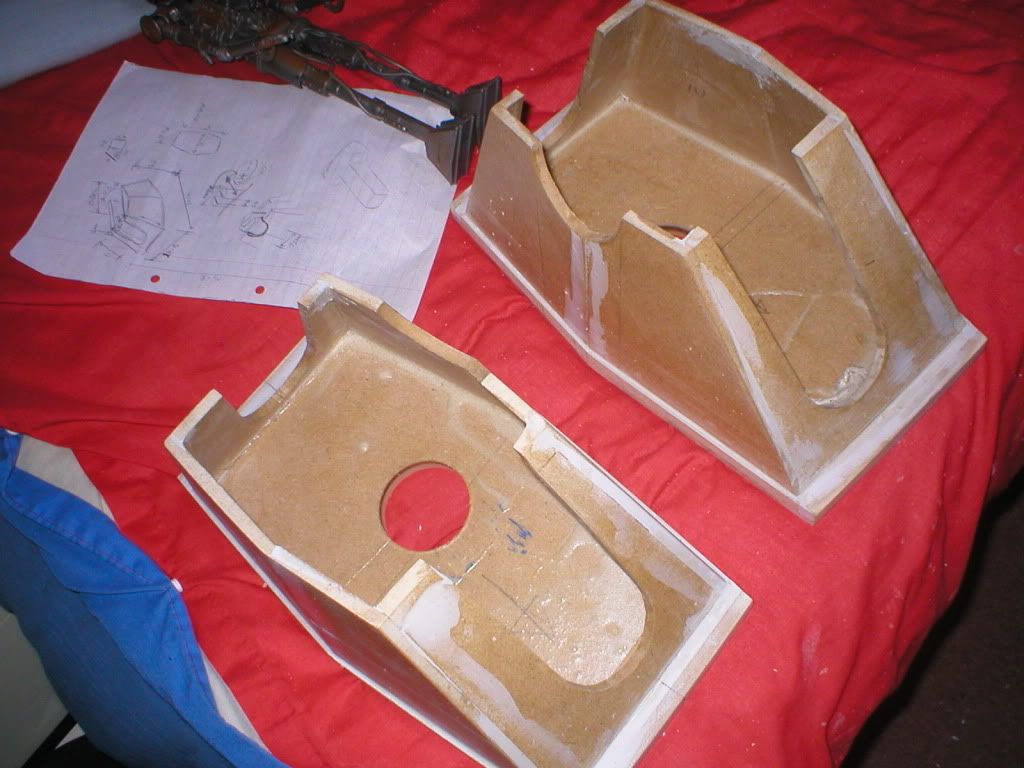
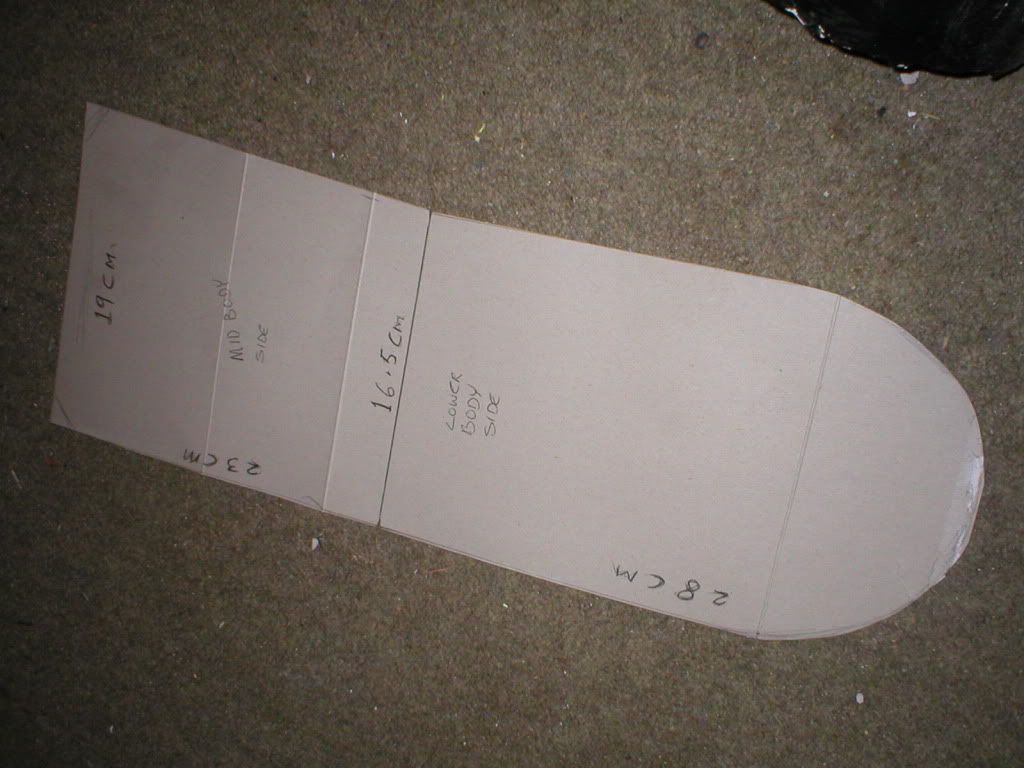
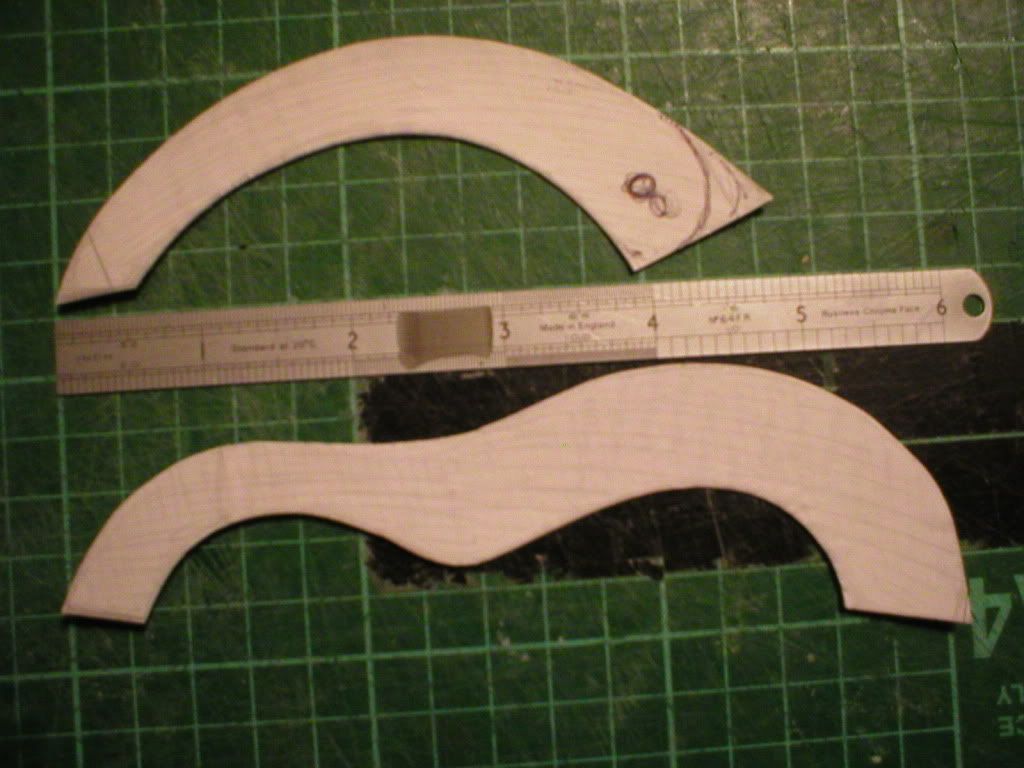
..Well the first bits and last bits were around 5 ish years apart ... but the build was on hold for a while as sourcing a derwent cast was a problem.Also life /reasearch and designing the structure took time .In all I didnt time it but quote it as taking about 2 /2.5 years of heavy tinkering ...what takes the time is being an icebreaker on a project ...if any one wants to use my IG info / measurements etc please feel free to do so , thats why the few templates I used got photographed with measurements on them .
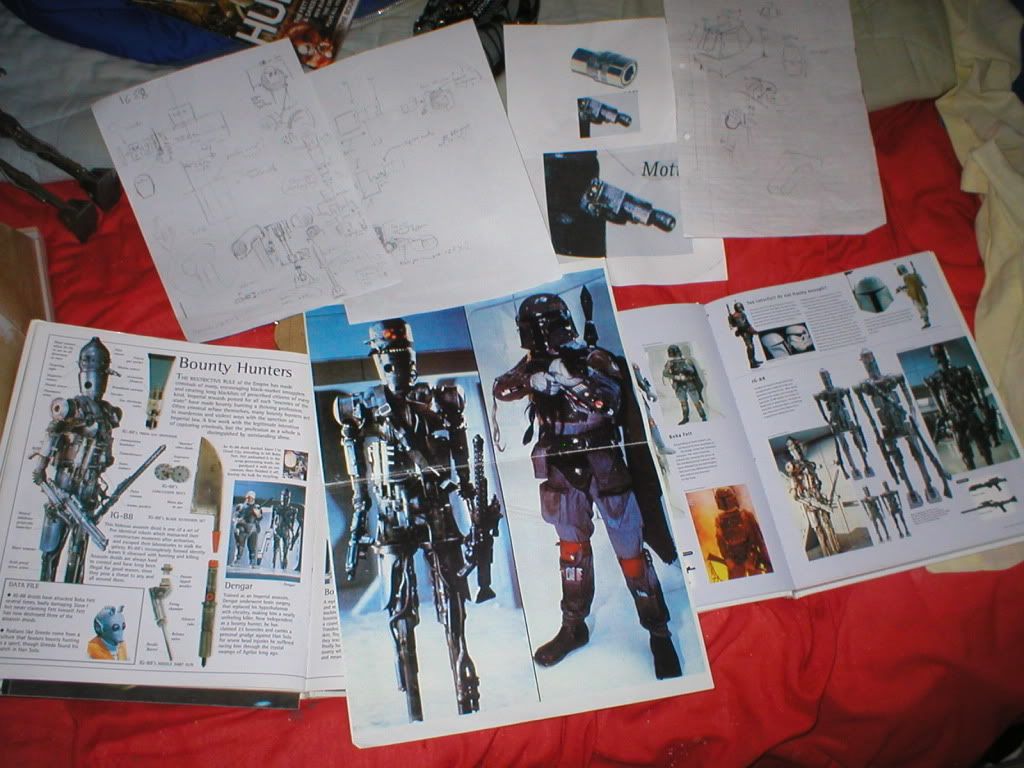
Overall it takes a LOT of time reasearching ,designing and finalising what the build is going to be like , I really did get headaches spending hours with w magnifying glass comparing angle shots to guage heights of details from the surface ,and particularly in IG's case ,as there are so few shots , whether some details existed at all.
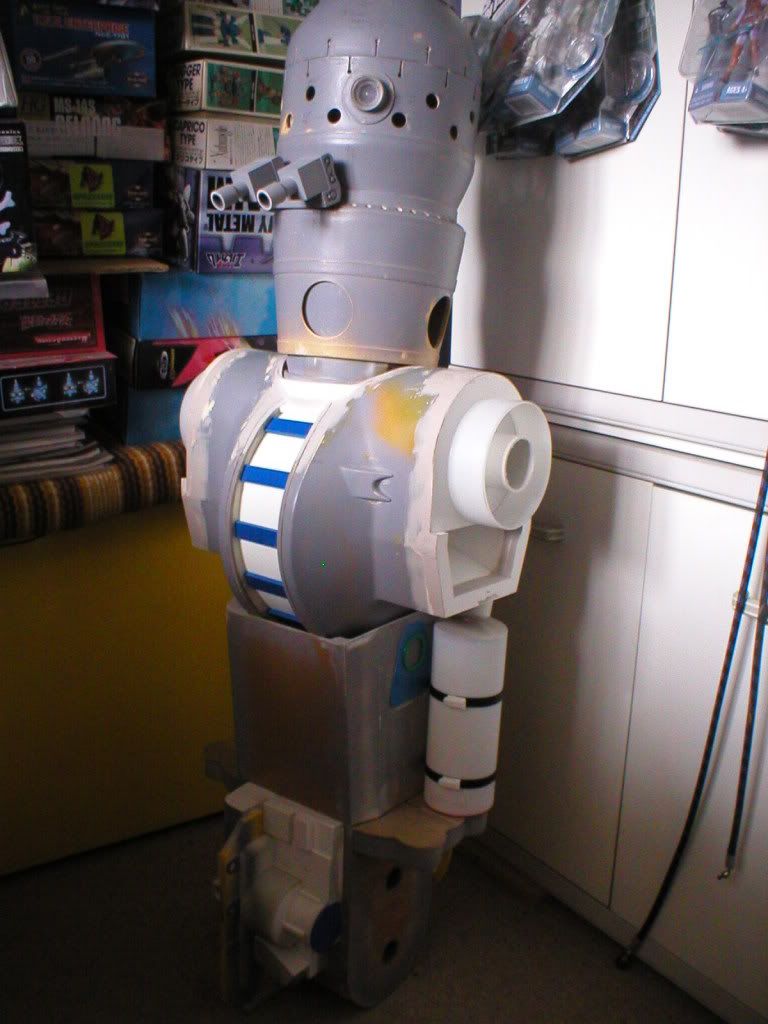
Some modification was made to IG as we know him as Ive already stated ,I wanted a figure that LOOKED mobile and also would have display versatility ..to this end I added the fake gaiters at the hip and ankle and extended the ones round the knee making them more obvious .
Why?
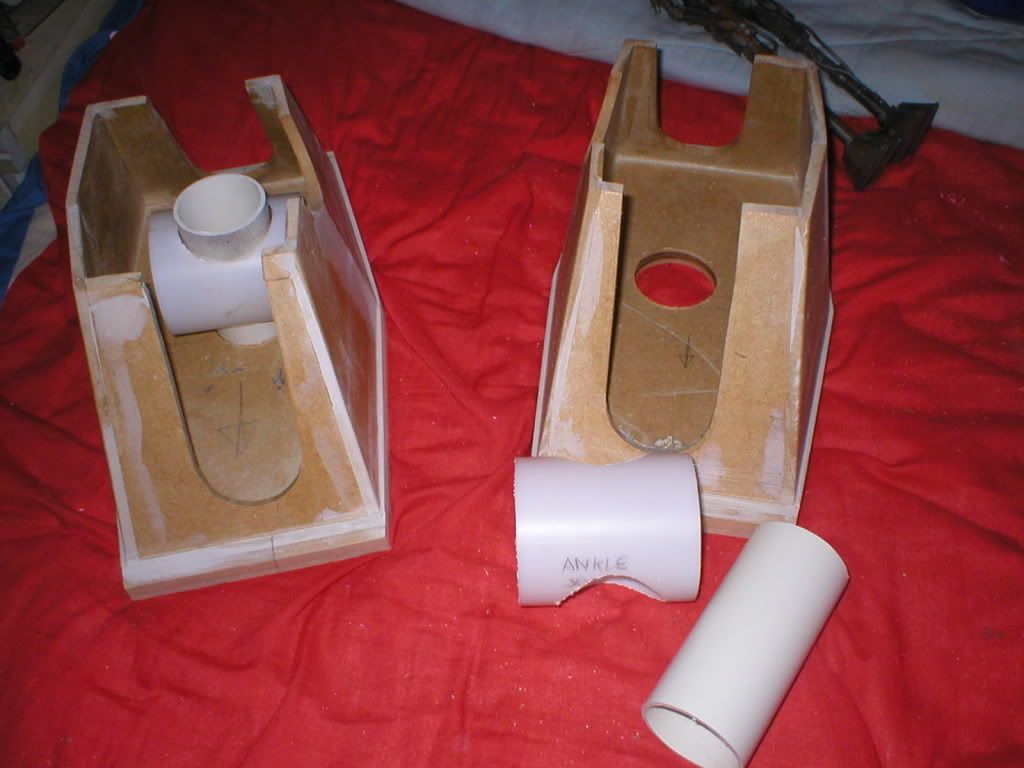
Well , if you read this far , youll know about the 'F PIN' in the hip with the fake gaiter attached .
This is the basic standing hip joint , IG ver.1.1......IG ver.1.2 has some additions,there will be a second 'F PIN ' for each hip .If you imagine a capital 'F' thats the first pin , now imagine an 'F' in italic style. This will be the second pin when the final angles are sorted and when I get around to building them , it will have a slightly expanded fake gaiter on it .
Now imagine a slightly bent joint for the knee block and ankle in the same way and hopefully , halfway through a gig , IG will suddenly be reposed !
Why not joint him?
Joints are difficult , on this scale we are fighting gravity and leverage principles , and I dont have a machine shop ,only a drill ,scalpel ,beltsander staple gun etc .Also the sheer weight of IG means I want to be in no doubt he's stable at gigs .Relatively he's not that heavy ,but for the potential strain on lower leg joints ....
Also ,when wrestling with this problem with the battledroid I realised ..."how much was he actually going to get reposed ?"...at the time of Roger ,I was just building for myself and wanted a cool ,unique floor ornament (instead I got Roger )so came up with a neutral ,stormtrooper ish leg pose (before TPM was out).Now ,IG stands around like a hat stand ...and I would like to push things and get a bit more 'life 'out of him .Its during the build that I really noticed Roger is interesting from all angles whereas IG is basically roadkill from the side ,... he needs all the help he can get!...
...hence the changes ....

..youve been good if youve stayed awake this far ....:cool
Time for more piccies!!!!...YEEEEHAH!

Arms next ! :)

P1010001-3.jpg


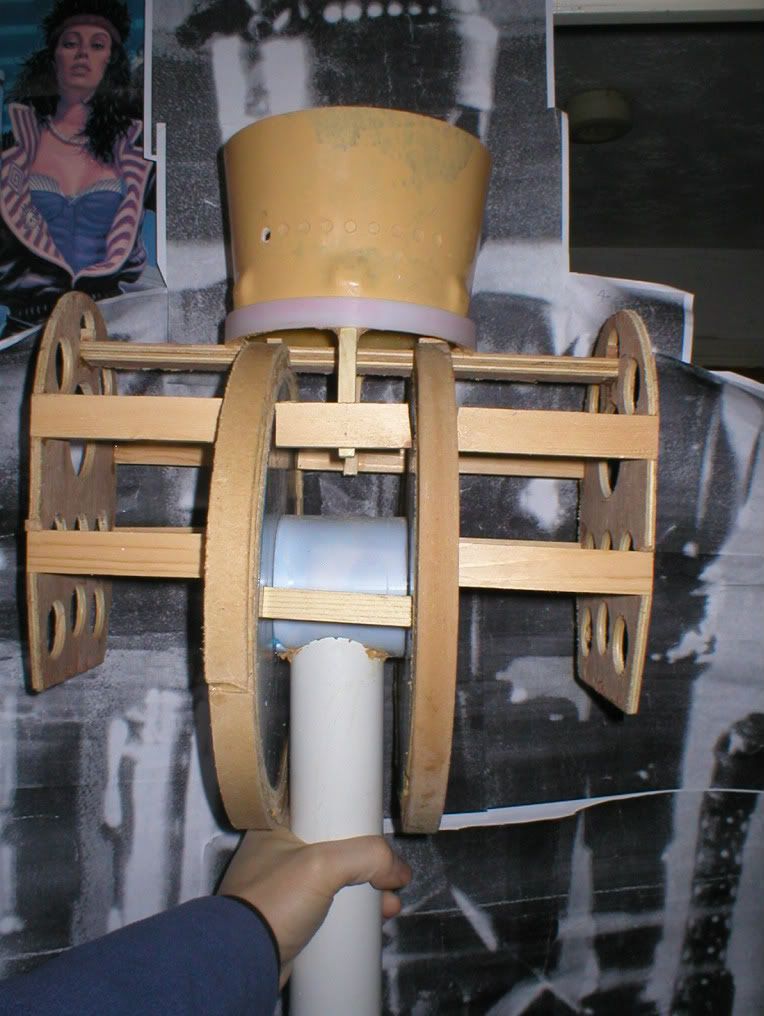
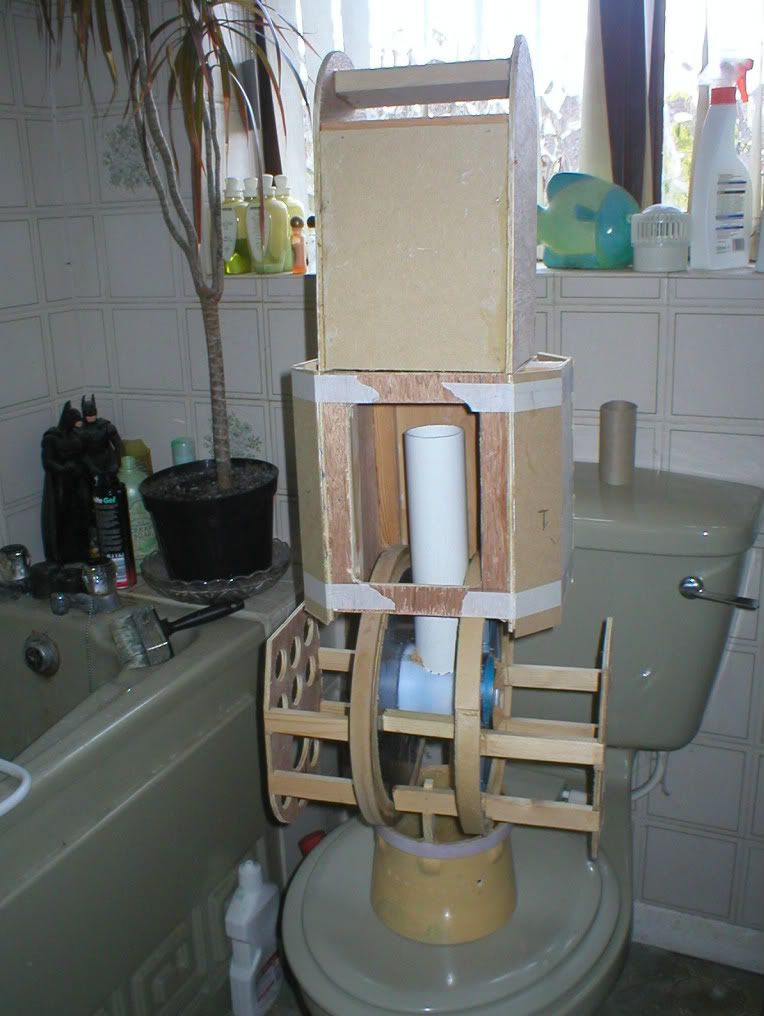
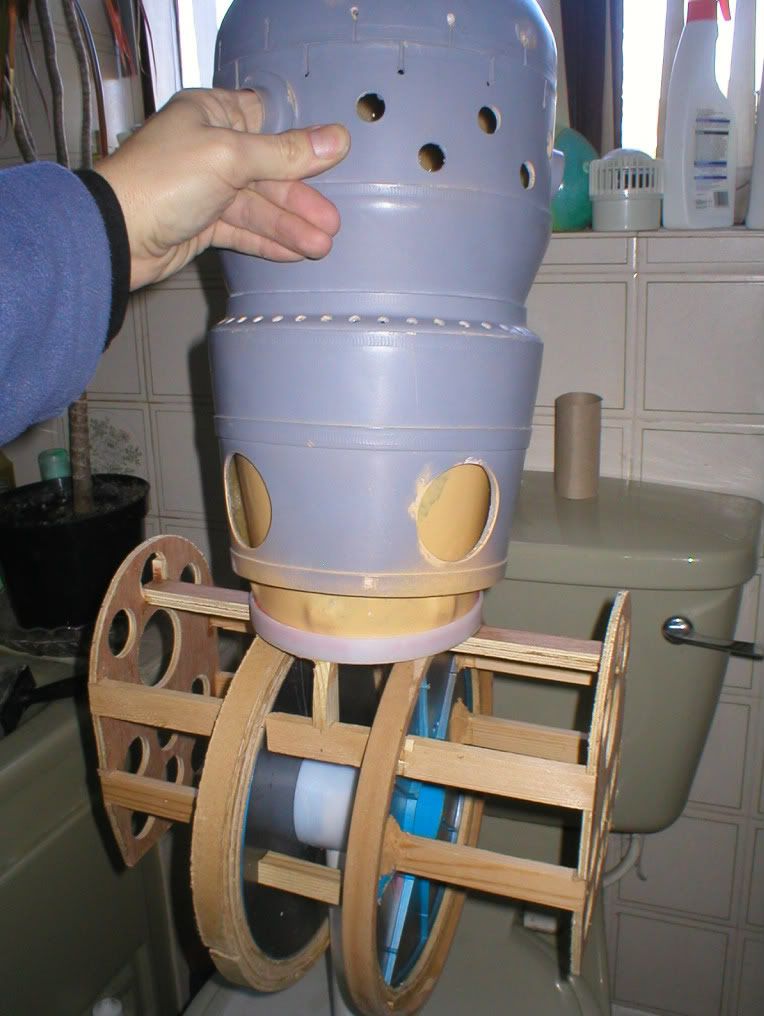
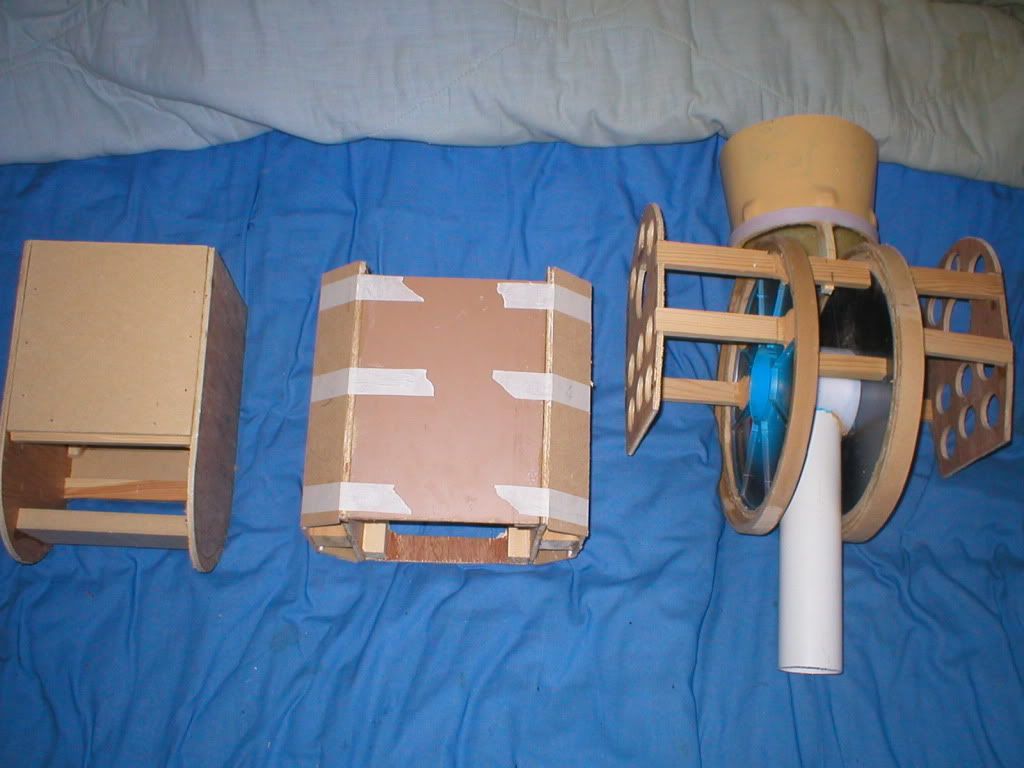
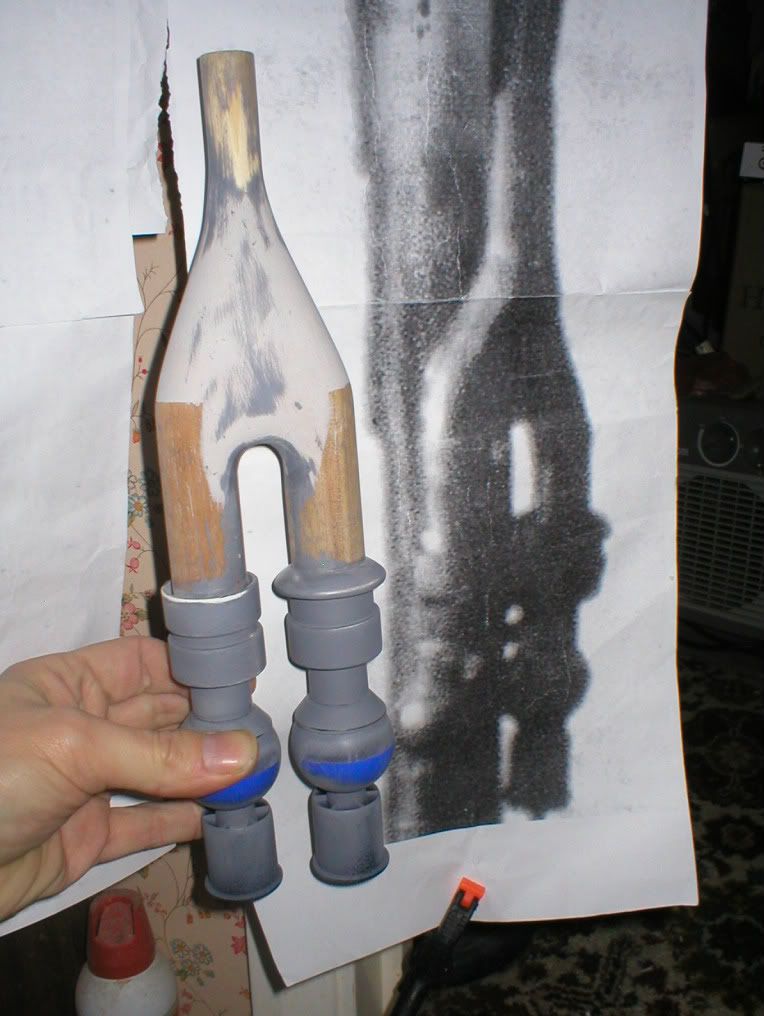
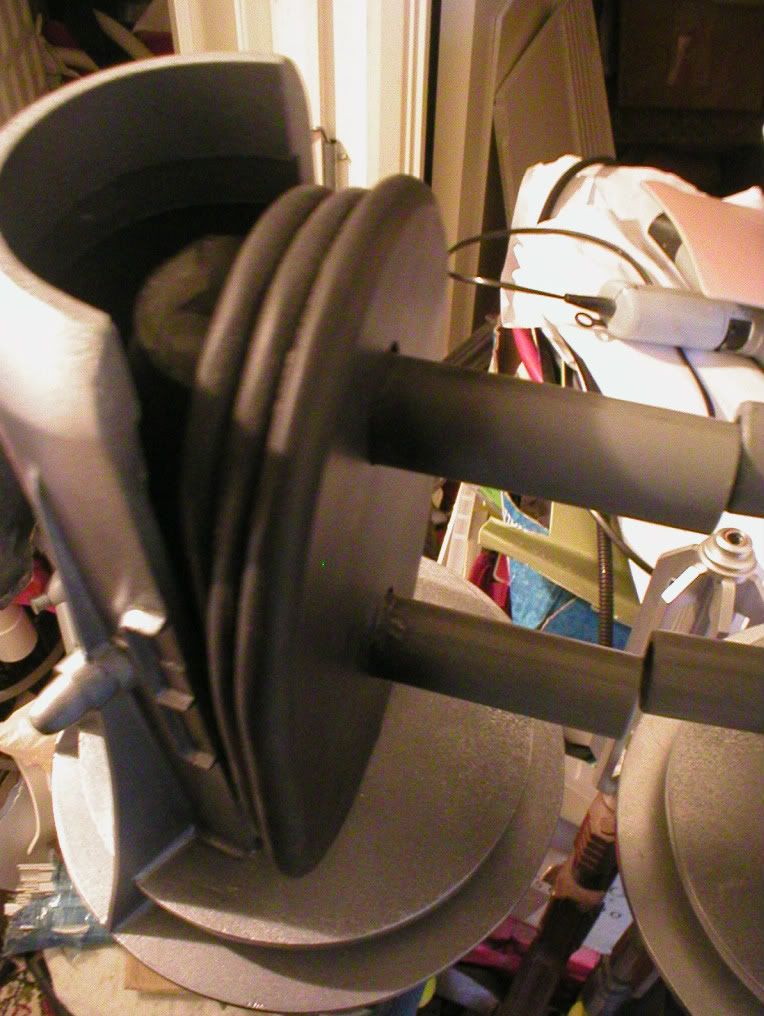
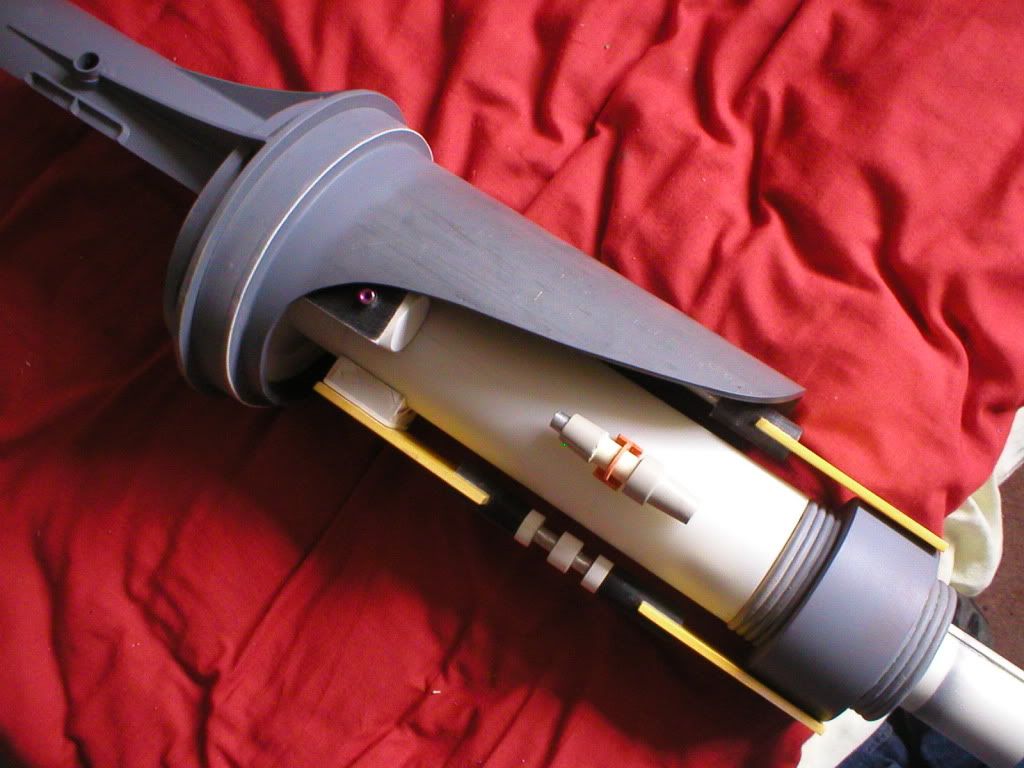
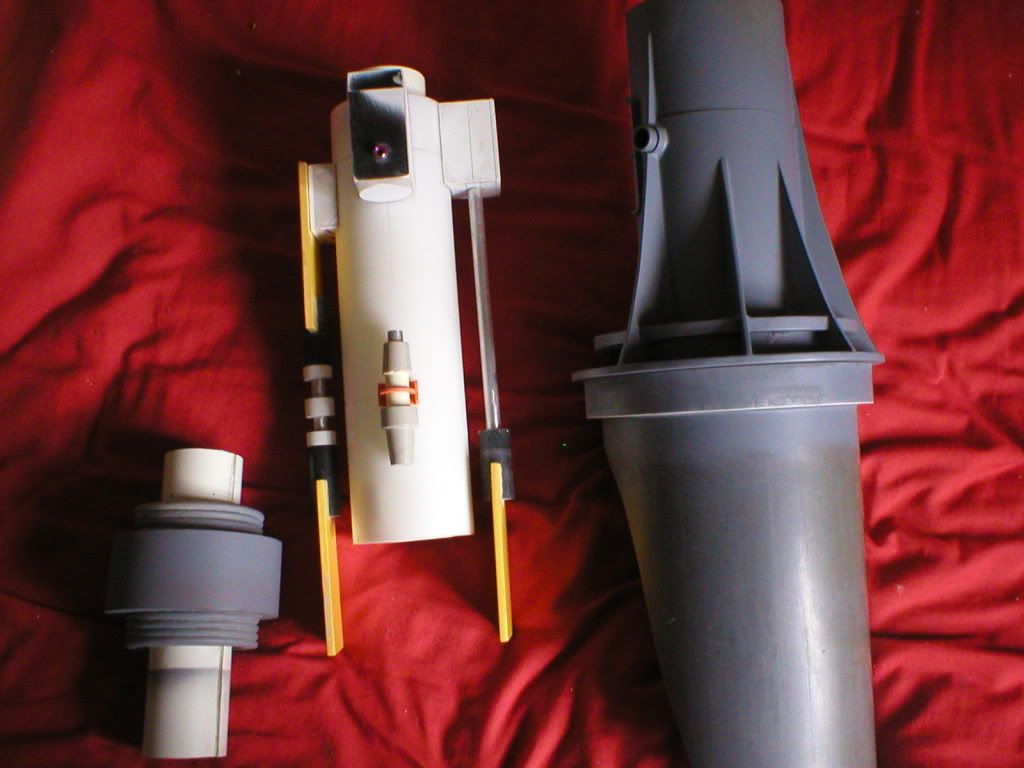
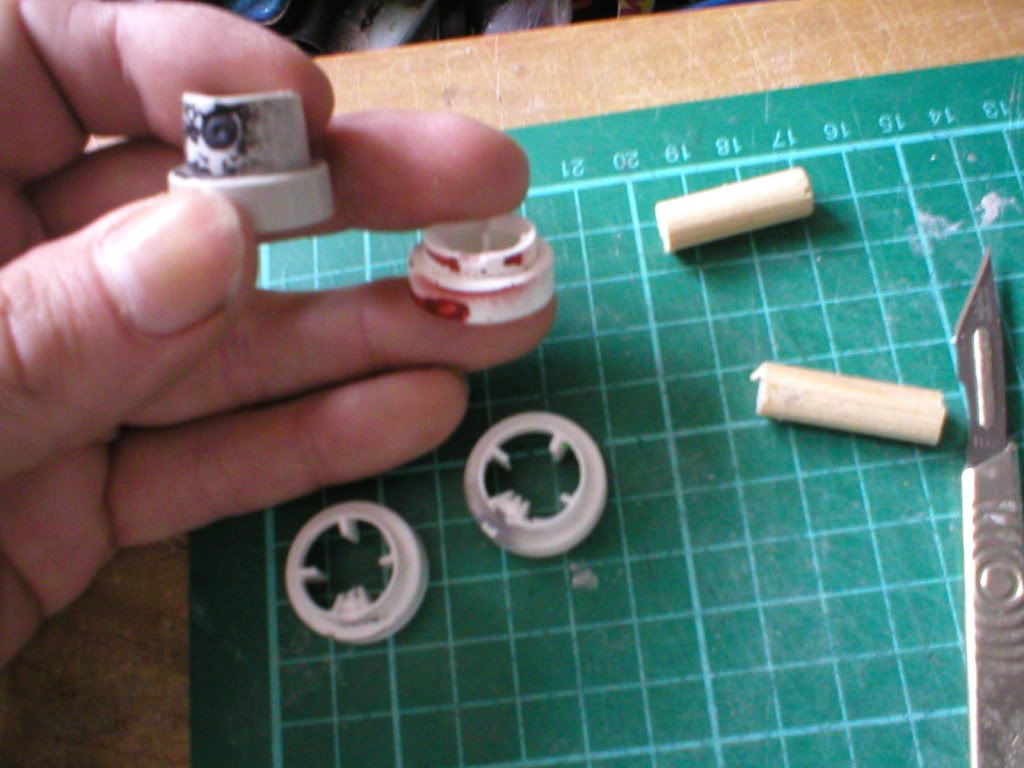
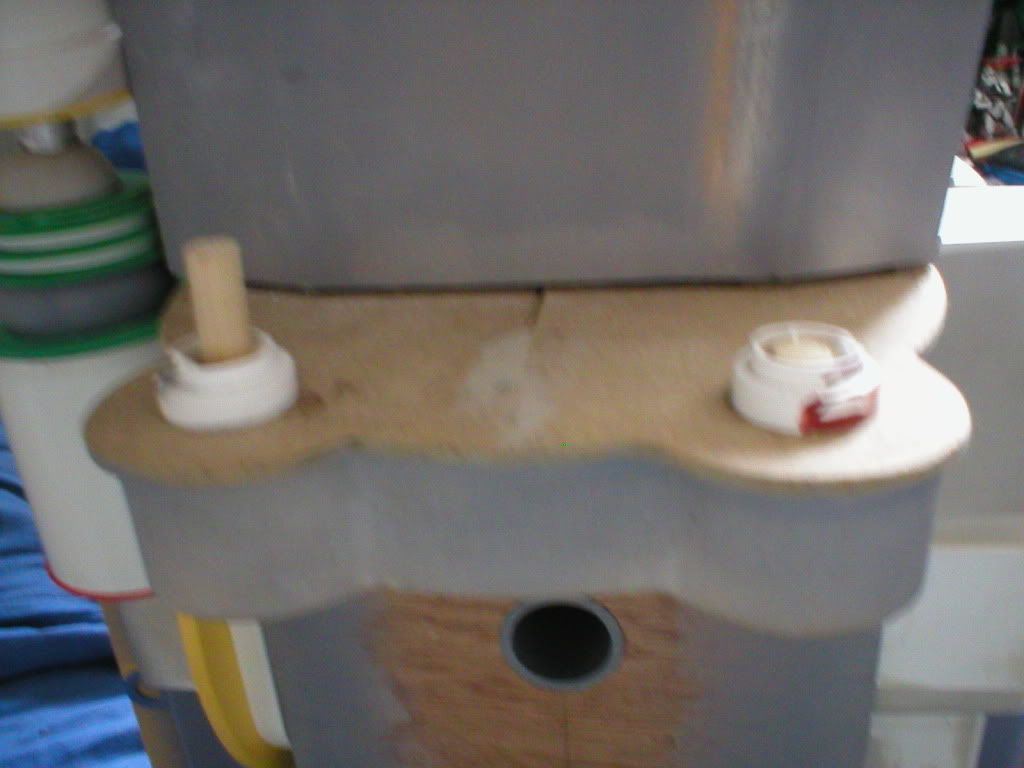
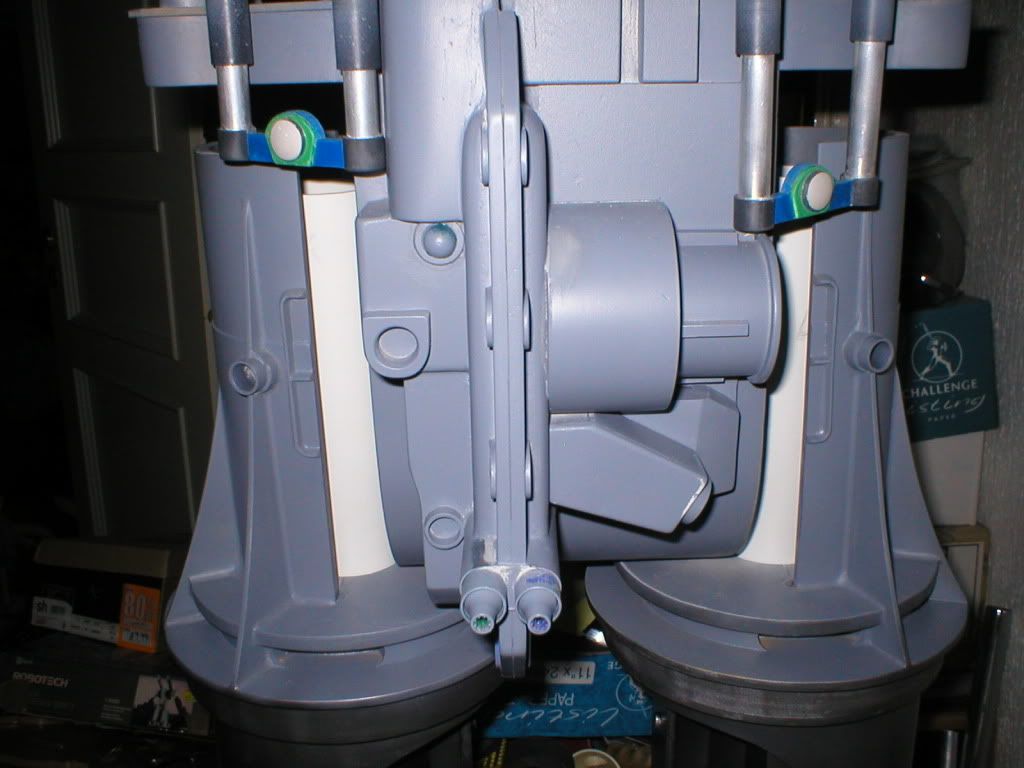
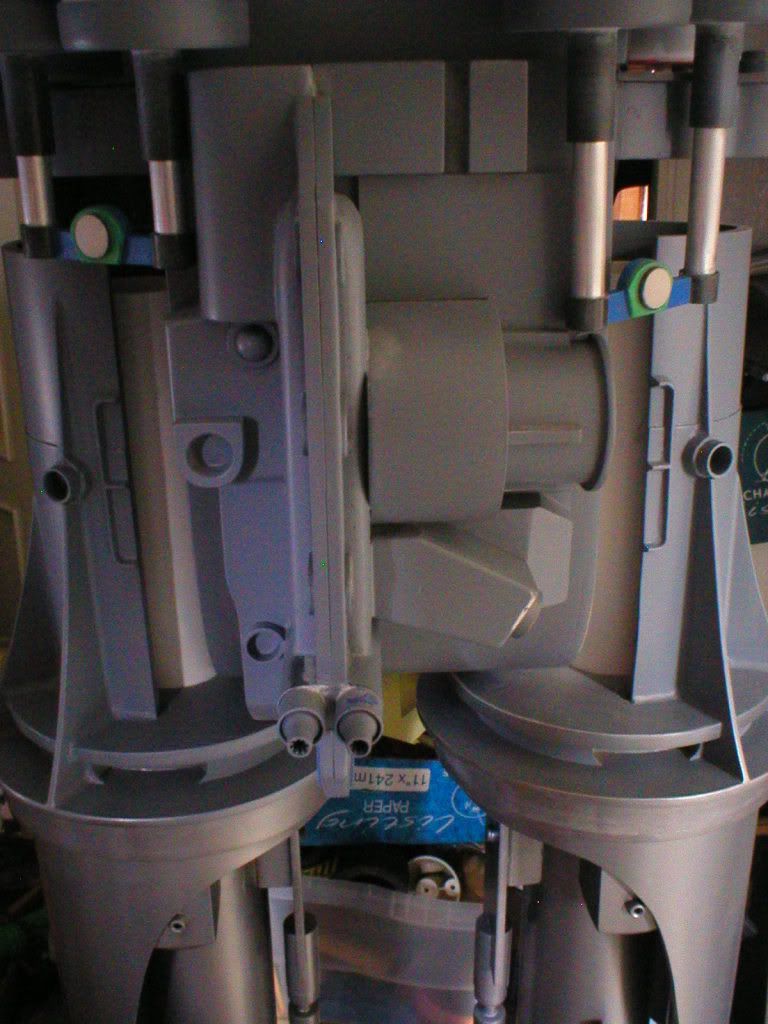
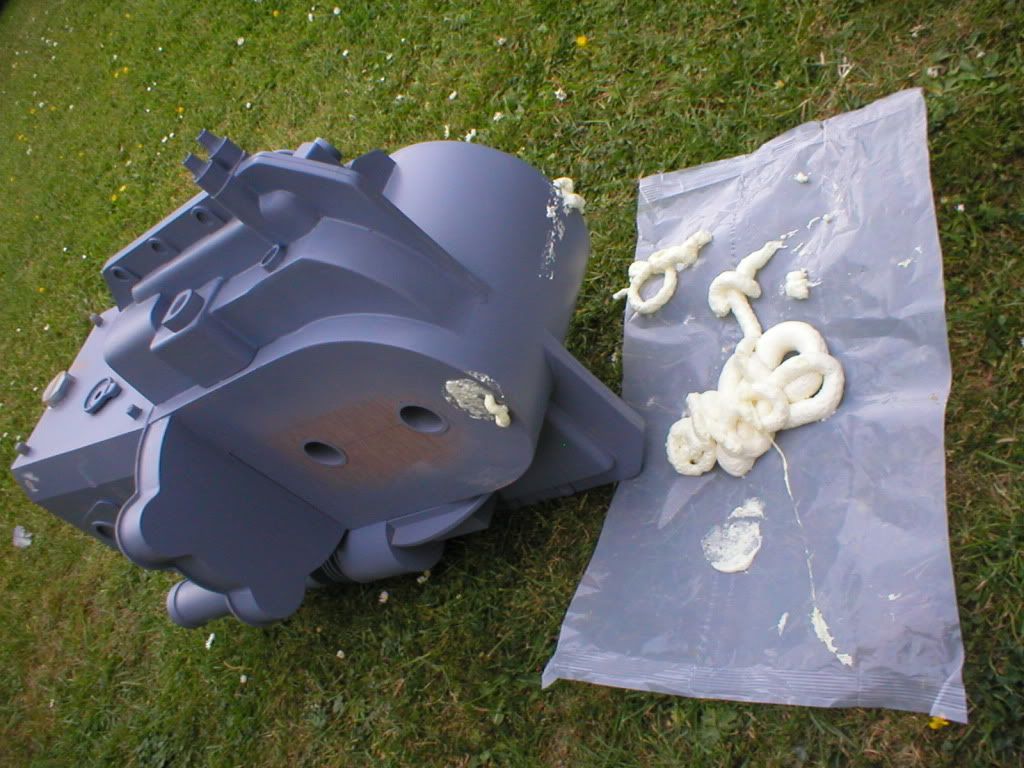
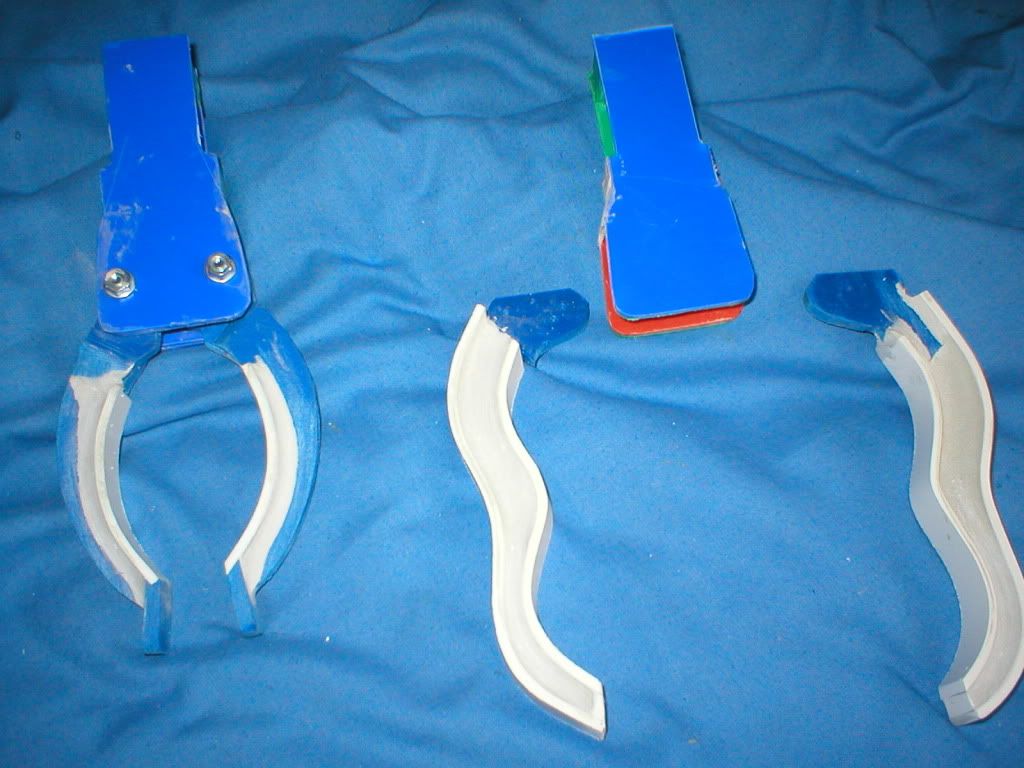
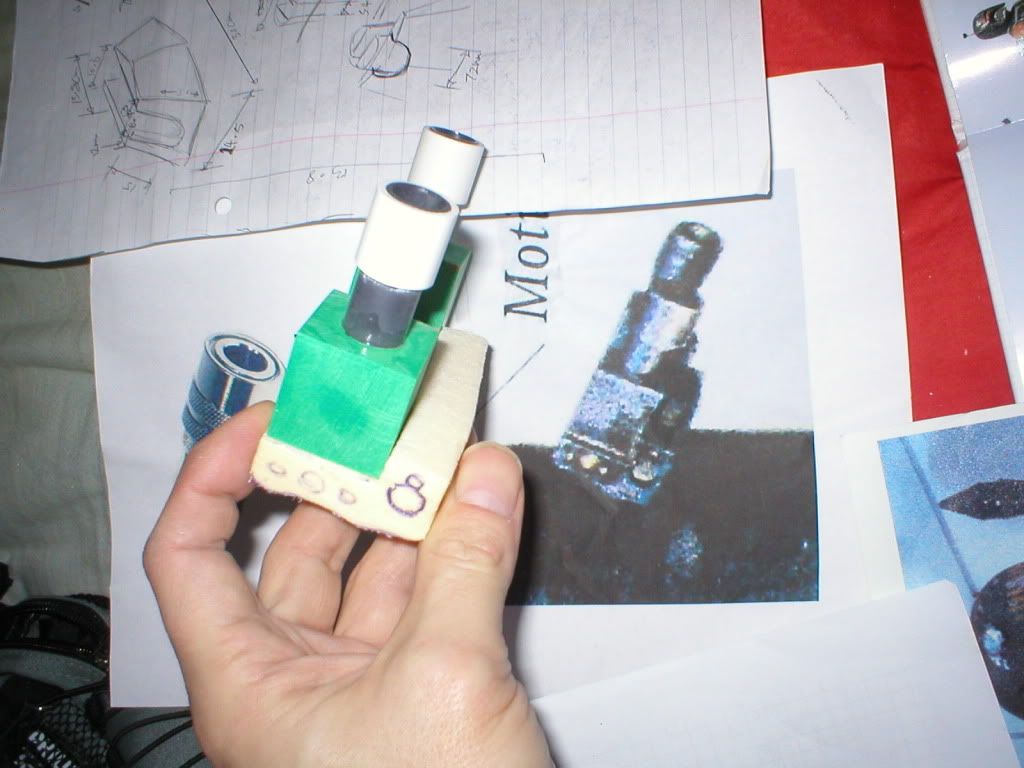
This is an overview of the arm construction, here you can see the bicep ,forearm ,elbow joint and claws..

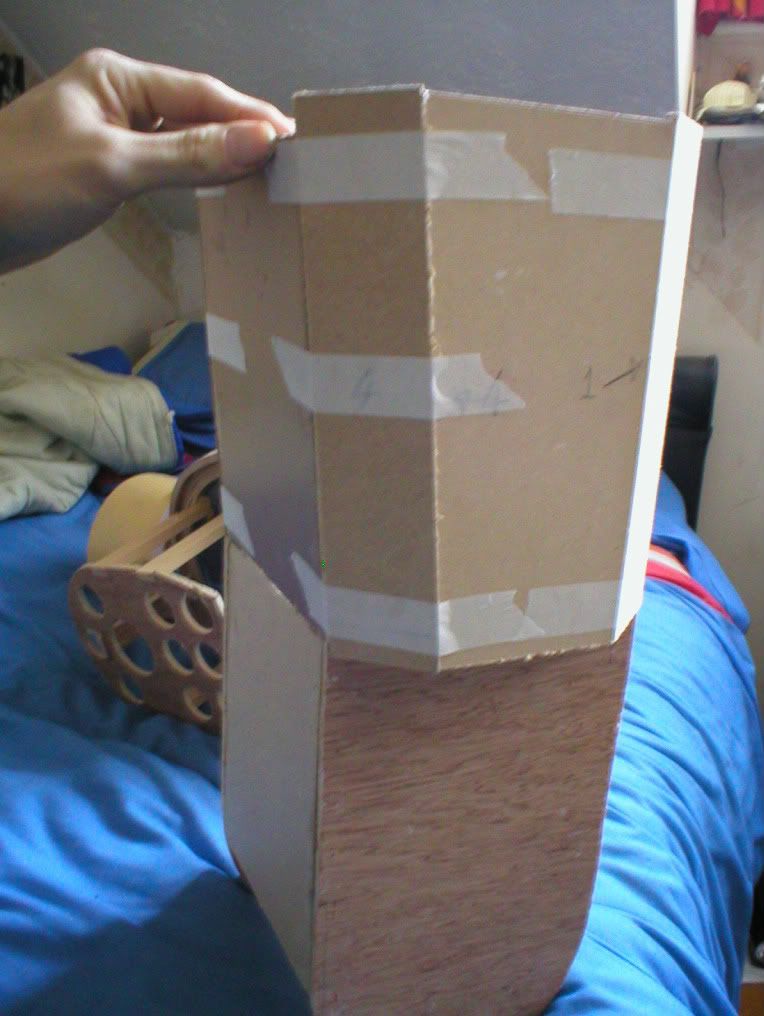
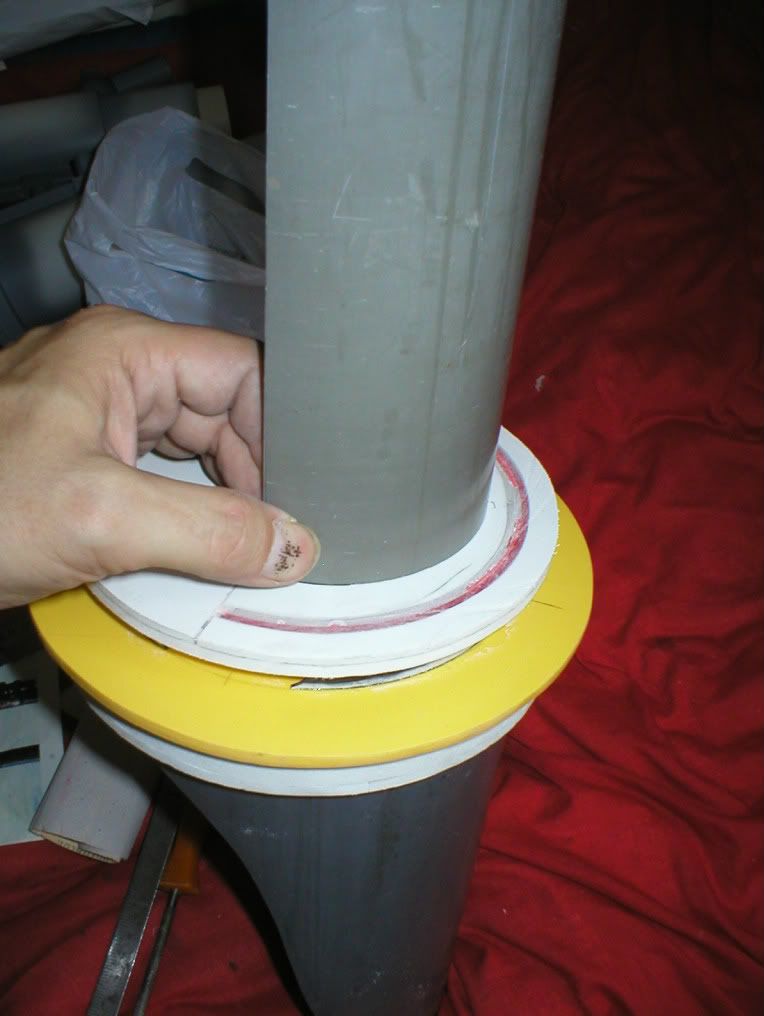
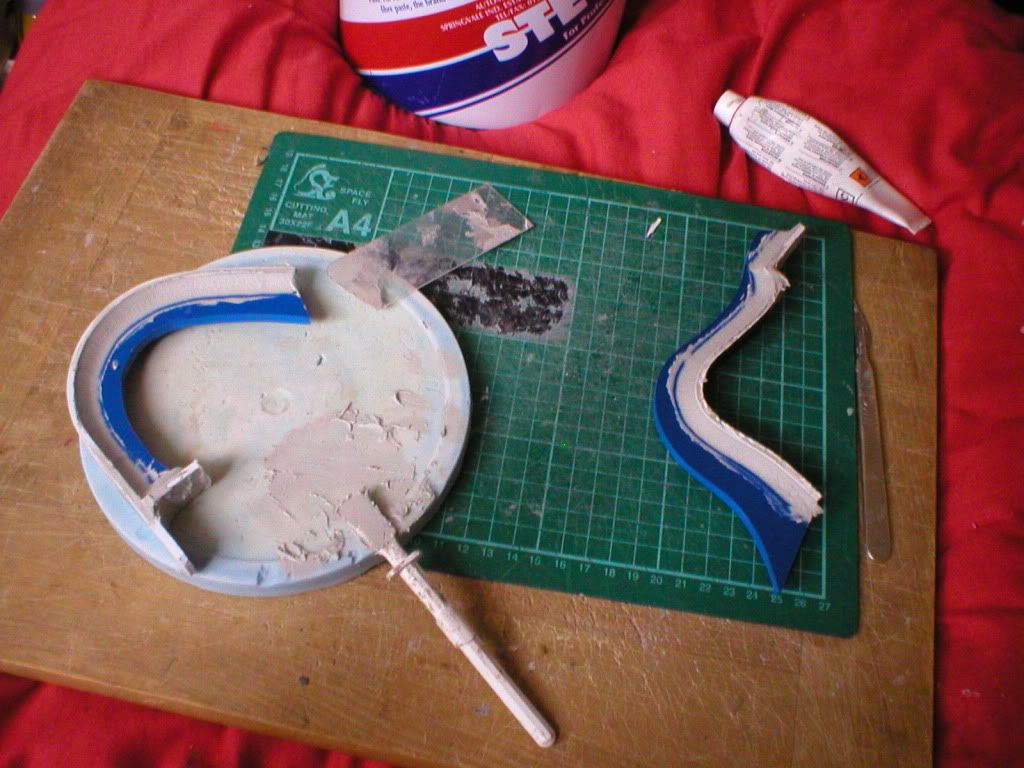
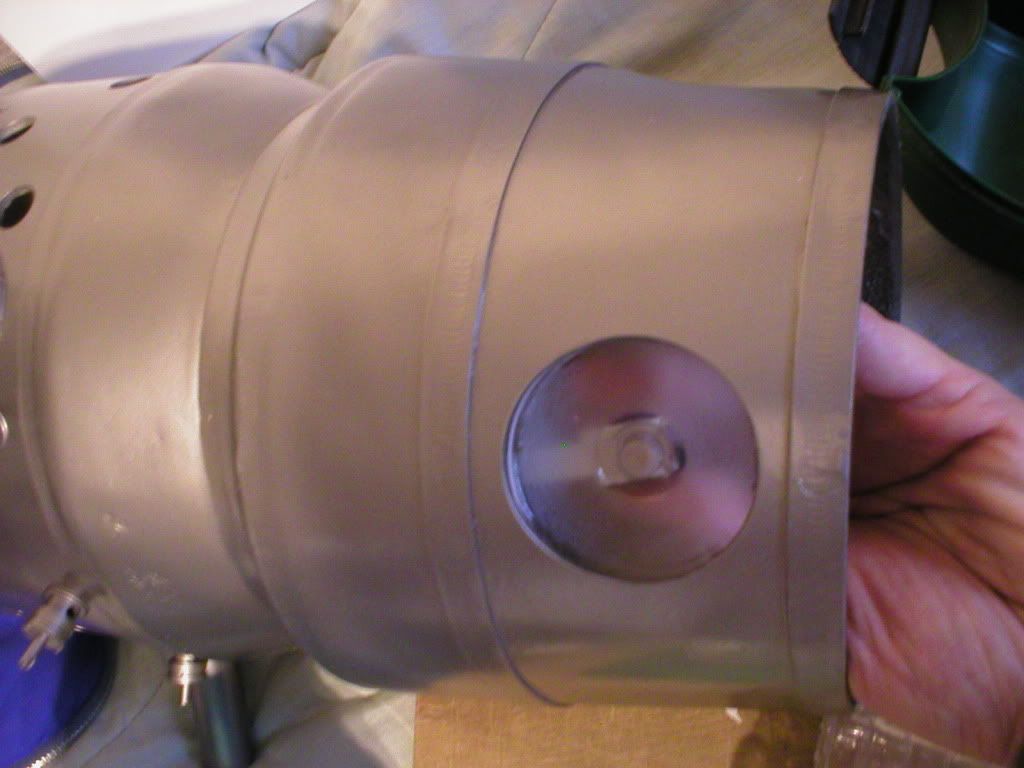
First the bicep was constructed...

P1010010-5.jpg


...and the detail on the back of it...

P1010289.jpg


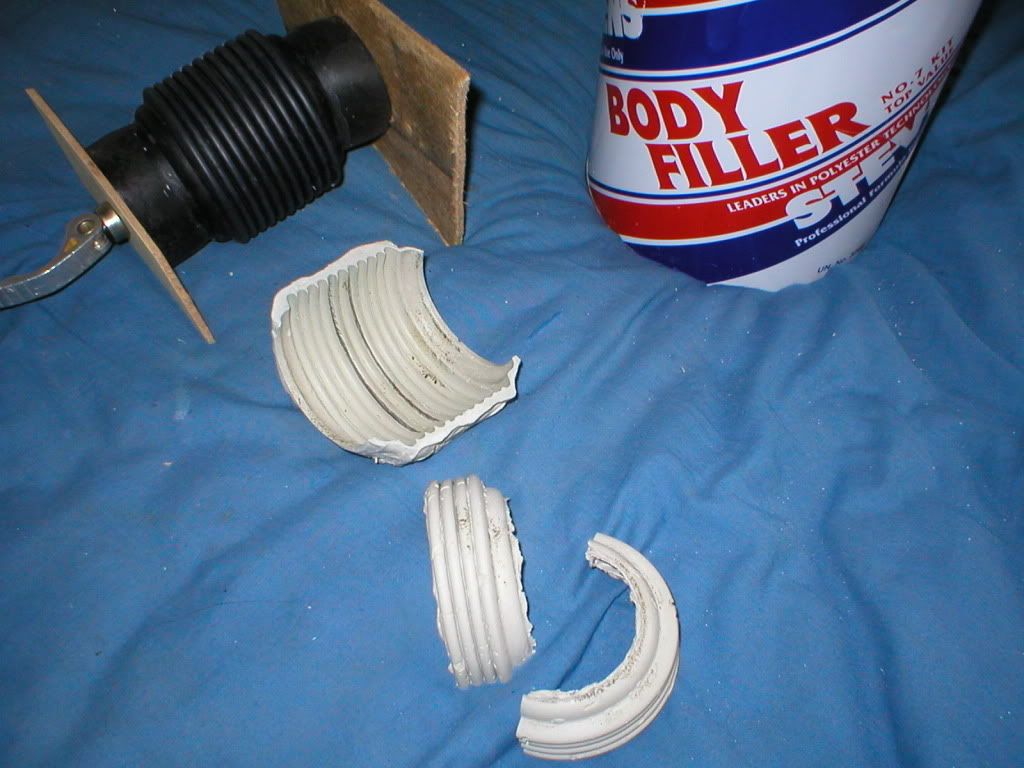
this is a pink plastic egg pod thing ... and yes I think I found that 'in the street'...:lol
(I think I'll get 'I found it in the street as a T shirt! )

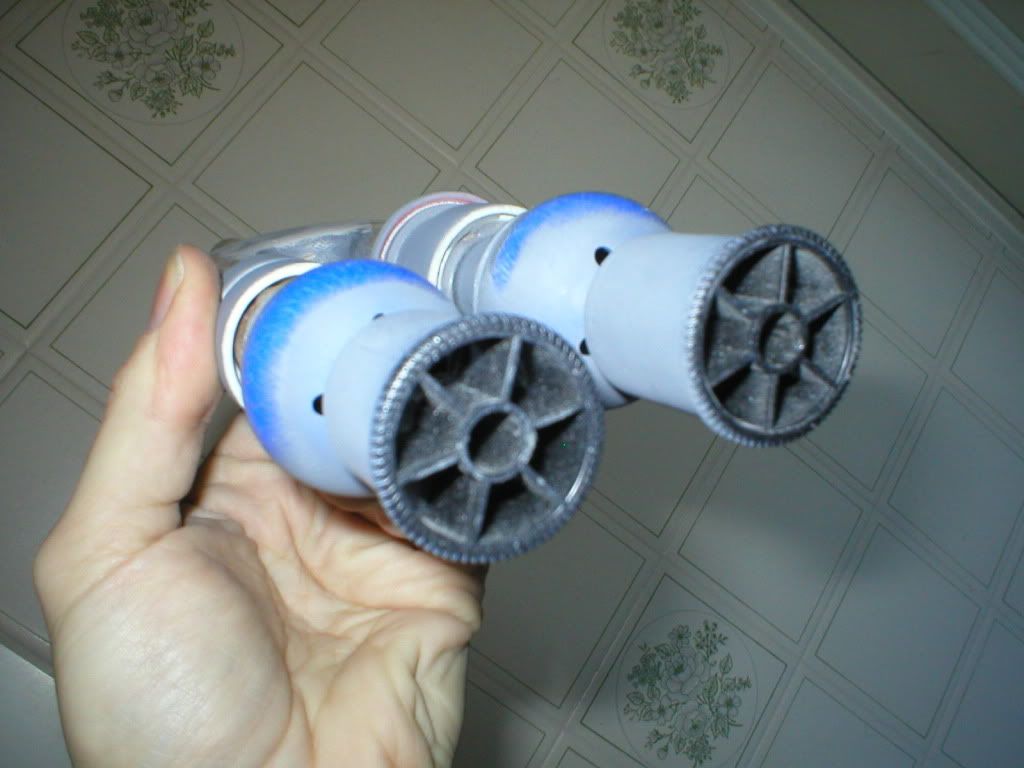
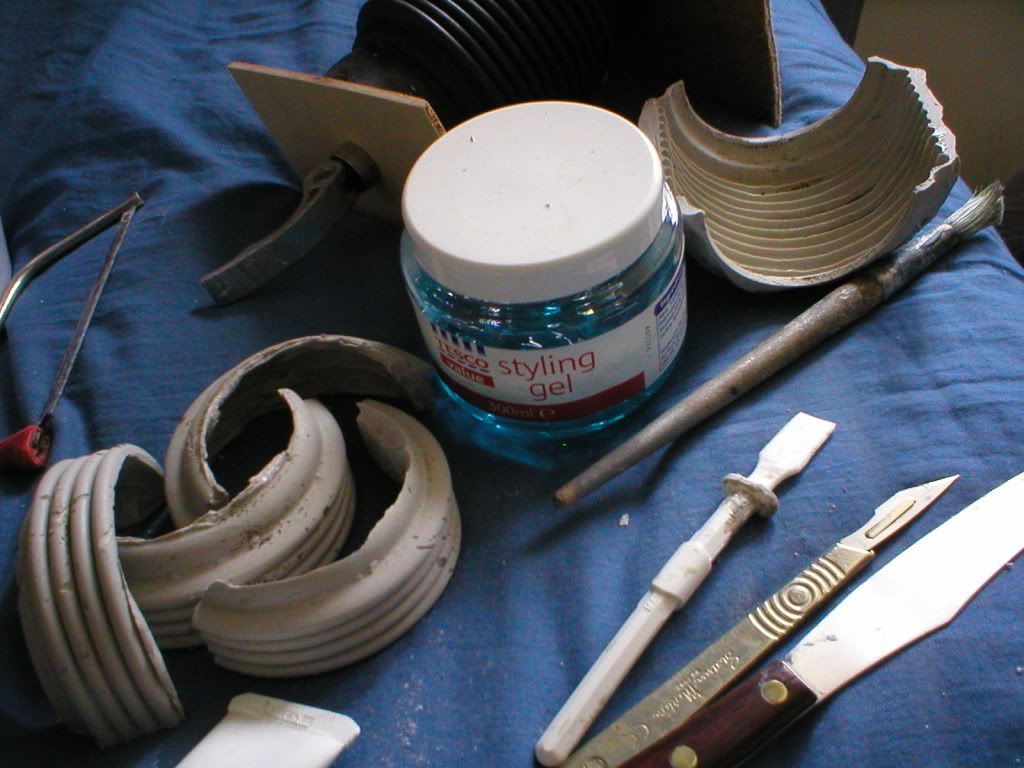
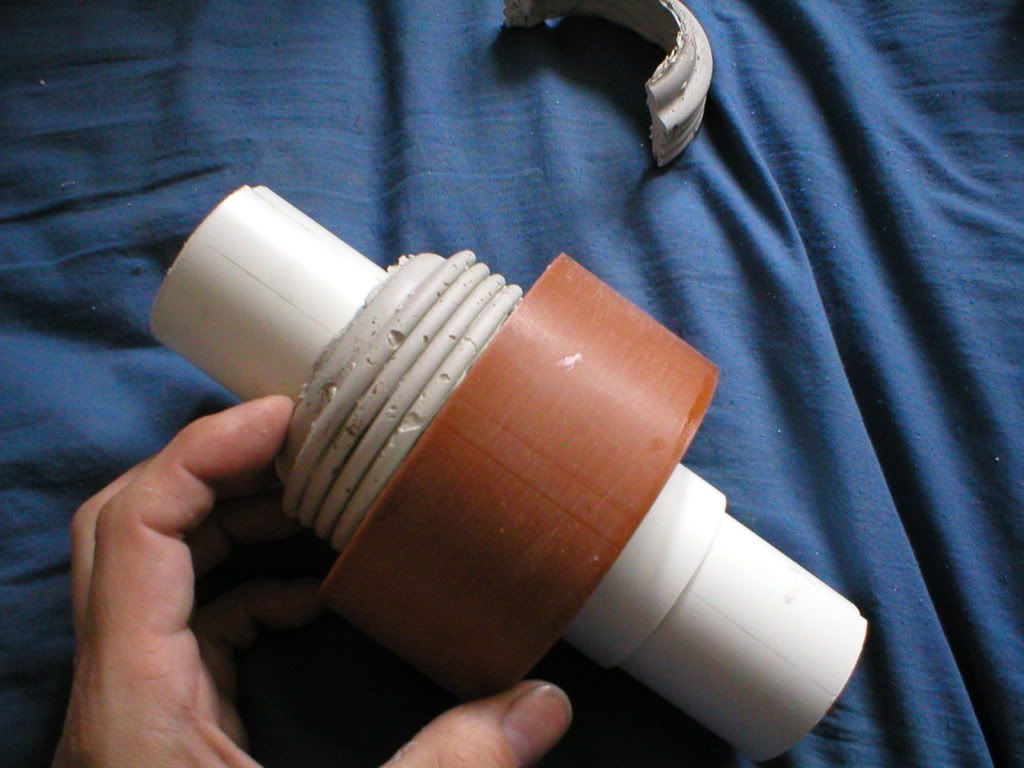
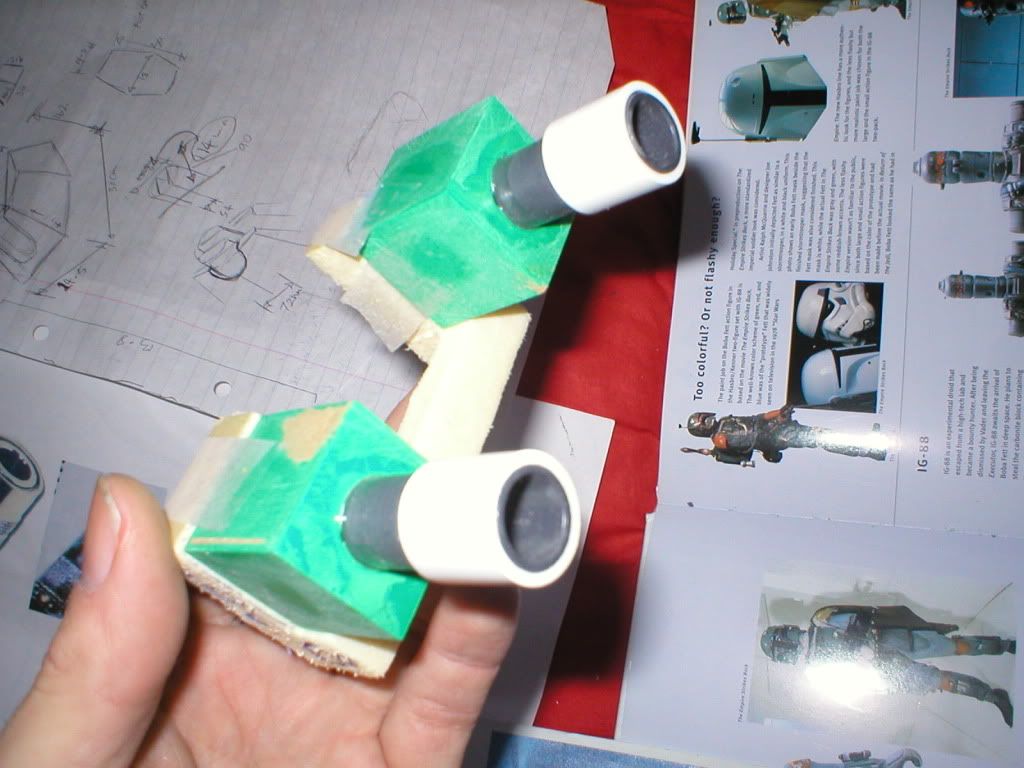
I cast a hollow egg shape inside it in car filler as shown (times 2)...
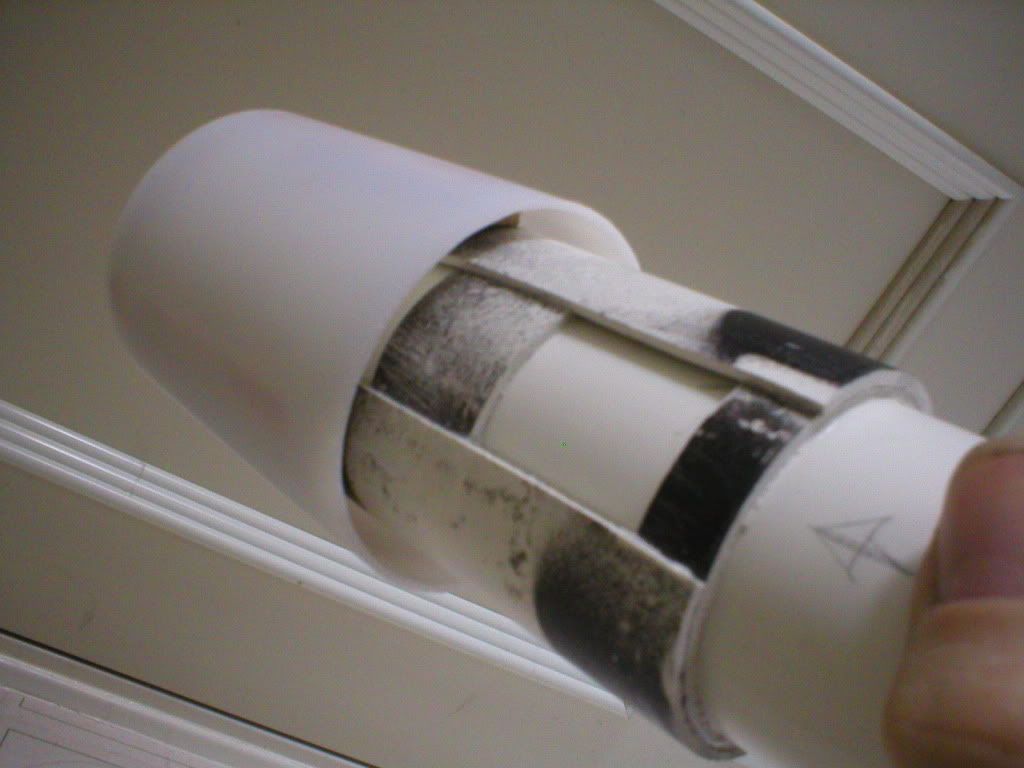
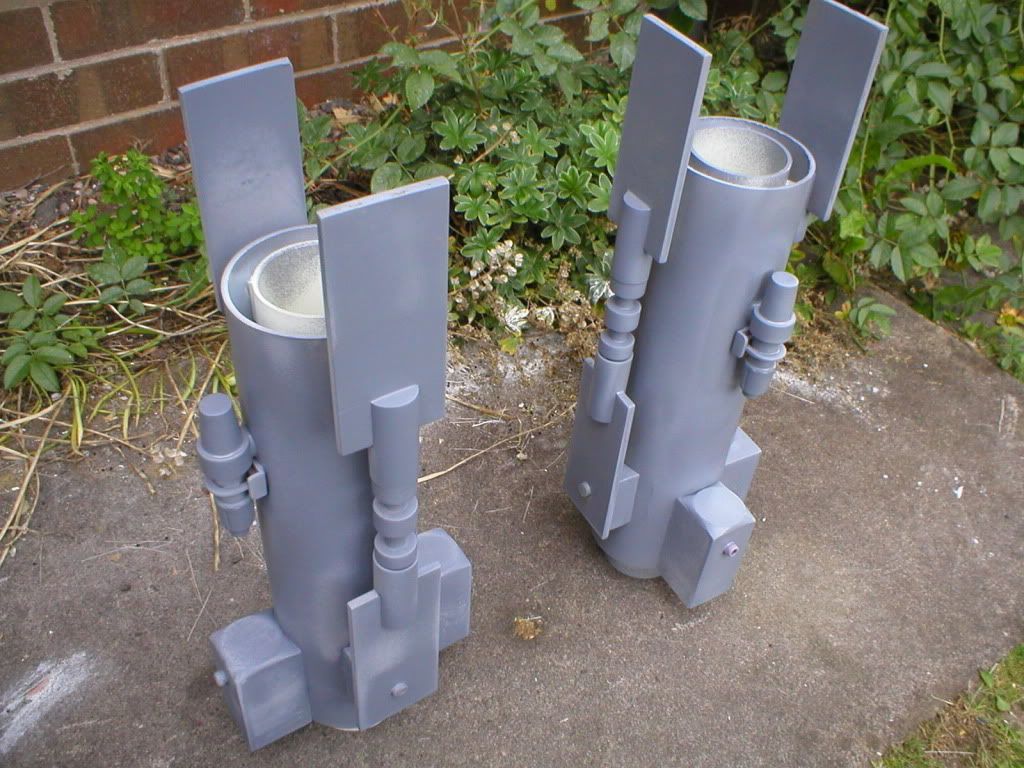
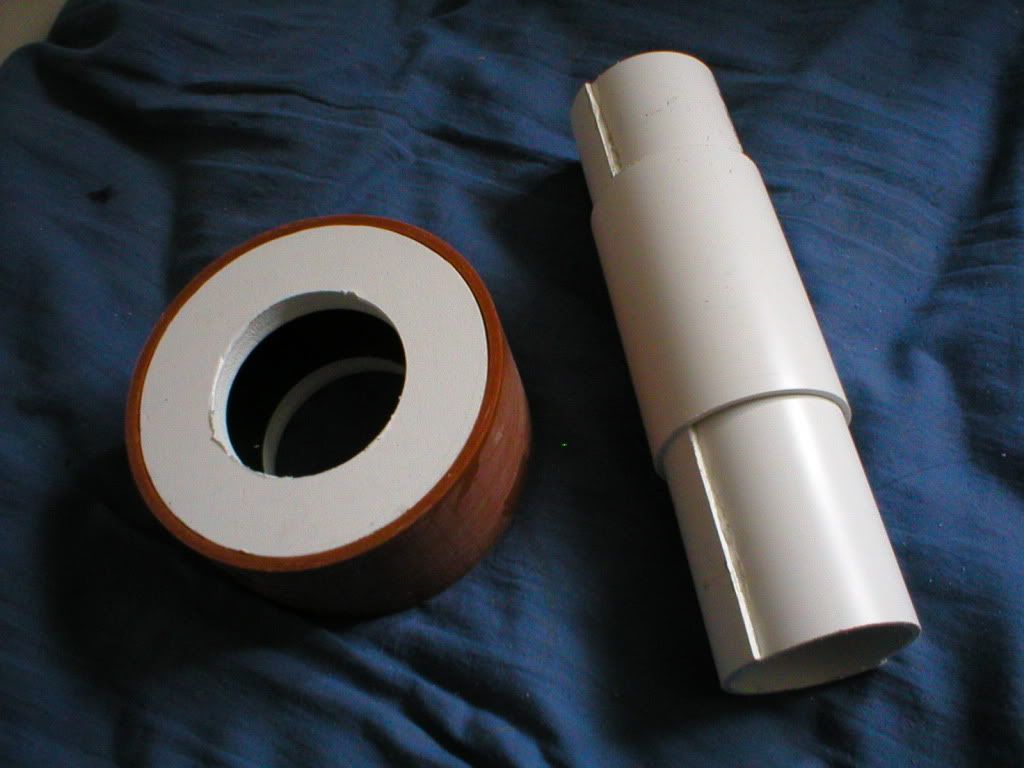
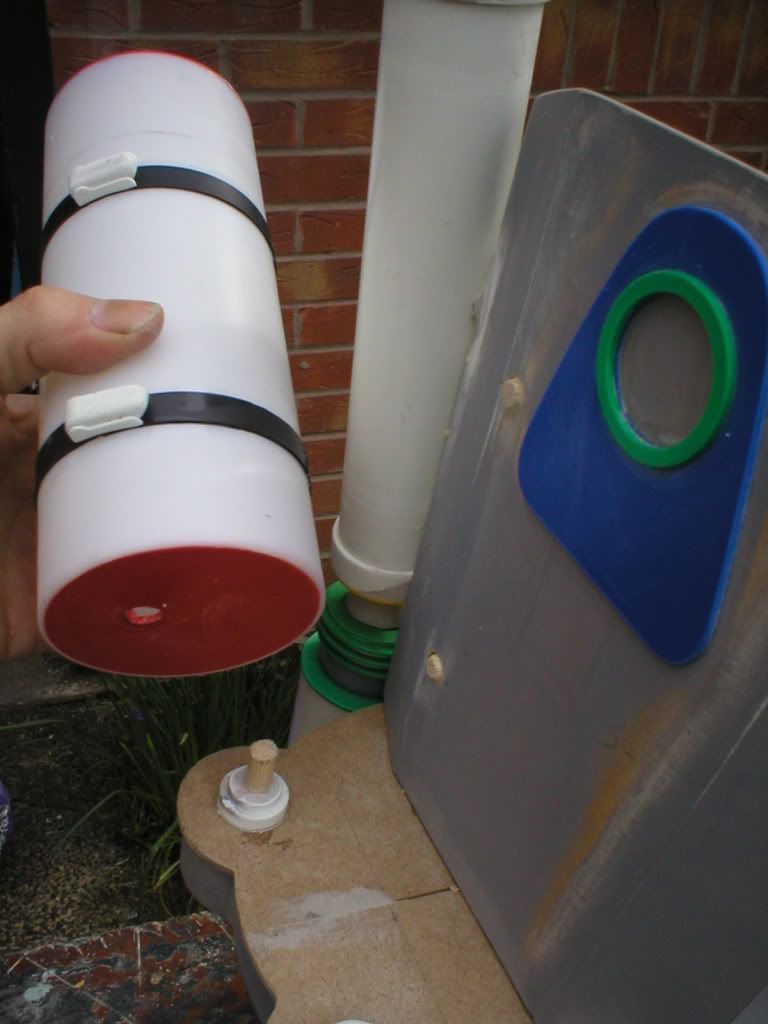
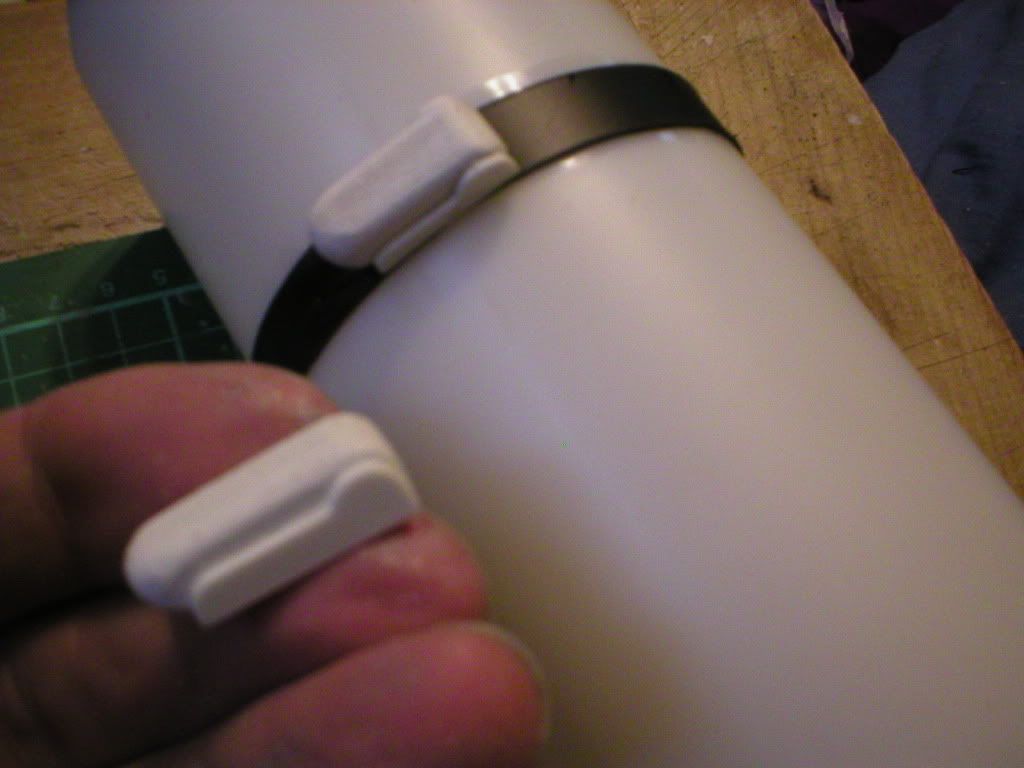
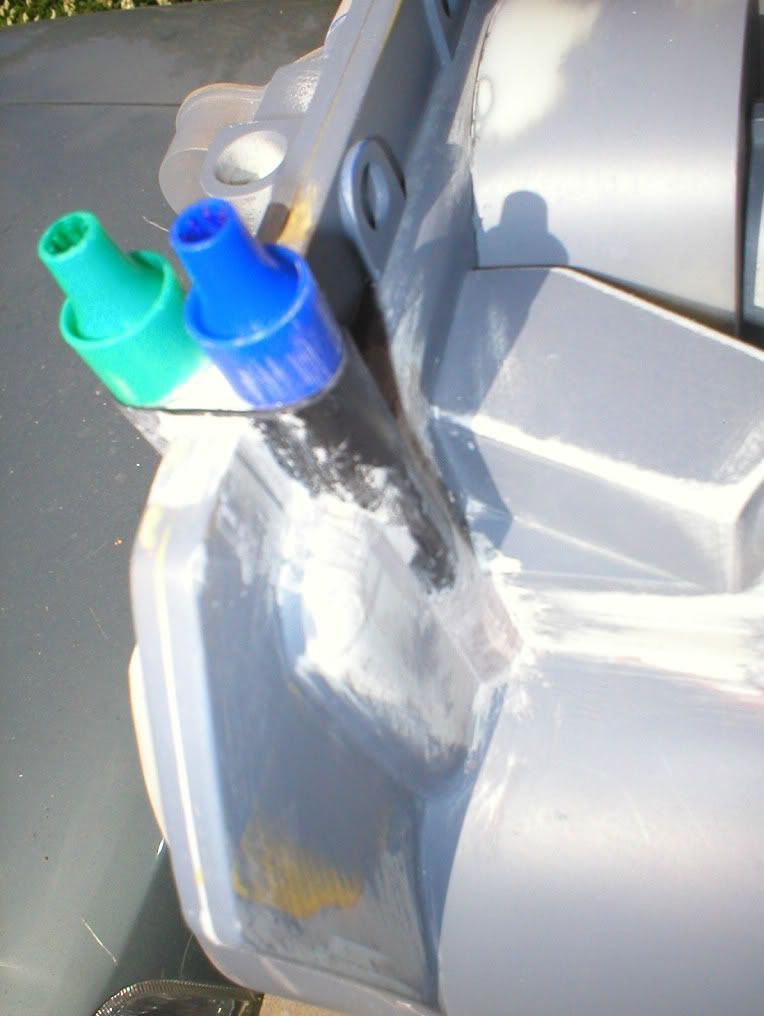
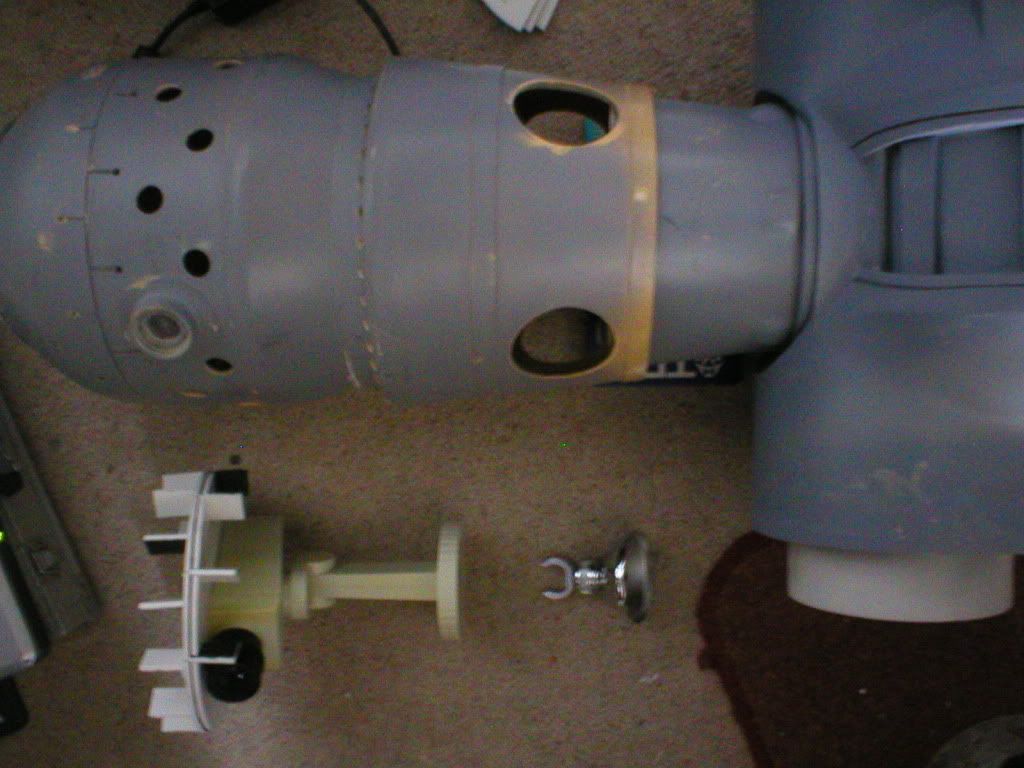
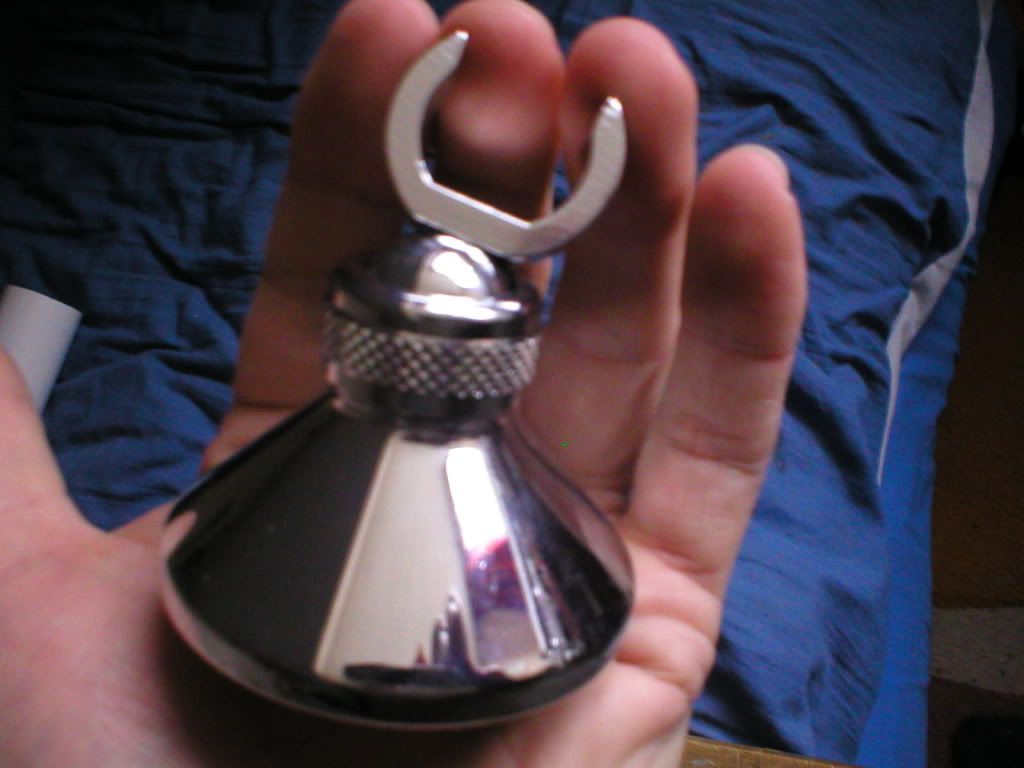
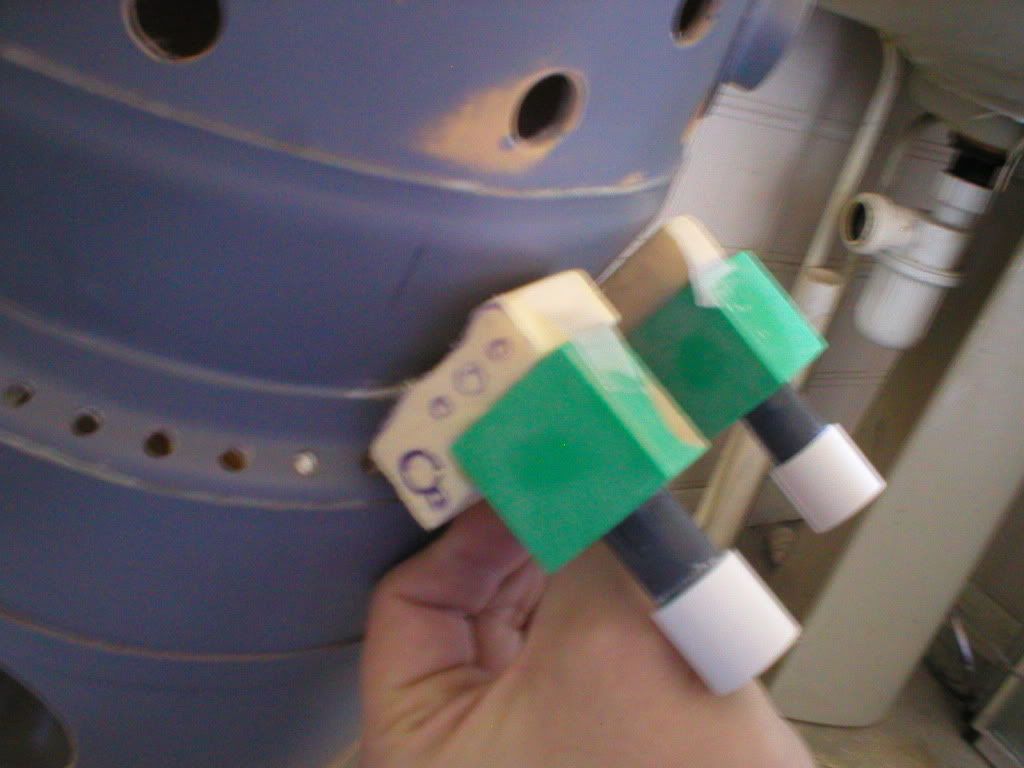
Heres the finished arm thruster greebly thing..

P1010290.jpg


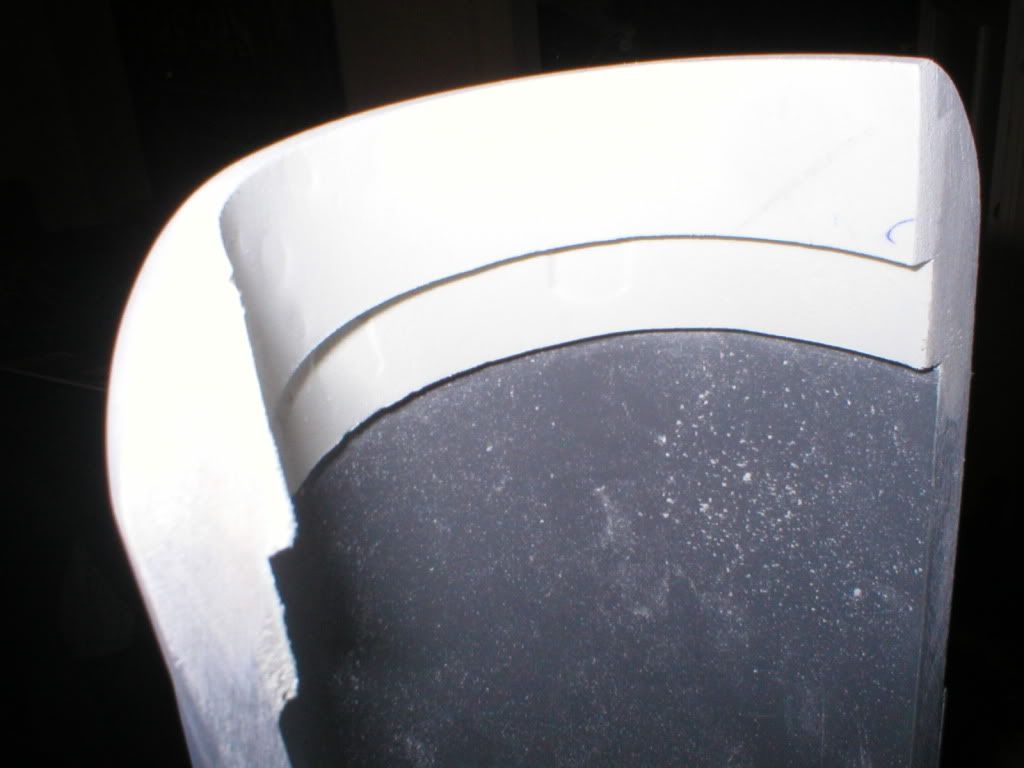
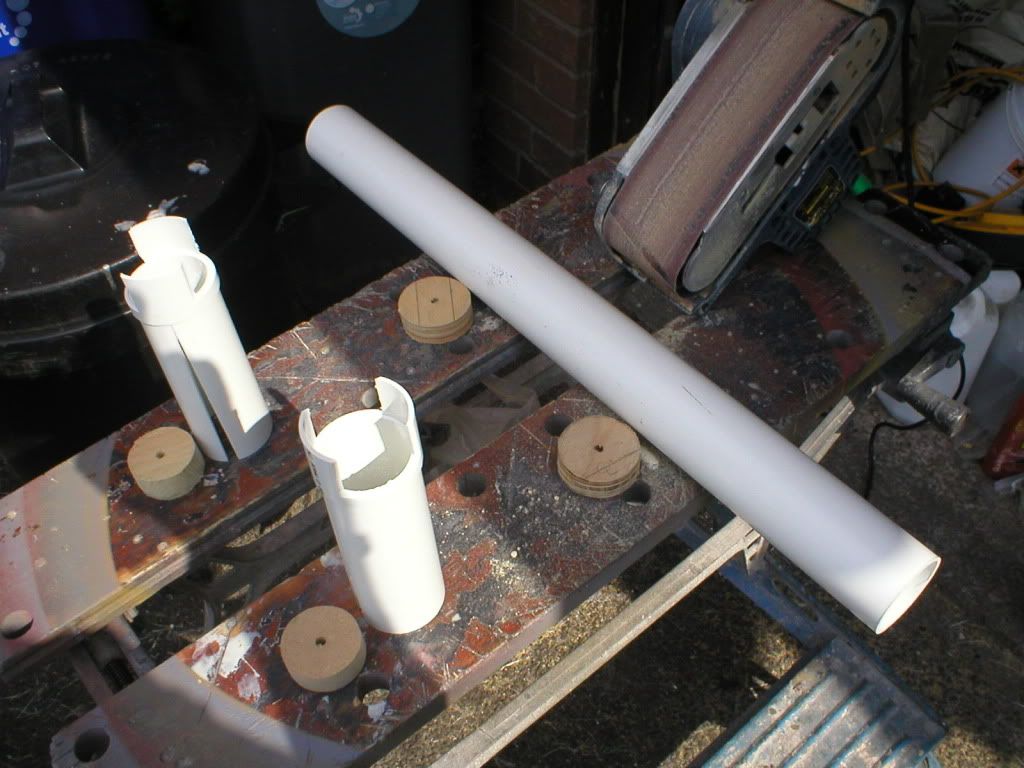
it was built from a small section of pipe and circles of styrene cut with the BACKWARDS circle cutting method from earlier, the tube section was bonded to the egg with a piece of dowel so its nice and knock resistant .

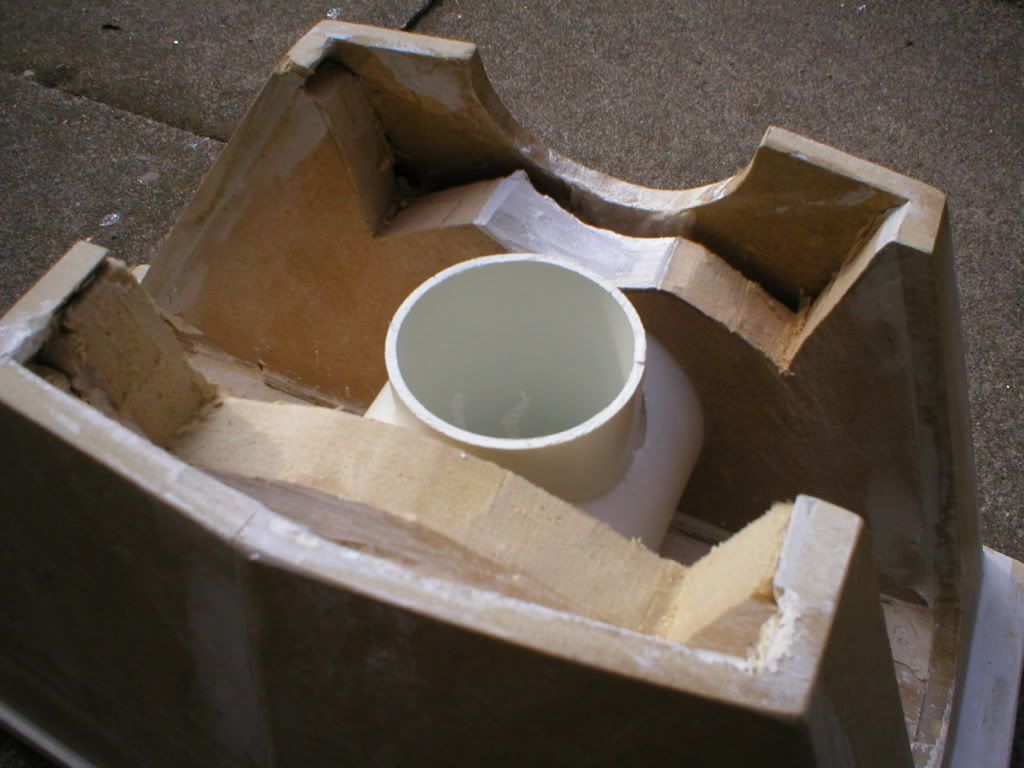
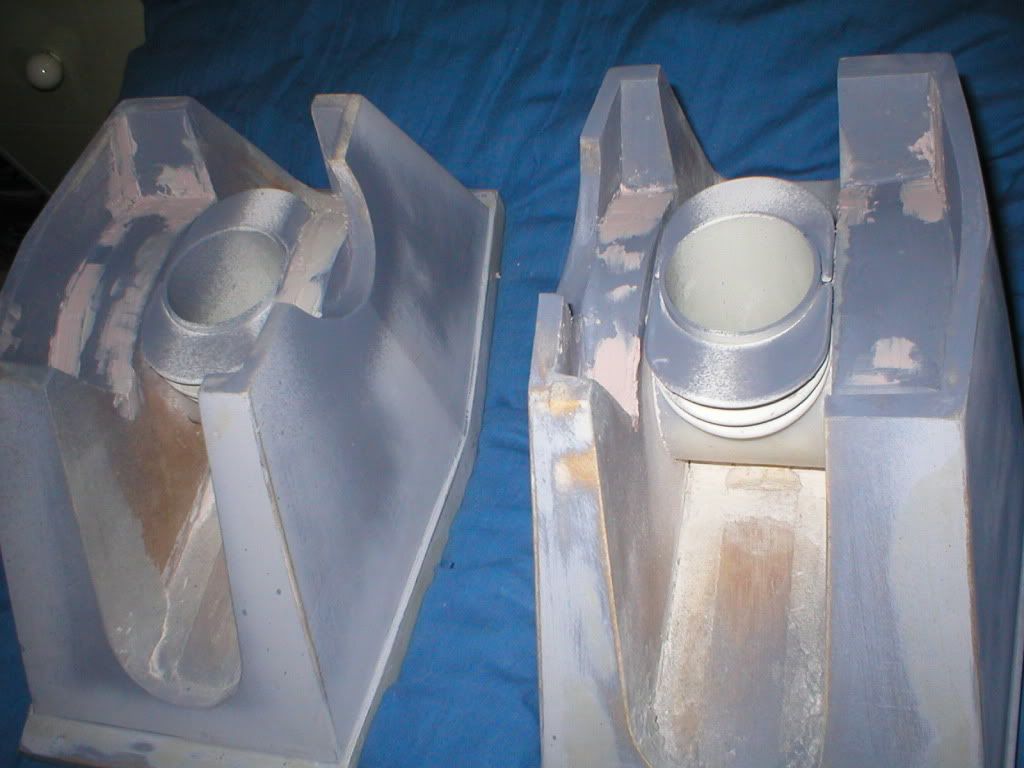
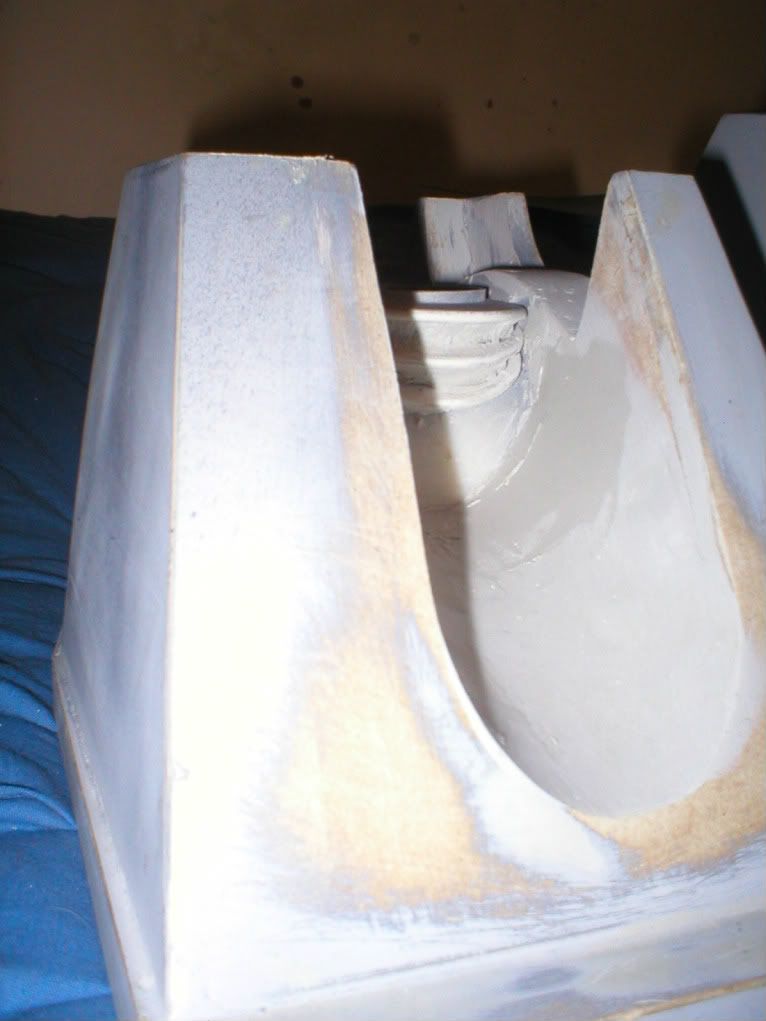
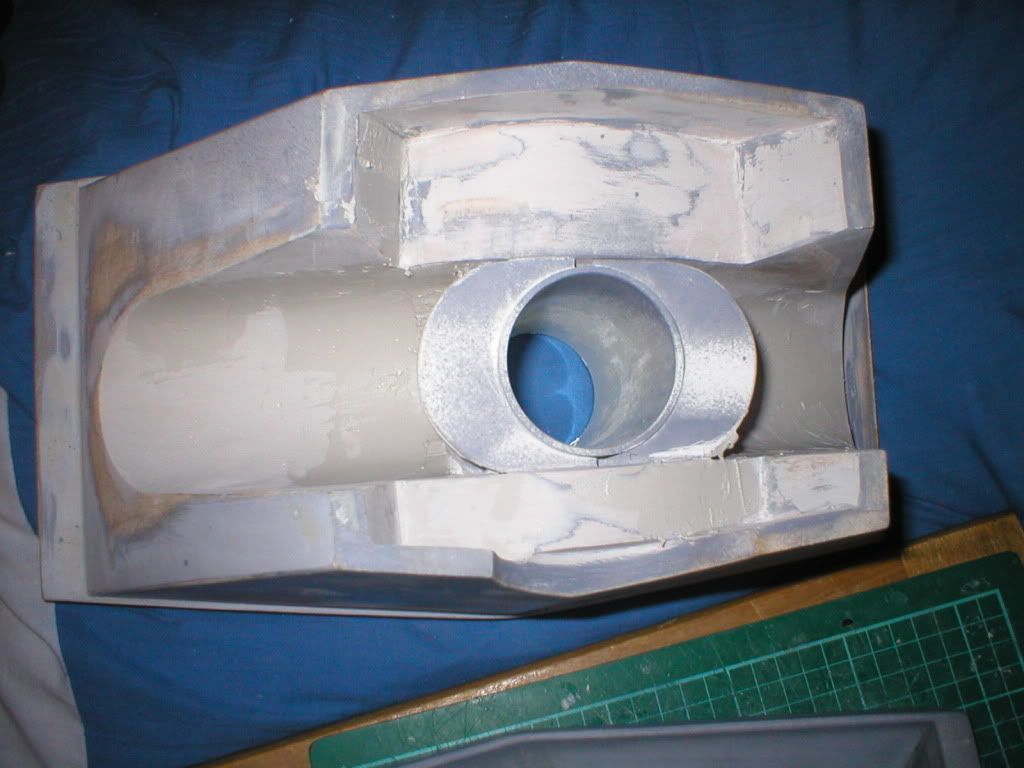
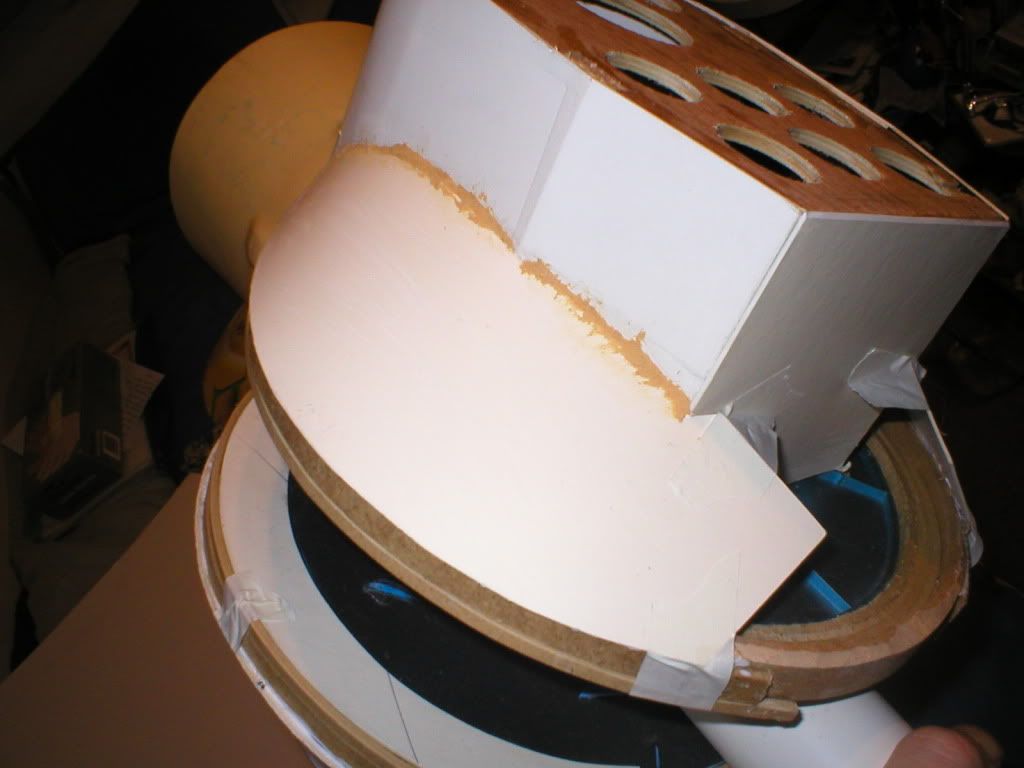
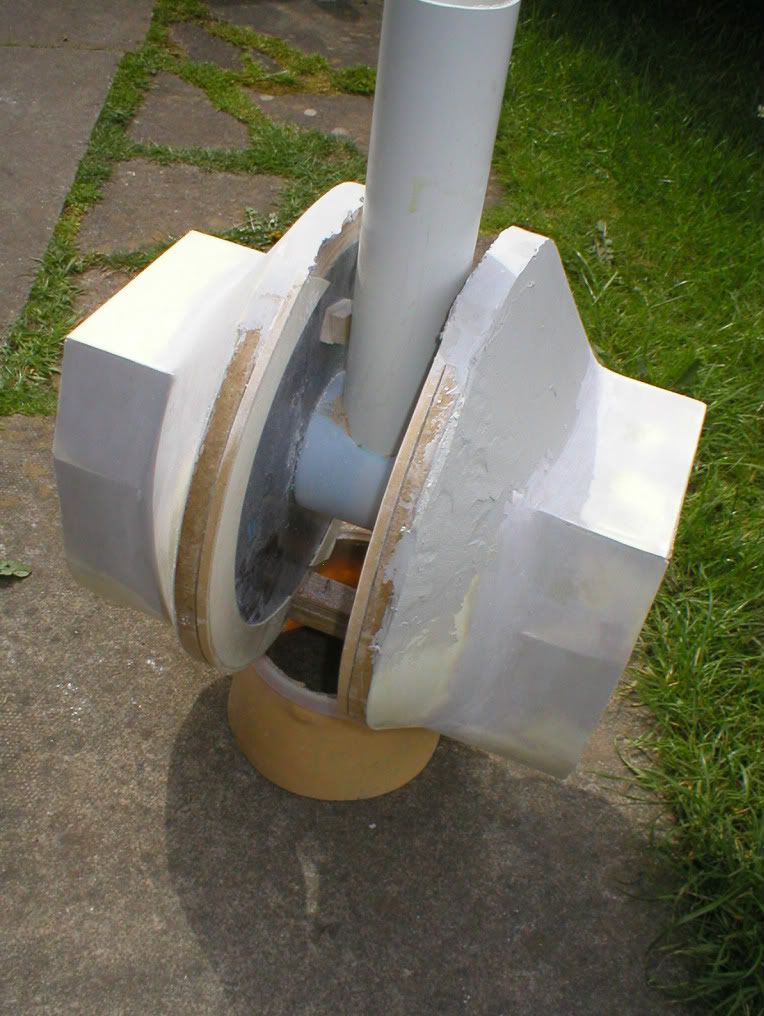
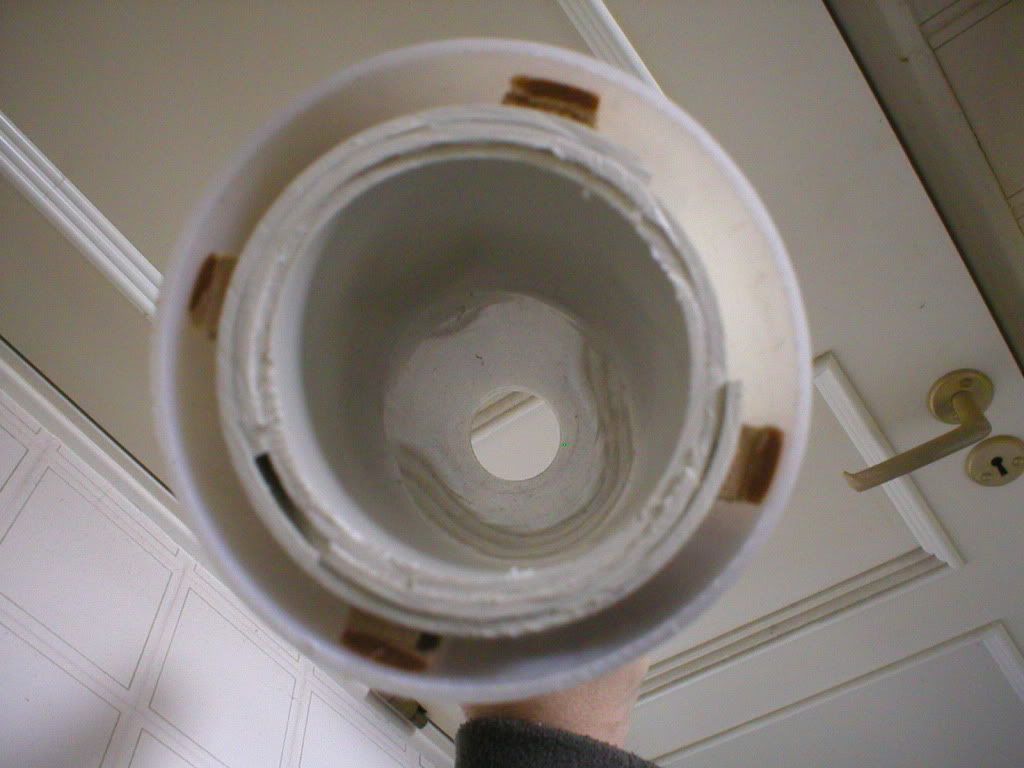
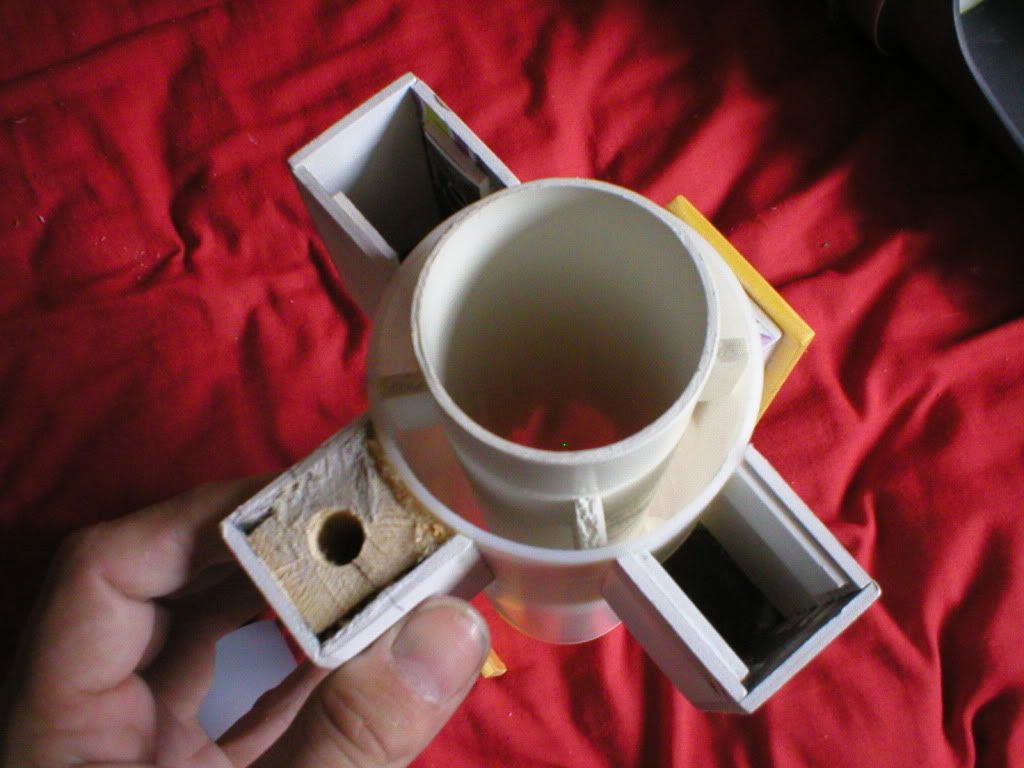
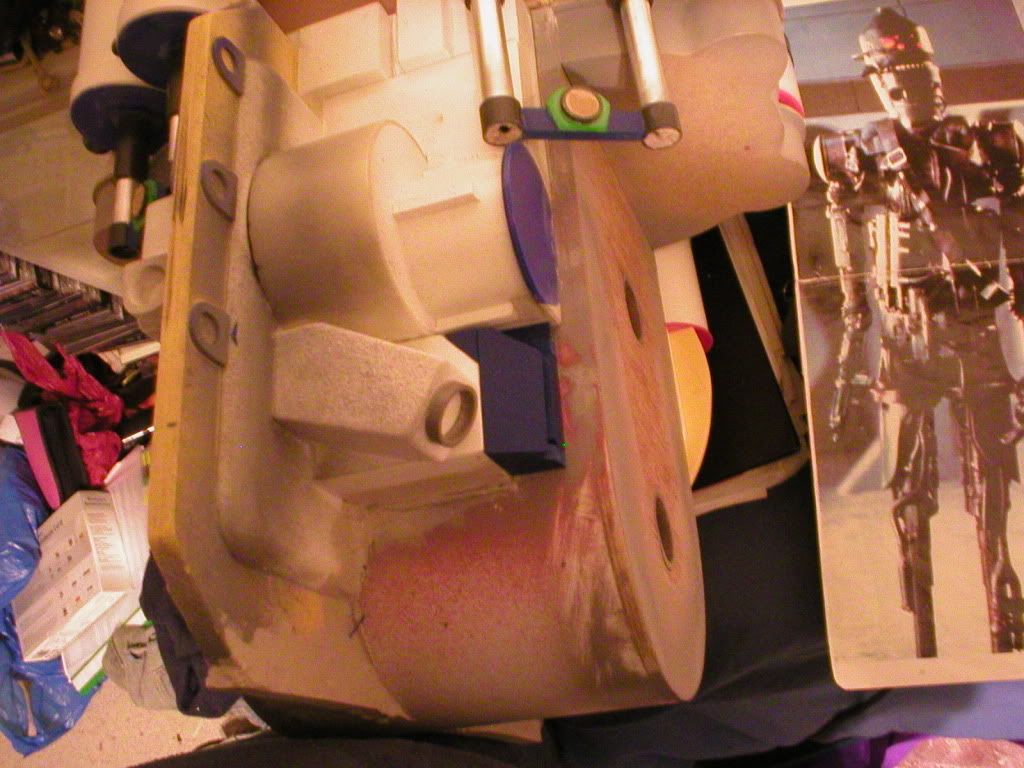
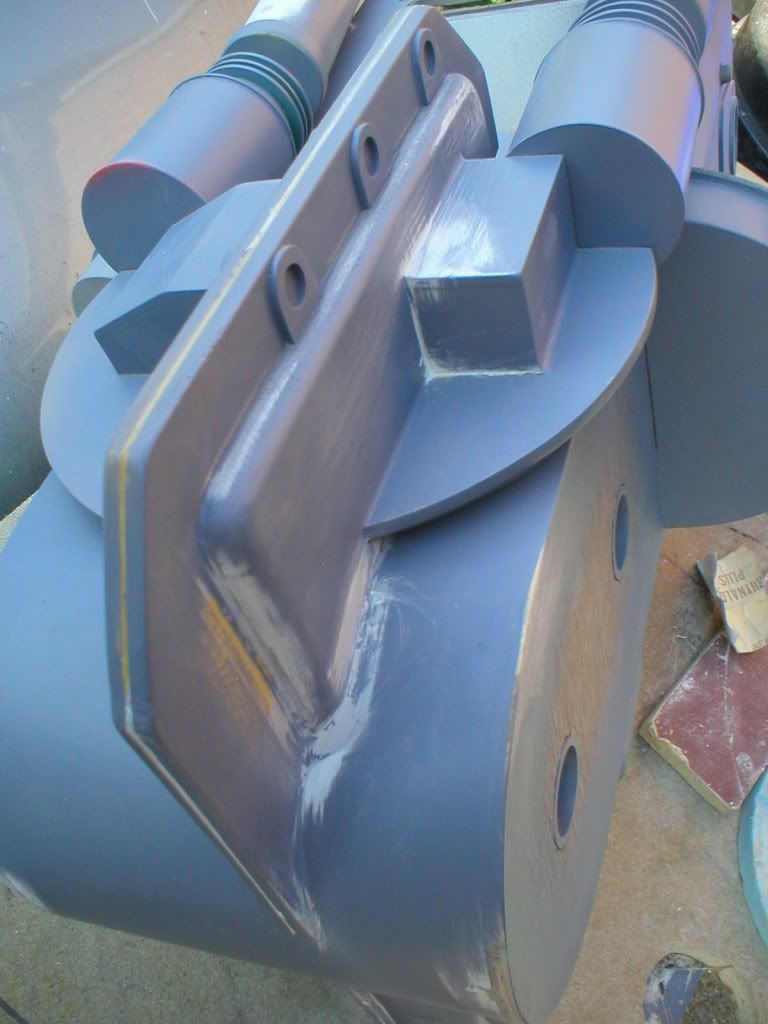
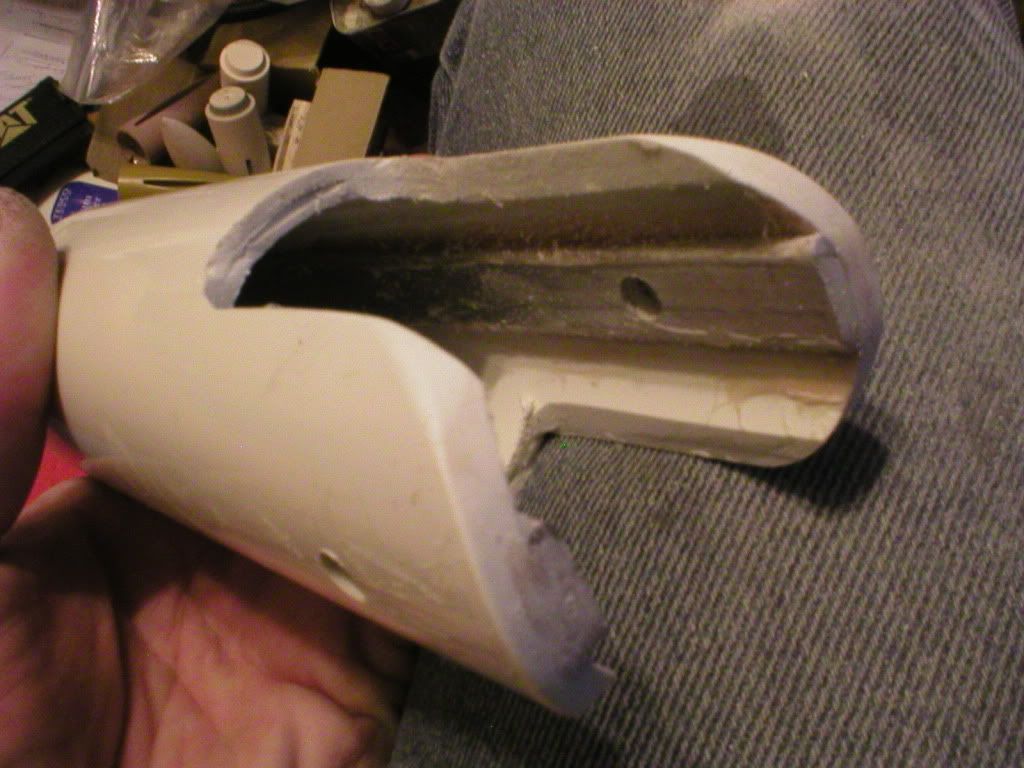
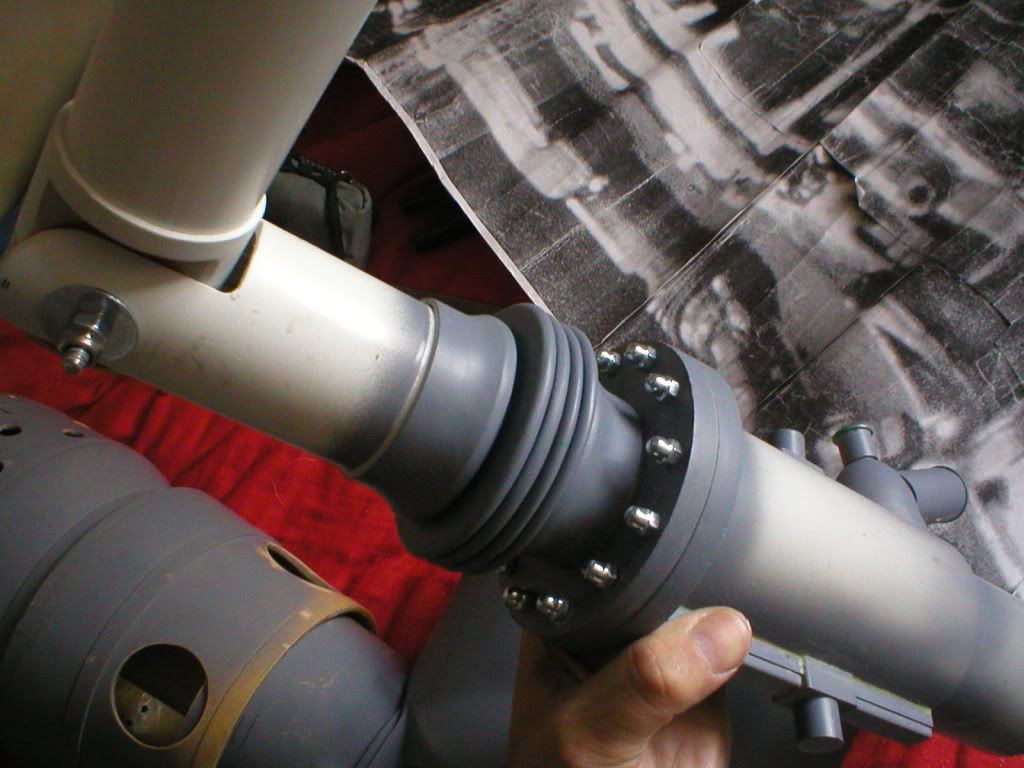
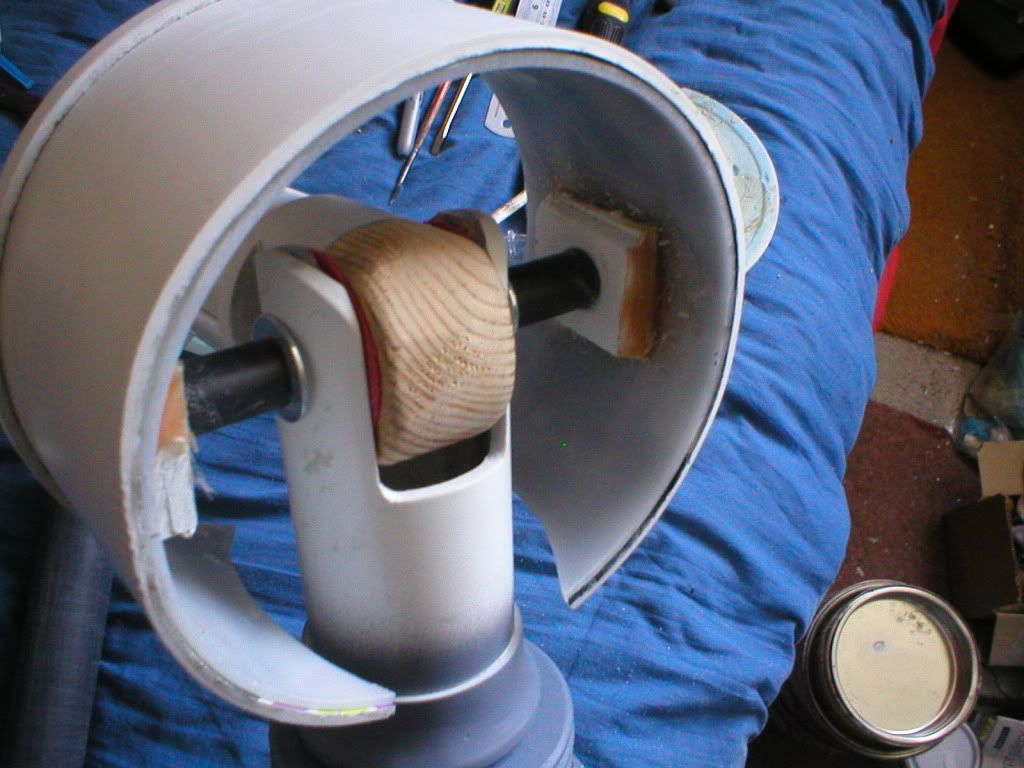
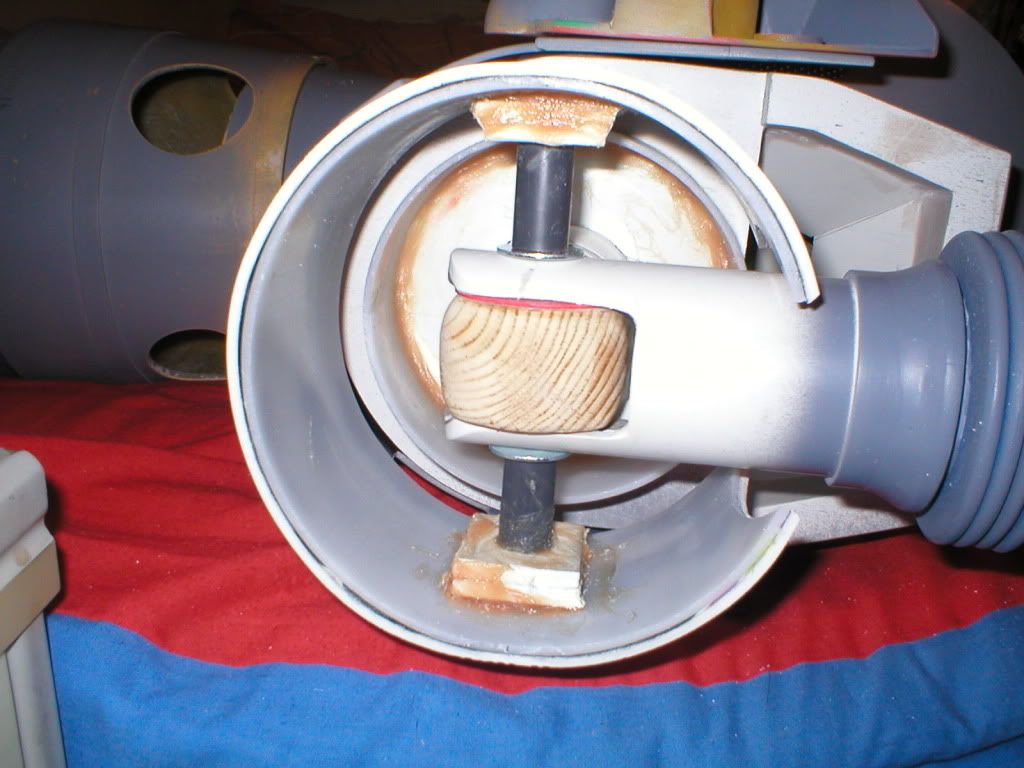
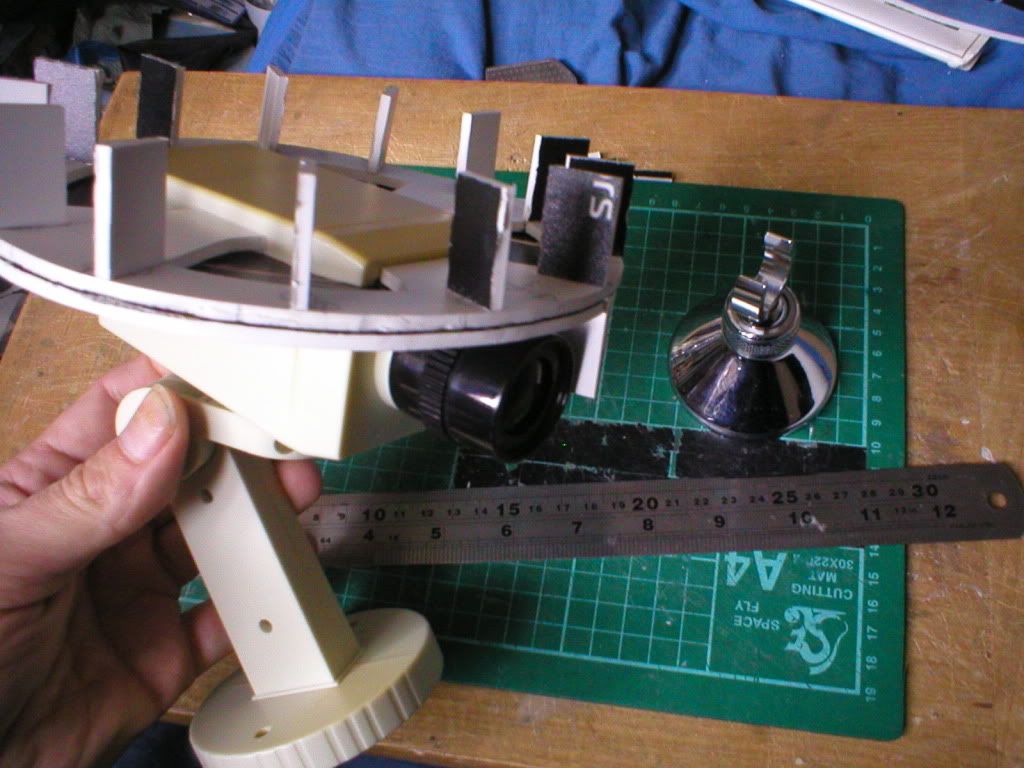
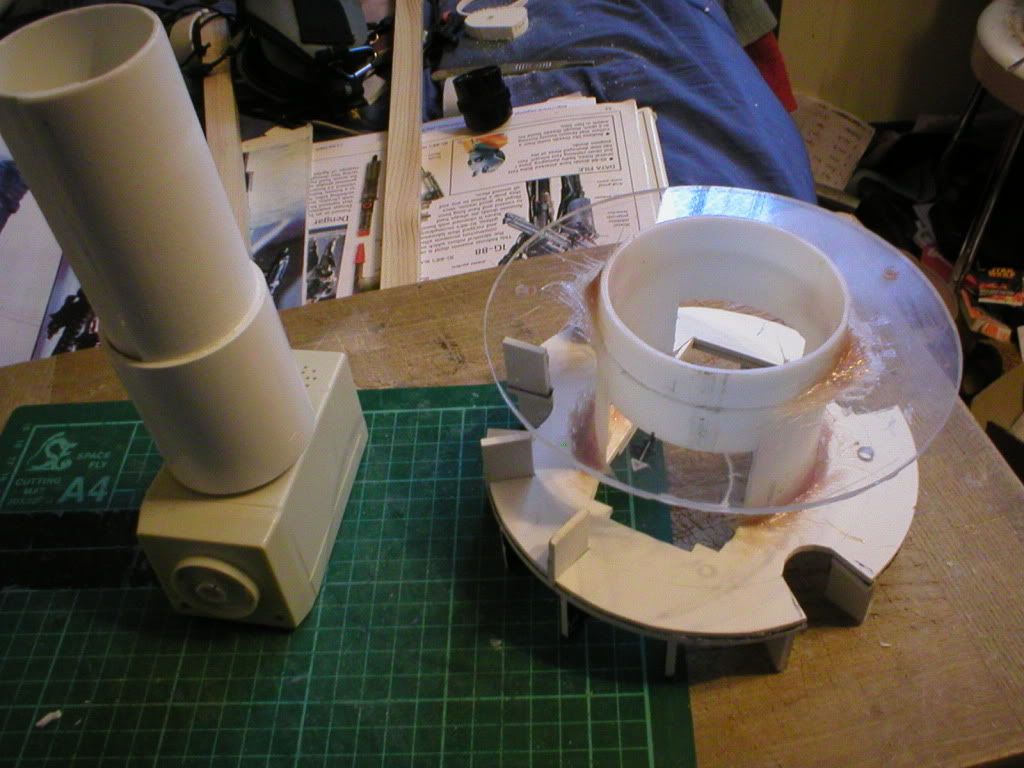
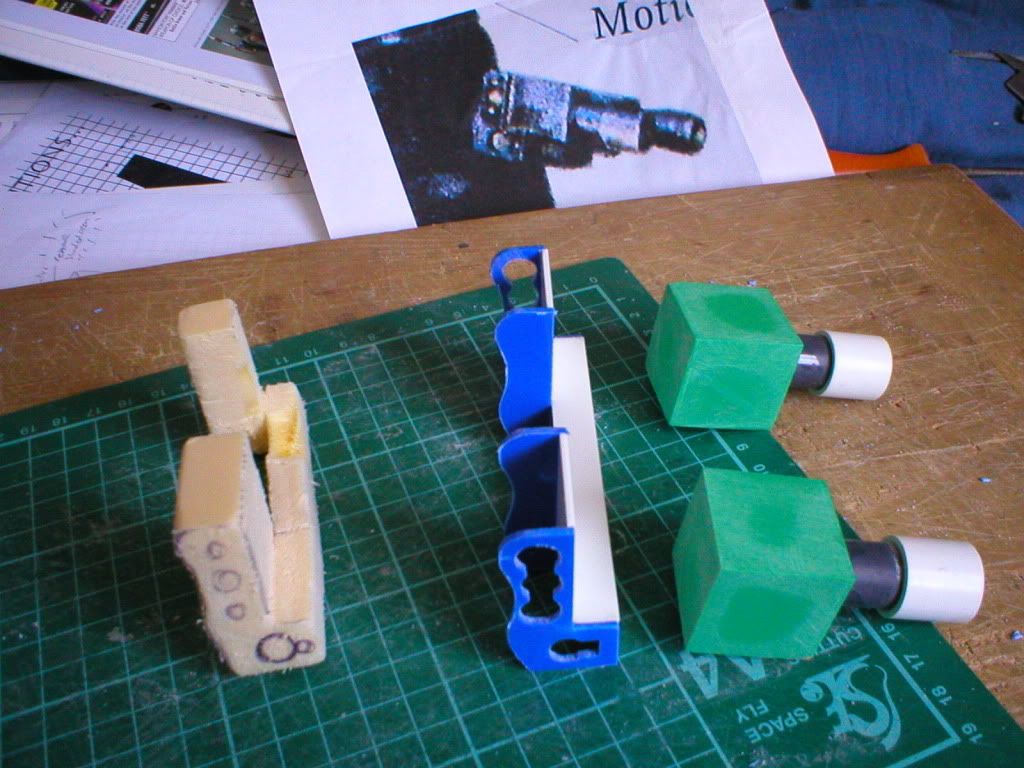
This next one is the start of the shoulder joint , its the part that will go into the body...

P1010007-6.jpg


...and more ..

P1010006-3.jpg


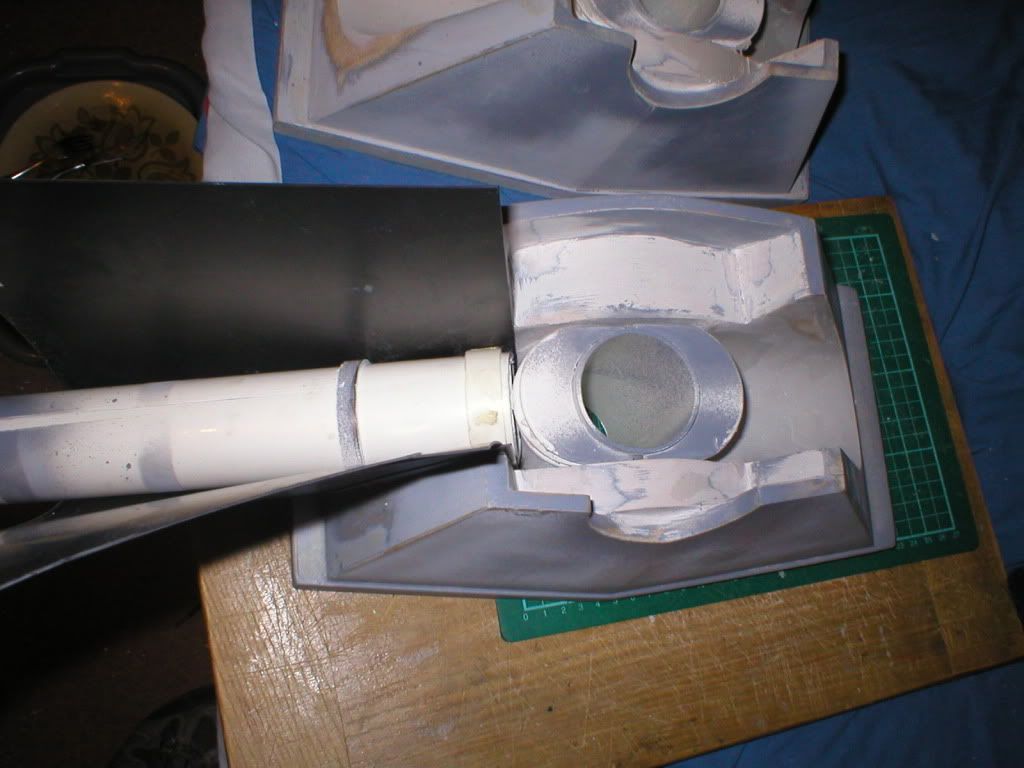
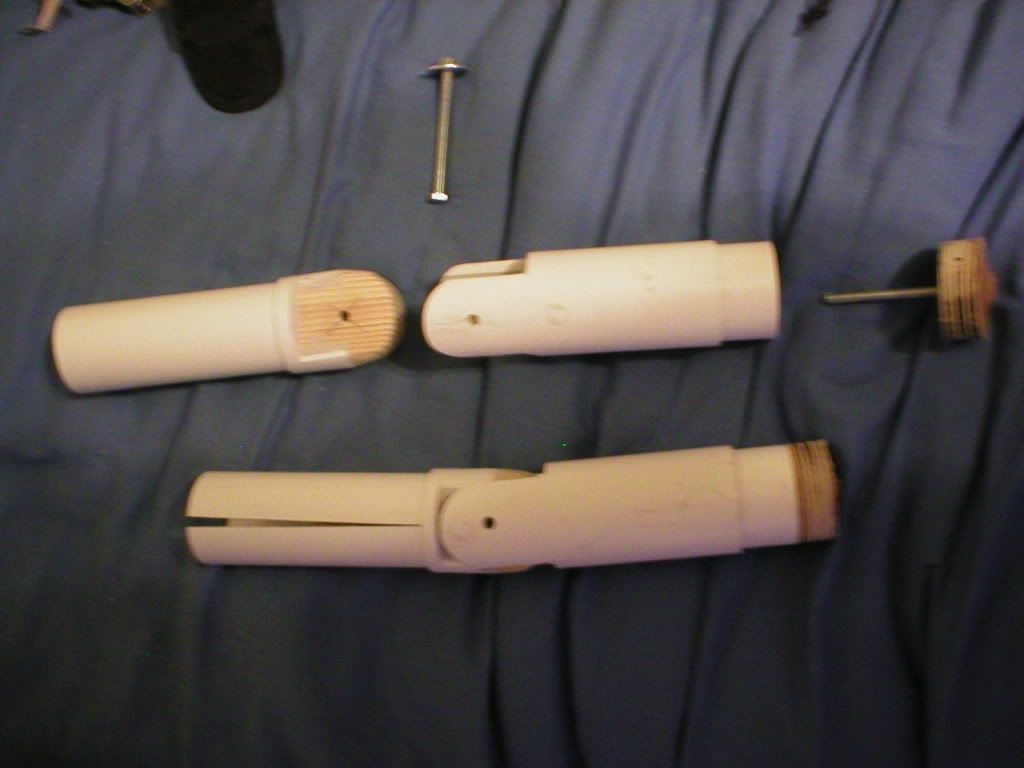
Then we have the part that will attach to that ,its the top of the upper arm..

P1010009-9.jpg


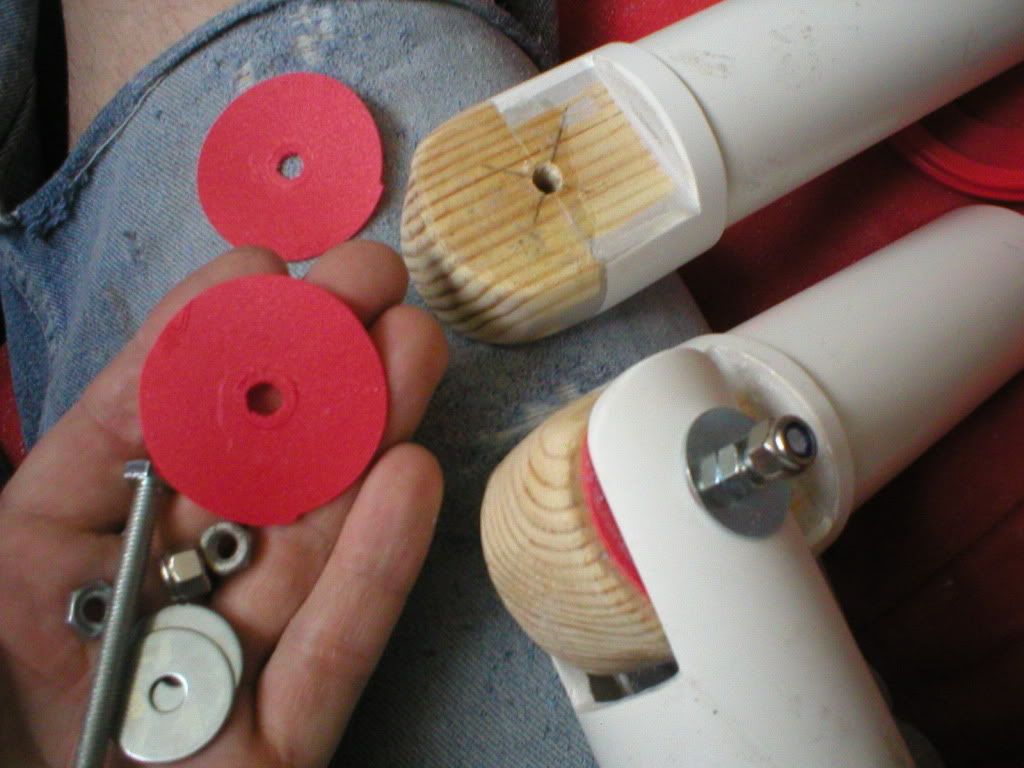
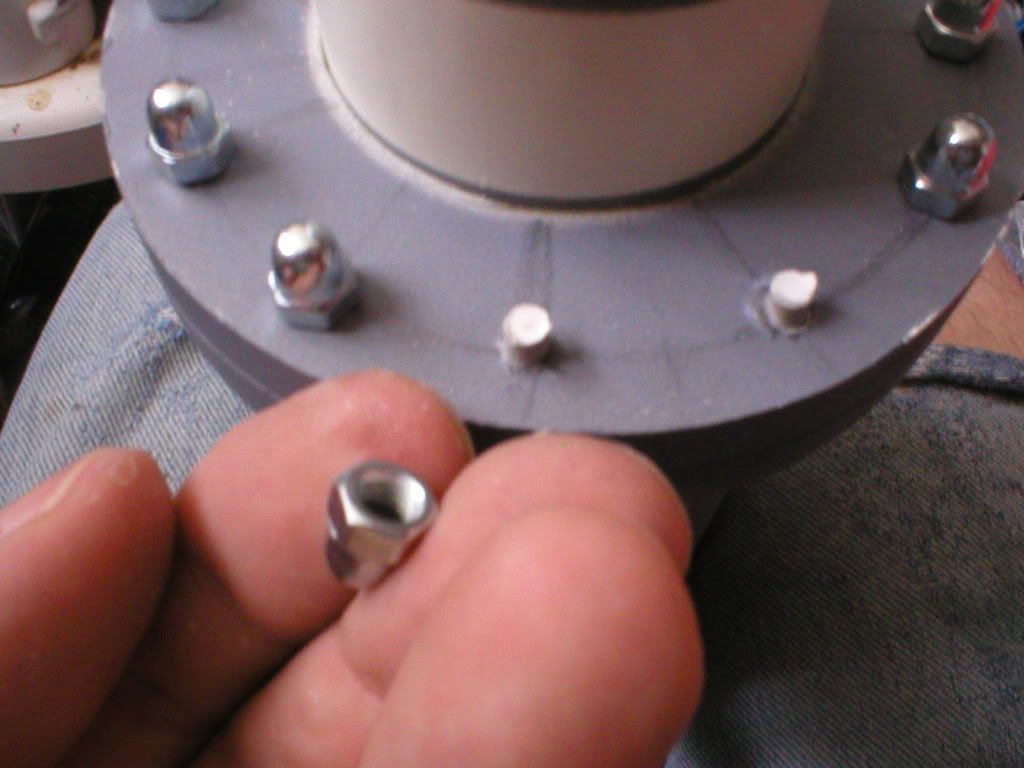
Notice the bonded in strip of aluminium , its there to strengthen where the bolt will pass through to pivot the arm.This unit becomes the top portion of the upper arm swivel.

P1010010-4.jpg
 
Here is the upper arm assembled and in pieces

P1010011-2.jpg


you can see the upper arm swivel here before insertion .

this is the top and bottom rings for the fake upper arm gaiter...

P1010010-2.jpg


foamex disc ,tube and filler...then foamex rings...

P1010009-2.jpg


The fake gaiter comes halfway over the swivel , 2 rings above and below, the swivel is axled with a bolt and NYLOCK nut .
After the upper arm swivel is assembled ,access to the nut is cut off by assembly of the shoulder joint...

P1010016-3.jpg


the red discs are washers made from drinking choc powder tops ...I found them in my kitchen ...not the street for once!
The bolt is over long to act as an axle for the shoulder cylinder unit.

These bolt heads were added to plastic sprue pins on the bicep

P1010015-3.jpg


... and so far...

P1010018-4.jpg


The shoulder cylinder was a piece of the lampshade tube I had , this was not big enough in diameter so I heated foamex,bent it and glued it round...

P1010025-4.jpg


You can see the till rolls mounted in foamex blocks glued and glassed (they fell off at first with just glass fibre!)to attach the shoulder cylinder onto the long shoulder bolt and pivot freely .

P1010021-3.jpg


notice in this shot above , IG's arm is test fitted to the body , you can see there isnt much clearance between the shoulder cylinder and the cylinder that is on the body , this limits IG's shoulder movement as they do slightly overlap.

The elbows ... here I decided to give him a good range of motion ,you can see the construction of the joint ,aluminium strip I had hanging around ,bolts and wing nuts so I can just push the finished gaiter up and tighten the joint at a gig

P1010023-3.jpg


the grey unit on the right is the forearm , similar to the upper bicep swivel it has a swivel comprising 2 wood discs ,one bonded in the forearm with a bolt anchored in it .Basically the wrist swivel , which I decided it needed , is right up just south if the elbow .The elbow itself is 2 stage like DRAGON or SIDESHOW figures so the lower arm will come right back on the upper.
Here's the complete but undetailed forearm about to be test fitted to the detailed upper arm (the ridge has been added front and back , also, between the large diameter and the smaller ,lower part there is a trench detail , I sweated over this for ages , eventually glued a sheet of styrene on the lower cylinder of the upper arm leaving a small gap of the grey cylinder visible to create the trench .Stud detail would also be added on the end of the ridges with small sections of till roll and dowel.

P1010024-3.jpg


The white part ,(reduced diameter 'bone'tube fits up into the 'bone 'tube of the upper arm and eventually got bonded in .IG's arm now has shoulder movement in 2 planes , an upper bicep swivel , 2 stage elbow and wrist equivalent. :confused
 
Onward!..
CLAWS !:eek
Now this is a bit Ive seen being got wrong ..
"Youre getting IG wrong !...".. to paraphrase Partridge! :confused
The mistake I see a lot is that both claws are done the same , they aren't .
Again KOTOBUKIYA is the best commercial IG Ive seen , the new SIDESHOW one is dissapointing , not only is the knee armour on the upper leg on it but they missed out an entire section of his head!!!
Nil Pointe!
Anyhow back to the claws.. there are 4 types of claw ..in this build I refer to them according to their shapes ,as the 'C' claw, this is the left one ,.. the '8' claw, the right and then there is the 'dew'claws (like a cat or dog) those are the weird bigger ones that run inline with the forearms .
What are they?
...I remembered seeing claw grabbers used in old shops to get things from top shelves and I do remember a figure 8 type one .. I believe this type of thing is an original part for IG .. and when it came to the 'C 'claw I found this..

P1010018-2.jpg


... A skinnier ,cheaper , modern version of another type I remembered . This I got just after guesstimating the size , heres the guesstimated pattern done BEFORE the claw was bought . Allowing for the skinnying down of the new cheapened claw I was quite pleased with this as a pattern ,they were going to be made from foamex and filler and I wanted them to be robust .Also I directly copied the mechanism from the bought claw so they have spring action , sticks a bit but it means they are geared together.

P1010005-2.jpg


Heres the templates and some shots of the claws in build.

P1010019.jpg


P1010011-6.jpg


P1010002-3.jpg


P1010004-2.jpg


P1010001-4.jpg


P1010002-2.jpg


...And with a bit of body work done....these are the 'dew'claws

P1010008-2.jpg


the finished claw units just slot tightly into the forearms...the DEW claws are mounted ,the right on the forearm underside ,it became a naturally strong mounting point to graft it into the block there (took a fair bit of examination to justify the existance of the under forearm blocks and ridge , once established I did the same on the left forearm having come to the conclusion that there is a block type detail visible on top of the left arm and I am convinced IG's forearm has been swiveled over so we are looking at its underside in the film stills .This explains the claw being on top and the block detail (which I found the arm looked blank without )
The mounting of the left 'dew' claw was a pain!
I could not justify a logical movement for it as a mechanical piece , again I'd put it down in IG land to an after market add on to stabilize some weapon and it would be put in place from its stowed position by IG or his owner .Eventually I made a mount that looked the part and put it on with a bolt so it is actually repositionable .It mounts directly on the claw ,visual reference is sketchy for this as with a lot of IG when you really get in to it.
This kinda thing is the tough ,positively painful at times bit of these builds that people dont see and one good reason to take plenty of shots (I learned this)and do a build diary /report like this .
 
OK ...wots up next ?...
covered the basic body , legs ,feet ,arms ,claws ...must be the head!...then some mopping up on detail


Overview of basic head assembly at an early stage ...

P1010016-5.jpg


Here you can see the derwent ,lower section cut from the upper and bonded to the chest unit as seen earlier , makes it a more comfortable fit to the head if you shave down the neck by a few millimeters ..5 ish?....
the internal unit as intended , and as I write this , STILL causing me grief 10 months on!!(dont ask !)is here , it is basically one of those cheap , fake security cameras , when the sensor is triggered it moves around 6 times from side to side . If you havent seen these before and have anything with a head or similar you want to move and cant do electrics like me these are cool .

heres the first take involving a PARASOL LIGHT , this turned out to be a dead end ...:cry

P1010044.jpg


...Saying that it DID generate a very interesting side effect ..same principal as a pinhole camera (air lens)...want to use it on a dirty little secret project !


P1010015-4.jpg


yup that is a shower head joint in the background ... getting to that ..

P1010018-6.jpg


Around it is the start of a foamex unit for mounting the lights ,which at first are xmas lights on 2 AA batteries ...was going to be 2 sets but Im not happy so looking into other options now as I aim for the head to look'lit up' in normal indoor enviroments .
The internals for the head eventually became a clear disc with a camera shaped socket in the middle and the foamex you see mounted on the socket , this would then be maneuvered into the head like one of those dismantling a nuke bomb sequences in a flim, past some small blocks and then the base,clear disc is held in the head by 3 small screws in to the blocks in the head .
As promised the shower joint...

P1010017-3.jpg


...Went to a bathroom shop years before and asked if they had any junk bits ... few quid for a load of bits like this
This is mounted into the body via a big bolt and a stack of wood discs that were waste product from using the hole saw drill so its just about level with the top of the neck.So now IG can do that head loll thing like in the film , also can stand straight and has a good bit of posability there now
This is where it gets complex to come up with and visualise :confused, the posable ball and socket tilt joint is at the top of the neck/base of the head ,I took the stand off the camera and replaced it with pipe and a reduced diameter bit of the same pipe was bonded to the top of the ball joint as a head mounting pin.Further up in the head , just under the orange eyes is where the swivel acts ,just under the camera(the ball joint obviously swivels as well )
When IG is dismantled the ball joint stays with the body and the rest is high up in the head and inbetween is a good firm attachment method...fair bit of sweat went into getting this right
 
And a few more brain shots

heres a shot of the first run of lights being hot glued to the standoffs.

P1010024-1.jpg


Like I say I want to replace these now with something better , have a guy working on it but its taking a long time

Heres an interesting little addition ...

P1010032-1.jpg


Those big holes had always bugged me ... and ,it seems, everyone else that does IG , hasbro or whoever !
I found a black and white ,on set shot of Vader , Kershner, Green Bucket Boy himself and the IGster in the pic references on THEDENTEDHELMET.COM ...expect everyone knows wot that place is ..(one of my hangouts for quite a few years now )
You can see right into his head ... not Kershners ..IG'S!...there be nuttin there!
...looks kinda dumb when you can examine it closely like at a gig so ...I wanted them closed off but in keeping with the junky IG feel .
The weapon of choice here is PLASTIC CHAMPAGNE GLASS FEET .. from a pound shop...dont remember how much they were though ..Hmmm ...(running joke round here )
It looks better than just blocking it off or doing the usual dome thing in there as the toy companies do , looks like an emmitter / reciever type thang too! ..
Also , and this is where it got harder , it COULDNT be attached to the head directly as this would foul the neck ball joint movement ...also it would prevent the brain being taken out for adjustment ...tricky one ..

Small bucket of sweat later and we have....

P1010031.jpg


and this is how they fit.....

P1010033-1.jpg


P1010034.jpg


...the triangular base is just to keep them stable , they push into polycaps (type of thing in japanese robot kits if you dont know ...Gundams and the like)I use large HAMA beads for these , big ones seem more difficult to find these days , I used to get them at TOYS 'R' MINE...(as I renamed it )... try online ?.. one pack will last years !(be aware tightness varies with color pigment it seems ?!?!? )

I like the loose nature of these and the fact there is a slight gap between the heads hull and the emitter thing , it seems to go with the rattly ,junkyness of IG and most of the old trilogy which I love:)
 
So ...onto the junk outside the head ..

heres my guesstimated measurements from the full size GOD image for IG'S binos ...

P1010260.jpg


notice the 'L' shaped unit .. I have seen this left out before ..

I modeled up the front portion (the cubes) as this was more of a known quantity and I needed them and a foam mack up of the back L section to see how the eye binos really interacted with the head ..

P1010050.jpg


P1010032.jpg


P1010033.jpg


P1010035.jpg


P1010036.jpg


...Then , when I'd figured how they fitted and attached I started the styrene one..

P1010258.jpg


To reduce weight I filled them with small blocks of foam ..

P1010259.jpg


Then skinned it with filler ...
 
This thread is more than 9 years old.

Your message may be considered spam for the following reasons:

  1. This thread hasn't been active in some time. A new post in this thread might not contribute constructively to this discussion after so long.
If you wish to reply despite these issues, check the box below before replying.
Be aware that malicious compliance may result in more severe penalties.
Back
Top