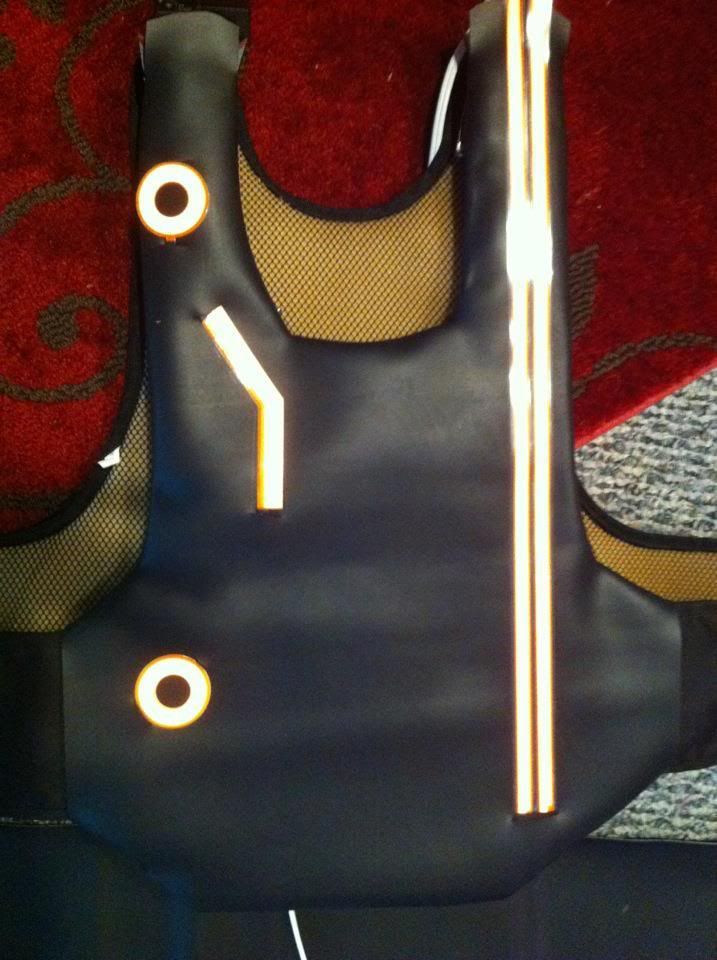
Tron Legacy Costume

Did somebody say Flynn cloak patterns?


White robe
60557DFD-49F4-414A-A8A6-7873131E1247-1305-0000019E1F3C4524.jpg


Black robe
A143EA3A-004E-4B9D-8C00-1FAF3CC6EE9A-1305-0000019E1D01C5A4.jpg


I'd like to clarify that these were done by another member here who very kindly shared these (I've been looking into making the black robes), and we're copied from screen grabs.


I've got to start work now, but I'll find out who it was and let you guys know (though you can find the thread by searching Kevin Flynn robes).


*edit* the patterns were done by RPF member mhatch, here is the link to the robe thread the pics came from

http://www.therpf.com/f24/tron-legacy-robes-103497/
 
Last edited:
I'm using the Luminous film light tape for my costume. Any hints on connecting the tape to actual wiring?
Luminous Film has some "Etco" clips for connecting to the tape. They crimp onto the tape and have teeth for making electrical connection. You solder a wire to them first before crimping.
 
Hi there

I'm brand new to this forum. I would like to make a TRON costume for Halloween and I don't want to spend more than $80-100. I was thinking of getting the regular TRON costume sold online - a thin polyester jumpsuit:

Kevin Flynn Costume | Wholesale Tron Legacy Mens Halloween Costume

and simply sewing EL wire onto the outside of the jumpsuit and using black tape where needed. I also want to use a sound activated battery pack.

What about sewing EL wire onto thin fabric -do you think it will be ok or will it rip out?

What about the arm and knee joints - is the EL wire flexible enough for dancing / movement?

thanks so much!
Glen

If you are worried about the stitching ripping out, I suggest getting some thin strips of dark fabric and place them along the same pattern as the lights, only on the inside of your costume. (Anything from raw fabric bought at a store to a sliced up t-shirt will work.) That way, you are sewing through multiple layers, so the stitching will be less likely to come out.

As for maneuverability: If you look at the costume, the lighting never really goes over the vertex of a joint (for example, the pattern on the knee swings to the inside of the actual knee joint on its way down, then resumes the center of the leg below). As long as you follow a similar pattern, and leave just a little slack in the wire line, you should be fine for general dancing and movement. I just recommend avoiding the breakdancing, no matter how cool you may think it will look with the EL wire ;)
 
Luminous Film has some "Etco" clips for connecting to the tape. They crimp onto the tape and have teeth for making electrical connection. You solder a wire to them first before crimping.

Oops, I meant like tape to tape piece? I believe there has been discussions of the staple method to act as a connector between pieces of the split eletrode panels. Is there a limit to how far that method can go/is there a better one?

Also- how do you get the piece of tape to the battery pack? XD I know that sounds like such a simple thing but I'm stuck. The battery pack I have has a plug on the end and the end of the Etco clip has a mini milex connector. So how do I get from point A to point B? XD
 
Last edited:
Wow these Rinzler builds are making me freaking drool. I REALLY REALLY REALLY want to have a slightly customized Rinzler suit as part of my DJing attire (not to be like DP or anything).

I wouldn't even know where to get started on making my own suit. How long would you guys say it takes to build one, including a helmet?

And who builds them for other people? :confused
 
What about the arm and knee joints - is the EL wire flexible enough for dancing / movement?

thanks so much!
Glen


El is flexible, but it WILL break if it is flexed too much, ie elbows and knees.
I had my arm and leg el wires break on my first two versions of my costume.
That's why I went with el sheets for my third attempt.
 
Oops, I meant like tape to tape piece? I believe there has been discussions of the staple method to act as a connector between pieces of the split eletrode panels. Is there a limit to how far that method can go/is there a better one?

Also- how do you get the piece of tape to the battery pack? XD I know that sounds like such a simple thing but I'm stuck. The battery pack I have has a plug on the end and the end of the Etco clip has a mini milex connector. So how do I get from point A to point B? XD

I experimented with staples, and its a flimsy solution. It works, but my staple joints kept breaking on me even with small movements. There was a bit of magic smoke too as the staple joint burned away some kind of crud in there, but it stabilized. The best way I found was to use rivets like they sell on their site, the eyelets as they call them. You end up with two holes in your material, but it didn't bug me much. Worked nicely to punch through both pieces and create a solid connection.

Sounds like you get to learn how to solder. Luckily EL inverters don't have polarity so you can use either end of the inverter output on your tape, so long as that is consistent throughout your design. If it were me, I would find the mating connector that goes to your Etco clips, and cut off the connector from your inverter and solder it down nice and tight.

I particularly like these connectors: Connectors and Lead Wire

That page has everything you need. This with some heatshrink and some hot glue will make your design very robust. Careful with testing: don't run your inverter without the tape or it will break, and they aren't cheap
 
Industrial strength adhesive Velcro.

I'm using E-6000 to adhere the velcro onto my costume, this stuff has been mentioned before on here and is great!

Also, can anyone experienced with painting on foam give me some suggestions? I've heard one of the best lo cost methods is to apply a few layers of PVC glue/water before you apply any paint works. I've looked into plasti-dip and similar products but i'm not convinced it's worth the effort of finding it.
 
Greetings fellow programmers. It's been a long while since I had posted here, but I'm in a emergency needing of some help in quickly modifying my TRON DISC to light-up! Does anyone here knows what be the BEST COST EFFECTIVE WAY to do so for next week's Halloween event I'm attending(I'm getting the suit done within the fastest on my end as well - YEAH, good ol' procrastination-buttme).:facepalm Please LMk if you know a GREAT LINK/SOMEONE that can provide some good fast tips and thank you! :)
 
Greetings fellow programmers. It's been a long while since I had posted here, but I'm in a emergency needing of some help in quickly modifying my TRON DISC to light-up! Does anyone here knows what be the BEST COST EFFECTIVE WAY to do so for next week's Halloween event I'm attending(I'm getting the suit done within the fastest on my end as well - YEAH, good ol' procrastination-buttme).:facepalm Please LMk if you know a GREAT LINK/SOMEONE that can provide some good fast tips and thank you! :)

I was going to create an instructable for the Tron disc I just finished modding, but this won't be done until after Halloween. I'm assuming you have the identity disc that already lights up and want to mod it to be brighter/stay on.

Here is a video that I used as a reference early on:Tron Identity Disc LED Custom Mod Cheap and Easy - YouTube

I used a different placement of the lights and i believe different battery arrangement as well, since I wanted bigger/longer lasting batteries. Here is an overview:

Things you will need:
- Led strips (around 2 ft) : The Leds I used came in a 15 ft roll and are quite affordable, here is an example Flexible Light Strip 300 SMD White LED Ribbon 5 Meter or 16 Feet By Ledwholesalers,2026wh - Amazon.com
White works just fine since the disc has a blue tint to it. There are a few different ratings of LED's, but i've found that the 3528 is more than birght enough (any higher and you will kill your batteries too fast). I'm sure if you look around in your city you will be able to find somewhere that sells these.

- Dremmel/cutting tool
- Hot glue gun
- 8 AAA batteries
- Soldering kit (preferred but you can get away with hot glueing everything if you need)
- Several feet of wire (don't need more than 24 gauge)
- Electrical/Duct Tape

When you unscrew the disc and separate the two halves, you'll see that basically everything is connected to the "bottom half". The top half contains the inner ring that lights up. The basic concept is to set up two strings of LEDs for the inner and outer rings.

To do this, you will first need to strip all of the electronics out of the bottom half and cut out EVERYTHING that isn't part of the structure. This means you need to cut out the battery box as well, just don't cut out the screw barrel. Also note that the two outer "lips" on the disc that hold the blue ring in need to stay, as well as the screw barrels. You also need to cut off the little tabs that stick out of the rubbery blue ring that sits in between the two halves (these are the ones that secure it around the screw barrels, don't worry they aren't actually important).

For the top disc half, the goal is to allow more places for your LED's to shine through the inner ring. The actual ring itself can be removed by CAREFULLY using a flat head screw driver and pushing on the exposed sections until it slowly comes out of the plastic section it is set it. After this I simply dremmeled several holes into the side of this section so the new led stip could shine through. Note that this section holds the very centre of the disc in, so make sure you leave enough plastic to hold everything together. To be clear, I dremmeled the side closest to the centre of the disc. I did this to keep the LEDs out of the way from everything else. Once this is done you can pop the clear plastic ring back in and hot glue the LED strip on.

*Note* Make sure that you test your disc often to make sure it will close with the modifications you are making to it.

Now it's time to set up the batteries. I used AAA batteries because they are small enough to fit in a line around the inside of the disc. All you need to do is solder them together with a very small piece of wire in between each battery. This is needed since they will be laid out in a circle around the inside of the disc and the angle prevents them from connecting consistently by themselves (set up in series). Once you've done this, set up the second LED string in a circle around the edge of the disc facing out. The string should almost be flush against the blue ring, but again make sure that it's set up in a way that your disc will still close.

Once this is done, connect your batteries to your LED's and set up a switch where the old on off switch was. I went to THE SOURCE/Radio Shack and found one for a few dollars. Tape the batteries down as well as any loose wires and you're pretty much set!

Using this method it shouldn't take you more than 4-5 hours to mod your disc. It won't be as pretty or as organised as other methods, but it works.

 
Luminous Film has some "Etco" clips for connecting to the tape. They crimp onto the tape and have teeth for making electrical connection. You solder a wire to them first before crimping.

Sorry, stupid question, I've never worked with EL tape. So can you connect that wiring to a standard battery pack (say 4 AAA or 9V) or do you need some kinda special power driver transformer or some such?

Thanks!
 
This thread is more than 3 years old.

Your message may be considered spam for the following reasons:

  1. This thread hasn't been active in some time. A new post in this thread might not contribute constructively to this discussion after so long.
If you wish to reply despite these issues, check the box below before replying.
Be aware that malicious compliance may result in more severe penalties.
Back
Top