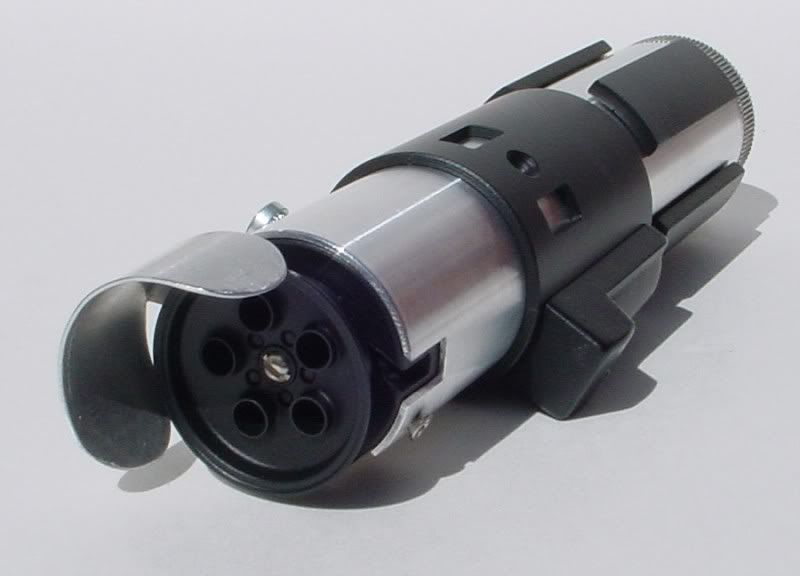
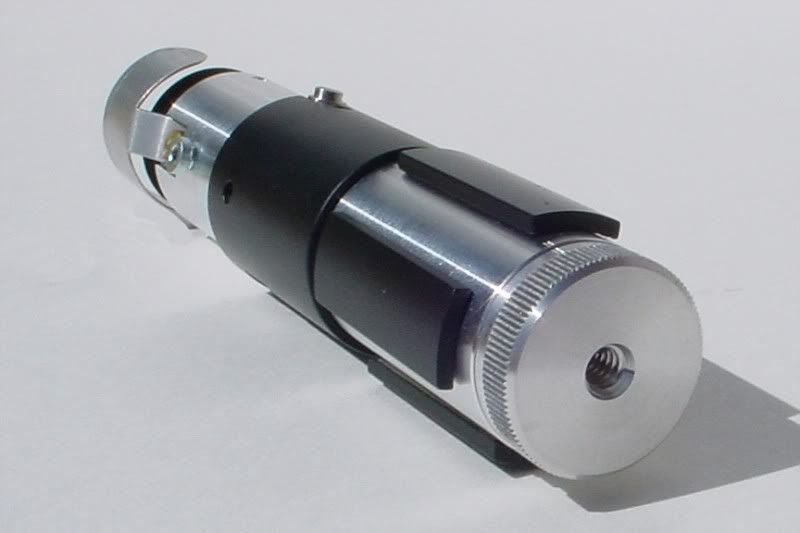
TPM VD Yoda Lightsaber Prop

CAD design is complete for now. The next step is to build a CNC/Molding engineering prototype. Will revise CAD design accordingly after learning from this prototype.

A couple of other things. There will be room for personal customization on the chassis surface, mostly greeblies such as adding brass/aluminum/stainless steel piping and rivets. There're pre-cut greebly channels and pits for you to "dress up" the chassis surface. The hilt body will have four sets of precision laser etched marks for applying conformed rubber grips(3M adhesive backed).


46.jpg61.jpg58.jpg52.jpg26.jpg29.jpg41.jpg42.jpg43.jpg44.jpg45.jpg50.jpg49.jpg62.jpg
 
One ergonomic revision. Brass pop out pull tab for sliding out the chassis. Li-ion packs will be spring loaded, no soldering required. The soft touch rubber over molding switch box will have aluminum/brass rod inserts(X2) for triggering the micro switches on the chassis.

80.jpg82.jpg75.jpg74.jpg72.jpg69.jpg68.jpg
 
Updates.

Engineering prototype is about 80% complete. It took a while because our CNC source was all queued up. It's hard to get in the pipeline when you're only making 1 unit. There're a few more parts still need to be completed such as the knurled end cap/speaker holder and more machining on the heat sink. Once we have all parts made(ETA 7/23), we'll begin assembly and testing.

One design change:

The chassis will be injection molded black engineering plastic/nylon instead of anodized aluminum. Safety is the primary reason for this change. Isolation becomes very tricky when you have a hilt this small. The space is very cramped inside. When you install wiring, the exposed wires and solder leads could get caught by those sharp edges. The original design with angled and sharp machined edges will likely cut the wires and short the board. Anodization wears off over time so it's isolation quality is not permanent. The other reason is the cost. Injection molding is a bit cheaper than CNC. The molded chassis provides some shock absorbing quality. It's reasonable to think this saber will find it's way on to the hands of reckless younglings.

The rest of the design stays the same unless we find issues when we assemble this prototype. Pics are cell phone quality, not the best way to show the details.

Stay tuned.

photo3.jpgphoto2.jpgphoto4.jpg
photo5.jpgphoto6.jpg
 
Three more important pieces have just completed. The 3/4" blade holder, the brass LED lens holder(imagine the green light spills through the cut outs) and the knurled pommel/speaker holder. Assembly will start later tonight when we're back home from work.

1d52a65d5f16caa5ac09685aa54f3ce8.jpg7cd6433785424ba89f3654049aef81a2.jpgc997077778d731c4a82c8fd83612369c.jpg
 
Hello saber fans,

After about 4 months of development, this mini saber has finally arrived! It seems to be diminutive in size, but not in terms of amount of design and engineering challenges. We’re happy to see it comes to fruition. Although it’s still a prototype, but we’re very intrigued about the potential it presented.

Some basic specs of this saber:

  • 1:1 scale accurate replica of the visual dictionary version;
  • Precision machined aluminum/brass external and internal parts with injection molded internal chassis;
  • Interchangeable blade holder and blade plug with integrated shroud;
  • Modular speaker/pommel;
  • Easy access panel to all ports;
  • Ability to accept the full range of Plecter Labs sound boards including the largest size CFV7;
  • Integrated main power switch with no annoying kill key;
  • Molded tactile activation and aux switches on the activation band;
  • Green blade with purple FOC(Ledengin RGGB with 8 degree lens). LED and lens are not included in the final production kit. See below;
  • Drop in battery bay(no soldering required);

Improvements and notes on the future production units:

  • There’s a CFV6.5 soundboard installed in the prototype. For the production units, advanced soldering skill and wiring management are required due to the amount of space available. All other boards will fit with ample room to spare.
  • The blade holder and the blade plug will be anodized in matte black on the production units.
  • There will be 5 saphire glass lenses on the emitter holes to focus the light.
  • Curved rubber grips with 3M adhesive backing will be provided.
  • Laser etched markings on the hilt for the precise grips positioning. Once rubber grips are installed, the markings will be hidden.

Things are not included in the production kit:
  • Sound board;
  • Ledengin RGGB with 8 degree lens;
  • ¾” Blade with diffuser;
  • 20 mm Bass speaker;
  • Batteries;

3 reasons to not to include the above parts is that those parts:

  1. Those parts might have already been available in people’s spare parts bin;
  2. People have preferences when it comes to sound board, LED, blade and diffuser types;
  3. It’s probably cheaper to buy those parts on your own;

For those people who’re interested in acquiring a production unit of this saber, please look out for our announcement soon.

Thank you so much for your support in the last 4 months!

20140731_172817.jpg20140811_023227.jpg20140811_032256.jpg20140811_034852.jpg20140808_210134.jpg20140808_210439.jpg20140811_060548.jpg20140811_060300.jpg20140811_055905.jpg20140811_055626.jpg
 
Last edited:
Hi guys,

Excellent work ... truly brilliant. Except the way you designed your clamp it's now based on a Bolsey 2 conversion not a Praco which is 180º mirrored ... here are some reference pictures of the original :


This should not be to hard to alter, I suppose?

Chaim
 
Ah yeah, hope that can be easily altered... that the little steal cylinder piece and cutaway don't have a practical use on your version.

That said, I love it. When I first got a look at the licensed yoda saber I didn't like it at all, this is great.
 
Thank you so much for your notes and suggestions!

When we started on initial layout design, my partner and I have went back and forth on the two mirrored layout(Bolsey vs. Praco). The decision was made to go with Bolsey for the human factor considerations. For right hand users, Bolsey's control layout is much more user friendly. The steel cylinder and cutout is now the main power switch. That switch is right under your right thumb. You can configure how you want it to turn the main power on(push or pull). The activation and AUX switches are on the left side which fall right under your index and middle finger.

Now, we also plan to release a left hand version after the right hand run. We understand people want the near exact copy of the Praco prop. We decided to do the right hand one first because there're more right hands than lefties, LOL.

Don't worry, left hand version WILL BE produced. Only two parts need to be changed(mirrored): the hilt body and the chassis.

Added 5 plastic lenses to the emitter. The sapphire glass lenses will be provided, but not installed. You can choose to stay accurate to the original prop. Acid dyed the plug and holder to black. The production version will be anodized black.

20140811_200438.jpg20140811_215437.jpg20140811_215544.jpg20140811_215552.jpg

Hi guys,

Excellent work ... truly brilliant. Except the way you designed your clamp it's now based on a Bolsey 2 conversion not a Praco which is 180º mirrored ... here are some reference pictures of the original :

http://i833.photobucket.com/albums/zz258/Sym-Cha/Yoda_saber_emitter-vi.jpg

http://i833.photobucket.com/albums/zz258/Sym-Cha/Yoda_saber_pommel-vi.jpg


This should not be to hard to alter, I suppose?

Chaim
 
This thread is more than 8 years old.

Your message may be considered spam for the following reasons:

  1. This thread hasn't been active in some time. A new post in this thread might not contribute constructively to this discussion after so long.
If you wish to reply despite these issues, check the box below before replying.
Be aware that malicious compliance may result in more severe penalties.
Back
Top