Space 1999 Ultra Probe Command Module

That is one thing that is nice about studio modeling. After you spend time using kit parts to detail something, your brain begins to figure problems out by looking for solutions to problems that have not yet cropped up and EVERYTHING you see begins to look like a greeblie.

Nice idea there with the pen tips!
 
Thanks very much for all the comments, guys. They are appreciated. I wish I had more time to spend at the work bench lately but I've made some progress since the last post finally.....


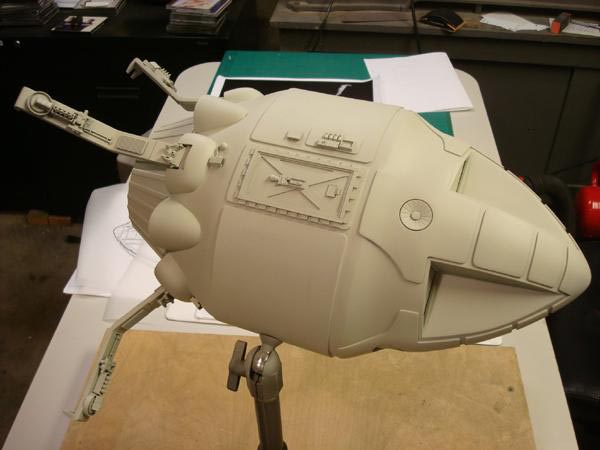
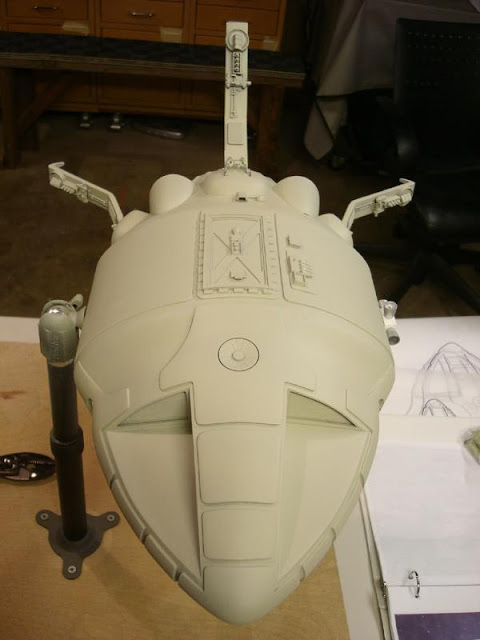
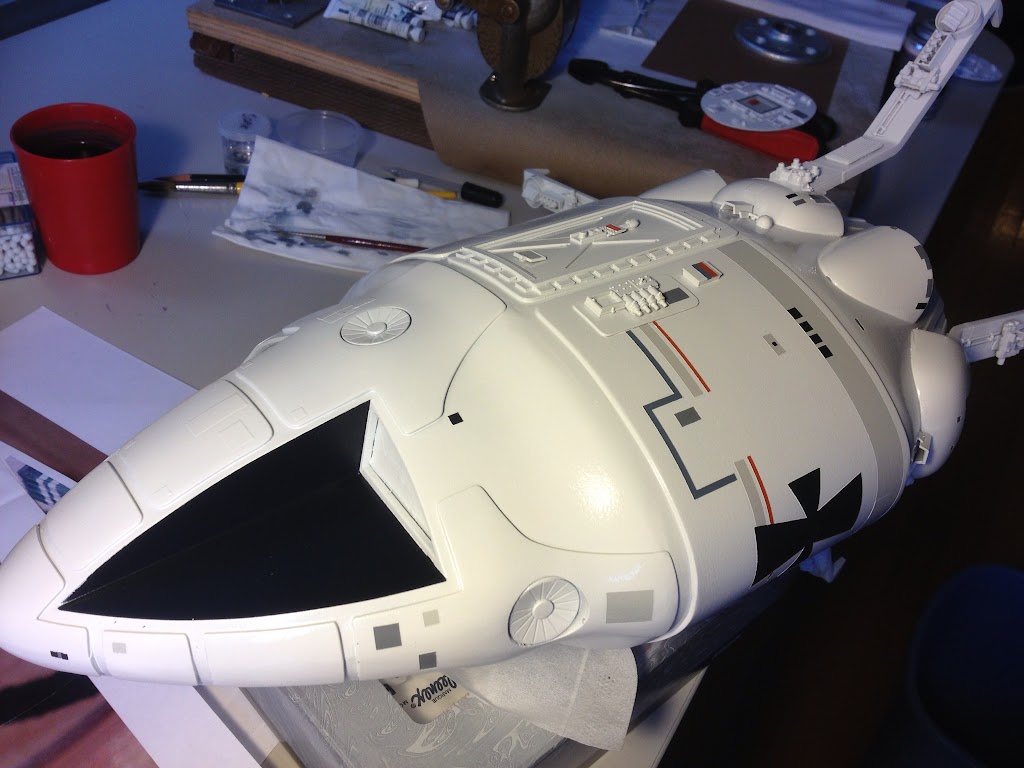
Construction complete and primered.
UPdiary025.JPG


UPdiary026.JPG


UPdiary027.JPG


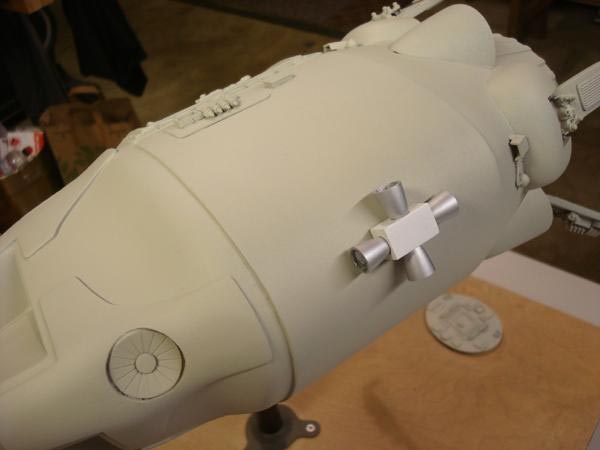
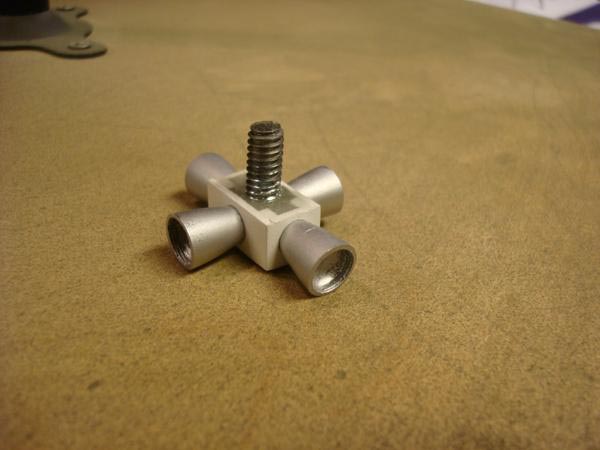
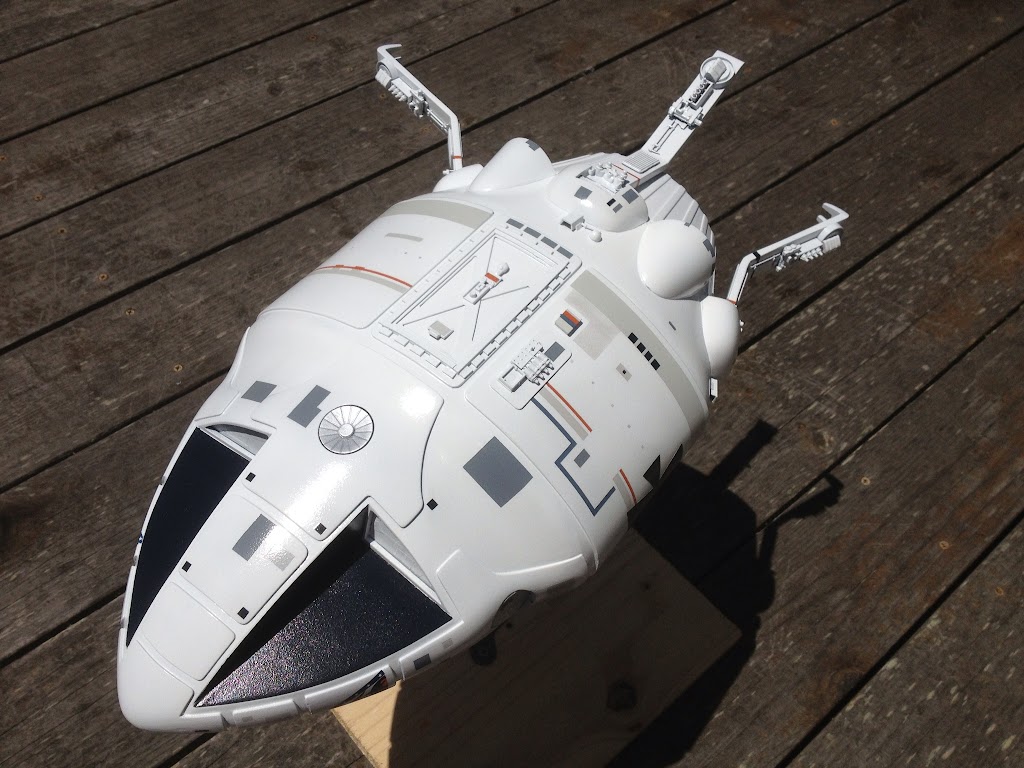
The side thrusters are done except for weathering. This one is held on by magnets.
UPdiary028.JPG


This side screws into the mounting point on the starboard side. The studio model mounted from this point so it will be in place when I'm using the bottom mount point.
UPdiary029.JPG


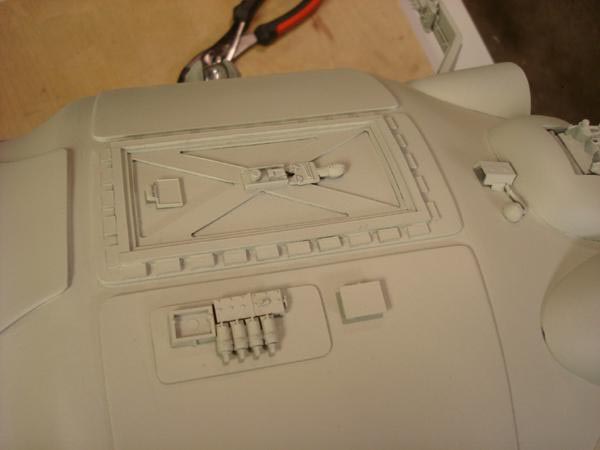
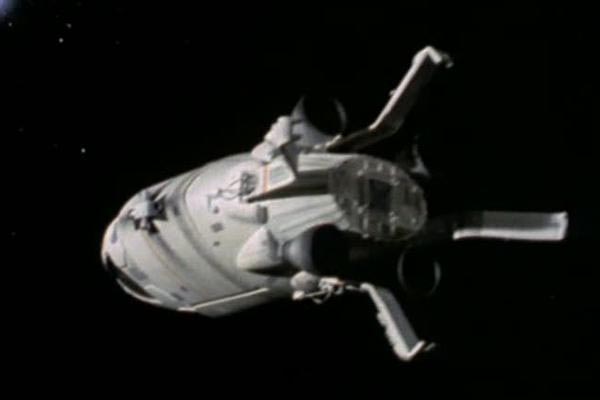
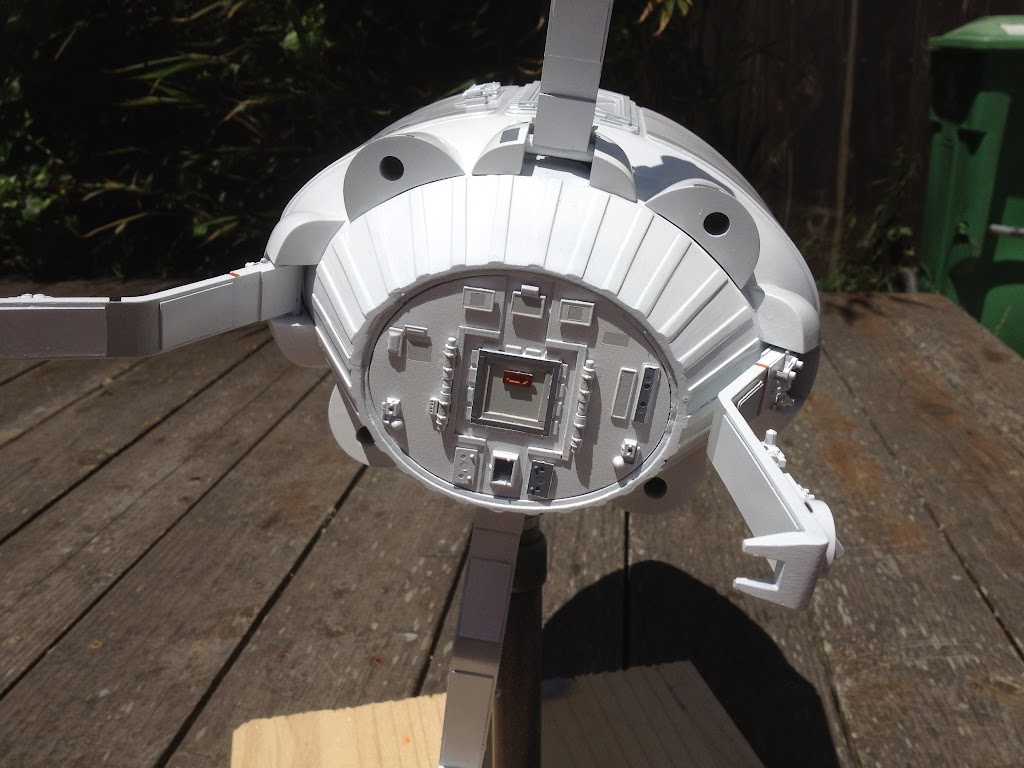
Now the tricky part was the rear plate details. The only reference I have been able to come by are screen caps showing the actual original details. The studio model was modified sometime after filming with the version with 2 thrusters and the details are different. Since this images is the best I have I did my best to duplicate it.
UPdiary030.JPG


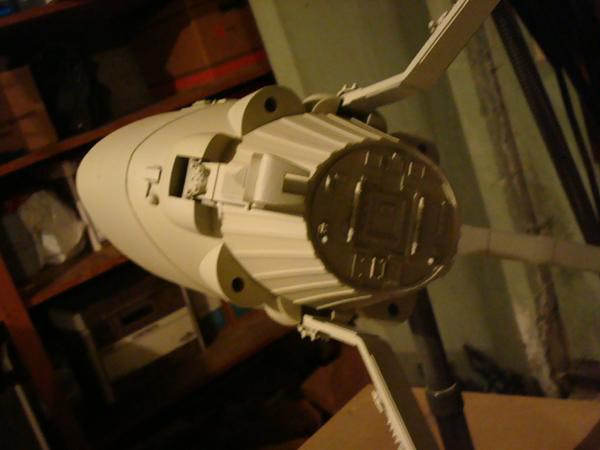
Here's what I came up with in similar lighting to the screencap. Not a perfect match but close enough given the reference.
UPdiary031.JPG


I also made this plate removable (held on with magnets) so if and when better reference comes to light I can scratch up a new one to swap out.
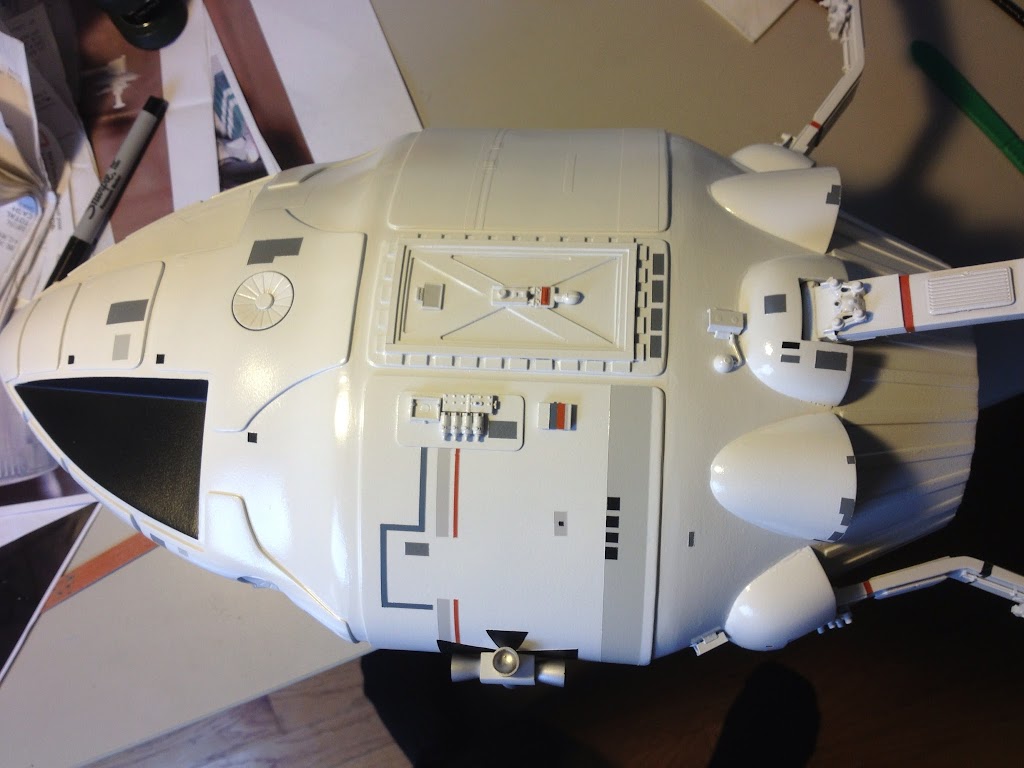
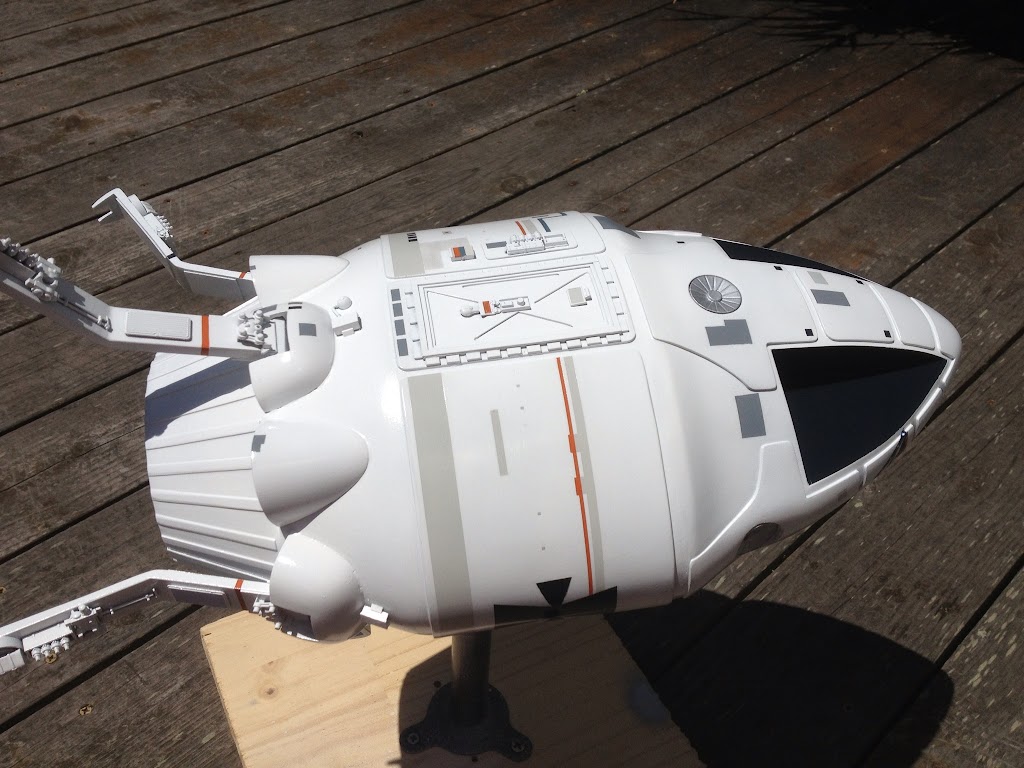
Here it is in better light. All the parts are from the same donor kit.
UPdiary033.JPG


Thanks for looking. Next up is painting all the markings.
-Doug
 
Last edited:
Logically, it ought to have an Eagle interior door there! :D

There's a bunch of model reference on this great site

Ultra Probe Lifeboat

Unfortunately the only shots of the rear of teh module show it after it was stripped and repainted around 1977 :(

891_imultracm4.jpg


You also ought to check out the Eagletransporter forum, I bet they have good reference - if it exists!

K
 
Looks like what you have is a logical extrapolation of the original Ultraprobe CM's back plate to me. I know it was in the Eagle Hangar in a couple Series 2 episodes, but the camera never showed it except for maybe a very distant background shot and I don't believe there were ever any closeups of the back end. As such, what you have may be it.

If you do go to Eagletransporter.com, try getting in touch with BP Taylor (he posts there semi-frequently). He has had some recent dealings with Martin Bower (as have others) and that might get you in communication faster.
 
Finally after a long hiatus I'm getting this one done. Going with all paint for the markings. Tedious as there's at least 7 colors on this.

photo.JPG
 
Glad to see this moving again Doug! Can't wait to see the paint treatment you give it! Based on your other work, I'm sure it's gonna be pure awesomeness!! :D
-Sean
 
Thanks guys. This ones been boxed for a while just needing paint. It will be good to have it finished up. It will have just enough weathering to keep it interesting too so I'm looking forward to that.
 
Mine is still on my bench, taunting me to finish it. God, what a pain of a kit. And a ***** of a paint scheme.

Go for it Doug. I look forward to using yours as a reference for mine...... :D

Gene
 
Thanks guys. This would be a tough scratch build with all the curved body panels.

Gene, yes get a move on. How far did you get? Yeah, getting the patterns down so they matched the photos more or less was a bit of a pain. Then there's all the colors to work out. Out of necessity I'm using rattle cans so it limited my choices a bit. I got the orange done and masked and working on the light grey now. The orange I found to look the best is model master 'go mango'. Probably not the original color but it looks ok. More pics this weekend.....
 
Wow! Awesome details! No problem finding job in the movie industry!...wait, you're not in the movie industry already- are you?
Keep up the excellent work!
 
Started removing the masking. Overall pretty good but a few touch ups needed.

IMAGE_3D583EF3-27AA-481C-A737-1215F0186B02.JPG


IMAGE_395BC78E-A66F-4E78-9A6E-3B55AC4314A9.JPG
 

Attachments

  • IMAGE_3D583EF3-27AA-481C-A737-1215F0186B02.JPG
    IMAGE_3D583EF3-27AA-481C-A737-1215F0186B02.JPG
    97.4 KB · Views: 177
  • IMAGE_395BC78E-A66F-4E78-9A6E-3B55AC4314A9.JPG
    IMAGE_395BC78E-A66F-4E78-9A6E-3B55AC4314A9.JPG
    112.7 KB · Views: 275
Last edited:
This thread is more than 7 years old.

Your message may be considered spam for the following reasons:

  1. This thread hasn't been active in some time. A new post in this thread might not contribute constructively to this discussion after so long.
If you wish to reply despite these issues, check the box below before replying.
Be aware that malicious compliance may result in more severe penalties.
Back
Top