Space 1999 Eagle Transporter Build Club (PIC HEAVY!)

Bob, I have a pair of multi-pliers and a bottle of Clan MacGregor with an uncracked seal.

Darren it's looking very good, I can't wait to see it fully skinned out.

Ray your pods are looking very goo, have you figured out if you are going to do the retracting landing gear?

F3nri5 thank you for posting your designs. They are giving me more ideas.

Braddock thank you for the screen caps those are also helping me with my story.

If I missed anyone my Apologies I'm kinda fuzzy in a Purple Haze (switching to Jimi)
 
Bob, I have a pair of multi-pliers and a bottle of Clan MacGregor with an uncracked seal.

That part I could go for! :thumbsup
Thanks!

Oh, and kcghostbuster, thanks for reading and chiming in finally! :) I agree with you. Even though I'm one of the builders, it's just as fascinating for me to watch all these projects coming together!
 
Thank you kcghostbuster! Wow! I don't think even I would have the courage to read it ALL!!! :lol your support means the world to us and thank you for subscribing! Please feel free to rate the thread, too if you should feel so inclined :)

F3n, the drawings look great and I am glad I could be of help!

Braddock, seems you are more helpful all the time! Thank you again for your contribution.. :)

Ray, those landing pads look tasty and then some! Great work, my friend!

Greylocke, many thanks, Bud! Always glad of your support!
 
Last edited:
Thanks Greylocke I'm trying to figure out the mechanics of it and thanks Darren I just popped the first landing pad casting out of the mold came out great!
 
Ray, why don't you give us all a small tutorial? It would be VERY well received by everyone and I, for one would love to know the what's, why's, how's and wherefores of it all. :)
 
Okay class is in session what do you guys want to know? Lol, here is the mold with the original and a casting with the original, I just took the pad and tacked it down to a piece of styrene then cut out some pieces to make the walls and then poured the silicone in and 3 hours later WA-LA! Lol I know its not spelled that way :lol.
 
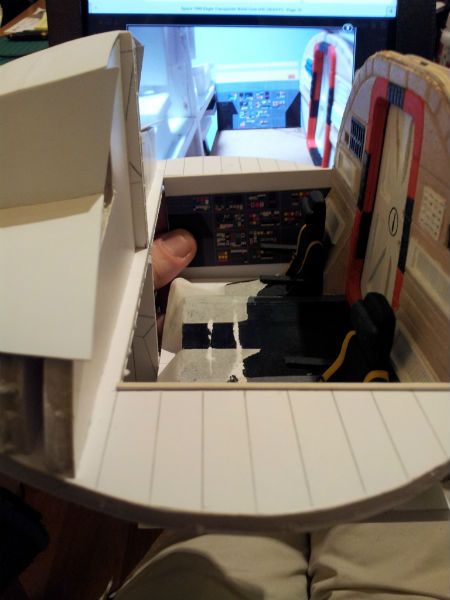
Hi there! Just a little update. I have been working on the new Command Module, and, again, I am pretty much following the methods that Bob has used, with a few changes here and there..
I spent two hours carefully disassembling my cockpit, and managed to salvage the back wall, the pilots' chairs and the floor. The rest I have scrapped as the new cockpit will be the same width but deeper from front to back. This is because I made an error in my calculations when I built the first one. No matter, as it is about to be improved upon, hopefully :)

I have cut and glued in the cockpit platform upon which my cockpit floor will sit and be glued into position. I have also started test fitting the new side walls and after a bit of adjusting, they seem to fit reasonably tightly.

Untitled-19.jpg

That's LMFAOSchwarz's CM on the screen behind mine.
Untitled-18.jpg

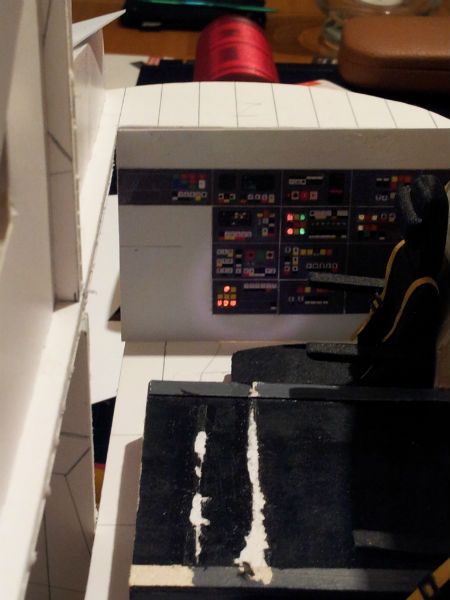
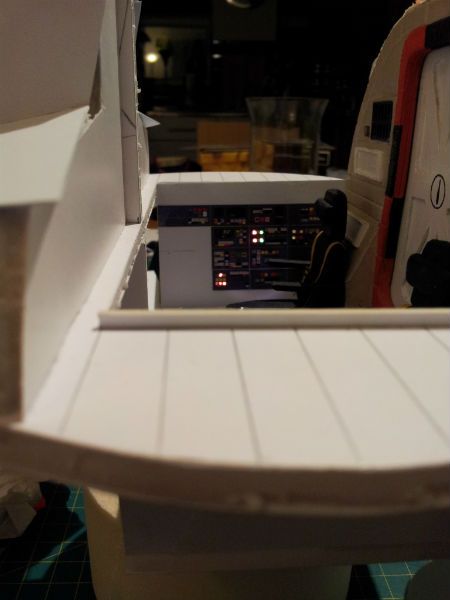
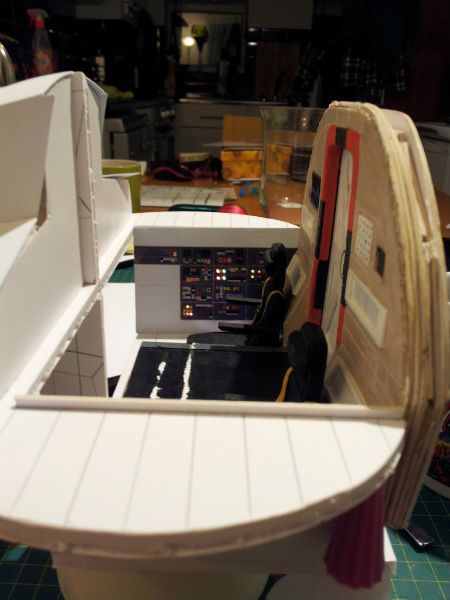
Then I had an idea for adding extra lighting to the cockpit. I am still going to illuminate the five TV screens as before, but I thought it would be cool if, just like on T.V. series, some of the side and front console buttons were illuminated, too. I made a mock up side wall and then took a draft print of the corresponding computer panels, and carefully cut out some of the little square lights with a scalpel. Then I placed the printed panels on the styrene side wall and marked the position of each cut out button. I then drilled the holes through the styrene and glued pieces of acetate over the holes, making sure that I used the right colours in the right places. Then I simply glued the printed computer panels over the top.
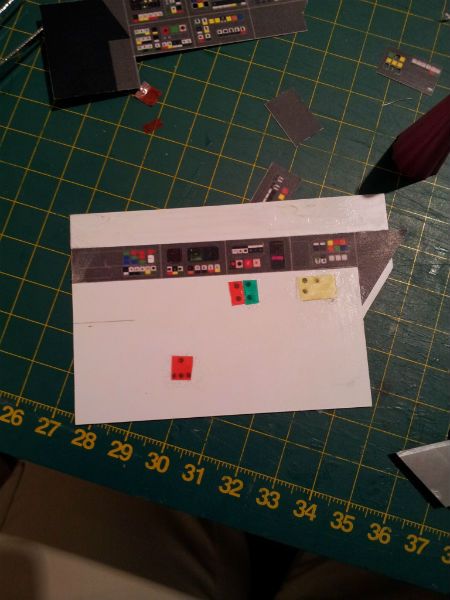
Untitled-20.jpg

As I said, this is just a test piece to see if it works, and I have to say that the photos are bleaching out a lot of the colour. On the whole, I am happy with the result. All I have to do now, Is wire in a block of three ribbon LEDs behind the panel and enclose them in a box of mirror card, to bounce the light around.

Untitled-21.jpg

Untitled-22.jpg

Untitled-24.jpg

Anyway, hope you liked my little update, and I will post soon when I have something. Thanks for looking in! :)
 
Last edited:
Whoa, Darren! This new CM has major potential to be seriously cool!! I love the new effects with the lights! I like how you've taken what I did, and improved upon it with your own special touches! Well done, son..well done!! :thumbsup
 
Oh, I wouldn't say improved so much as innovated or adapted. I so wish I had taken your advice back when we started all this. Your build method allows for so much more access and detailing etc.
You are a non stop revelation at the moment, Bob and I can't begin to tell you how grateful I am :)
 
Hey Darren the control panels and seats in the CM is way to cool I would be pulling my hair out Lol, I have been working on the landing struts just one has taken over 2 hours and it still needs the linkage part that's it for tonight a shower and grab something to eat :popcorn.
 
Me, too....but by that time, it'll give me something to do down at the old folks home, on a rainy afternoon. :lol

Ray, that looks mustard, Mate! Top drawer stuff, and then some!
 
This thread is more than 10 years old.

Your message may be considered spam for the following reasons:

  1. This thread hasn't been active in some time. A new post in this thread might not contribute constructively to this discussion after so long.
If you wish to reply despite these issues, check the box below before replying.
Be aware that malicious compliance may result in more severe penalties.
Back
Top