You are using an out of date browser. It may not display this or other websites correctly.
You should upgrade or use an alternative browser.
You should upgrade or use an alternative browser.
Phaser 1 Kit Buildup plus MM P2 Restoration
- Thread starter asalaw
- Start date
asalaw
Sr Member
Re: John Long Phaser 1 Kit Buildup plus MM P2 Restoration

I agree about the CAD. There's nothing like it.
I'm using Inventor because that's what they have at the shop. Autodesk is a major Techshop partner, so they've got every piece of software Autodesk makes, as well as the full Adobe suite, and MS software as well (MS and Adobe are also partners). So they've also got Max, Maya, Mudbox, SoftImage, the works, plus regular AutoCad, plus the electronics AutoCAD, plus other stuff I can't remember. There's a freakin' mosaic of Autodesk icons on the Techshop desktop.
I'd love to check out SolidWorks one day if I ever get access. I've heard great things about it, and they used that over in the 5' MF thread to do their photogrammetry and generate blueprints and parts.
Anyway, thanks again for the very kind comment. I'll be back some time tonight or tomorrow morning with this weekend's emitter post -- I finished it (though I might do it again next weekend to get it perfect).
Here's a teaser till I get it up. The post, I mean.

Thanks, that's very kind!Fantastic! CAD is definitely the way to best document these props (although, I prefer SolidWorks...)
This is still one of my favorites threads...
I agree about the CAD. There's nothing like it.
I'm using Inventor because that's what they have at the shop. Autodesk is a major Techshop partner, so they've got every piece of software Autodesk makes, as well as the full Adobe suite, and MS software as well (MS and Adobe are also partners). So they've also got Max, Maya, Mudbox, SoftImage, the works, plus regular AutoCad, plus the electronics AutoCAD, plus other stuff I can't remember. There's a freakin' mosaic of Autodesk icons on the Techshop desktop.
I'd love to check out SolidWorks one day if I ever get access. I've heard great things about it, and they used that over in the 5' MF thread to do their photogrammetry and generate blueprints and parts.
Anyway, thanks again for the very kind comment. I'll be back some time tonight or tomorrow morning with this weekend's emitter post -- I finished it (though I might do it again next weekend to get it perfect).
Here's a teaser till I get it up. The post, I mean.

asalaw
Sr Member
Re: John Long Phaser 1 Kit Buildup plus MM P2 Restoration
Wow, what a day! Things would've gone better if I'd gotten on Lathe 2, but the chick at the desk wanted to put me on Lathe 1. Turns out the wobble was not the chuck, it's in the damn drive. But I persevered -- I got it done, but I had a lot of needless problems. I might give it another go next week on Lathe 2, but we'll see how I feel then. I'm kind of itching to get on with the brass bits and soldering to finish the whole emitter and travel assembly.
Okay, so last night, when I was having that horrible chatter using my taper tool, I came up with a workaround that worked very... around, I guess. Anyway, it worked.
But let's go through it from the start:
Once again, I made my marks on the tool blank with the height gage and a purple Sharpie.

No notch this time, just a straight taper. This was much easier to grind than the first one, and I even used the sanding disk for touching up the edge. This tool came out really nice. Too bad it didn't work.
The wobble in the lathe made a horrible chatter, and just cracked the crap out of two pieces before I gave up on the tool. Then I had a brainstorm: 80 grit to the rescue!

Well, I had to find it somewhere.
I just went and got my sanding block, set the lathe for around 900 rpm, and went to it. The results were quite good!


That was last night's piece, and as I said earlier, I got frustrated and called it quits. I think it was for the best. When I'm working the lathe at the nursing home one day, I want to be the guy who's famous for still having all his fingers.
But this afternoon I was energetic and feeling spendy, so I dropped $1.12 on two sheets of 80 grit at the shop. Then I went to my home away from home, the Techshop scrap pile, and grabbed a likely-looking piece of wood.
When I got to the bandsaw, though, I damn near loaded my shorts. Somebody had left it running. Unattended. With the blade guard about a foot up. Anyone walking by could have lost an arm.
I found the knuckle-dragger who'd used it last (he was nearby doing something else), and I called him over and built him a new ass. He actually said "I thought I turned it off." Yeah, that makes it so much better. This guy was maybe 25 going on 12. He does not belong around scary machinery. Word to the wise: the wood shop is not a playground. I told the nearest DC to watch out for that guy.
After that was over, though, I cut myself some sanding blocks, broke out the ol' 3M Super 77, and made myself some two-sided sanding blocks tailor-made to shape an emitter.


Acrylic clogs up sandpaper really fast, and I wanted to keep going without stopping every 30 seconds to blast off the sandpaper. Four 8-inch blocks, double-sided. Eight surfaces, no waiting. Awesome!! (Yes, I'm easily impressed. What's your point? )
)
So I set up the lathe. I cut myself a 4-inch piece of acrylic, set it up in the indexing collet, got my center drill, and made my little divot thingy.


The piece was actually perfectly straight, that's just barrel distortion from the wide-angle lens making it look like a trumpet.
I'd thought about this all last night and this morning; I changed the order of operations. This time I'd drill first, then turn it down to 0.305" (the bore of the inside of the nozzle) then make the taper, then part it (leaving myself a little bit extra so it would still fit in the same collet), then flip it around and drill the back, then flip it around again and do my final part. It worked pretty well, but if I do this again next week, I'll tweak it just bit more.
The first attempt resulted in yet another broken bit, because of that damn wobble. But since I'd cut myself a 4-inch piece, I was able to just part the end off and start over. That's the value of screwing it up in such a wide variety of ways!


The turning went fine, and after just a few passes I had a very nice fit. Still at 40 rpm, but I upped my feed to around .0030 ips, because I wanted to finish while I was still 50.
I'm almost at my picture limit, so I'll part it off here and continue. (See what I did there?)
Wow, what a day! Things would've gone better if I'd gotten on Lathe 2, but the chick at the desk wanted to put me on Lathe 1. Turns out the wobble was not the chuck, it's in the damn drive. But I persevered -- I got it done, but I had a lot of needless problems. I might give it another go next week on Lathe 2, but we'll see how I feel then. I'm kind of itching to get on with the brass bits and soldering to finish the whole emitter and travel assembly.
Okay, so last night, when I was having that horrible chatter using my taper tool, I came up with a workaround that worked very... around, I guess. Anyway, it worked.
But let's go through it from the start:
Once again, I made my marks on the tool blank with the height gage and a purple Sharpie.

No notch this time, just a straight taper. This was much easier to grind than the first one, and I even used the sanding disk for touching up the edge. This tool came out really nice. Too bad it didn't work.
The wobble in the lathe made a horrible chatter, and just cracked the crap out of two pieces before I gave up on the tool. Then I had a brainstorm: 80 grit to the rescue!

Well, I had to find it somewhere.
I just went and got my sanding block, set the lathe for around 900 rpm, and went to it. The results were quite good!


That was last night's piece, and as I said earlier, I got frustrated and called it quits. I think it was for the best. When I'm working the lathe at the nursing home one day, I want to be the guy who's famous for still having all his fingers.
But this afternoon I was energetic and feeling spendy, so I dropped $1.12 on two sheets of 80 grit at the shop. Then I went to my home away from home, the Techshop scrap pile, and grabbed a likely-looking piece of wood.
When I got to the bandsaw, though, I damn near loaded my shorts. Somebody had left it running. Unattended. With the blade guard about a foot up. Anyone walking by could have lost an arm.
I found the knuckle-dragger who'd used it last (he was nearby doing something else), and I called him over and built him a new ass. He actually said "I thought I turned it off." Yeah, that makes it so much better. This guy was maybe 25 going on 12. He does not belong around scary machinery. Word to the wise: the wood shop is not a playground. I told the nearest DC to watch out for that guy.
After that was over, though, I cut myself some sanding blocks, broke out the ol' 3M Super 77, and made myself some two-sided sanding blocks tailor-made to shape an emitter.


Acrylic clogs up sandpaper really fast, and I wanted to keep going without stopping every 30 seconds to blast off the sandpaper. Four 8-inch blocks, double-sided. Eight surfaces, no waiting. Awesome!! (Yes, I'm easily impressed. What's your point?
So I set up the lathe. I cut myself a 4-inch piece of acrylic, set it up in the indexing collet, got my center drill, and made my little divot thingy.


The piece was actually perfectly straight, that's just barrel distortion from the wide-angle lens making it look like a trumpet.
I'd thought about this all last night and this morning; I changed the order of operations. This time I'd drill first, then turn it down to 0.305" (the bore of the inside of the nozzle) then make the taper, then part it (leaving myself a little bit extra so it would still fit in the same collet), then flip it around and drill the back, then flip it around again and do my final part. It worked pretty well, but if I do this again next week, I'll tweak it just bit more.
The first attempt resulted in yet another broken bit, because of that damn wobble. But since I'd cut myself a 4-inch piece, I was able to just part the end off and start over. That's the value of screwing it up in such a wide variety of ways!


The turning went fine, and after just a few passes I had a very nice fit. Still at 40 rpm, but I upped my feed to around .0030 ips, because I wanted to finish while I was still 50.
I'm almost at my picture limit, so I'll part it off here and continue. (See what I did there?)
asalaw
Sr Member
Re: John Long Phaser 1 Kit Buildup plus MM P2 Restoration
It's great to be back! Miss me?
So here's one way to know you're getting a good result: nice, pretty, curly chips. (Crap, now I want to go to Arby's.)

So the reason I turned it down first, prior to sanding down the taper, is so there'd be less material to remove, and thus it would go quicker.

I'd like to finish before this little yutz is old
enough to push my wheelchair for minimum wage.
So as I sanded, I just used my tool as a guide to make sure I was on target with my taper. Worked like a charm. I did the sanding at 600 rpm.

Then I came in with the wet-sanding and polishing:


Now all I had to do was complete the hole from the other side, so I'd have to flip it around and... uh... how do I put this?


"Re-orient the workpiece 180º and repeat the procedure from the opposite direction," I guess.
So I got that done, and then I drilled out the very end about 1/16" deep with a 1/4" drill bit, to make a sleeve for that little ring I machined into the end of the brass tube.

And Bob's your uncle!

Except... uh... oops...

That damn wobble bit me in the ass at the very end, cracking my piece. This is why I might do one more next week. I'm also unhappy with the transition between the wide hole and the narrower one near the tip. It's rough-looking, not the nice little funnel shape we see in the GJ. But if I screw up the next one, I can live with this one.
Back in a minute with some final pictures of this part of the build.
It's great to be back! Miss me?
So here's one way to know you're getting a good result: nice, pretty, curly chips. (Crap, now I want to go to Arby's.)

So the reason I turned it down first, prior to sanding down the taper, is so there'd be less material to remove, and thus it would go quicker.

I'd like to finish before this little yutz is old
enough to push my wheelchair for minimum wage.
So as I sanded, I just used my tool as a guide to make sure I was on target with my taper. Worked like a charm. I did the sanding at 600 rpm.

Then I came in with the wet-sanding and polishing:


Now all I had to do was complete the hole from the other side, so I'd have to flip it around and... uh... how do I put this?


"Re-orient the workpiece 180º and repeat the procedure from the opposite direction," I guess.
So I got that done, and then I drilled out the very end about 1/16" deep with a 1/4" drill bit, to make a sleeve for that little ring I machined into the end of the brass tube.

And Bob's your uncle!

Except... uh... oops...

That damn wobble bit me in the ass at the very end, cracking my piece. This is why I might do one more next week. I'm also unhappy with the transition between the wide hole and the narrower one near the tip. It's rough-looking, not the nice little funnel shape we see in the GJ. But if I screw up the next one, I can live with this one.
Back in a minute with some final pictures of this part of the build.
asalaw
Sr Member
Re: John Long Phaser 1 Kit Buildup plus MM P2 Restoration
And we're back! You're listening to WFU2, where all the hits are on your face! That was The Wet Tee-Shirts with their number one single, "If I Could Do It All Over Again, I'd Do It All Over You!"
So of course the first thing I did was look at it in the nozzle, so I could figure out how much I'd have to trim down the brass tube to make it all work. And to my total shock and awe, it all fit perfectly -- no need to trim anything (unless, again, I make a new one next weekend with a little more plexi behind the taper).


And that left only one thing -- lighting test!!
I don't have any GOW bulbs, but I do have various GORs, so I went with that. From what I could see, it looks like there's plenty of room for the bigger GOW size, so I'm going to order a few. Besides, the phaser 2 runs on 3 volts (because of the two N-cells), and this bulb is pretty bright with just 1.5V (as in the P1). I don't want it to burn out prematurely.


You can really see what I mean about the rough transition between the larger hole and the smaller one in the second picture. But bear in mind this is a macro shot of a very tiny area, so I may not worry about it. We'll see how I feel next weekend.
Last shots of the emitter with the brass tube:


The nice thing about having cracked the end, though, is it illustrates really well what I'm doing with the joint between the two pieces. There's plenty of surface still left for glueing, and it's in an area that will never be seen.

Like this dork's last five pictures.

Not a bad day's work!
There's another possibility for next week: I might do all the brass stuff just for a change of scenery, and then go back and try one last emitter. Film at 11, as they used to say.

Back when iPads looked like this.

And we're back! You're listening to WFU2, where all the hits are on your face! That was The Wet Tee-Shirts with their number one single, "If I Could Do It All Over Again, I'd Do It All Over You!"
So of course the first thing I did was look at it in the nozzle, so I could figure out how much I'd have to trim down the brass tube to make it all work. And to my total shock and awe, it all fit perfectly -- no need to trim anything (unless, again, I make a new one next weekend with a little more plexi behind the taper).


And that left only one thing -- lighting test!!
I don't have any GOW bulbs, but I do have various GORs, so I went with that. From what I could see, it looks like there's plenty of room for the bigger GOW size, so I'm going to order a few. Besides, the phaser 2 runs on 3 volts (because of the two N-cells), and this bulb is pretty bright with just 1.5V (as in the P1). I don't want it to burn out prematurely.


You can really see what I mean about the rough transition between the larger hole and the smaller one in the second picture. But bear in mind this is a macro shot of a very tiny area, so I may not worry about it. We'll see how I feel next weekend.
Last shots of the emitter with the brass tube:


The nice thing about having cracked the end, though, is it illustrates really well what I'm doing with the joint between the two pieces. There's plenty of surface still left for glueing, and it's in an area that will never be seen.

Like this dork's last five pictures.

Not a bad day's work!
There's another possibility for next week: I might do all the brass stuff just for a change of scenery, and then go back and try one last emitter. Film at 11, as they used to say.

Back when iPads looked like this.
Last edited:
asalaw
Sr Member
Re: John Long Phaser 1 Kit Buildup plus MM P2 Restoration
Off to the shop again this morning, but here's what I did last night. I was incredibly exhausted and wouldn't have even gone if I'd been in my right mind, but what's the point of being exhausted if you can't turn into an angry, petulant two-year-old?

With lots of money.
Not much to talk about with Inventor, but I did change out the screw in the phaser nozzle, and not without some minor difficulty.


The oval head screw was fine, but it was blocking the receiver bigtime.
So I grabbed a new screw from one of my baggies -- not the ones in my sock drawer. Those are for when Daddy has a headache.

And since the new one was a slot drive, of course trying to get it into position was a major nightmare.

Almost as bad as the 80s.
So I gave up trying to work with my own driver set, and checked out a set of magnetic drivers from the front desk.

And that was an epic fail.
Because the screw turned out to be non-ferrous.
Yes, I know what you're thinking, and you're right.
It was Ferrous Screwler's Day Off.

Not my finest moment, I grant you.

So anyway, now I'm ready for today's adventure -- I got the screw in, and it's a much better profile, so all I need to do is file down the brass slide a bit, and I'll have free travel.

80,000 club miles for this? I think I've been screwed.
Off to the shop to cut some brass and put the torch to it!

Off to the shop again this morning, but here's what I did last night. I was incredibly exhausted and wouldn't have even gone if I'd been in my right mind, but what's the point of being exhausted if you can't turn into an angry, petulant two-year-old?

With lots of money.
Not much to talk about with Inventor, but I did change out the screw in the phaser nozzle, and not without some minor difficulty.


The oval head screw was fine, but it was blocking the receiver bigtime.
So I grabbed a new screw from one of my baggies -- not the ones in my sock drawer. Those are for when Daddy has a headache.

And since the new one was a slot drive, of course trying to get it into position was a major nightmare.

Almost as bad as the 80s.
So I gave up trying to work with my own driver set, and checked out a set of magnetic drivers from the front desk.

And that was an epic fail.
Because the screw turned out to be non-ferrous.
Yes, I know what you're thinking, and you're right.
It was Ferrous Screwler's Day Off.

Not my finest moment, I grant you.
So anyway, now I'm ready for today's adventure -- I got the screw in, and it's a much better profile, so all I need to do is file down the brass slide a bit, and I'll have free travel.

80,000 club miles for this? I think I've been screwed.
Off to the shop to cut some brass and put the torch to it!
Replicator1701
Well-Known Member
Re: John Long Phaser 1 Kit Buildup plus MM P2 Restoration
Or you could just use an undercut screw. they are designed for use with counter sunk sheet metal so they sit flush
Or you could just use an undercut screw. they are designed for use with counter sunk sheet metal so they sit flush
asalaw
Sr Member
Re: John Long Phaser 1 Kit Buildup plus MM P2 Restoration

Good news: I was at Techshop from about 1pm yesterday till about 5 am this morning. Awesome!
Bad news: An equipment issue prevented my finishing the brass bits for the slide. More on that tonight.
Good news: The reason I was at the shop till 5 am is I got sucked into Inventor. I'm beginning to scratch the surface of getting the hang of launching the app!


More tonight about how I acted like a complete brasshole yesterday, but right now I owe the Axanar blog 1,000 words about TOS props by tomorrow, so I have to go poop out some next-level prose. Or just next-level poop. One of those.
Hadn't heard of those, but I didn't have any in my baggie regardless. Think I'll lay some in though. Thanks!Or you could just use an undercut screw. they are designed for use with counter sunk sheet metal so they sit flush
Good news: I was at Techshop from about 1pm yesterday till about 5 am this morning. Awesome!
Bad news: An equipment issue prevented my finishing the brass bits for the slide. More on that tonight.
Good news: The reason I was at the shop till 5 am is I got sucked into Inventor. I'm beginning to scratch the surface of getting the hang of launching the app!


More tonight about how I acted like a complete brasshole yesterday, but right now I owe the Axanar blog 1,000 words about TOS props by tomorrow, so I have to go poop out some next-level prose. Or just next-level poop. One of those.
Last edited:
asalaw
Sr Member
Re: John Long Phaser 1 Kit Buildup plus MM P2 Restoration
My Axanar blog piece is in, so here I am with the latest on yesterday's debacle/triumph/porn shoot (one of those may not be entirely factual).
I got into the shop yesterday full of hope and cheese. Seriously, I ate a lot of cheese yesterday.
I broke out my 1/4" brass bar from Online Metals, and took it into the machine shop for the usual marking up with the height gage. At 1" x 6", it only comes to $7.
I followed the technique I saw on YouTube by Tubalcain on how to mark holes with a height gage. It's definitely worth a look, and I've gotten great results with it.
I finally got to try out my machinist's punch, too -- it's excellent for punching machinists, but yesterday I just stuck to the brass.
You just drag it along the grooves you make with the height gage till you feel it nestle into the spot where they intersect, and give it a thunk. Like buttah.

You can also use a regular center punch and a mallet, but that's one more tool than I can use at a time without mashing my middle finger, and I need that to drive.
Next up, time to set the belts on the drill press. Because God forbid they should put a knob on these things. The chart says 3,000 rpm for brass up to 3/16", so I set the belts for what I hoped was 2950, but really, how can you tell? The damn thing's Chinese, and 2950 is probably Mandarin for "Warp Eleventy-Five."

Not shown: Ludicrous Speed.
So, Tubalcain recommends not clamping down your work when you have a punched center like this. Instead, he says to just guide the work with your hand, and gently drop the drill bit into the work, letting the bit wobble its way into the punch. And I'll be damned, that works really well!

Of course, what Tubalcain doesn't tell you is that at Techshop, you better damn well wear ear protection at the drill press, because chances are some shmuck will be ten feet away from you on the Water Jet.

Actual shmuck may differ from picture.
If you've never heard a Water Jet, try to imagine watching Star Trek Into Darkness with a xenomorph who hates J.J. Abrams even more than you do. I've heard less eardrum-ripping screeches from a toddler on a hotplate. You probably shouldn't try that at home.
Tubalcain also fails to mention how hot it can get in there when the AC is on the fritz. (Seriously, why do I watch that old fart's videos anyway?) But that's when you reach for ASA Law's patented man-portable air conditioner, which the other shop denizens insist on calling the "compressed air nozzle."

If this lawyer thing doesn't work
out, maybe I can rent myself out
as a putting green.
So, onto drilling:


Basically, you just walk up the drill bit sizes. I skip a size with each transition, because life is too damn short. Also, once you get close to 3/16", you have to step down to 1,200 rpm. The chart says you're good at 3,000 up to 1/4", but when I got one bit before 3/16", the whole thing started to chatter like a college girl on adderall.

I'm gonna stab that calculus exam repeatedly!
Also possibly my boyfriend.
Fortunately, though, the mistake drilled out by the time I got up to 1/4", so my first hole was fine.
So, why didn't I just drill both holes as I went, instead of doing the whole thing twice?
First, I'm a moron. I think we've established that by now.
But second, I wanted to make sure I was going about this the right way, since I'd literally never done this on a drill press before -- I've been using the knee mill up till now, but I wanted to try getting precision on the drill press. That sucker vibrates violently at high speed, and it's not unusual to have to chase middle-aged women away from it at all hours.

Some are pretty adamant about staying.
So once I got into the larger sizes at lower speeds, I went ahead and clamped down my piece. This worked out pretty well.

And now some drill press porn, just because.


So, lather, rinse, repeat, and I wound up with two perfect 1/4" holes, ready to be marked and cut into four P1 emitter catches on the bandsaw!


Except, once I got there, the bandsaw wouldn't work. It just went kachunk when I hit the button. A DC told me the belt was busted, and they were waiting on a new one to come in...
 !
!
And that's when I went off to the computer area to teach myself Inventor by making props with it.

Pictured: Surprisingly, only 12 hours of work!
So hopefully next weekend the bandsaw will be back up and running, and I can either finish making my pieces, or at least practice sewing my fingers back on.


My Axanar blog piece is in, so here I am with the latest on yesterday's debacle/triumph/porn shoot (one of those may not be entirely factual).
I got into the shop yesterday full of hope and cheese. Seriously, I ate a lot of cheese yesterday.
I broke out my 1/4" brass bar from Online Metals, and took it into the machine shop for the usual marking up with the height gage. At 1" x 6", it only comes to $7.
I followed the technique I saw on YouTube by Tubalcain on how to mark holes with a height gage. It's definitely worth a look, and I've gotten great results with it.
I finally got to try out my machinist's punch, too -- it's excellent for punching machinists, but yesterday I just stuck to the brass.
You just drag it along the grooves you make with the height gage till you feel it nestle into the spot where they intersect, and give it a thunk. Like buttah.

You can also use a regular center punch and a mallet, but that's one more tool than I can use at a time without mashing my middle finger, and I need that to drive.
Next up, time to set the belts on the drill press. Because God forbid they should put a knob on these things. The chart says 3,000 rpm for brass up to 3/16", so I set the belts for what I hoped was 2950, but really, how can you tell? The damn thing's Chinese, and 2950 is probably Mandarin for "Warp Eleventy-Five."

Not shown: Ludicrous Speed.
So, Tubalcain recommends not clamping down your work when you have a punched center like this. Instead, he says to just guide the work with your hand, and gently drop the drill bit into the work, letting the bit wobble its way into the punch. And I'll be damned, that works really well!

Of course, what Tubalcain doesn't tell you is that at Techshop, you better damn well wear ear protection at the drill press, because chances are some shmuck will be ten feet away from you on the Water Jet.

Actual shmuck may differ from picture.
If you've never heard a Water Jet, try to imagine watching Star Trek Into Darkness with a xenomorph who hates J.J. Abrams even more than you do. I've heard less eardrum-ripping screeches from a toddler on a hotplate. You probably shouldn't try that at home.
Tubalcain also fails to mention how hot it can get in there when the AC is on the fritz. (Seriously, why do I watch that old fart's videos anyway?) But that's when you reach for ASA Law's patented man-portable air conditioner, which the other shop denizens insist on calling the "compressed air nozzle."

If this lawyer thing doesn't work
out, maybe I can rent myself out
as a putting green.
So, onto drilling:


Basically, you just walk up the drill bit sizes. I skip a size with each transition, because life is too damn short. Also, once you get close to 3/16", you have to step down to 1,200 rpm. The chart says you're good at 3,000 up to 1/4", but when I got one bit before 3/16", the whole thing started to chatter like a college girl on adderall.

I'm gonna stab that calculus exam repeatedly!
Also possibly my boyfriend.
Fortunately, though, the mistake drilled out by the time I got up to 1/4", so my first hole was fine.
So, why didn't I just drill both holes as I went, instead of doing the whole thing twice?
First, I'm a moron. I think we've established that by now.
But second, I wanted to make sure I was going about this the right way, since I'd literally never done this on a drill press before -- I've been using the knee mill up till now, but I wanted to try getting precision on the drill press. That sucker vibrates violently at high speed, and it's not unusual to have to chase middle-aged women away from it at all hours.

Some are pretty adamant about staying.
So once I got into the larger sizes at lower speeds, I went ahead and clamped down my piece. This worked out pretty well.

And now some drill press porn, just because.


So, lather, rinse, repeat, and I wound up with two perfect 1/4" holes, ready to be marked and cut into four P1 emitter catches on the bandsaw!


Except, once I got there, the bandsaw wouldn't work. It just went kachunk when I hit the button. A DC told me the belt was busted, and they were waiting on a new one to come in...
 !
!And that's when I went off to the computer area to teach myself Inventor by making props with it.

Pictured: Surprisingly, only 12 hours of work!
So hopefully next weekend the bandsaw will be back up and running, and I can either finish making my pieces, or at least practice sewing my fingers back on.
Last edited by a moderator:
asalaw
Sr Member
Re: John Long Phaser 1 Kit Buildup plus MM P2 Restoration

Belt, not blade. I'm guessing Sears and Home Depot don't carry drive belts for Jet bandsaws.Waiting for a blade? They can't go to Sears or Home Depot to get one?
asalaw
Sr Member
Re: John Long Phaser 1 Kit Buildup plus MM P2 Restoration
Sure thing, Emily! Tomorrow's topic will be sax and violins on TV.
Just went through your phaser thread again from last year -- I'd forgotten what a sweet piece of work that was!
Oh belt, never mind :$
Sure thing, Emily! Tomorrow's topic will be sax and violins on TV.
Just went through your phaser thread again from last year -- I'd forgotten what a sweet piece of work that was!
asalaw
Sr Member
Re: John Long Phaser 1 Kit Buildup plus MM P2 Restoration
So my steel cubes were delivered on the 8th, but my wife may have misplaced them. I'll know soon enough. At least they're cheap enough to just reorder if I need to.
But my 0.005" aluminum foil sheet did make it unscathed, and so did my 8GB of RAM for my hot little Mini! BOY, does Photoshop launch faster now!

The foil is for gaging what thickness I should use for creating my own diamond-embossed foil. I think 0.005" may be a hair too thin, but I know 0.010" will be too stiff. That's the gauge of the brass I used on the handle. I should probably mic that Diet Pepsi can I murdered for shim metal.
Yeah... Kinda obvious... Explains why I didn't think of it...
Although, now that I think of it, the arbor press at the shop is a 3-ton. Maybe I can press 10-thou aluminum in there...
So my steel cubes were delivered on the 8th, but my wife may have misplaced them. I'll know soon enough. At least they're cheap enough to just reorder if I need to.
But my 0.005" aluminum foil sheet did make it unscathed, and so did my 8GB of RAM for my hot little Mini! BOY, does Photoshop launch faster now!
The foil is for gaging what thickness I should use for creating my own diamond-embossed foil. I think 0.005" may be a hair too thin, but I know 0.010" will be too stiff. That's the gauge of the brass I used on the handle. I should probably mic that Diet Pepsi can I murdered for shim metal.
Yeah... Kinda obvious... Explains why I didn't think of it...
Although, now that I think of it, the arbor press at the shop is a 3-ton. Maybe I can press 10-thou aluminum in there...
Last edited:
asalaw
Sr Member
Re: John Long Phaser 1 Kit Buildup plus MM P2 Restoration
Got my steel cubes! Headed to the shop in 3 1/2 hours. My main goal is to cut out the P1 emitter receivers (is there some other name for this dingus?) and the little Z-shaped thingy that mounts it to the brass slider. Not sure if I'll get to soldering tonight, but I am in the mood to play with some fire...
I'll probably drill my first cube for the side dial jig tomorrow and see how it works and whether I need to make modifications to it. Definitely tomorrow. I'm in no mood to drill through an inch of mild steel tonight.
EDIT --
HAHAHAHA!!!!!
Made a discovery. I should've used 1/8" brass instead of 1/4". After I cut them out, I noticed they looked WAY wrong. Like little brass marshmallows. Checked my photos again -- sure enough, I'd made them too thick. D'OH!! (yet again...)
I have 1/8" brass on hand, though, so tomorrow I'll be going through the whole process again from start to finish. For now, here's a picture of my steel cubes for no apparent reason, other than posting something besides poop jokes or marginally appropriate memes squeezed into context like Oprah putting on her high school Spanx.

Pictured: Borg bullion.
Got my steel cubes! Headed to the shop in 3 1/2 hours. My main goal is to cut out the P1 emitter receivers (is there some other name for this dingus?) and the little Z-shaped thingy that mounts it to the brass slider. Not sure if I'll get to soldering tonight, but I am in the mood to play with some fire...
I'll probably drill my first cube for the side dial jig tomorrow and see how it works and whether I need to make modifications to it. Definitely tomorrow. I'm in no mood to drill through an inch of mild steel tonight.
EDIT --
HAHAHAHA!!!!!
Made a discovery. I should've used 1/8" brass instead of 1/4". After I cut them out, I noticed they looked WAY wrong. Like little brass marshmallows. Checked my photos again -- sure enough, I'd made them too thick. D'OH!! (yet again...)
I have 1/8" brass on hand, though, so tomorrow I'll be going through the whole process again from start to finish. For now, here's a picture of my steel cubes for no apparent reason, other than posting something besides poop jokes or marginally appropriate memes squeezed into context like Oprah putting on her high school Spanx.

Pictured: Borg bullion.
Last edited:
asalaw
Sr Member
Re: John Long Phaser 1 Kit Buildup plus MM P2 Restoration
Hey, RPFeeps! So last night was interesting. I learned a few things (as usual), some of them due to my own laziness (also as usual).
But first, there's this. Last week, I mentioned the need to file down the slide cylinder because of the screw that holds the nozzle in place. Then Replicator was all like --
And then I was all like --
And then we had a pie fight offline, and that led to a lot of flopping around. There may have been oil involved. There's also the possibility that I just made that part up.
But anyway, the joke's on Todd, because I had no idea that the screws in my baggie were already undercuts! (No, wait... I think that means the joke's still on me. CURSE YOU TODD!!!!)

That little plateau where the head of the screw meets the... um... part that screws... yeah... anyway, that's the undercut. So I'm probably still going to have to file down the side of the tube a little bit, unless I (or somebody in possession of an actual brain) come up with something better. Like maybe a way to countersink the hole, which might involve some tool use. Damn.
So I started on the drill press like last week, and that went much faster since I was only drilling 1/8" brass this time. After the DCs changed the blade on the bandsaw for me (you know it's time for a new blade when the bandsaw is only scratching your metal), I got it cut out to its initial shape. Then I filed around the sides till it looked clean.

But when I tested it in place, I noticed that while the fit was fine, the shape was nowhere close. This thing is supposed to be more of a U-shape. But then, wouldn't that leave a lot of clearance around the P1 emitter?

So I put it up in the vise and went at it with a round file. Now the shape matched the pictures of the GJ phaser, but that's a lot of clearance. This was a totally unexpected development. I'd always pictured a perfect fit...

And this is the position I'd always assumed it would occupy. Makes sense, right? Lots of engagement between the front flat of the P1 and the brass piece, hopefully contributing to a smooth slide when you push the P1 into the cradle.

So I went back to my reference, in this case the still frame from the credits of A Piece of the Action and Mark of Gideon:


And I'm pretty sure that the relationship between the two pieces is what you see in the second photo. That lets the brass tube of the P1 sit correctly in the U-cutout, though it makes for a tenuous amount of contact between the pieces. It should work just fine, since we're not exactly talking about huge forces being applied to that point, but it certainly is counterintuitive.
But hell, that's what I'm going with. I'll have plenty of time to experiment with this relationship when I create the mechanism in Inventor for my scratch-builds, but for this build I'm just going to match this look. Which is good, because I've never experimented with relationships before. Except for that one time at camp. And that other one time at camp.
But now it was time to cut out that Z-shaped bit that holds the U-shaped bit to the cylinder. I just sorta winged it.

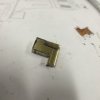
So once I had the initial cut, it was mainly a matter of filing and test fitting and back and forth...
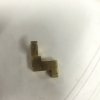
At this point, I had a very rough approximation of the shape and size, but I needed to solder it all into place to test the relationship with the P1, and that's when things got a little messy. Also because I was pretty tired by now.
I filed down a little flat spot on the cylinder and set the parts up for the torch:
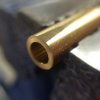
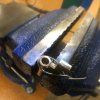
No sense worrying about the vise jaw marks on the cylinder, since the whole piece lives inside the nozzle tube and you'll never see that stuff.
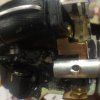
So from here on out, it was test fit, desolder, file, resolder, and so forth. Hadn't yet noticed my big mistake... and there's always a big mistake...
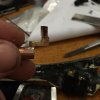
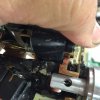
At this point, I had a good fit, and it looked like it would just be a matter of filing away that front tab protruding past the U-thingy and drilling the hole for the wire. Mind you, I was looking at the height, not its travel. I'm going to have to excavate a bit from the front wall of the phaser body to let the Z-thingy travel another 1/8" forward, plus maybe a little more height to get the U-dingus in the position I talked about before.
But why was I getting a jiggly fit between the cylinder and the nozzle tube?
D'OH!!!
Turns out my Z-thingy needs to be cut from 3/16" brass, not 1/8"...

Say it again, must I? Fµçktarded you are.
So I promptly ordered some 3/16" brass from Online Metals. It'll be here in a couple of days. Meanwhile, I'm going to take a crack at figuring out the best dimensions for the Z-piece. Cuz next weekend I only want to do this twice once.
Hey, RPFeeps! So last night was interesting. I learned a few things (as usual), some of them due to my own laziness (also as usual).
But first, there's this. Last week, I mentioned the need to file down the slide cylinder because of the screw that holds the nozzle in place. Then Replicator was all like --
Or you could just use an undercut screw. they are designed for use with counter sunk sheet metal so they sit flush
And then I was all like --
Hadn't heard of those, but I didn't have any in my baggie regardless. Think I'll lay some in though. Thanks!
And then we had a pie fight offline, and that led to a lot of flopping around. There may have been oil involved. There's also the possibility that I just made that part up.
But anyway, the joke's on Todd, because I had no idea that the screws in my baggie were already undercuts! (No, wait... I think that means the joke's still on me. CURSE YOU TODD!!!!)

That little plateau where the head of the screw meets the... um... part that screws... yeah... anyway, that's the undercut. So I'm probably still going to have to file down the side of the tube a little bit, unless I (or somebody in possession of an actual brain) come up with something better. Like maybe a way to countersink the hole, which might involve some tool use. Damn.
So I started on the drill press like last week, and that went much faster since I was only drilling 1/8" brass this time. After the DCs changed the blade on the bandsaw for me (you know it's time for a new blade when the bandsaw is only scratching your metal), I got it cut out to its initial shape. Then I filed around the sides till it looked clean.

But when I tested it in place, I noticed that while the fit was fine, the shape was nowhere close. This thing is supposed to be more of a U-shape. But then, wouldn't that leave a lot of clearance around the P1 emitter?

So I put it up in the vise and went at it with a round file. Now the shape matched the pictures of the GJ phaser, but that's a lot of clearance. This was a totally unexpected development. I'd always pictured a perfect fit...

And this is the position I'd always assumed it would occupy. Makes sense, right? Lots of engagement between the front flat of the P1 and the brass piece, hopefully contributing to a smooth slide when you push the P1 into the cradle.

So I went back to my reference, in this case the still frame from the credits of A Piece of the Action and Mark of Gideon:


And I'm pretty sure that the relationship between the two pieces is what you see in the second photo. That lets the brass tube of the P1 sit correctly in the U-cutout, though it makes for a tenuous amount of contact between the pieces. It should work just fine, since we're not exactly talking about huge forces being applied to that point, but it certainly is counterintuitive.
But hell, that's what I'm going with. I'll have plenty of time to experiment with this relationship when I create the mechanism in Inventor for my scratch-builds, but for this build I'm just going to match this look. Which is good, because I've never experimented with relationships before. Except for that one time at camp. And that other one time at camp.
But now it was time to cut out that Z-shaped bit that holds the U-shaped bit to the cylinder. I just sorta winged it.


So once I had the initial cut, it was mainly a matter of filing and test fitting and back and forth...

At this point, I had a very rough approximation of the shape and size, but I needed to solder it all into place to test the relationship with the P1, and that's when things got a little messy. Also because I was pretty tired by now.
I filed down a little flat spot on the cylinder and set the parts up for the torch:


No sense worrying about the vise jaw marks on the cylinder, since the whole piece lives inside the nozzle tube and you'll never see that stuff.

So from here on out, it was test fit, desolder, file, resolder, and so forth. Hadn't yet noticed my big mistake... and there's always a big mistake...


At this point, I had a good fit, and it looked like it would just be a matter of filing away that front tab protruding past the U-thingy and drilling the hole for the wire. Mind you, I was looking at the height, not its travel. I'm going to have to excavate a bit from the front wall of the phaser body to let the Z-thingy travel another 1/8" forward, plus maybe a little more height to get the U-dingus in the position I talked about before.
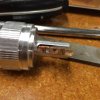
But why was I getting a jiggly fit between the cylinder and the nozzle tube?

D'OH!!!
Turns out my Z-thingy needs to be cut from 3/16" brass, not 1/8"...

Say it again, must I? Fµçktarded you are.
So I promptly ordered some 3/16" brass from Online Metals. It'll be here in a couple of days. Meanwhile, I'm going to take a crack at figuring out the best dimensions for the Z-piece. Cuz next weekend I only want to do this twice once.
Replicator1701
Well-Known Member
Re: John Long Phaser 1 Kit Buildup plus MM P2 Restoration
I think I can help or at the very least give you an option.
This is a normal type of count sink used for tapering holes for flat head screws.

As you can see it's much to big to go through the top access hole in your nozzle.

Here's a little trick I use.
I don't know the technical name of this little gem but it's used with a lathe's tail piece to make
a centering hole when a piece is to long and needs to be supported on both ends.

It works quite well as a counter sink.
You may have to slightly enlarge the outer screw hole on your nozzle to get to the bottom screw hole.
I would recommend turning it by hand a little bit at a time until you get the results you want. Do not
use this in a drill cause you run the risk of going all the way through and ruining your nozzle.
Hope this helps....
I think I can help or at the very least give you an option.
This is a normal type of count sink used for tapering holes for flat head screws.

As you can see it's much to big to go through the top access hole in your nozzle.

Here's a little trick I use.
I don't know the technical name of this little gem but it's used with a lathe's tail piece to make
a centering hole when a piece is to long and needs to be supported on both ends.

It works quite well as a counter sink.
You may have to slightly enlarge the outer screw hole on your nozzle to get to the bottom screw hole.
I would recommend turning it by hand a little bit at a time until you get the results you want. Do not
use this in a drill cause you run the risk of going all the way through and ruining your nozzle.
Hope this helps....
Similar threads
- Replies
- 8
- Views
- 595

