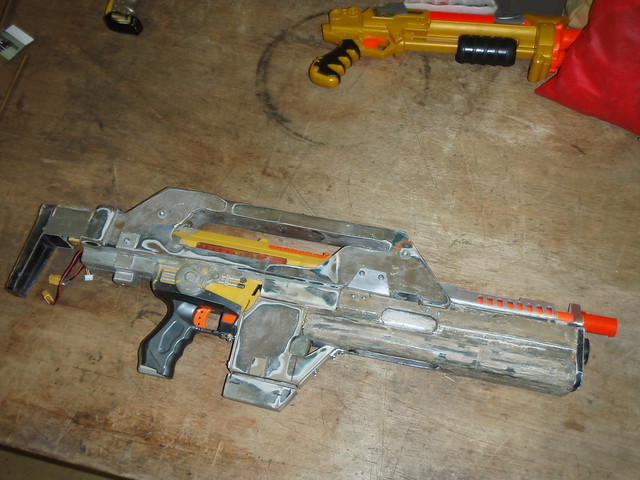
All these posts have got me in the Nerfing mood in the last few weeks. I've done a few simple mods and paintjobs so far (I'll post that stuff later), but my biggest project so far has been to tackle re-working the Nerf Rebel Blaster. Unlike many of the other Nerf guns, this one was never meant to be taken apart (as several sections are glued together). I've posted several pics of my progress in the following album on Photobucket.
http://s33.photobucket.com/albums/d70/aestivalis_in_irvine/Nerf Blasters/
I've seen various mods for this gun online, but every one has totally butchered the cosmetics, so my focus was to make it shoot and still look good doing so.
The first step was getting the frame apart by removing the scope and splitting the front and rear portions. The scope had to be removed because the front and rear portions are glued on, and also because there are some hidden screws underneath the fake scopemount bracket knobs (which are also glued in place - so taking the scope off completely and re-mounting it later seemed the easiest solution). Since the rear end cap of the frame was glued on, I had to split it with a hobby knife (my hand isn't quite steady enough to try it with a dremel saw...). I then separated the front portion of the frame behind the orange tip, so it will still hold the barrel fairly well. I added some screw holes and threaded standoffs in the rear portion so it will go back together and not be loose or sloppy, and since there really is no place to add screws to the front portion, I added a slip-fit aluminum ring to hold it together.
After cleaning up various details on the main frame, I made a bracket to re-mount the scope that would go inside and be virtually undetectable (except for the two screws on the left side of the frame holding it in place). Unfortunaely, the electronic function of the scope light was lost in the doing, but I may go back and see if it can also be re-worked sometime in the future; right now, I just wanted to get this thing shooting! Dimensions for the scope mounting bracket available upon request (pretty sure I saved my sketch...).
I removed the air restrictor and added a brass barrel, and to increase spring tension, I made a small aluminum spacer that goes behind the spring. I also added a second o-ring of the same size to the plunger (not pictured), since there is room enough in that groove for two.
I think I'll begin masking and painting this thing up pretty soon...
") Good luck and have fun if successful!
Good luck and have fun if successful!