kalkamel
Master Member
Here's something I did for fun over the weekend. I bought the Mondoshawan Key from Russ and a coupla multipass kits from Matt so I thought it would be nice to display them with the elemental stones. Trouble is, most of the stones available are kinda out of my price range. I'm not too concerned about having stones which are super accurate, having every crack/details as the screen-used ones; I just want a set which a lay person will immediately identify as the stones in The Fifth Element.
I did some research and collected some reference pics, and thought about the best ways to replicate the stones; e.g. using plaster or foam what-have-yous. Finally I decided to take the easy route... cardboard.
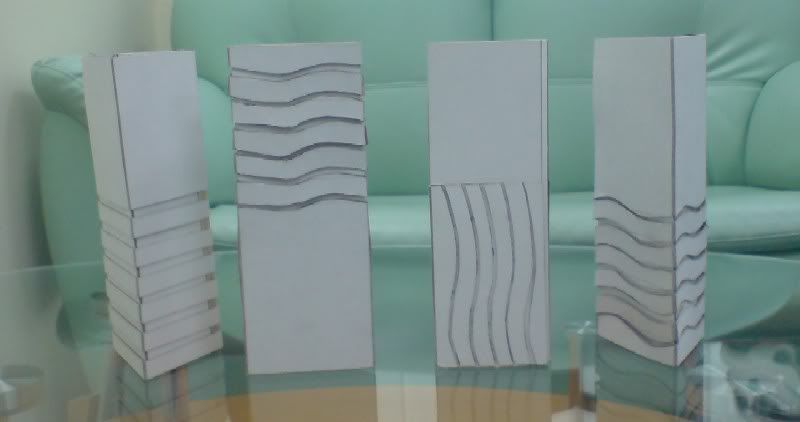
I got the dimensions of the stones from one of my reference sites and began to draw out the template for 4 stones. These are just the basic dimensions without the swirls and patterns. Once I cut out the basic template, I drew on the swirls for each stone template and then cut them all out with a combination of box-cutter, Exacto and sharp scissors. I glued them into the stone shape and added backing to the swirl holes I cut out. When I was done, this is what I got:
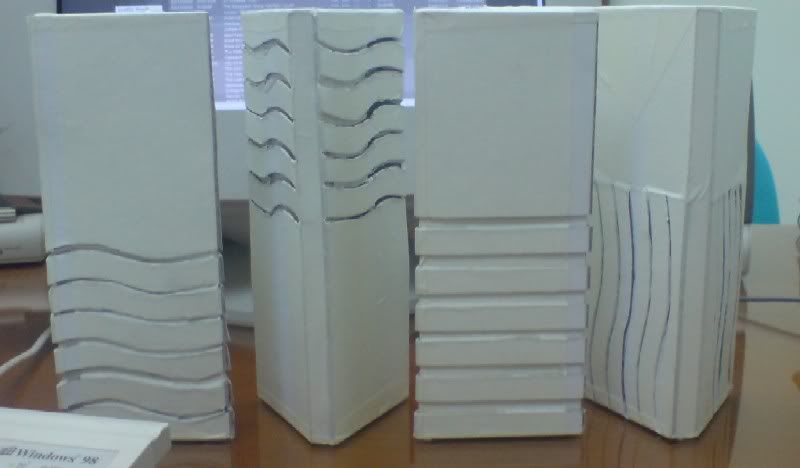
They were still very flimsy, so I used masking tape over the stones, making sure the swirl patterns are still clearly visible.
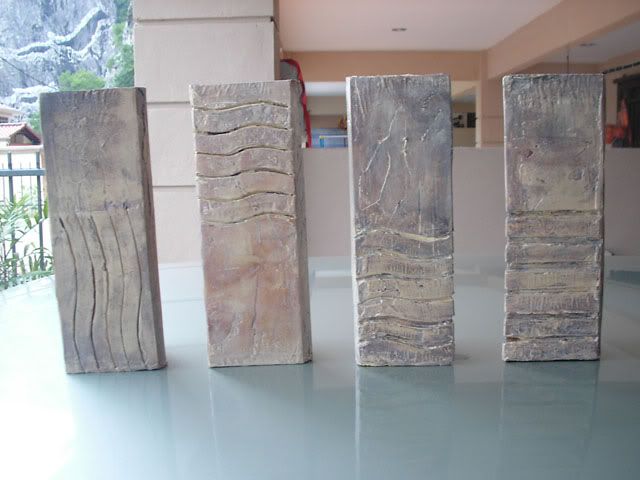
Here's where it got tricky. I really didn't know what I should do next. I wanted the stony texture and heft so plain cardboard just wouldn't do. I rummaged through my hardware shed and found a tub of cellulose based wall filler. So I slapped them onto each "stone", again making sure each and every swirl was still clearly visible.
I left them for 12 hours and this is what resulted:
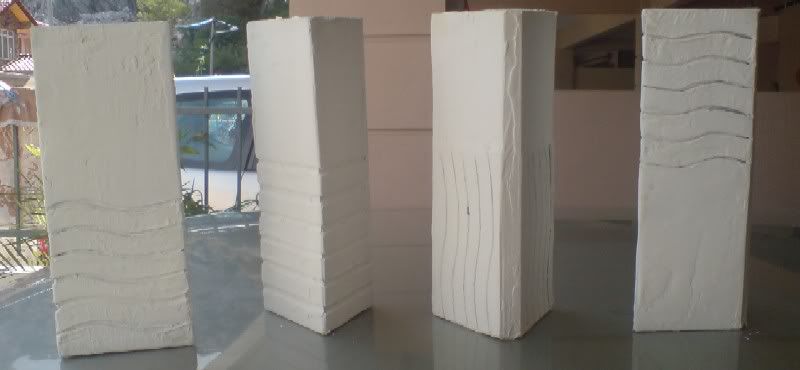
Now, they've got good stony texture and they've got a nice heft too!
Here's what I'll do next:
(a) lots of sanding
(b) slapping a coat of matt sealer to each "stone"
(c) adding the cracks
(d) painting
(e) weathering
Stay tuned for more progress. Suggestions would also be welcomed.")
(c)
I did some research and collected some reference pics, and thought about the best ways to replicate the stones; e.g. using plaster or foam what-have-yous. Finally I decided to take the easy route... cardboard.
I got the dimensions of the stones from one of my reference sites and began to draw out the template for 4 stones. These are just the basic dimensions without the swirls and patterns. Once I cut out the basic template, I drew on the swirls for each stone template and then cut them all out with a combination of box-cutter, Exacto and sharp scissors. I glued them into the stone shape and added backing to the swirl holes I cut out. When I was done, this is what I got:
They were still very flimsy, so I used masking tape over the stones, making sure the swirl patterns are still clearly visible.
Here's where it got tricky. I really didn't know what I should do next. I wanted the stony texture and heft so plain cardboard just wouldn't do. I rummaged through my hardware shed and found a tub of cellulose based wall filler. So I slapped them onto each "stone", again making sure each and every swirl was still clearly visible.
I left them for 12 hours and this is what resulted:
Now, they've got good stony texture and they've got a nice heft too!
Here's what I'll do next:
(a) lots of sanding
(b) slapping a coat of matt sealer to each "stone"
(c) adding the cracks
(d) painting
(e) weathering
Stay tuned for more progress. Suggestions would also be welcomed.
(c)