You are using an out of date browser. It may not display this or other websites correctly.
You should upgrade or use an alternative browser.
You should upgrade or use an alternative browser.
Enterprise NCC-1701 Refit-FINISHED PICS!
- Thread starter trekriffic
- Start date
Southern OR
Active Member
Re: Enterprise NCC-1701 Refit
Just noticed the purple nacelle grills. Nice. I just posted in my thread about how awesome that would be.
Just noticed the purple nacelle grills. Nice. I just posted in my thread about how awesome that would be.
trekriffic
Sr Member
Re: Enterprise NCC-1701 Refit
Yesterday I started decaling the lower saucer and after applying the two sections that flank the centerline in the front I noticed with some chagrin that the blue-grey inscribed hatches/panels were not accounted for with the decals so I had to put on the brakes and paint the panels before proceeding with the rest of the decals:
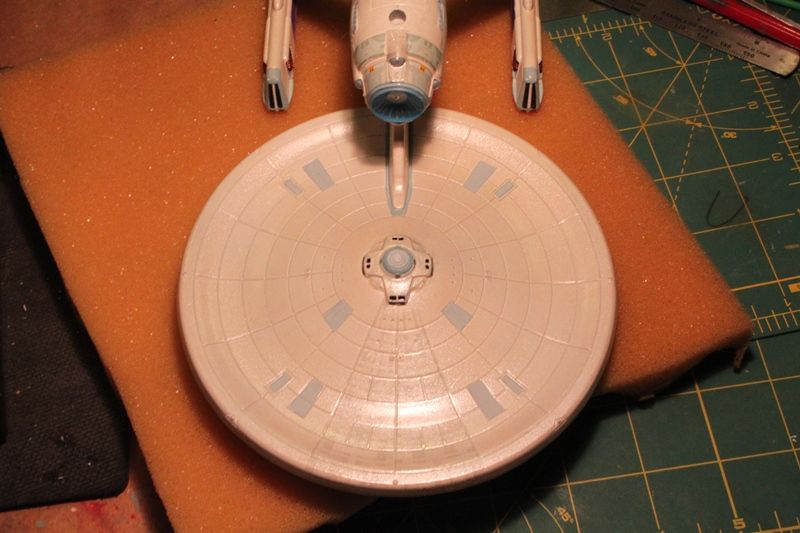
I let the paint dry overnight then went back at lunch today and finished the rest of the lower saucer decals:
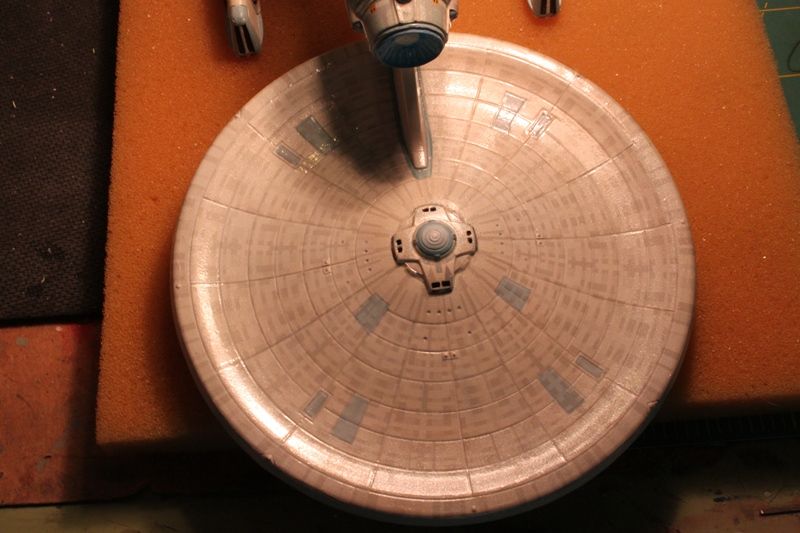
I trimmed away almost all of the light blue inside border on the two rearmost sections that flanked the neck as I had already painted those areas blue-grey previously. This made fitting them around the neck much easier than would otherwise have been the case.
Yesterday I started decaling the lower saucer and after applying the two sections that flank the centerline in the front I noticed with some chagrin that the blue-grey inscribed hatches/panels were not accounted for with the decals so I had to put on the brakes and paint the panels before proceeding with the rest of the decals:
I let the paint dry overnight then went back at lunch today and finished the rest of the lower saucer decals:
I trimmed away almost all of the light blue inside border on the two rearmost sections that flanked the neck as I had already painted those areas blue-grey previously. This made fitting them around the neck much easier than would otherwise have been the case.
Southern OR
Active Member
Re: Enterprise NCC-1701 Refit
Are you going to clear coat it when your done? If so are you going to use mat, semi, or high gloss?
Are you going to clear coat it when your done? If so are you going to use mat, semi, or high gloss?
trekriffic
Sr Member
Re: Enterprise NCC-1701 Refit
After the decals have dried I'll clearcoat with Testors Glosscote to seal them. Then she'll get a shot of Dullcote for applying Tamiya pastel chalks. Then that gets sealed with a coat of satin semi-gloss. If that seems too glossy I'll give her one more shot of Dullcote. I like a semi-gloss look for this ship but, for photography, usually a flatter finish is best.
Are you going to clear coat it when your done? If so are you going to use mat, semi, or high gloss?
After the decals have dried I'll clearcoat with Testors Glosscote to seal them. Then she'll get a shot of Dullcote for applying Tamiya pastel chalks. Then that gets sealed with a coat of satin semi-gloss. If that seems too glossy I'll give her one more shot of Dullcote. I like a semi-gloss look for this ship but, for photography, usually a flatter finish is best.
Southern OR
Active Member
Re: Enterprise NCC-1701 Refit
Thanks. That sounds like what we're (myself and my wife) are going for on the Pl 350, except the current plan is to apply3-4 layers of paint for the Aztec rather then using the decals, but we're still using them for the details like the name and docking ports. My background is (or with this economy, was) in film and video so I can work with shiny. So far your kit looks great, can't wait to see it finished.
Thanks. That sounds like what we're (myself and my wife) are going for on the Pl 350, except the current plan is to apply3-4 layers of paint for the Aztec rather then using the decals, but we're still using them for the details like the name and docking ports. My background is (or with this economy, was) in film and video so I can work with shiny. So far your kit looks great, can't wait to see it finished.
moonlightdrive2
Well-Known Member
Re: Enterprise NCC-1701 Refit
Very nice - thanks for sharing !
Very nice - thanks for sharing !
trekriffic
Sr Member
Re: Enterprise NCC-1701 Refit
Spent about 4 hours aztec decaling yesterday...
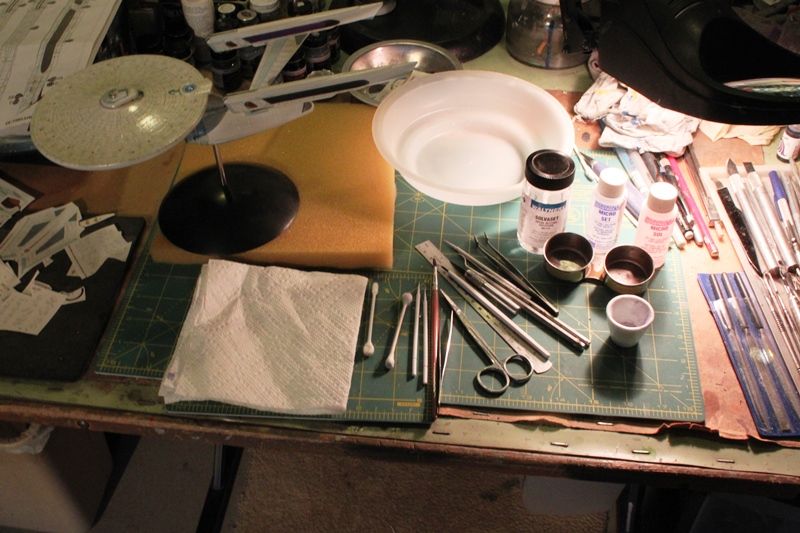
This is my decaling setup. I have separate metal mixing cups for MicroSol and MicroSet. The little ceramic cup is for my white glue and water mix. The large white bowl is from a Healthy Choice Cafe Steamer meal. I use various and sundry cotton swabs, scissors, tweezers, and microbrushes to do the job:
Finshed the impulse engine deck. After the Set and Sol dried I gave the decals a good brushing with Solvaset to really tighten them down. Then I brushed on some Future to seal and protect them:
The dorsal/neck was finished:
I had to add some extra light blue-gray decal bits to the top and bottom of the decal on the front as the kit decal was too short. Luckily I had some of the same color decal left over from the decal at the base of the warp pylons which I had painted. The red stripes didnt reach all the way around to cover the front and back edges either so I had to add some red decal stripes from my stash left over from another Trek model kit:
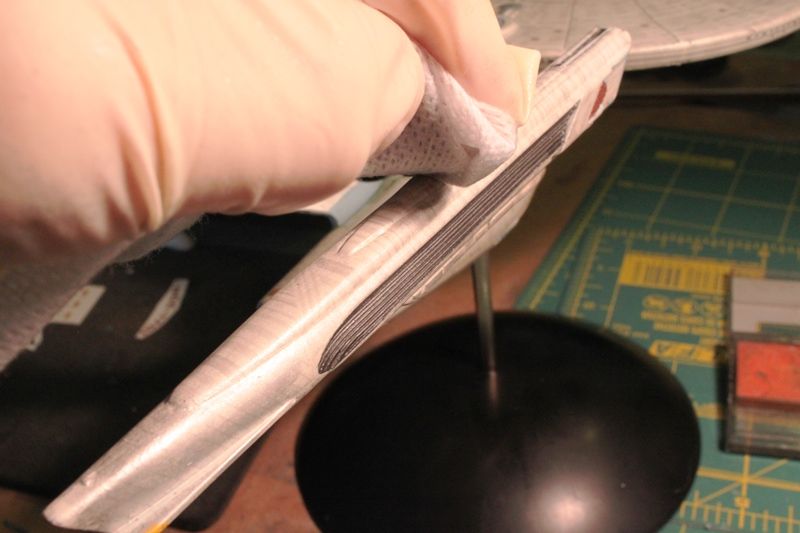
The decals for the front sides of the nacelles have to curve over top and bottom and it took some work to get them to lay down. Here I am tamping them down after brushing some white glue mixture under the edges. It took a good 10 minutes each before the glue set up enough to get them to stay down. So that's 10 minutes x 4 decals or 40 minutes altogether going back and tamping down while I worked on other areas:
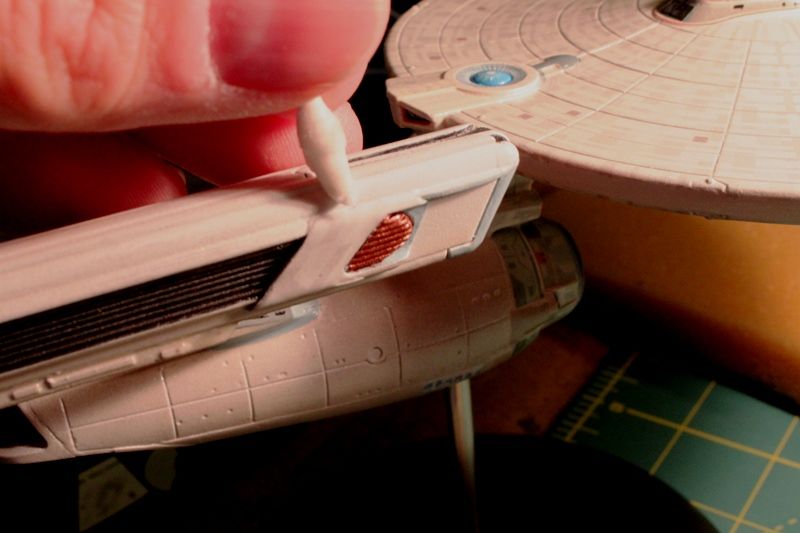
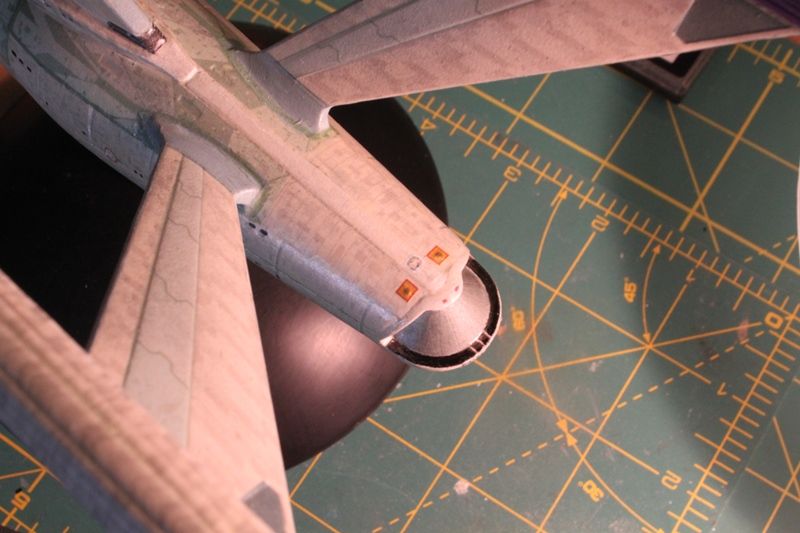
The front and undersides of the nacelles completed. You can't see them from this angle but the lower inside facing decals needed to be trimmed to fit. Basically they were too wide to fit between the top of the pylons and the bottom edge of the warp grills:
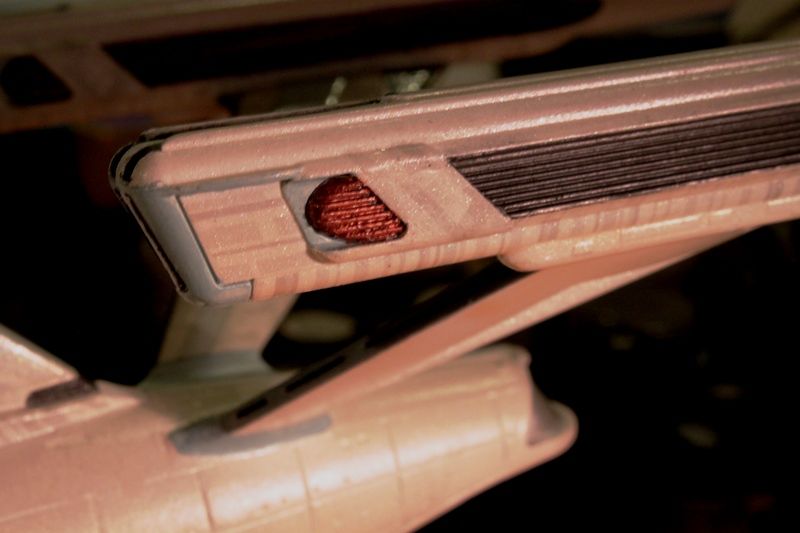
I discovered that there were no decals for the yellow parallelograms that wrap around the tips of the two nacelle fins so I masked and brushed them with yellow Testors enamel. Still need to paint the red dots and I think there is a red border too which I can add using leftover stripe decals from the stash. Thankfully I've learned never to throw out unused decals; they can come in handy for use in situatiosn like this:
That was it for Saturday. Today I hope to finish the nacelles and if I'm lucky and nothing unexpected pops up (what's the chance of that eh?) I should also be able to finish the pylons and secondary hull today. Then I need to wait for the decals to dry before sealing with Glosscote followed by Dullcote. The I'll give her a rub with pastel chalks. Then more Glosscote before applying the rest of the registration markings, phaser strips, reaction control thrusters, etc.
Stay tuned! V'ger is just around the corner and Kirk and company are all over me to get this baby launched! :lol
Spent about 4 hours aztec decaling yesterday...
This is my decaling setup. I have separate metal mixing cups for MicroSol and MicroSet. The little ceramic cup is for my white glue and water mix. The large white bowl is from a Healthy Choice Cafe Steamer meal. I use various and sundry cotton swabs, scissors, tweezers, and microbrushes to do the job:
Finshed the impulse engine deck. After the Set and Sol dried I gave the decals a good brushing with Solvaset to really tighten them down. Then I brushed on some Future to seal and protect them:
The dorsal/neck was finished:
I had to add some extra light blue-gray decal bits to the top and bottom of the decal on the front as the kit decal was too short. Luckily I had some of the same color decal left over from the decal at the base of the warp pylons which I had painted. The red stripes didnt reach all the way around to cover the front and back edges either so I had to add some red decal stripes from my stash left over from another Trek model kit:
The decals for the front sides of the nacelles have to curve over top and bottom and it took some work to get them to lay down. Here I am tamping them down after brushing some white glue mixture under the edges. It took a good 10 minutes each before the glue set up enough to get them to stay down. So that's 10 minutes x 4 decals or 40 minutes altogether going back and tamping down while I worked on other areas:
The front and undersides of the nacelles completed. You can't see them from this angle but the lower inside facing decals needed to be trimmed to fit. Basically they were too wide to fit between the top of the pylons and the bottom edge of the warp grills:
I discovered that there were no decals for the yellow parallelograms that wrap around the tips of the two nacelle fins so I masked and brushed them with yellow Testors enamel. Still need to paint the red dots and I think there is a red border too which I can add using leftover stripe decals from the stash. Thankfully I've learned never to throw out unused decals; they can come in handy for use in situatiosn like this:
That was it for Saturday. Today I hope to finish the nacelles and if I'm lucky and nothing unexpected pops up (what's the chance of that eh?) I should also be able to finish the pylons and secondary hull today. Then I need to wait for the decals to dry before sealing with Glosscote followed by Dullcote. The I'll give her a rub with pastel chalks. Then more Glosscote before applying the rest of the registration markings, phaser strips, reaction control thrusters, etc.
Stay tuned! V'ger is just around the corner and Kirk and company are all over me to get this baby launched! :lol
Southern OR
Active Member
Re: Enterprise NCC-1701 Refit
Looks awesome so far. I'm still on the assembly and fill portion on my old AMT kit. I''m just hoping I don't get cancer or organ damage from the filler. Looks like we're still in the same boat since I'm still waiting on my lighting kit too (Trek Modeler-ordered in December).
Looks awesome so far. I'm still on the assembly and fill portion on my old AMT kit. I''m just hoping I don't get cancer or organ damage from the filler. Looks like we're still in the same boat since I'm still waiting on my lighting kit too (Trek Modeler-ordered in December).
trekriffic
Sr Member
Re: Enterprise NCC-1701 Refit
So last night I spent some time tidying up the decals on the secondary hull and nacelles.
For the nacelles this consisted chiefly of poking bubbles with a pin, pressing out any remaining water, and applying Solvaset to tighten them down flat. This morning I went back and found some more so did more of the same. It takes time with so many curved surfaces to get the decals where I want them. I think all the bubbles are finally gone now though.
The secondary hull was fun. Sunday I managed to get all the decals down but then after brushing on Solvaset the edges on some of the decals started curling up! Frack! Decals just don't like to stick to curved surfaces.
Or it could be the new shields repelling them! :lol
So I ended up using white glue to hold them down. This added another hour or so to my decaling session since I had to keep tamping the decals down until the glue set. After the glue dried I coated the entire secondary hull with liquid decal film followed by Future. Finally finished around 7 PM so spent about 6 hours altogether Sunday on aztec decals.
Last night I went back with Testors enamels and a fine tipped brush and filled in some gaps between the base of the warp pylons and the strongback; funny that the decal was too small to cover what it needed to cover. Anyway, my colormatch was dead on and you can't even tell where the decal ends and tha paint begins.
Here are a few pics:
trekriffic
Sr Member
Re: Enterprise NCC-1701 Refit
Update...
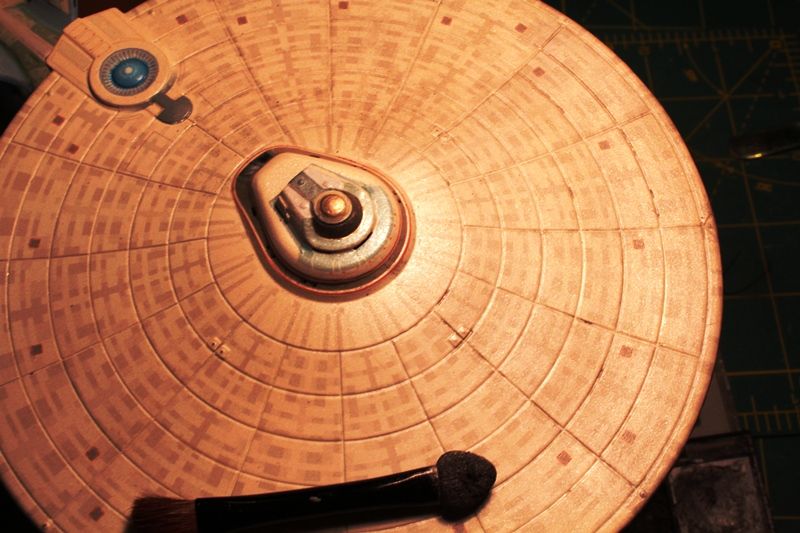
After finishing the aztec decals I gave her a spray of Dullcote and rubbed the hull with Tamiya silver pastel chalk.
Here's a pic of the upper saucer after the port half has been rubbed.
It's hard to tell in this pic but the pearl effect is very subtle; just enough to mute the underlying aztecing a tiny bit:
Rubbing the nacelles:
After her rudown I gave her another spray of Glosscote in preparation for the final decal application.
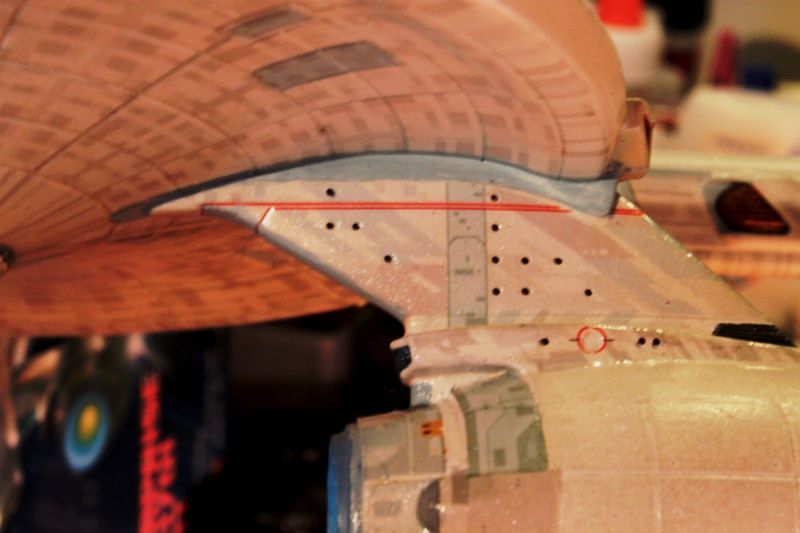
The hardware references over on SSM showed what looked to be a hatch of some kind just in front of the phaser bumps above the hangar bay doors.
The kit didn't include any decals for the spine so I found a "hatch" in my leftover decal stash that looked to be the right size and shape.
It was bright yellow though so I gave it a coat of white acrylic thinned with Future to look more like the white/amber color in the picture:
There is also a red circle around the beacon light above the bay.
Not sure if I can paint that or not and I don't have a decal to fit it.
I may try using a piece of tubing and dipping it in paint before pressing it gently down around the beacon.
If I'm steady enough it woud leave behind a red circle.
I may need to practice the technique a bit if I decide to try it.
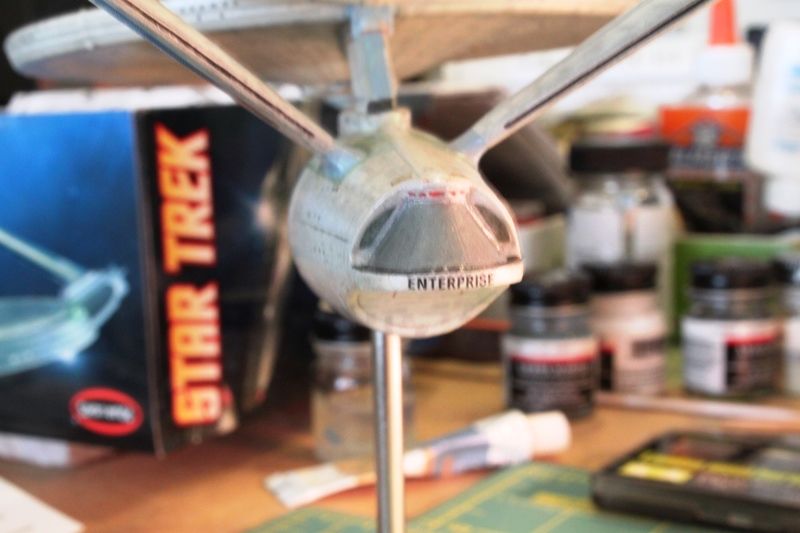
Here's the "Enterprise" insignia on the fantail edge.
The kit decal was curved too much as the edge is not bevelled as much as the decal designers apparently thought which looked stupid so I removed it with alcohol and used a decal from my stash.
It's a little oversized but I can live with it and at least it goes straight across without bending upward at the corners:
For the port side saucer rim gangway hatch I wanted a white background. The kit decal is on clear film so if I'd just laid it down as is you'd see stripes through it so... I found an old sheet of US Airforce decals with white bits on it and cut out a rectangle.
The kit decal will go on over the white decal once I seal it with Future:
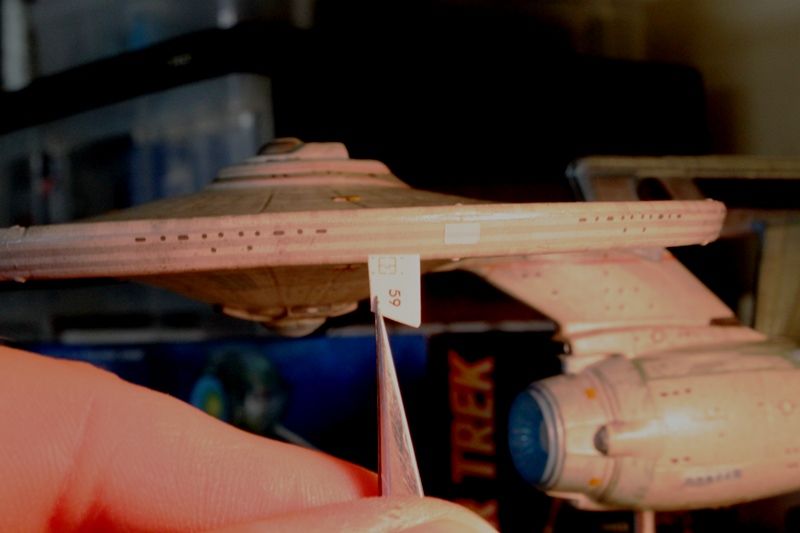
One word of caution about the kit instructions regarding the rim stripe/window decal placement.
The instructions show the saucer underside with placement of the rim decals in relation to it.
It mistakenly instructs you to place the decal with the double row of 4 large rectangular windows near the impulse engines on what would be the port side looking up from underneath.
Those windows are actually on the starboard side of the saucer.
I thought I had screwed this up believing the instructions were correct (when I was placing the decals I got confused and thought I was looking at the upper saucer so I placed those windows opposite of what the instructions called out) but when I checked the references I realized that my placement was correct and the instructions were wrong.
The windows on the port side are different from the ones on the starboard side so if you screw this up any purist who knows the refit would immediately catch it and kick you out of the starfleet modeling corp.
So... I lucked out I guess.
I should be done with decals by tomorrow then she'll dry overnight and get her final clearcoats on Sunday before she launches.
Thanks for all the support and comments!
Update...
After finishing the aztec decals I gave her a spray of Dullcote and rubbed the hull with Tamiya silver pastel chalk.
Here's a pic of the upper saucer after the port half has been rubbed.
It's hard to tell in this pic but the pearl effect is very subtle; just enough to mute the underlying aztecing a tiny bit:
Rubbing the nacelles:
After her rudown I gave her another spray of Glosscote in preparation for the final decal application.
The hardware references over on SSM showed what looked to be a hatch of some kind just in front of the phaser bumps above the hangar bay doors.
The kit didn't include any decals for the spine so I found a "hatch" in my leftover decal stash that looked to be the right size and shape.
It was bright yellow though so I gave it a coat of white acrylic thinned with Future to look more like the white/amber color in the picture:
There is also a red circle around the beacon light above the bay.
Not sure if I can paint that or not and I don't have a decal to fit it.
I may try using a piece of tubing and dipping it in paint before pressing it gently down around the beacon.
If I'm steady enough it woud leave behind a red circle.
I may need to practice the technique a bit if I decide to try it.
Here's the "Enterprise" insignia on the fantail edge.
The kit decal was curved too much as the edge is not bevelled as much as the decal designers apparently thought which looked stupid so I removed it with alcohol and used a decal from my stash.
It's a little oversized but I can live with it and at least it goes straight across without bending upward at the corners:
For the port side saucer rim gangway hatch I wanted a white background. The kit decal is on clear film so if I'd just laid it down as is you'd see stripes through it so... I found an old sheet of US Airforce decals with white bits on it and cut out a rectangle.
The kit decal will go on over the white decal once I seal it with Future:
One word of caution about the kit instructions regarding the rim stripe/window decal placement.
The instructions show the saucer underside with placement of the rim decals in relation to it.
It mistakenly instructs you to place the decal with the double row of 4 large rectangular windows near the impulse engines on what would be the port side looking up from underneath.
Those windows are actually on the starboard side of the saucer.
I thought I had screwed this up believing the instructions were correct (when I was placing the decals I got confused and thought I was looking at the upper saucer so I placed those windows opposite of what the instructions called out) but when I checked the references I realized that my placement was correct and the instructions were wrong.
The windows on the port side are different from the ones on the starboard side so if you screw this up any purist who knows the refit would immediately catch it and kick you out of the starfleet modeling corp.
So... I lucked out I guess.
I should be done with decals by tomorrow then she'll dry overnight and get her final clearcoats on Sunday before she launches.
Thanks for all the support and comments!
Southern OR
Active Member
Re: Enterprise NCC-1701 Refit
Looks awesome. When you starting on the PL 350? My lighting kit gets mailed next week and I got a better look at my 350. Makes my current amt refit project look awful as a kit in almost every way, but so far I've gotten what I want out of it. I'm looking forward to the PL 350 and my bop, just need to finish the amt kit (Easier said then done).
Looks awesome. When you starting on the PL 350? My lighting kit gets mailed next week and I got a better look at my 350. Makes my current amt refit project look awful as a kit in almost every way, but so far I've gotten what I want out of it. I'm looking forward to the PL 350 and my bop, just need to finish the amt kit (Easier said then done).
dlots1701a
New Member
Re: Enterprise NCC-1701 Refit
looking good i am stopped at the nacelles on mine i have some rips where the decal did not set properly went back over with solva set and tried to press bubbles out but did not work
looking good i am stopped at the nacelles on mine i have some rips where the decal did not set properly went back over with solva set and tried to press bubbles out but did not work
moonlightdrive2
Well-Known Member
Re: Enterprise NCC-1701 Refit
Wow...so impressive...thanks for sharing all the pics and tips !!!
Wow...so impressive...thanks for sharing all the pics and tips !!!
trekriffic
Sr Member
Re: Enterprise NCC-1701 Refit
The decals are a real challenge for sure. I had some bubbling near the edges after they dried on the rear of the nacelles. Solvaset did the trick for the most part but I also had to patch up a couple of other tears using leftover Acreation aztec decals from when I built my 1/2500 Enterprise D. Luckily I was able to cobble together enough of the leftover decals to hide the most glaring issues. I recommend giving them a coat of liquid decal film too if you have it. It also helped that I was shading the finished decals using silver pastel chalk which muted the overall pattern and mostly blended any blemishes away to the point you'd have to look closely to see the problem areas. The chalk was rubbed on with a foam applicator over a coat of flat lacquer. This was repeated to even out the finish in the trouble spots with the surrounding hull. Of course, the digital camera is keener than the human eye so it may look like crap in the pictures depending on the angle but, what the hell, all you can do is give it your best shot.
looking good i am stopped at the nacelles on mine i have some rips where the decal did not set properly went back over with solva set and tried to press bubbles out but did not work
The decals are a real challenge for sure. I had some bubbling near the edges after they dried on the rear of the nacelles. Solvaset did the trick for the most part but I also had to patch up a couple of other tears using leftover Acreation aztec decals from when I built my 1/2500 Enterprise D. Luckily I was able to cobble together enough of the leftover decals to hide the most glaring issues. I recommend giving them a coat of liquid decal film too if you have it. It also helped that I was shading the finished decals using silver pastel chalk which muted the overall pattern and mostly blended any blemishes away to the point you'd have to look closely to see the problem areas. The chalk was rubbed on with a foam applicator over a coat of flat lacquer. This was repeated to even out the finish in the trouble spots with the surrounding hull. Of course, the digital camera is keener than the human eye so it may look like crap in the pictures depending on the angle but, what the hell, all you can do is give it your best shot.
dlots1701a
New Member
Re: Enterprise NCC-1701 Refit
i was trying to send you pics of mine but they are not showing
i was trying to send you pics of mine but they are not showing
Last edited:
trekriffic
Sr Member
Re: Enterprise NCC-1701 Refit
Too bad. I'd like to see them!
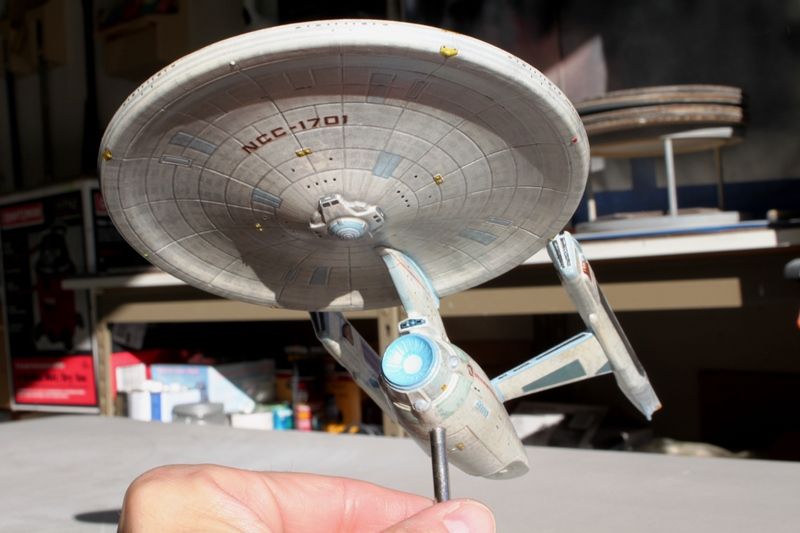
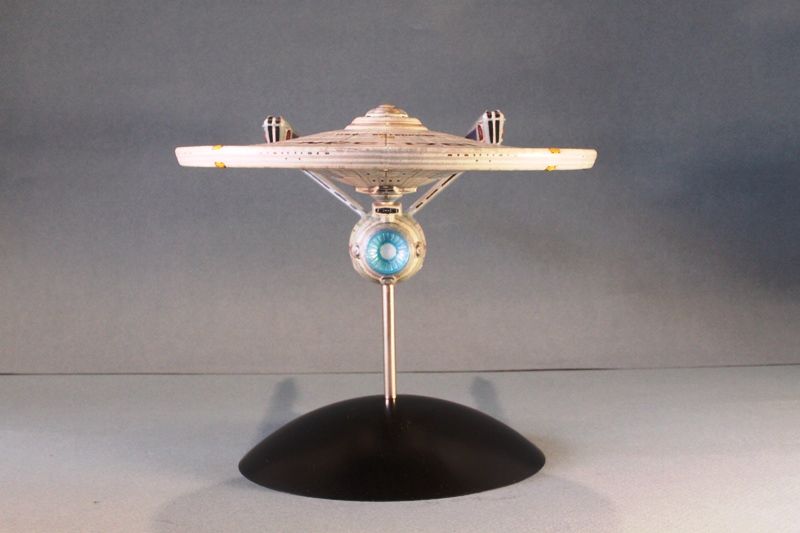
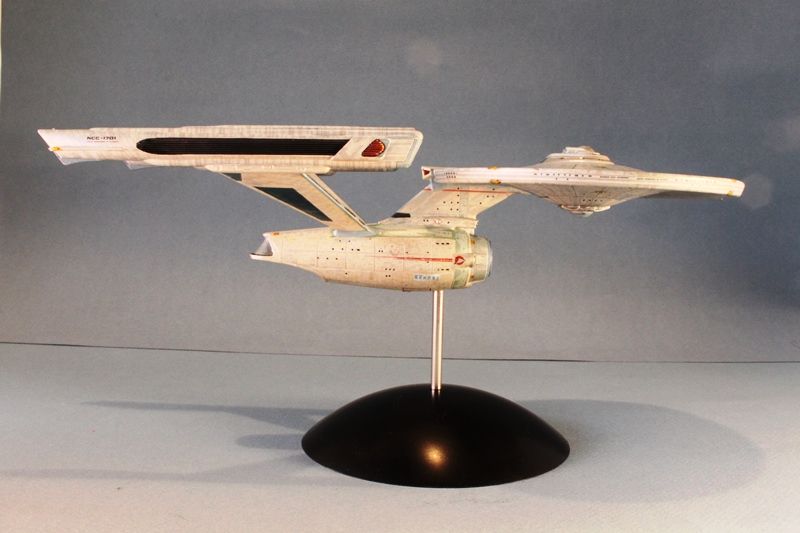
Here are a few pics after a shot of Glosscote.
Good enough to launch on her mission to intercept The Cloud.
I'll take more and better pics this weekend when Kirk and company return and she can get her final satin semi-gloss treatment...
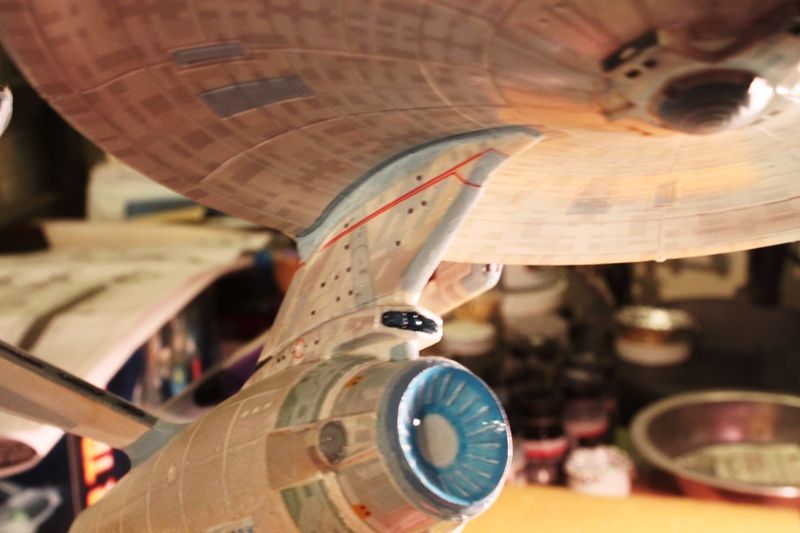
Dorsal view of saucer...
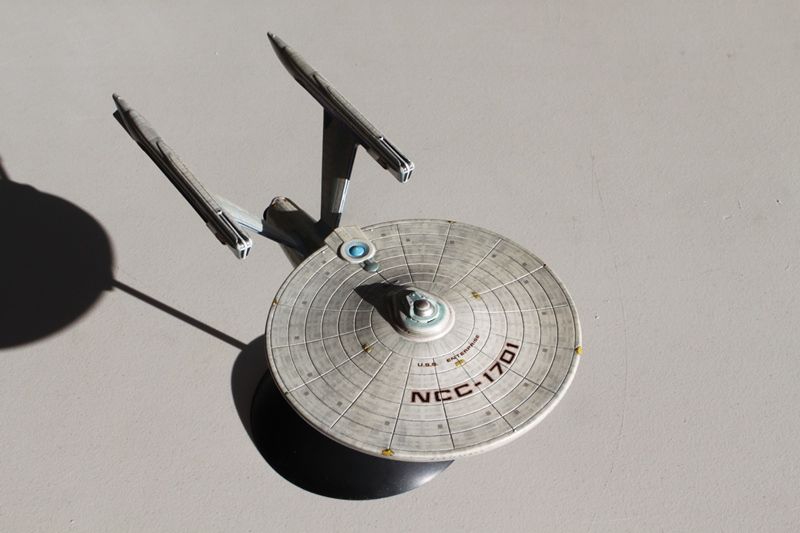
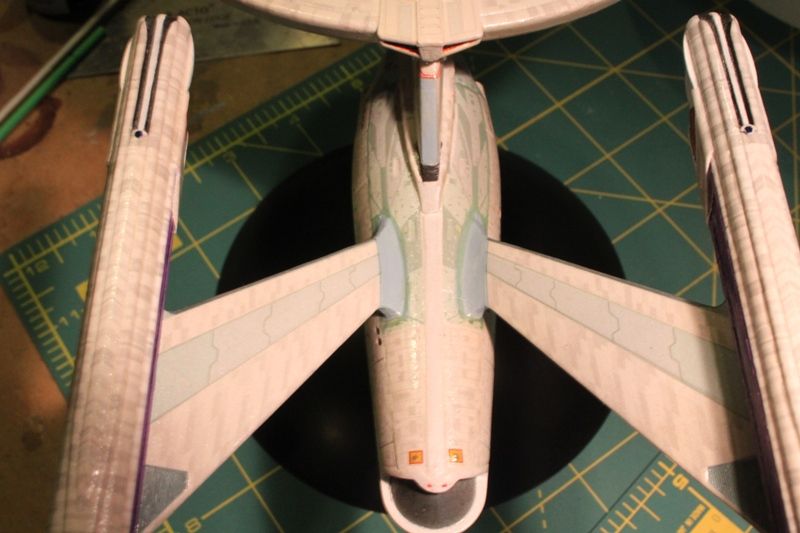
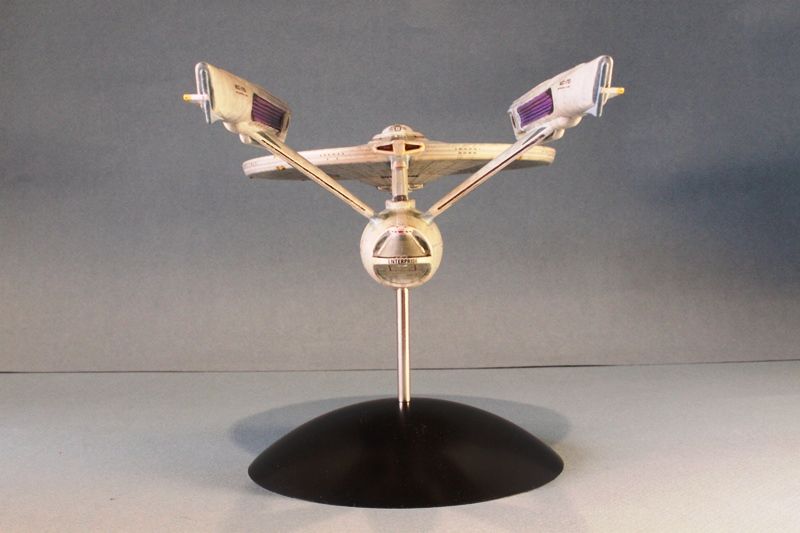
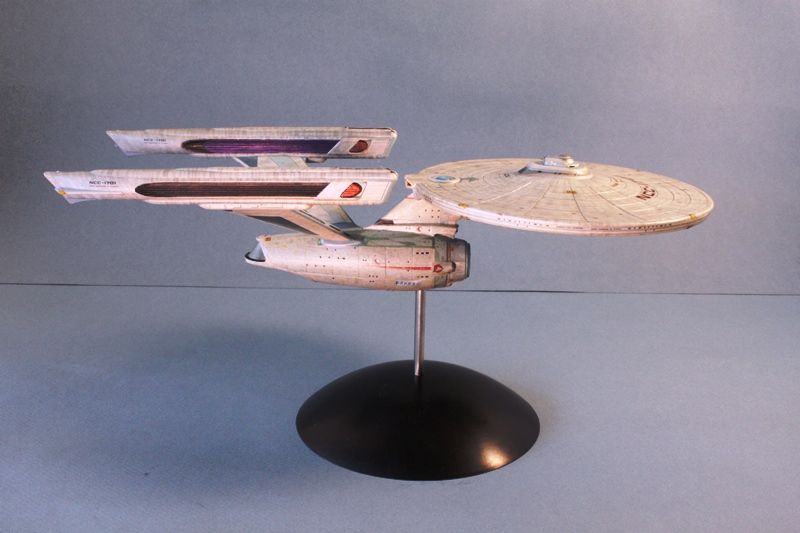
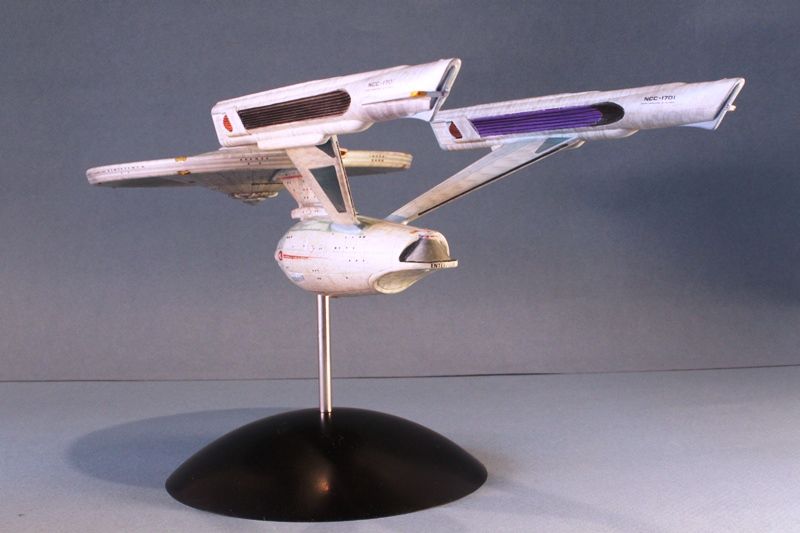
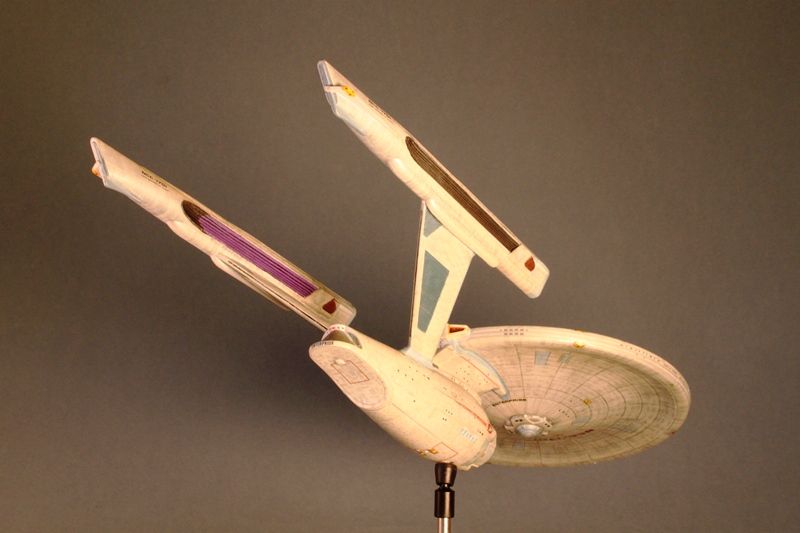
Nice view of the purple warp grills...
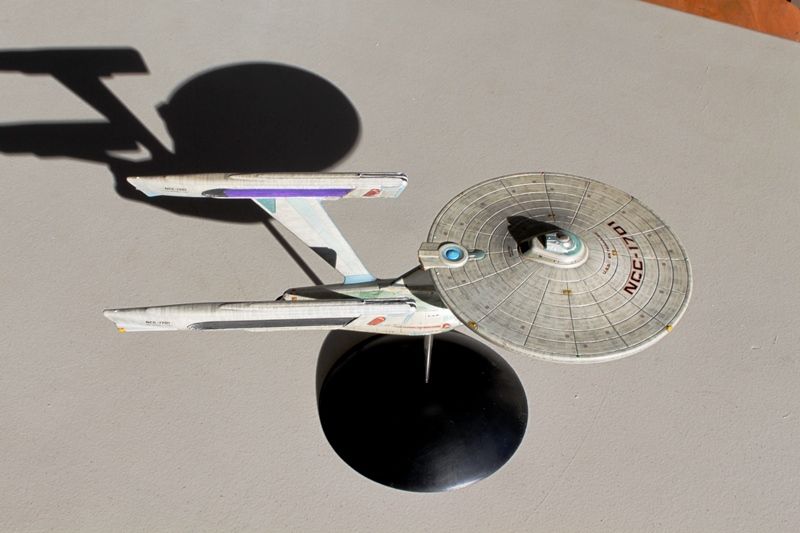
I used some leftover black decals trimmed to fit the openings of the photorp launchers. That really added to the realism IMO...
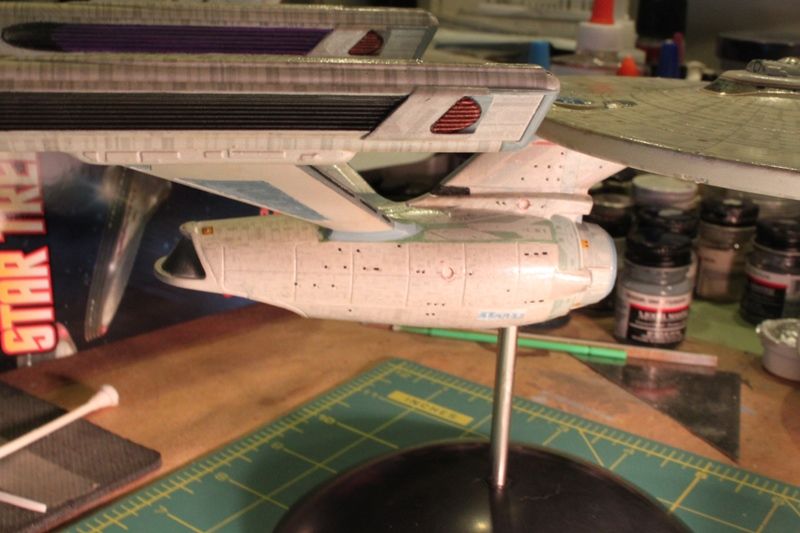
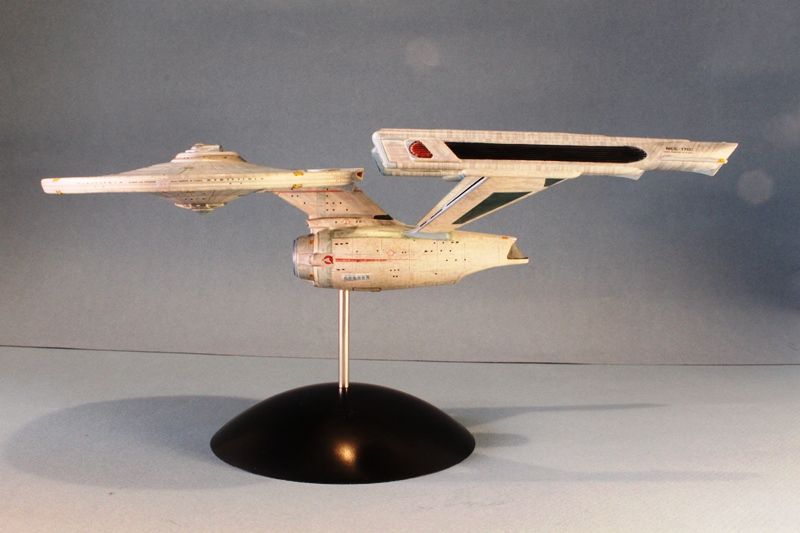
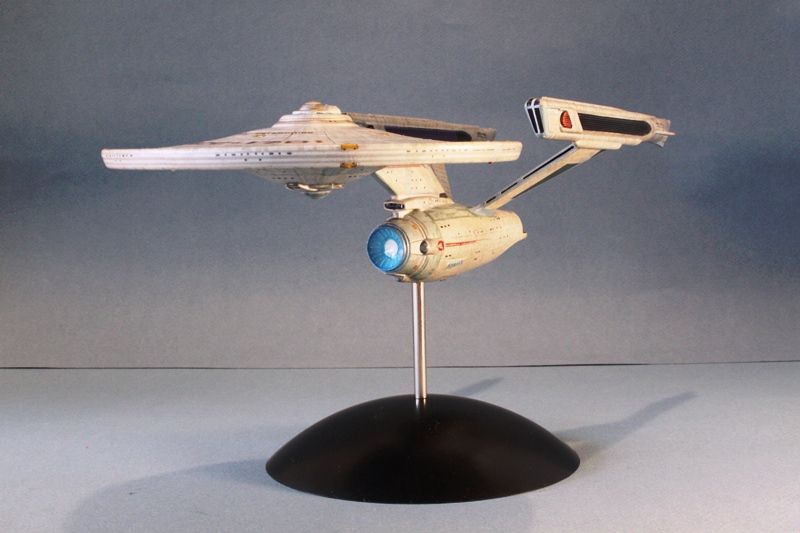
Starboard profile...
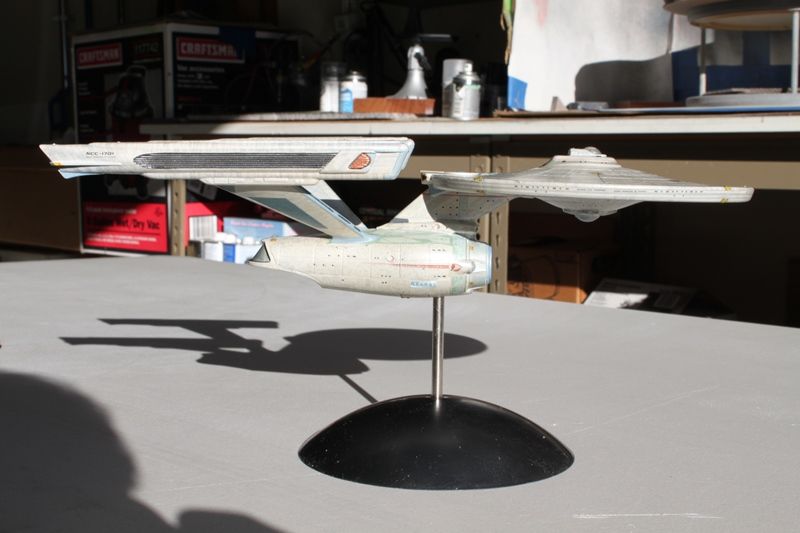
Closeup of the top of the fantail.
I added some extra aztec decals to the spine and painted the red circle around the beacon...
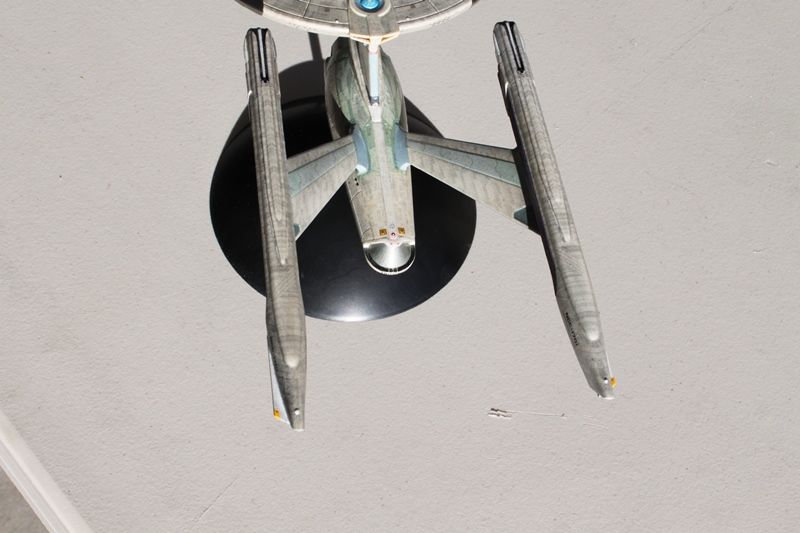
If you haven't guessed, I took these in bright sunlight so y'all can see the true colors.
i was trying to send you pics of mine but they are not showing
Too bad. I'd like to see them!
Here are a few pics after a shot of Glosscote.
Good enough to launch on her mission to intercept The Cloud.
I'll take more and better pics this weekend when Kirk and company return and she can get her final satin semi-gloss treatment...
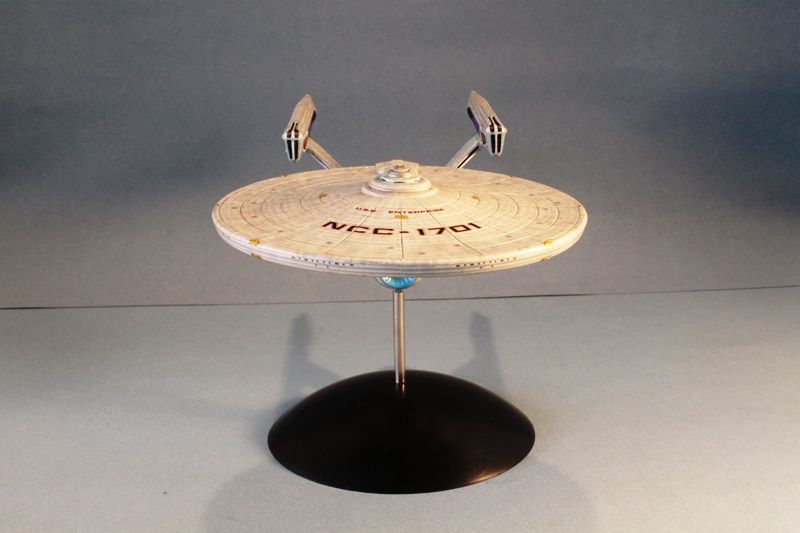
Dorsal view of saucer...
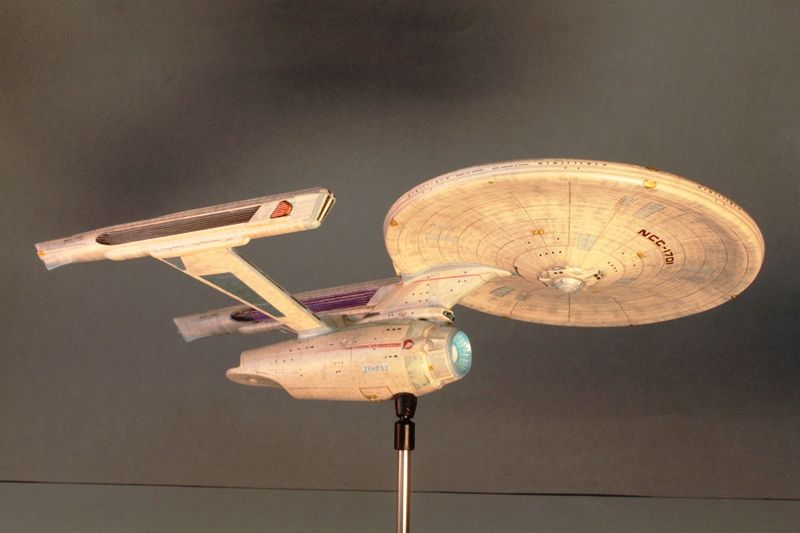
Nice view of the purple warp grills...
I used some leftover black decals trimmed to fit the openings of the photorp launchers. That really added to the realism IMO...
Starboard profile...
Closeup of the top of the fantail.
I added some extra aztec decals to the spine and painted the red circle around the beacon...
If you haven't guessed, I took these in bright sunlight so y'all can see the true colors.
dlots1701a
New Member
Re: Enterprise NCC-1701 Refit
looking good warp speed
looking good warp speed
trekriffic
Sr Member
Here are the finished pics taken on Saturday. Hope you all enjoy them!

Lots More pics here...
http://s146.beta.photobucket.com/user/Trekriffic/library/NCC-1701 Refit 1-1000
Lots More pics here...
http://s146.beta.photobucket.com/user/Trekriffic/library/NCC-1701 Refit 1-1000
Just stunning. Beautiful work.
Similar threads
- Replies
- 67
- Views
- 8,794
- Replies
- 18
- Views
- 2,015
- Replies
- 14
- Views
- 2,613
- Replies
- 0
- Views
- 201