District 9 Fuel Cell modelling, here I go!

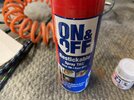
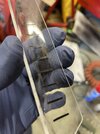
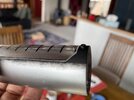
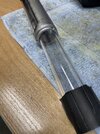
Next step: try to paint the inside of the outer glass covers

Unfortunately, it appears I did not take a photo of the ensuing ... disappointment.

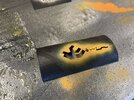
I had taped the shaped template to the inside and attempted to hand paint it.
The paint bled on the inside, creating lines that could best be desribed as "of a 4 year old".

They WERE vertical. But has some additional "embelishments" of the younger generation.
In short: they were terrible. Now I wish I had a photo to share with you. Alas.

You'll just have to use your imagination!

IMG_8865.jpeg
 
sooooo. next attempt is a template curved to the shape of the window.


This is a .14mm print, single layer. In the vid I'm *attempting* to form it to the same shape as the window.
There's still some gaps (due to print issues). I've filled those with paint. Will look again once its formed.

Idea (I hope) is to get some low tach spray paint, stick it on the INSIDE of the window, spray, hope, done.
 
OK. It's not bad. Not perfect... in that its still a mm or so off the actual diameter of the inside cylinder. But preeeetyy good.

I'm going to fill more see-thru spots with some more paint (or ... twink!). Just anything to stop the final spray coming through!
Then I'll try to "low tack" spray it to the inside of the window, and see what happens when I paint it.
IMG_8964.jpeg
IMG_8963.jpeg
IMG_8965.jpeg
 
This. Maybe. Gives you an idea. The single layer print was good actually. But not perfect.
Here, at a certain spot, are a few layers that didn't quite join properly (and that's with a 140% fill rate, 20mm p/second, super slow print)
IMG_8966.jpeg

So because I want to try spraying next, and I don't want to have to "fix" the piece afterwards, I'm going to try to fill these.
 
I got myself some low tack spray. Worked out quite well (not perfect, perhaps I didn't apply enough on the 2nd piece)

I had "filled" my small template with paint to cover the holes.
I then waited for the spray to dry, stuck it onto the inside of the windows, and sprayed a few light coats of black.

that'll do :)
 

Attachments

  • IMG_8973.jpeg
    IMG_8973.jpeg
    2.5 MB · Views: 53
  • IMG_8974.jpeg
    IMG_8974.jpeg
    4.5 MB · Views: 60
  • IMG_8975.jpeg
    IMG_8975.jpeg
    4.2 MB · Views: 69
  • IMG_8976.jpeg
    IMG_8976.jpeg
    4.2 MB · Views: 56
  • IMG_8978.jpeg
    IMG_8978.jpeg
    1.6 MB · Views: 50
  • IMG_8979.jpeg
    IMG_8979.jpeg
    1.8 MB · Views: 62
So many small details! Today I modelled some stencils for the "round silver cicles" and also the orange alien writing. Went really well! Same technique. Gently heat the template on a piece of the same sized tube (maybe to 80 deg c). But not on the silver circle one! I melted one of the 1mm rings doing that.

Anyway; this is what it all looks like!

IMG_8991.jpeg
 

Attachments

  • IMG_8993.jpeg
    IMG_8993.jpeg
    3.7 MB · Views: 64
  • IMG_8992.jpeg
    IMG_8992.jpeg
    3.5 MB · Views: 69
  • IMG_8990.jpeg
    IMG_8990.jpeg
    2.3 MB · Views: 63
  • IMG_8989.jpeg
    IMG_8989.jpeg
    3.4 MB · Views: 66
  • IMG_8988.jpeg
    IMG_8988.jpeg
    3.7 MB · Views: 62
I also painted the ends of the 40mm (outer) cylinder black, which I had somehow missed earlier.

This shows those ends plus the spray painted silver details.
In the last couple of shots I've glued in the ... things? sticky out bits? Buttons? Release buttons? Dunno what they are. Near the silver circles, anyway.

Next step; wait for the paint to dry, then I'll clear coat before gluing the window pieces into place.
 

Attachments

  • IMG_8996.jpeg
    IMG_8996.jpeg
    1.2 MB · Views: 69
  • IMG_8995.jpeg
    IMG_8995.jpeg
    1.3 MB · Views: 53
  • IMG_8994.jpeg
    IMG_8994.jpeg
    2.2 MB · Views: 60
  • IMG_8983.jpeg
    IMG_8983.jpeg
    2.5 MB · Views: 59
  • IMG_8982.jpeg
    IMG_8982.jpeg
    2.3 MB · Views: 50
  • IMG_8981.jpeg
    IMG_8981.jpeg
    2.3 MB · Views: 66
I'm ... done!

some shots of the final for you all :)

I left my cylinder "Free". So the inside can slide out. There's no stopping it... it'll come straight out. But I thought: why not? Let it be shown, at least. In the last pic you can see that the inner cylinder exists (not so obvious in the previous pics). So there'd be nothing stopping you making a fixed model where the cylinder was 'out' (if that's what you wanted).
 

Attachments

  • IMG_9006.jpeg
    IMG_9006.jpeg
    1.9 MB · Views: 56
  • IMG_9005.jpeg
    IMG_9005.jpeg
    1.7 MB · Views: 66
  • IMG_9004.jpeg
    IMG_9004.jpeg
    1.9 MB · Views: 71
  • IMG_9003.jpeg
    IMG_9003.jpeg
    1.8 MB · Views: 55
  • IMG_9002.jpeg
    IMG_9002.jpeg
    1.8 MB · Views: 64
  • IMG_9023.jpg
    IMG_9023.jpg
    2.4 MB · Views: 56
Last edited:

Your message may be considered spam for the following reasons:

If you wish to reply despite these issues, check the box below before replying.
Be aware that malicious compliance may result in more severe penalties.
Back
Top