scornflake
Active Member
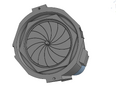
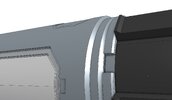
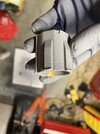
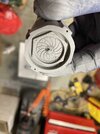
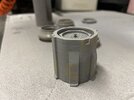
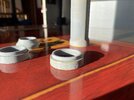
So I have covid. Yay. About a year ago now I made a replica of the D9 AR.
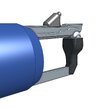
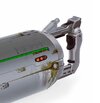
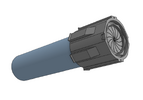
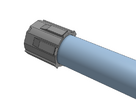
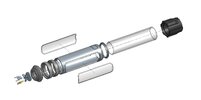
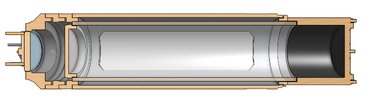
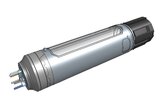
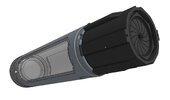
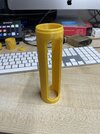
Someone asked about the fuel cell, so I thought I'd begin modelling it, since I've not much else to do while I mope around the house!
Q: How big do you think that fuel cell is? I've been staring at pics. I havn't seen it in movie yet (I assume it's in a shot, somewhere).
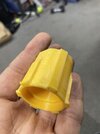
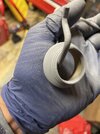
I thought I could get semi-accurate dimensions by using the "inside" of the hand grip as a guide. Figuring if a prawn can hold it, and guessing their hand size is 1.2x ours ... if my inner grip is ~90mm and theirs ~108mm, then the barrel is about 1/2m long. That's a tad longer than from my fingers -> end of elbow. Hmm. That's *seems* too long but I've not seen it in context yet.
I'm parameterising the model as I go, so I can just change a number and hey presto make it bigger/smaller (or change the length ratio to hand grip size as well)
(yeh I know the pic is pretty boring right now, but I felt I had to post *something*!)
thoughts?
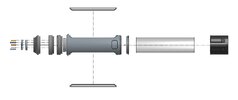
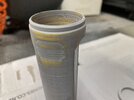
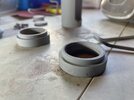
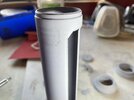
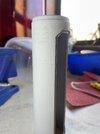
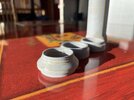
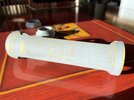
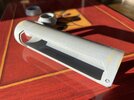
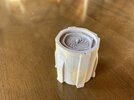
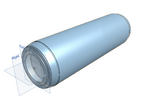
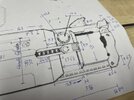
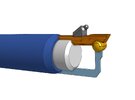
Someone asked about the fuel cell, so I thought I'd begin modelling it, since I've not much else to do while I mope around the house!
Q: How big do you think that fuel cell is? I've been staring at pics. I havn't seen it in movie yet (I assume it's in a shot, somewhere).
I thought I could get semi-accurate dimensions by using the "inside" of the hand grip as a guide. Figuring if a prawn can hold it, and guessing their hand size is 1.2x ours ... if my inner grip is ~90mm and theirs ~108mm, then the barrel is about 1/2m long. That's a tad longer than from my fingers -> end of elbow. Hmm. That's *seems* too long but I've not seen it in context yet.
I'm parameterising the model as I go, so I can just change a number and hey presto make it bigger/smaller (or change the length ratio to hand grip size as well)
(yeh I know the pic is pretty boring right now, but I felt I had to post *something*!)
thoughts?
")