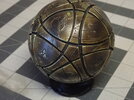
Build Log - Map to Thrawn (Ashoka)

zjunlimited

Sr Member
Alrighty, the next build on the bench is the Map to Thrawn from the Ashoka Disney show.

The direction I'm taking with this one is to use the Megaminx ball as the base and the Map tiles from Wonderknight and eethan
(links to their interest/purchase thread and the WIP thread).

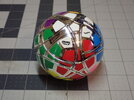
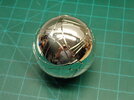
I ordered the Megaminx ball from AliExpress and arrived as promised without any issues (whew!). I wanted the all black version but that was all sold out. Only the silver was available so I grabbed it. Wasn't sure yet how to address the silver finish but that will wait for later.
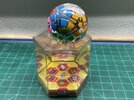
00 Megamix Ball.jpg 01 Megamix Ball 02.JPG

Next was to remove the stickers which came off pretty easy
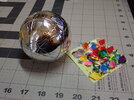
01 Megamix Ball 04 - Stickers Removed.JPG 01 Megamix Ball 05.JPG

A quick test with some 320 grit sandpaper reveals the black plastic underneath and proceeded to sand the rest of the ball down.
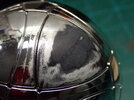
04 Ball Prep 01.JPG

04 Ball Prep 03.JPG


So while that was relatively easy...just took some old fashioned sanding effort, I'm left with the silver in the seams.
I thought about painting the entire ball black to hide the silver but I quickly moved away from that idea.

I really didn't want to disassemble the ball but I don't think I have a choice here...
 
Last edited:
Megaminx Ball Prep

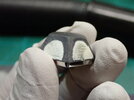
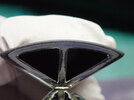
Removing the tiles from the ball really wasn't that difficult. Since the tiles rotate, the design has some inherent flex so if find one section a bit looser, pry up on an edge and the piece will pop off. And once that occurs everything else is easily removed. I used an orange plastic lego extractor initially but once you understand how it works you can make it work with just your fingers.

05 Ball Disassembly 01.JPG


05 Ball Disassembly 03.JPG


The caps on what's left on the ball is just press fit so they can be easily removed. And I didn't have a need to mess with those screws so I left them alone.
05 Ball Disassembly 04.JPG


Some careful sanding of the edges...making sure you don't round them over since the plastic is quite soft in those areas.
04 Ball Prep 05.JPG 04 Ball Prep 06.JPG

All parts sanded using 300, 400, 600 (whatever I had and felt comfortable using) and finished it with a wet 1000 pass.
04 Ball Prep 07.JPG


And reassembled everything. Again it wasn't hard but it's a bit tricky to get a few of the tiles aligned and started since they don't stay in place on their own initially. Once that happens, then all the pieces go back together nicely. For what this is, I'm actually impressed with the design and engineering of this ball.
04 Ball Prep 11.JPG
 
Last edited:
Map Tile Prep

Next up is the "star" of the show...the map tiles.

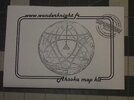
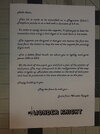
These are all resin printed and wow, all of the lines, details, circles are super crisp. Very little cleanup is required which makes this build process infinitely more enjoyable. The kit also includes an instruction pamphlet with a 1:1 scale of the tiles to help in orientation and assembly. I'm purposely NOT posting the map due to sensitivities around how much work was put into laying out all of the details and such but include the general instructions for reference. Here's the family picture.
02 Kit 01.JPG


03 Kit 01.JPG 03 Kit 02.JPG

After the 600 grit sanding pass, I thought with all of the layers of potential paint I was planning to use (note at this stage I didn't figure out exactly how I was going to paint this yet), I didn't want those layers to"soften" or mask the details so I thought I would try to deepen the lines and details on the tiles.

Well, after further inspection the straight lines were still clean and crisp but the "holes" looked a little soft around the edges. Maybe I went a bit aggressive on the sanding but I pulled out my pin vise and gently cleaned up the holes. If you plan to do this be sure to have a variety of bit sizes since the holes are different sizes. At the end this was likely unnecessary but I'd rather spend the time now when I can rather than regret it later when the opportunity passed.
10 Tile Prep 03 - defining holes.JPG


Here's closeup and the white dots are all of the holes I cleaned up. You can also see how crisp the design and lines are.
10 Tile Prep 04 - closeup.JPG


The final step prior to painting is I wet sanded everything with 1000 grit to remove any sanding dust and to get the finish where I prefer. This is a standard practice I use to prep any printed parts for painting and is certainly not necessary...just my OCD ;)

10 Tile Prep 01 - wet sanding.JPG
 
Last edited:
Very nice zjunlimited ! thank you for sharing your process and for being so nice about everything on this project :) I really enjoy seeing the photos :)

I'm sure you saw it, but just in case, remember you can break out the first two lines of supports and keep the rest, that will allow you to sand the bottom edge of the tiles were the support were attached, while still keeping the rest of the support if you want to handle the tiles a bit easier.

That being said, when Julie did her batch of painted tiles, she ended up removing everything, sanding the backs clean, then attaching all the parts to a big plastic cup, this allowed her to paint all the parts together nicely.

looking forward to see the next steps :)

edit: ah, she actually posted a photo were the parts can be seen on the left here, if that helps understanding what I meant :)
1711131489858.jpeg
 
Last edited:
Very nice zjunlimited ! thank you for sharing your process and for being so nice about everything on this project :) I really enjoy seeing the photos :)

I'm sure you saw it, but just in case, remember you can break out the first two lines of supports and keep the rest, that will allow you to sand the bottom edge of the tiles were the support were attached, while still keeping the rest of the support if you want to handle the tiles a bit easier.

That being said, when Julie did her batch of painted tiles, she ended up removing everything, sanding the backs clean, then attaching all the parts to a big plastic cup, this allowed her to paint all the parts together nicely.

looking forward to see the next steps :)

edit: ah, she actually posted a photo were the parts can be seen on the left here, if that helps understanding what I meant :)
View attachment 1802402
Appreciate the kind words eethan. Funny you should post that photo since that is what I used. She posted it on one of your threads and thought it was such a good idea since painting all 62 pieces on the individual sprues really intimidated me.
 
Priming and Base Coat (Stage 1)

So following my comment above, I decided to remove all of the supports from the tiles. You can see in the background the cup which I sprayed with Krylon primer. The cup itself was very smooth and the blue-tac was not sticking to it. With the primer, relatively no issues....more later.
20 Paint Prep 01 - Remove Supports.JPG


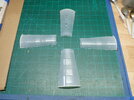
And then the process of using blue-tac removable adhesive (like silly putty) and attaching the tiles to the cup. Using a utility knife helps cut the right size adhesive for the piece. In general, the rectangle and pentagon shaped pieces needs a small piece while the larger triangular piece required 2 or 3 of the small pieces.
20 Paint Prep 03 - Blue Tac.JPG


Here it is all ready for the primer coat.
20 Paint Prep 04 - Cup.JPG


I decided to use Vallejo Gloss Black as my primer and followed that with Vallejo Metal Color Gold.
21 Paint 04 - Black Gloss.JPG


22 Paint 01 - Gold.JPG


So overall, this worked out very well. Much easier and way more efficient than painting each individual piece. Thanks to eethan and Wonder Knight for sharing their WIP photo.

That said, one issue I ran into which only affected 2 pieces during painting was the airflow from the airbrush caused 2 pieces to detach from the cup. No issues since it was an adjacent piece that I had not painted yet. I finished what you see above without any issues but it did give me something to think about for the next phase of this project.
 
Last edited:
Initial Wash (Stage 2)
So I decided after the last post to call the different phases of the paint process "Stages"...or maybe because my boys are into Cars N Coffee and modified cars now so all I hear is "what stage tune does xxx have"...aaaaanyhow

Since the primer and base coat were applied uniformly (the point is to have a nice even coat right?), I wasn't too concerned about airbrushing using the cup format. But then with the instances where the tiles detached, I think I came up with a solution that worked better for me.....both in applying the wash, paint AND in judging how much color was applied. I did NOT want the paint to be applied in a uniform layer and wanted some variation. The wash was probably the main reason for this next step since I couldn't figure out how to do uniform washes when the tiles are vertical.

So what I did was pretty simple. I used a utility knife and cut a couple of cups into 4 equal parts.
24 Paint Prep 01.JPG

Then I transferred the tiles from the intact cup to the paper map. Once I had the visual of how all of the tiles looked laid out flat, I started attaching the tiles to the cup. I also numbered them because I plan to move the tiles to the paper map and back to the cut cups depending on what step of the process I was at and this made it easier to track things...again my OCD. More on this later.... I also grabbed an old salsa container lid for the pentagon pieces.
24 Paint Prep 02.JPG


24 Paint Prep 03.JPG


These fit perfectly in those plastic food takeout containers. Doing this allows me to spray the parts down with water and contain the mess. As for the wash I used simple DecoArt craft paint in black and raw umber diluted in distilled water and Vallejo Rust wash. And here you can see the start of the wash process with the black to start filling in the grooves and details. Several other wash passes followed with the other colors. (Oh and I did dap away the wash that pooled before it dried since this step was for the grooves primarily. More washes will come later.)
24 Paint Prep 04.JPG
 
Base Weathering (Stage 3)

Sorry guys, I forgot to mention that before the initial wash step above, I sprayed Vallejo Metal Color Gloss Clear on all the tiles after the gold was applied.

Here's the result of the initial wash
25 Wash 03.JPG


Following this, I used Archive-X paints below to prepare a solution for the base weathering. The intent here was to add some color without making everything completely saturated and opaque. I will later remove and fine tune later. So I used eethan's painting guide as a reference and prepared a solution of Engine Black, Weathered Black, Brown Bess, and Coach Green in ratios of 5:5:5:3 drops and thinned it with Archive-X thinner and Vallejo retarder. You can use colors from any brand but this is what I had on hand.
26 Paint 01.JPG


Results are below.
26 Paint 03 - after.JPG


26 Paint 04.JPG


The A-X paints sprayed very easily and this step literally took less than 15min from mixing to spraying since 1) you don't have to be perfect and 2) how I laid out the tiles made it super easy to apply the paint. The blotchy coverage is intended to introduce variation, leaving some areas lighter / darker. And since these are acrylic paints, I will be able to use water to remove areas of paint as needed.
 
Base Weathering Removal / More Washes (Stage 4)

So for this next step, I first attached the map included in the kit onto a piece of plywood scrap I had. The reason behind this is I wanted a solid structure behind the map since I will be moving this between my office and the garage.

So with that done, I moved all of the tiles onto the map to see how all the tiles (and the colors) interact with each other.

Then with a simple microfiber towel wrapped around a finger lightly dipped in water, I started rubbing each tile to remove layers of paint to expose the gold underneath. This process was repeated multiple times until I had the look I wanted.
* NOTE: I used some airbrush thinner initially as my wetting agent and in my test section, the thinner worked too well and too much paint was removed. Using water only gave me more control.

I then applied more wash...blacks, brown, rust. And added "drops" all in an effort to simulate some of the variation from the reference photos. I accomplished the drops by loading up the paint brush with the wash and tapping the handle of the brush against another brush or finger. Once dry I gently used the same microfiber towel process above to smooth out the dried wash and to further fine tune the look.

Once I was satisfied with the look, I used Vallejo Gold to bring out some highlights.

Clear Coat (Stage 5)

To seal this thing up, I applied 2 coats of Liquitex High Gloss clear. To me, the dried finish of the Liquitex was more Satin to my eyes than High Gloss....which I actually prefer. I think if I added more layers of clear it would be more glossy but I was happy with the look after 2 coats and stopped.

So to summarize the painting process, I pulled some photos of a particular portion of the tiles to show an example of the paint progress.
From top down...
* Stage 1 - Vallejo Gold base
* Stage 3 - Base Weathering
* Stage 4 - Base Paint Removed / Wash & Drops applied
* Stage 4 - Wash and Drops Dried
* Stage 5 - Clear Coated


Paint Process.jpg
 
Final Assembly (Stage 6)

Ok, so the end is in sight and this is probably the most stressful part of the build for me. Everything else up to this point allowed quite a bit of flexibility in case things don't turn out exactly as expected. However, for attaching the tiles to the ball, you gotta get it right....62 times...lol.

So here we go...

I'm using standard CA glue...gap filling medium thickness. This gives me some working time to get the tile aligned and oriented before the actual attachment and the drop of glue has enough surface tension that it doesn't run everywhere. And as always, I have Un-Cure readily available for emergencies. And the toothpick is to keep the nozzle of the CA glue clear.

I'm using a standard spray can cap as a stand to hold the ball. It works wonderfully.

Some tips / thoughts so far...
  • Double and triple check the relation of all tiles when moving from the map to the ball. You can easily get a tile turned around without knowing it.
  • I found it was easier to rotate the map to align with the specific section on the ball that I'm working on to keep everything straight in my head.
  • Without the plywood base, this step would have still been do-able but much more challenging since I was rotating the map quite a bit for each tile. The base just made it easier without the tiles moving everywhere due to the flex in the paper.
  • For the big triangle tiles, I applied a drop go glue in the middle, each corner, and each side (see below)
  • For the little pentagons, one drop in the middle, one near each point
  • For the rectangular pieces, one in the middle and one drop at each end.
  • For all of this, place the drop far enough away from the edge to prevent squeeze-out.
  • There is almost no margin for correction if the tiles are misaligned to the ball. You might have 1sec to make a slight alignment correction but the CA glue grabs fast so forget about sliding the tile around to find the perfect position.
  • So after applying the CA glue, I would hold the tile by the edges with my right hand and align the position vertically directly above the desired space on the ball and slowly lower the tile using my left to press down until it makes contact. Once it does, I gently hold down the edges using vertical pressure only. I found using both hands was the only way to keep the tile aligned while controlling the actual contact.
  • I worked in small sections only and then took a break. This is not the part to lose focus on....the orientation of the tiles or attaching the tiles to the ball has to be as perfect as possible. Others may be able to do this in one sitting but I found I could only stay focused for roughly 8-10 tiles before needing a break.
  • And I guess it goes without saying but I'll say it anyway, wear gloves around CA glue.

40 Tile Glue 03.JPG


40 Tile Glue 04.JPG
 
Assembly is done!

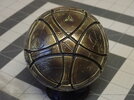
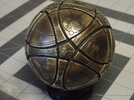
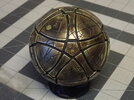
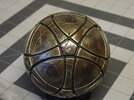
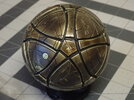
Below are some photos of the completed map.

Much thanks to Wonderknight and Supergreen props for taking the time and effort to create such a wonderful kit. Everything fit perfectly and the details are simply amazing. I tried to build this prop to the best of my ability and I am quite satisfied with how this turned out.

I put together a brief video so if you are inclined to take a look I would appreciate it. Hopefully the insights I share will be helpful for others in their build.


50 Finished 07.JPG


50 Finished 01.JPG 50 Finished 02.JPG 50 Finished 03.JPG 50 Finished 04.JPG 50 Finished 05.JPG 50 Finished 06.JPG
 
Assembly is done!

Below are some photos of the completed map.

Much thanks to Wonderknight and Supergreen props for taking the time and effort to create such a wonderful kit. Everything fit perfectly and the details are simply amazing. I tried to build this prop to the best of my ability and I am quite satisfied with how this turned out.

I put together a brief video so if you are inclined to take a look I would appreciate it. Hopefully the insights I share will be helpful for others in their build.


View attachment 1807538

View attachment 1807532 View attachment 1807533 View attachment 1807534 View attachment 1807535 View attachment 1807536 View attachment 1807537
Awesome result zjunlimited, your finished prop looks amazing! you did great honour to our kit and I appreciate you took the time to share your process here :) thank you :)
 
Building a Rock Stand

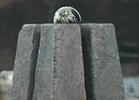
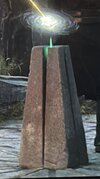
I wanted to build a proper stand that resembles the stone structure the map sits on in the show. So I first grabbed a couple of screen shots for reference and inspiration.
IMG_0269.jpg IMG_0271.jpg

Next, after just briefly contemplating building this out of a wood block and quickly talking myself out of it, I found a 6"x 6"x 6" foam cube at Michaels as my starting base....affordable at about $8 after taxes.
As you can see the cube is rather large but I figured I can always cut it down. Those are 1" lines to get a rough idea of the angles.

01 6x6 Block sizeup.JPG


But visually I thought it looked too extreme so I decided to draw 1/2" lines from the edge going with the principle that I can always cut more later if needed.
02a Initial Lines.JPG


So I went ahead and cut along these new lines using a bread knife. I learned of this years ago on another project and it did not fail me this time but 1) the serrated edge cuts through the foam very easily (much better than a non-serrated knife), 2) the blade is very sturdy...especially compared to a utility knife, and 3) the blade is long enough to cut through the foam in one shot.
03a Initial Cuts.JPG


Well after this cut I decided the proportions and angles were not steep enough so I went ahead and cut the sides again along my original lines.
04c Final Updated Lines.JPG


Personally for me, cutting the foam was the most critical step of this project since 1) I only bought one cube and didn't want to go back to the store but in all seriousness, 2) I needed to get the angles (and cuts) straight to obtain the correct profile that I was going after.
 
Shaping the Foam to Size

Next up was marking and making the interior cuts that makes the stone so unique in the show. Basically the gap is wider at the top and narrows down to the bottom so a few more reference lines...after drawing the center lines, the additional lines were offset ~1/4" from center.
05a Interior Lines.JPG


Before making these cuts, I decided to reduce the height of this down 2" to fit my display case better.

Here's the shorter piece with initial interior cuts made. The blue painter tape was a mark for me to know how far down vertically I needed to make the cuts. I did NOT want to cut all the way through the foam block and wanted to preserve enough foam in the center so the stand still retains some stability and structure.

First for reference...bottom width is now 4.5", top width is 3 7/8", height is 4".

The depth of the center cut is roughly halfway down at 2".
05b Interior LInes.JPG


05d Final Interior Lines.JPG


I hope this makes sense but after the initial cuts, for the side walls, I wanted to make the cuts shallow enough to preserve the structural integrity but deep enough that you couldn't see the center of the stand. The following photos should help convey what I just said.

05e Final Interior Lines.JPG


05f Final Interior Lines.JPG


Once I was happy with the shape, I sanded everything down with 500g sandpaper on a block and with a series of nail files for the interior walls.

I then proceeded to add dents, chips, and other character features in the foam block to give it some organic feel using a variety of tools.

06 Creating Dents.JPG
 
Sealing the Foam

Now that I have the final shape, I proceeded to seal the foam with drywall spackle. I used the spatula in the photo above to press the spackle into the foam.
07a Spackle.JPG


And once everything was covered and dry, I sanded everything down using a disposable nail file / emory board. These are great since there is a coarse and fine side and it is thin and flexible to get in between the gap.
08a Sanding.JPG


Next I mixed up some spackle with water to create a thinned goop that will help get into the gaps better and spread it across the entire surface to smooth out sections and give the overall look a smoother appearance.

Below is the final spackled piece. I then mixed up some Mod Podge and grey acrylic paint and applied it to the entire surface for a total of two coats.
10a Seal.JPG


10c Seal.JPG


Once that dried, everything received another sanding including removing the visible brush strokes. This was then followed by two coats of filler primer and more sanding but gentler than before with 500g and 1000g sandpaper on the exterior surfaces.
11a Filler.JPG
 
Last edited:

Your message may be considered spam for the following reasons:

If you wish to reply despite these issues, check the box below before replying.
Be aware that malicious compliance may result in more severe penalties.
Back
Top