Boba Fett helmet build, ongoing project.

Re: pepafett (boba fett pepakura attempt)

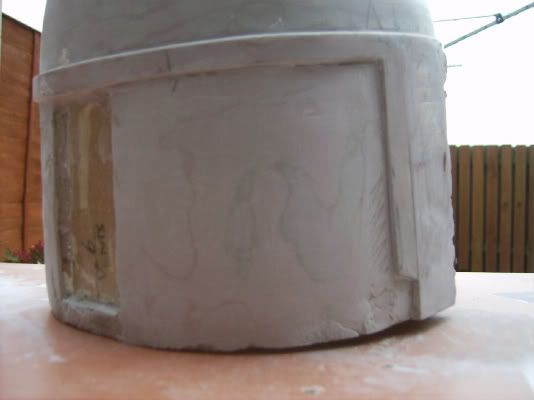
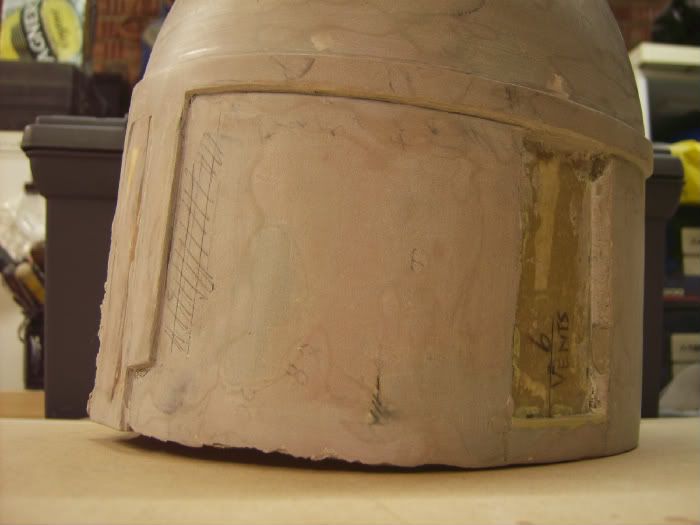
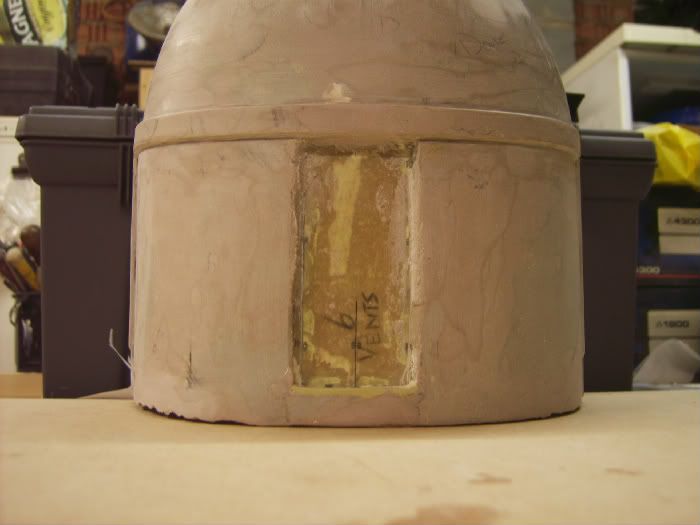
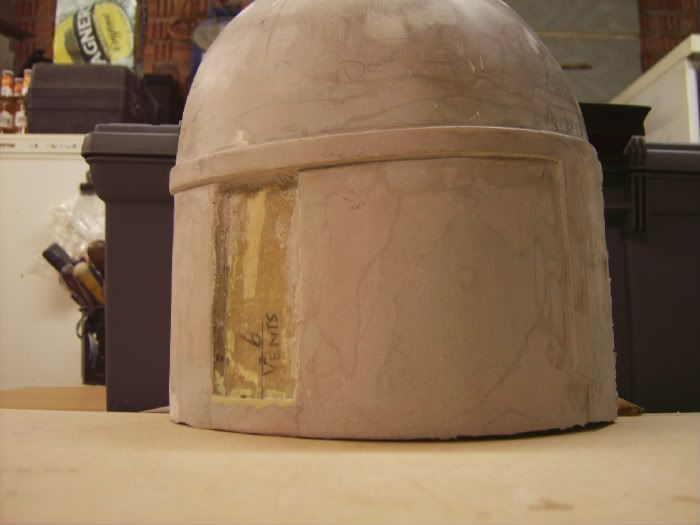
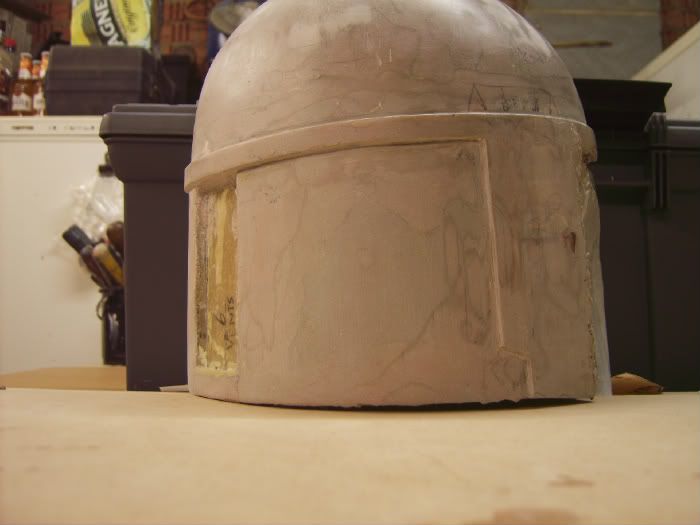
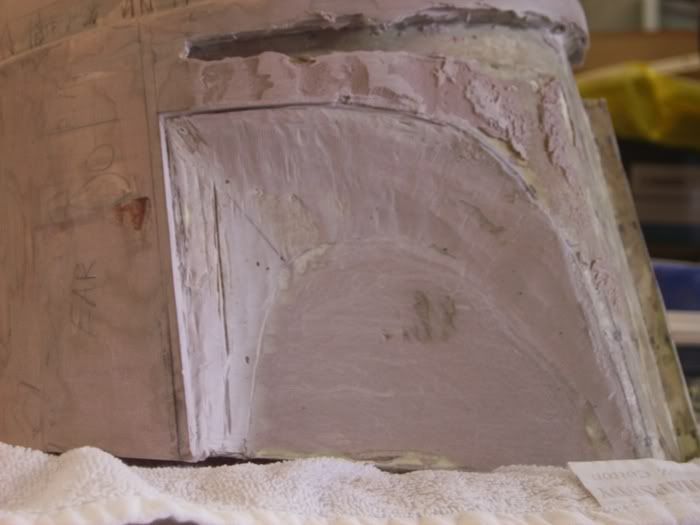
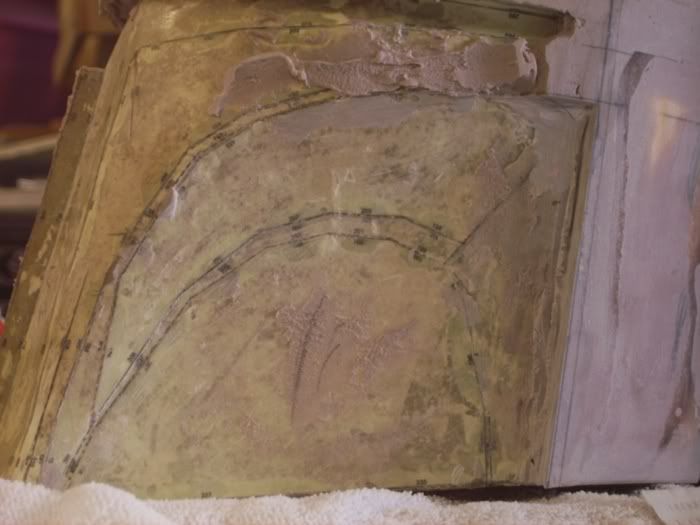
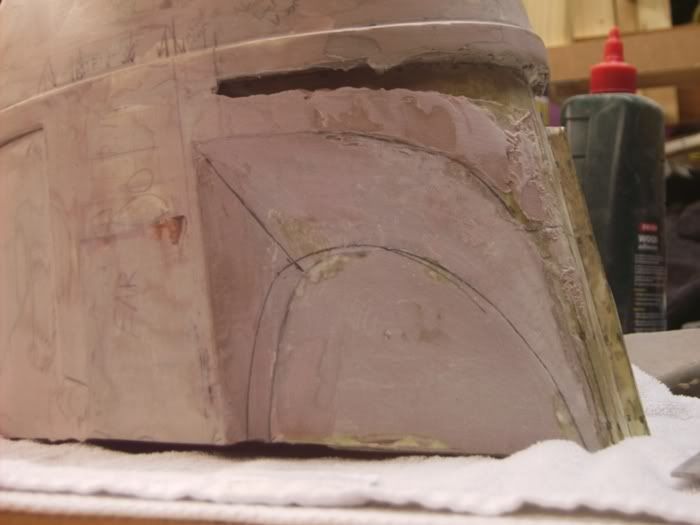
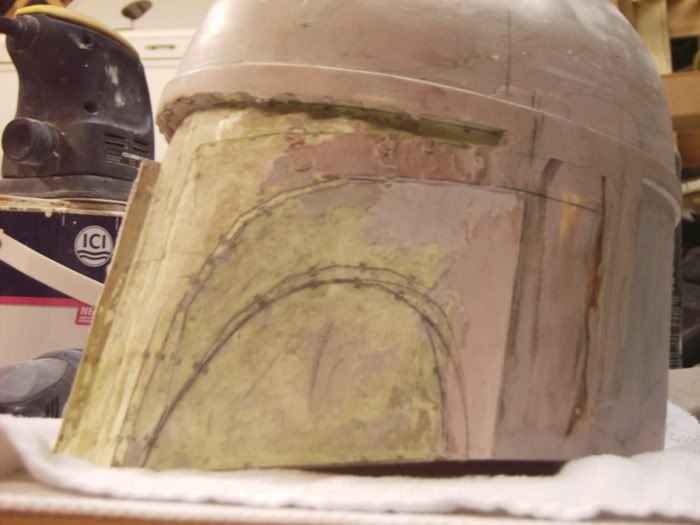
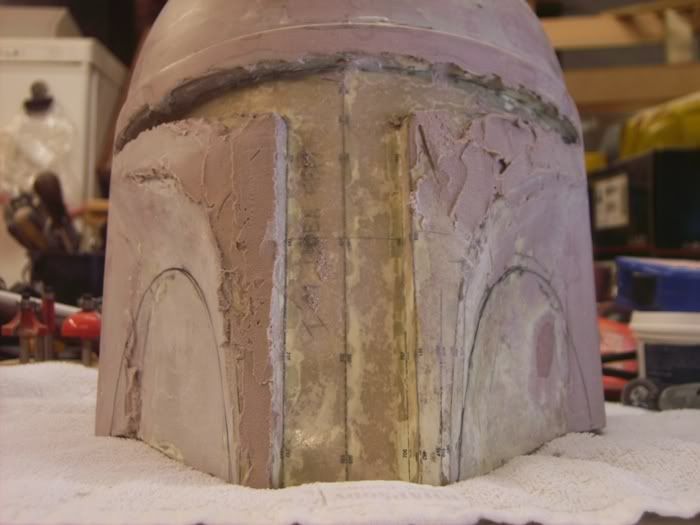
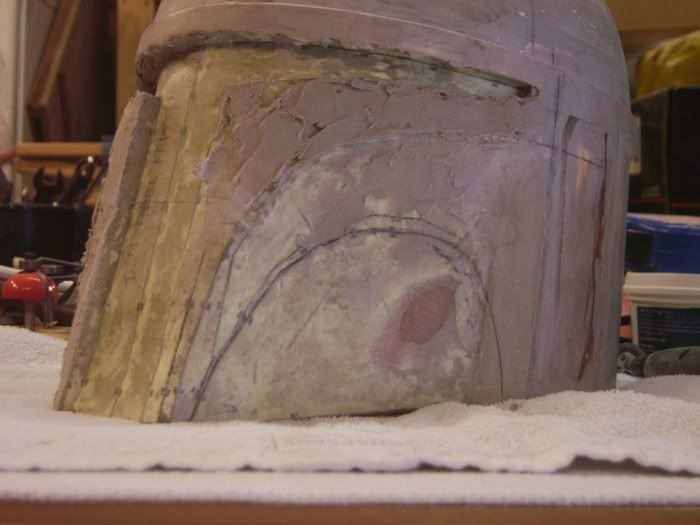
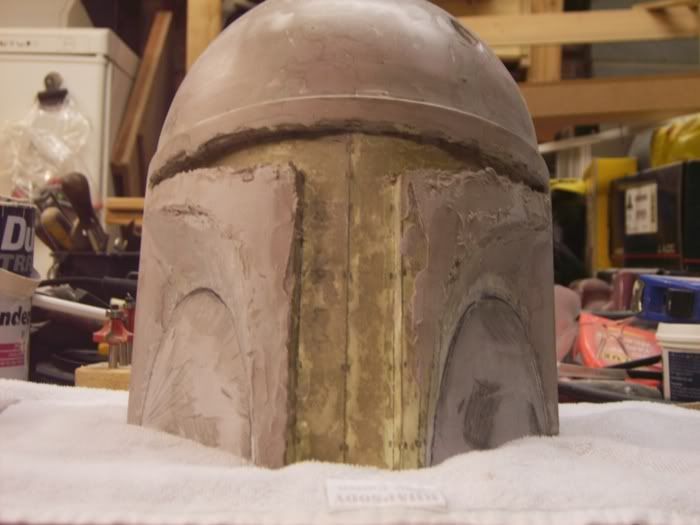
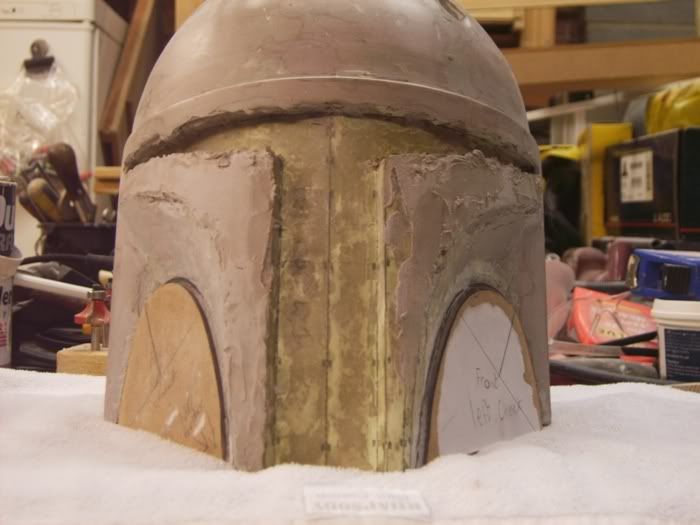
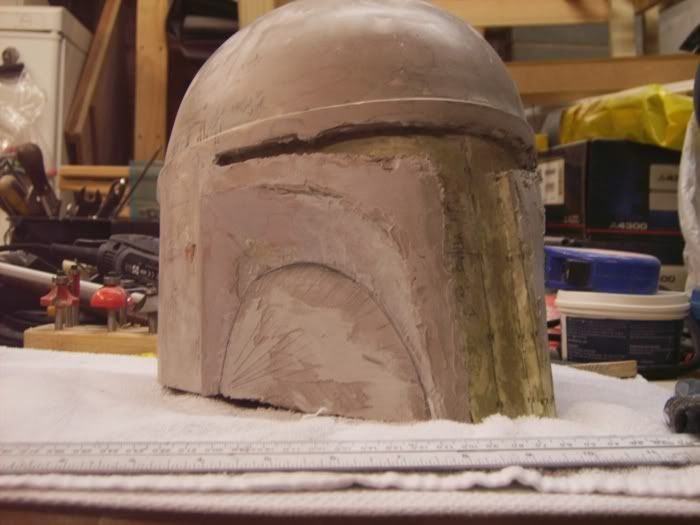
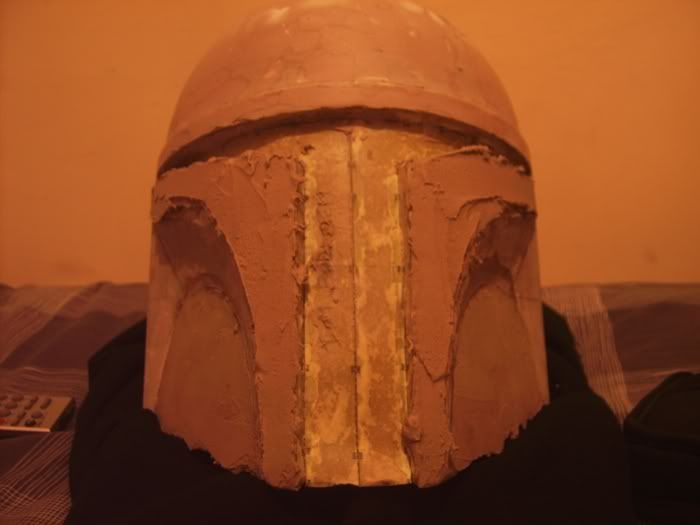
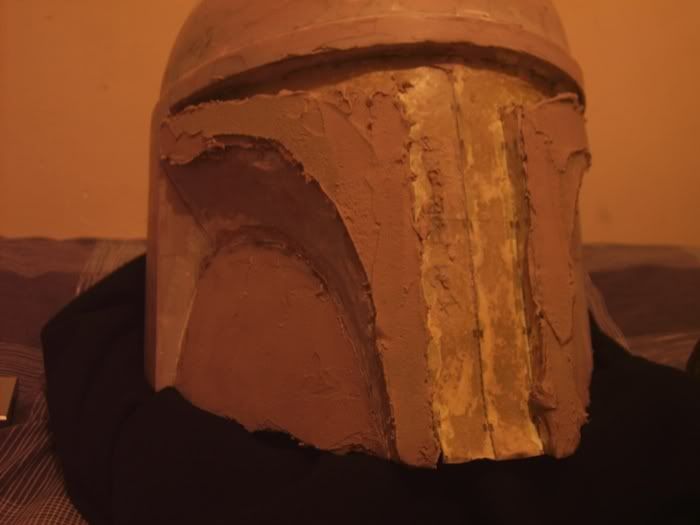
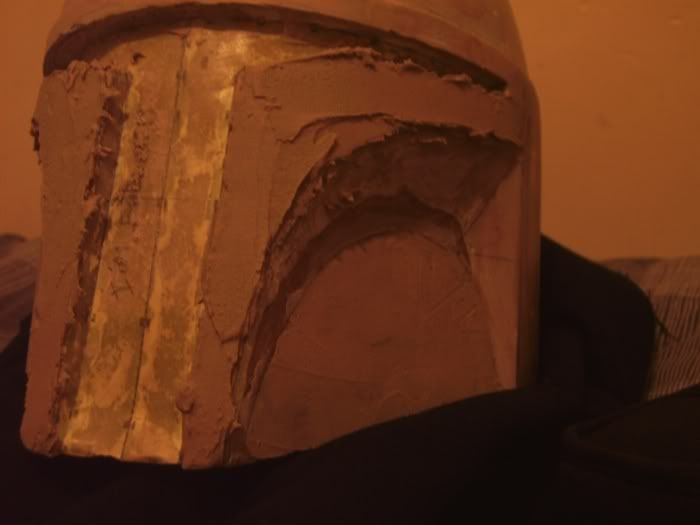
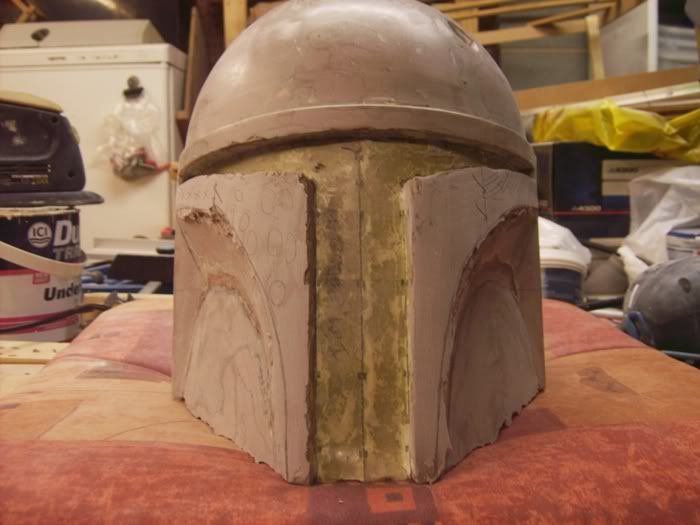
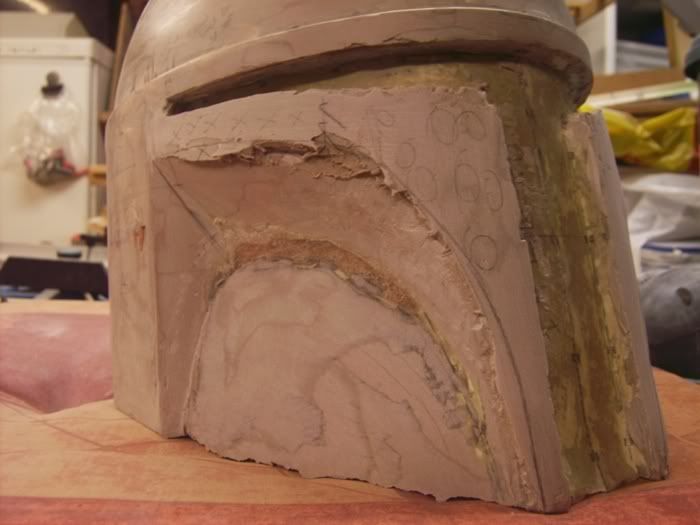
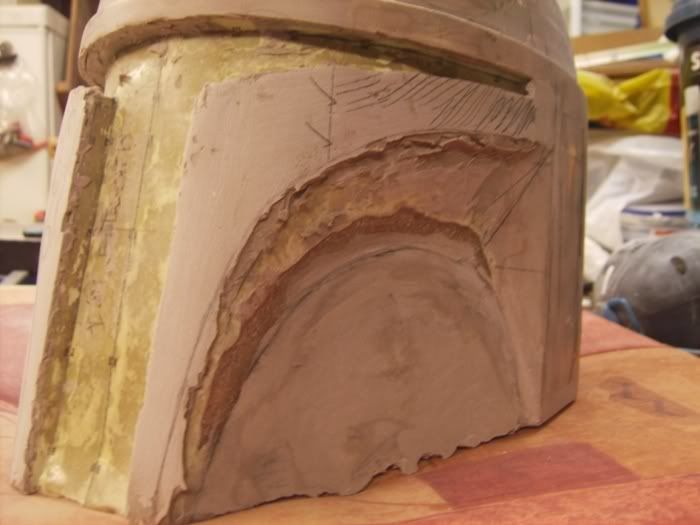
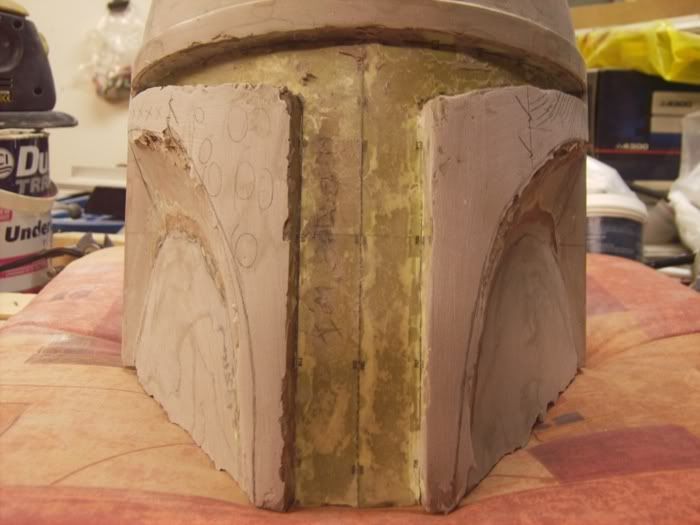
well the work on the ears (i can't think of a better word to use when referring to them) continued. more sanding and fillering, rinse and repeat...

using a kindly borrowed sander from a friend (thanks joe) has worked wonders :) no more aches in my hands/wrists from hours of sanding

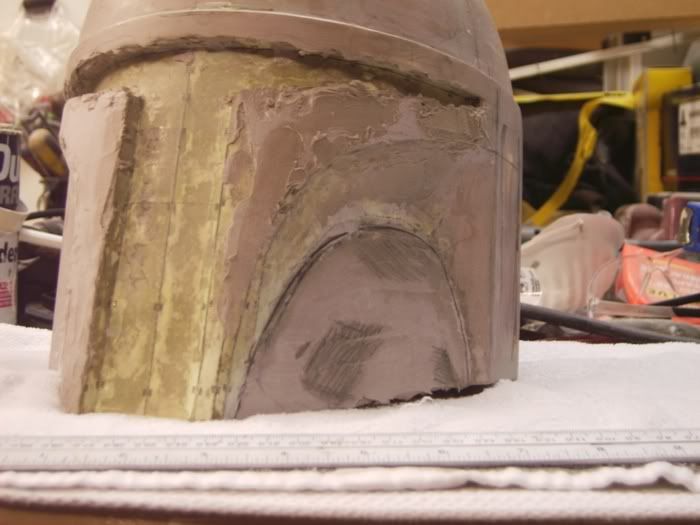
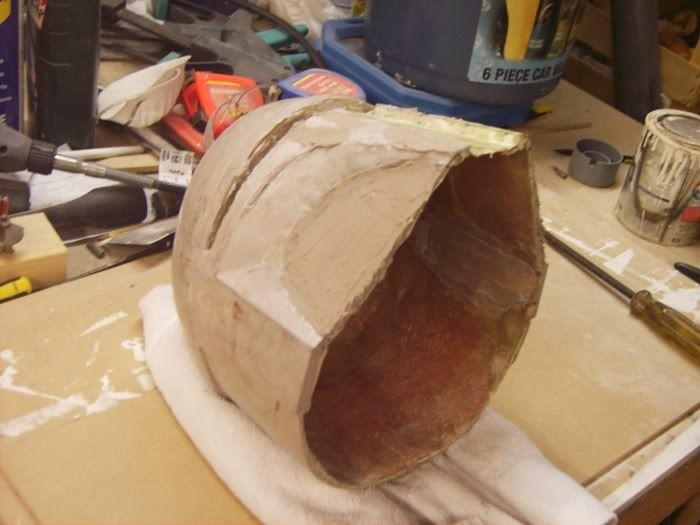
you can't really see from the pictures what i've done so you'll have to look very close and figure it out.

PICT0269-1.jpg

PICT0266.jpg

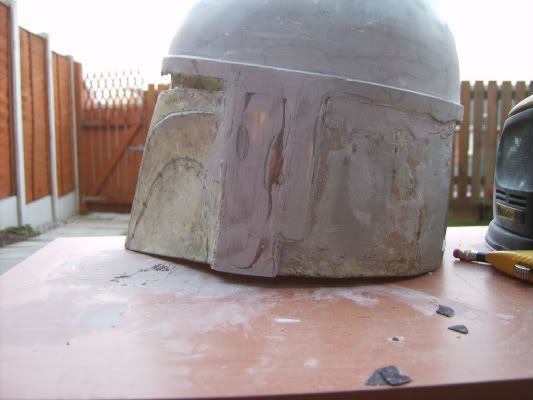
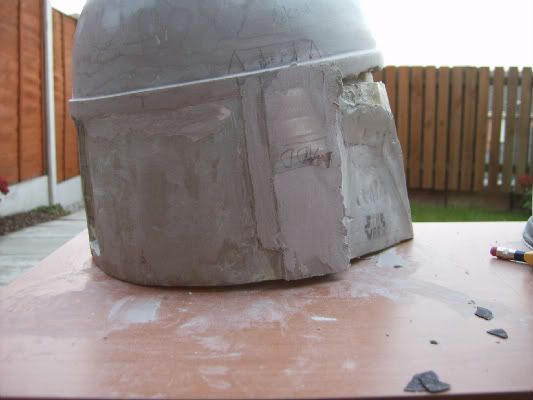
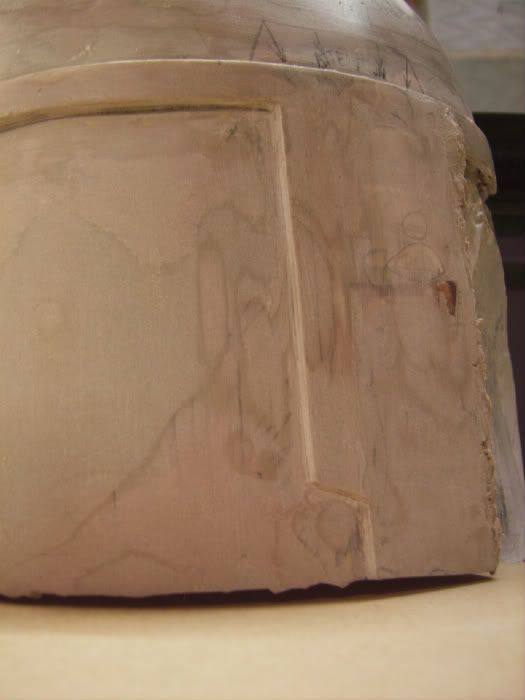
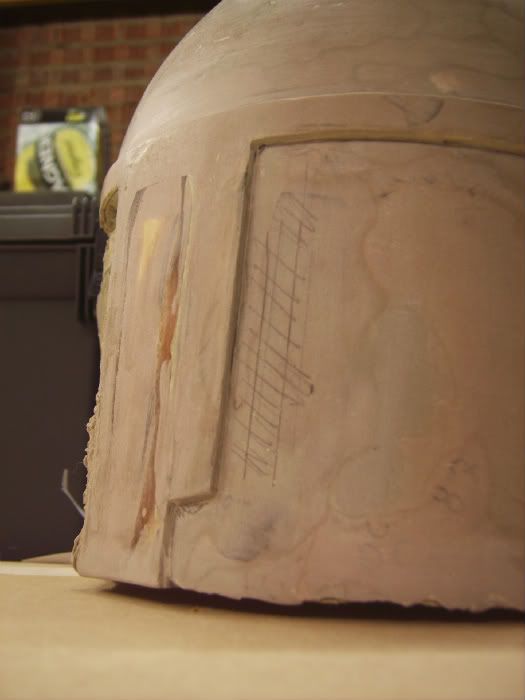
the pictures are really poor, sorry about that, can't see anything on them, but its amazing i promise :)

put the flash on and got a bit of a shadow which helps show my progress (slightly) instead of it all looking rather flat on the first two pictures.
PICT0263.jpg


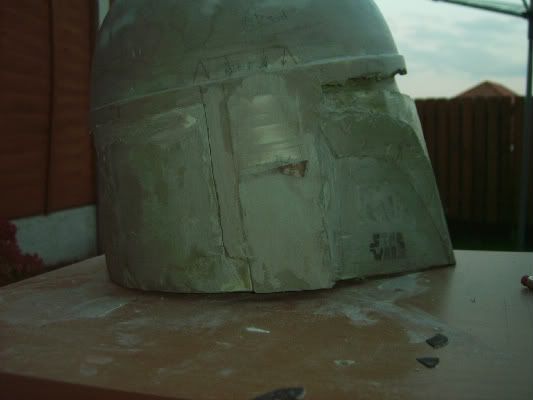
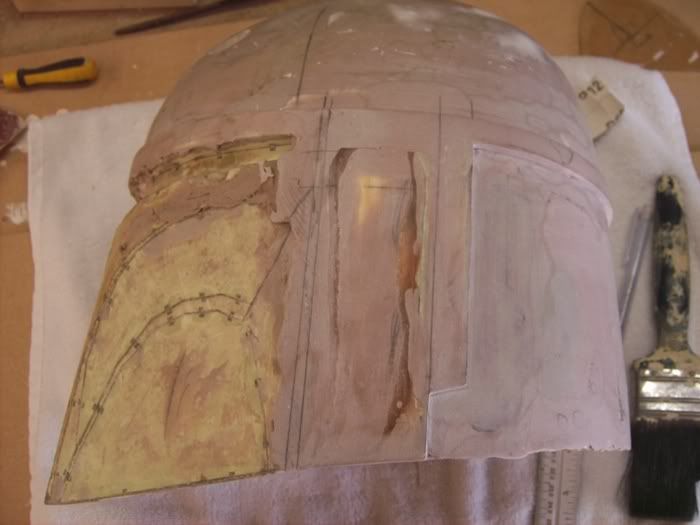
im working my way to the back of the helmet now so the edges to the front of the ears are still a bit rough and the left side ear is slightly better shaped atm compared to the right as well.
since pictures added some more filler to near the end of shaping the 'ears' and then i can get the back finished up, which as i always say should be easier.

everything considered i feel im making some progress at least and happy with how its going.

so...what do you think? :confused
 
Re: pepafett (boba fett pepakura attempt) I dislike working in the sun

being at home i am forced to work outdoors so had a couple of issues with the sun beaming down on my filler and drying it up in about 3 minutes.

despite the obstacles i encountered i made some progress, only a little update though but i've began to shape the back of the helmet.

PICT0276-1.jpg

after spending weeks on the ridge and 'ears' its nice to do a large area, just getting a nice smooth curve to shape it. should have this side (the side shown in the picture) completed by tomorrow then start on the over side.

its very very slowly coming together, maybe 40-50% completed, i hope so anyway
 
Re: pepafett (boba fett pepakura attempt) I dislike working in the sun

It looks to slowly but surely be taking good shape. Nice job!

thanks for the kind words Apocodaddy

if you're going do something, do it right i say, the time spent should pay off in the end, when ever that will be :confused
 
Re: pepafett (boba fett pepakura attempt)

slow progress and slow updates, sorry to keep you waiting (terra1 and anyone else looking at this :))

well i hope this is update worthy i think it is. been working (slowly) on the back on the helmet recently, forgetting the vent bit in the middle for now, that well be done after the cheeks are done, which is next on the to do list, maybe even start that tomorrow, then it should bring the helmet together much more

picture time, say cheese

PICT0256.jpg

PICT0255.jpg

PICT0258.jpg

PICT0260-1.jpg

PICT0261-1.jpg

PICT0263-1.jpg

PICT0268.jpg
 
Re: pepafett (boba fett pepakura attempt)

looks like it's coming together well now!

that dome looks lovely and smooth, and the edging looks very neat too.

good work after Magners and Bacardi Breezers!!!
 
Re: pepafett (boba fett pepakura attempt)

I cringe at all the putty sanding there!

Another way to get the proper ratios is just draw a line across the blob of putty with the hardener. Seems to work right every time. I saw it on a TV Auto show.
 
Re: pepafett (boba fett pepakura attempt)

I wish I would have seen your post sooner, I am making my second Fett helmet now and maybe could have helped you through your build. The filler (if you have any more left to do) is also easily shaped with a sharp knife or box cutter blade while it is in that rubbery stage before it hardens, saves alot of sanding. The "key slots" someone else mentioned is the part that goes in the rectangular hole you cut into the back. I always wait to cut out any holes or anything until after I've done my shaping and main sanding so the helmet is more rigid and easier to work with. I used the clear plastic for poster frames for the visor and used automotive window tint to darken it, you cannot see my face through it and my visibility out is really good. If you have any problems with sanding down to the paper, or getting the mdf "ears smooth, give it a thick coat of shellac, and it will help with the roughness when you sand it. I made a short write up on my first helmet which was made from cardboard on my blogsite, and the Rpf's sister site" The Dented Helmet" has a ton of these done as well. It's a great place for info. Good luck on the rest of the build and I'll be glad to help however I can !
 
Re: pepafett (boba fett pepakura attempt)

looks like it's coming together well now!

that dome looks lovely and smooth, and the edging looks very neat too.

good work after Magners and Bacardi Breezers!!!

my dome has suffered from countless amounts of times i've simply sat it down, gave it numerous flat spots but thanks for the kind words

I cringe at all the putty sanding there!

Another way to get the proper ratios is just draw a line across the blob of putty with the hardener. Seems to work right every time. I saw it on a TV Auto show.

i dont mind the sanding (most of the time) im gettin better at applying it, doing it more precise so i dont have to sand down loads before i get to where i want it to be. also my little mouse sander works wonders for me

I wish I would have seen your post sooner, I am making my second Fett helmet now and maybe could have helped you through your build. The filler (if you have any more left to do) is also easily shaped with a sharp knife or box cutter blade while it is in that rubbery stage before it hardens, saves alot of sanding. The "key slots" someone else mentioned is the part that goes in the rectangular hole you cut into the back. I always wait to cut out any holes or anything until after I've done my shaping and main sanding so the helmet is more rigid and easier to work with. I used the clear plastic for poster frames for the visor and used automotive window tint to darken it, you cannot see my face through it and my visibility out is really good. If you have any problems with sanding down to the paper, or getting the mdf "ears smooth, give it a thick coat of shellac, and it will help with the roughness when you sand it. I made a short write up on my first helmet which was made from cardboard on my blogsite, and the Rpf's sister site" The Dented Helmet" has a ton of these done as well. It's a great place for info. Good luck on the rest of the build and I'll be glad to help however I can !

i believe i've previously seen your build, for how it looked you did it from scratch using the cardboard which is pretty impressive. i use a knife (stanley normally) to get some of the sharp edges, but im putting on the filler better each time so i don't have massive amounts to sand down. your tip on smoothing the MDF "ears" sounds helpful as i've been debating how to get a smooth finish on them. if i've got any queries i'll be sure to ask, any help is always useful, save me from making mistakes other people already have.
 
Re: pepafett (boba fett pepakura attempt)

I've done a lot of bondo work on cars. Believe me, after a while you want to minimize the work as much as possible. Use a little and build it up, rather than knock it back down. Saves time and money and mess.
 
Re: pepafett (boba fett pepakura attempt)

I've done a lot of bondo work on cars. Believe me, after a while you want to minimize the work as much as possible. Use a little and build it up, rather than knock it back down. Saves time and money and mess.

i know that now but sadly learnt it the long and hard way, i can do a half decent job now though, which should only improve with time
 
Re: pepafett (boba fett pepakura attempt)

Fantastic! I love the Fett costumes, there can never be too many. Cant wait to see this finished up :)
 
Re: pepafett (boba fett pepakura attempt)

Looking pretty sweet so far! Keep up the good work and enjoy the learning process!
 
Re: pepafett (boba fett pepakura attempt) currently shaping cheek bones [WIP]

Fantastic! I love the Fett costumes, there can never be too many. Cant wait to see this finished up :)

a couple more fett builds have appeared recently which is nice to see, you really can't have enough boba fett

Looking pretty sweet so far! Keep up the good work and enjoy the learning process!

i am very much going through the learning process, don't know if enjoying it is the right word to describe it though :p thanks for the kind comments and words of encouragement though
 
Re: pepafett (boba fett pepakura attempt) Almost flat cheeks, but not completely

due to being at my own house (and not my girlfriends) work completely stopped as i couldn't work outside in the elements, such as rain, wind and just general cold.

so i was back at the gf's at the weekend and (tried to) get stuck into my build as i hadn't done anything to it in over a week and was just sitting onto of a pillow in the middle of kitchen table, made a nice centre piece.

objective, shape cheek bones, whether i did this i can't say 100% yet. heres some 'pictars', tell me what you think as im starting to get to that point where i can work on for 4 days and think "i've not even done anything to it, i can't see a difference". i guess i need some fresh eyes to judge it

markings on cheeks/ears to dremel
PICT0279.jpg


one freshly dremeled cheek
PICT0283-1.jpg

and the other
PICT0288.jpg


i did start on the slopes down to the cheek
PICT0259.jpg

PICT0263-2.jpg


stencilled on where the cheek edges are
PICT0263-2.jpg


front view
PICT0271.jpg


this cheek puffed out during fibre glassing so caused all kinds of trouble
PICT0272.jpg


another front view after a passing of filler
PICT0260-2.jpg


templates in place
PICT0257.jpg


one side
PICT0262.jpg


and the other
PICT0267.jpg


then left it to dry for the night
PICT0270-1.jpg


at this point i still was happy with the not-flat cheeks i had, i dremeled the crap out of the puffed cheek so much so i went through it complete and batched it from the back with some filler. this allowed me to get the cheeks (almost) completely flat, fast-forward one and half days to what i have now

horrible light and cheap tourist camera's dont produce great pictures
PICT0264-1.jpg

PICT0266-1.jpg

PICT0268-1.jpg


need sand them down smooth and should be about done with the cheeks, for now.

im moving onto the visor edges and then i'll put a smooth and sharp transition down to the cheeks and i'll have a roughly finish helmet (it all sounds so easy when im typing it)

comments, thoughts, judgement, insults, 2 cents?
 
Re: pepafett (boba fett pepakura attempt) Almost flat cheeks, but not completely

i am pretty sure my cheeks aren't very symmetrical, the right (left on picture) cheek looks deeper set than the left(right on picture). not really sure what to do about that right now as im focusing on the front visor edges/side bits. which is a fair bit easily then the cheeks were.

small picture updates
PICT0255-1.jpg

PICT0259-1.jpg

PICT0261-2.jpg


close up
PICT0264-2.jpg


any comments...
 
Re: pepafett (boba fett pepakura attempt) Almost flat cheeks, but not completely

I think it looks good! It looks symmetrical to me, but thats just one opinion!
 
Re: pepafett (boba fett pepakura attempt) Almost flat cheeks, but not completely

I think that puffed out cheek threw it off. Cut the flat right off and put a new piece in.
 
Re: pepafett (boba fett pepakura attempt) Almost flat cheeks, but not completely

I think it looks good! It looks symmetrical to me, but thats just one opinion!

I think that puffed out cheek threw it off. Cut the flat right off and put a new piece in.

i prefer Crank's response, less/little no work involved :). thanks for the suggestion terryr all the same, i know having a new base to work off can greatly help as you may have seen i did that with my 'ears' but i never thought it was beyond repair though.

small update shortly.
 
This thread is more than 9 years old.

Your message may be considered spam for the following reasons:

  1. This thread hasn't been active in some time. A new post in this thread might not contribute constructively to this discussion after so long.
If you wish to reply despite these issues, check the box below before replying.
Be aware that malicious compliance may result in more severe penalties.
Back
Top