B/Y wing builds.

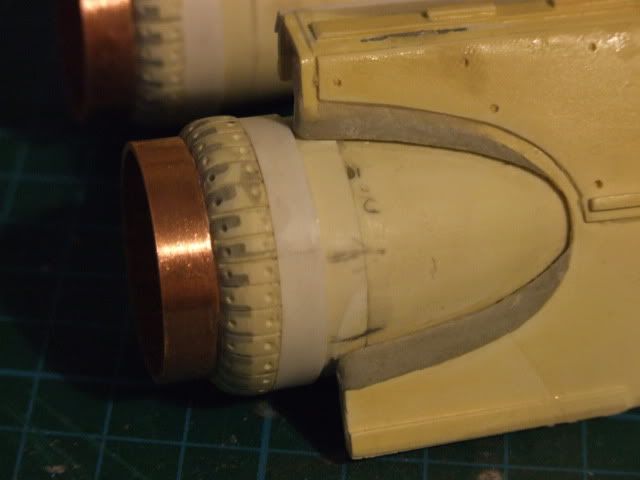
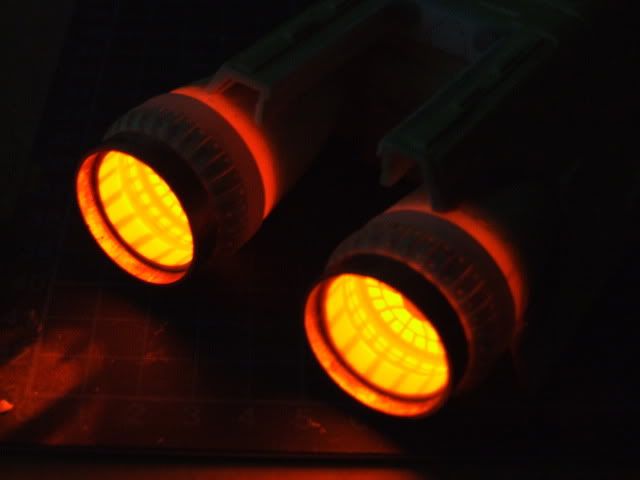
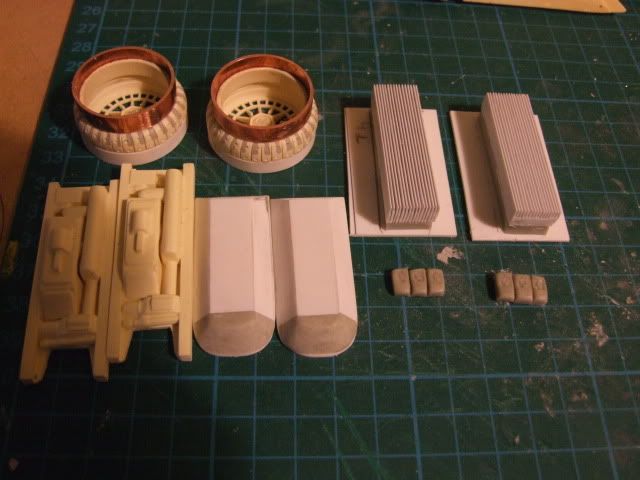
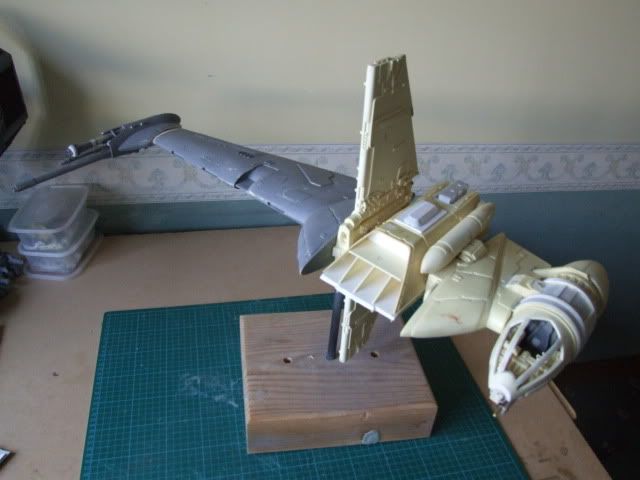
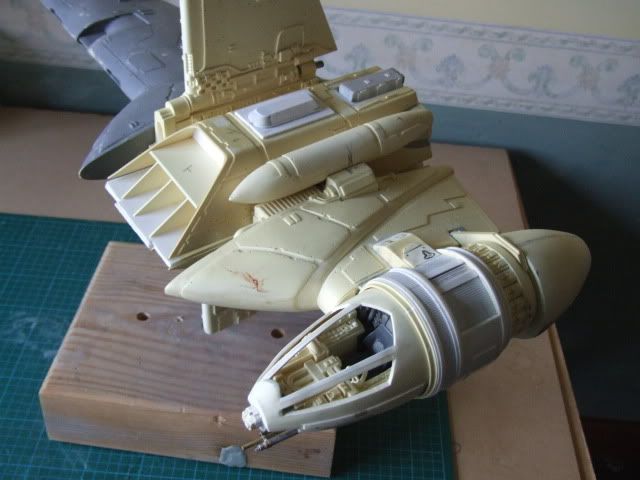
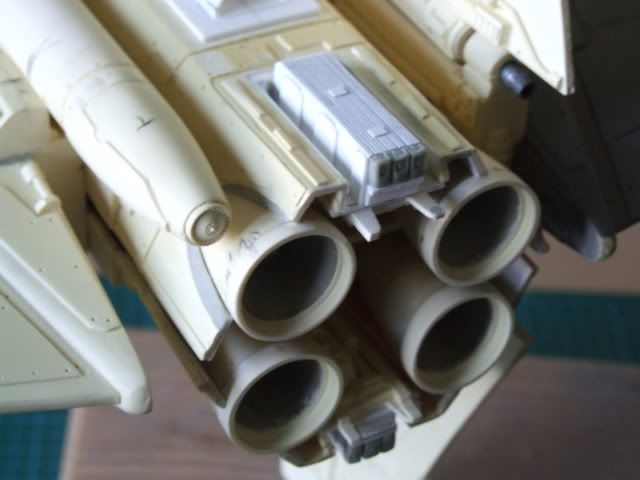
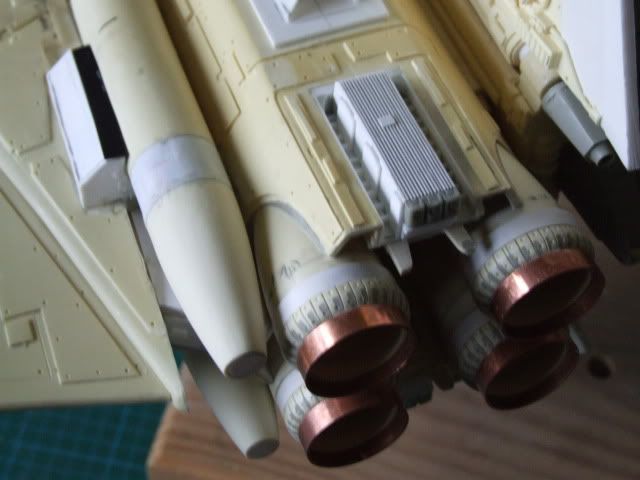
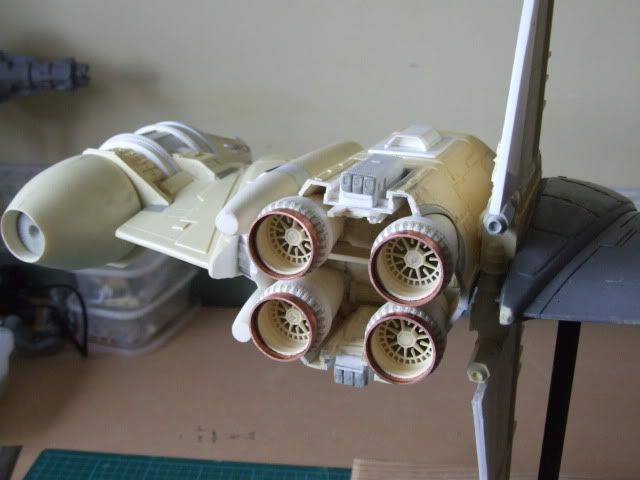
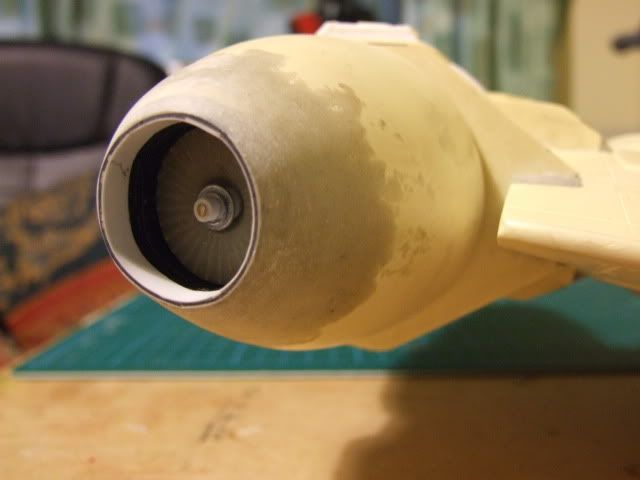
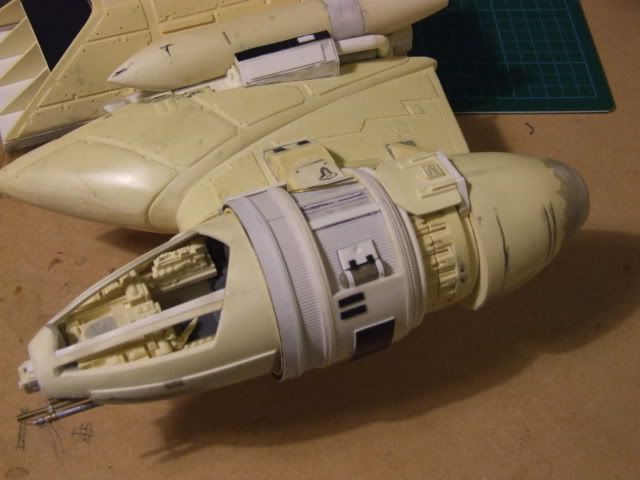
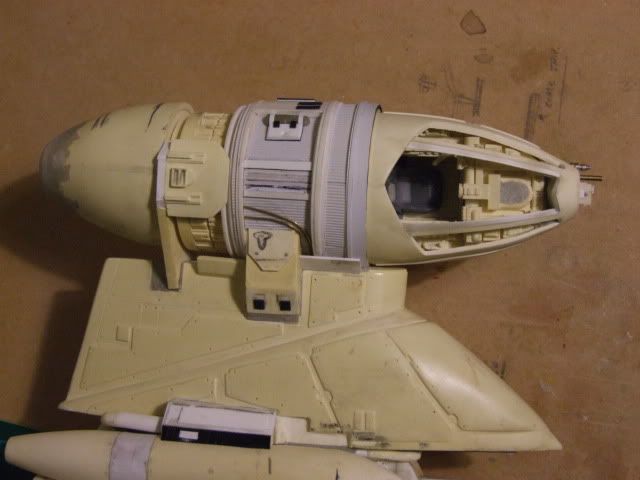
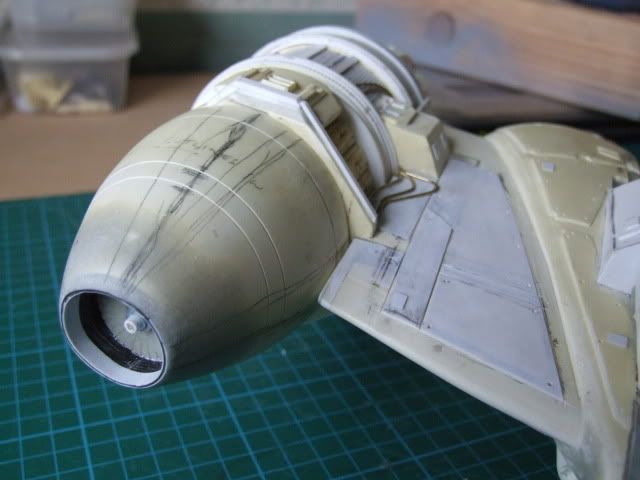
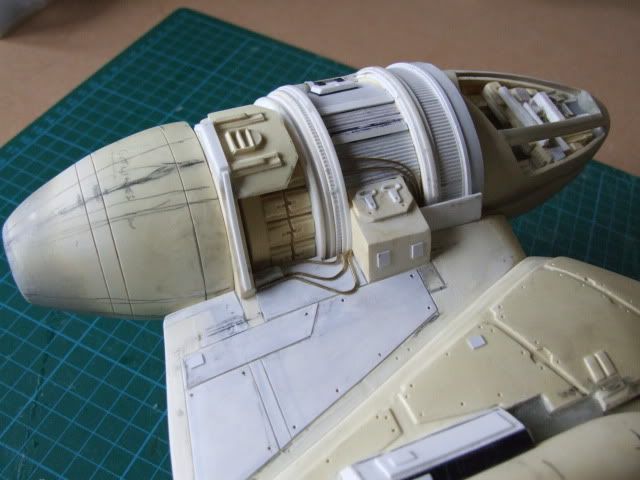
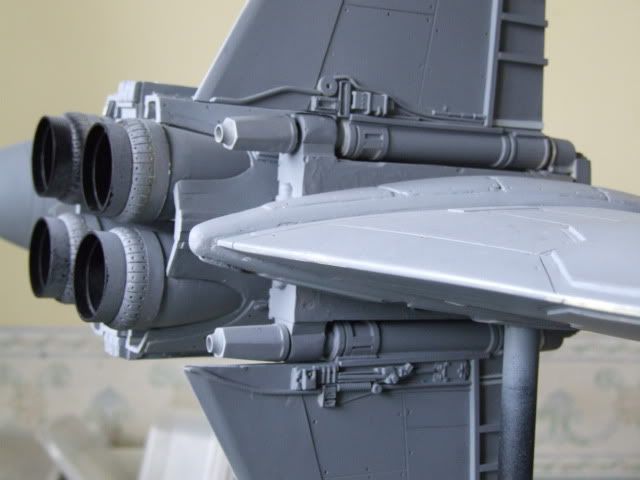
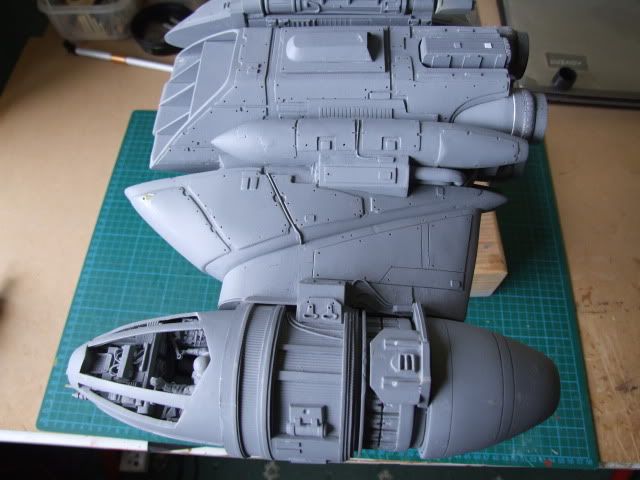
I knew those engines were going to be hard going. The actual cones are solid resin so you have to drill them out to get the LEDs in and taper the inners to match the outsides. Not much fun but done. They then appeared to be quite short so I extended them. Then corrected the last three sections so they look a little more like the originals.Couldn't find anything to match the cowls so I ended up sawing copper piping up.That was alot harder than I thought it would be.
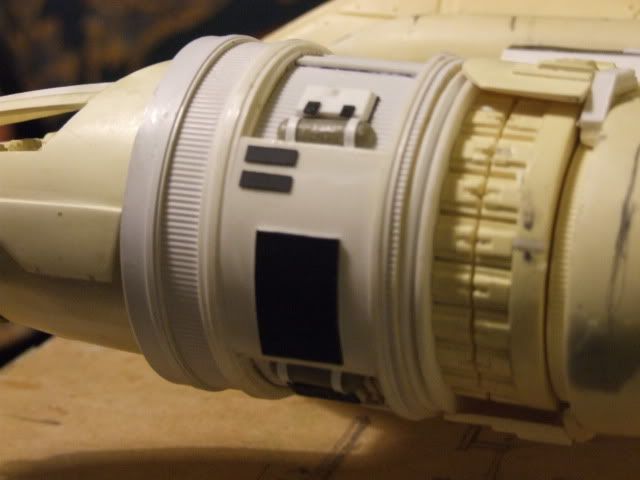
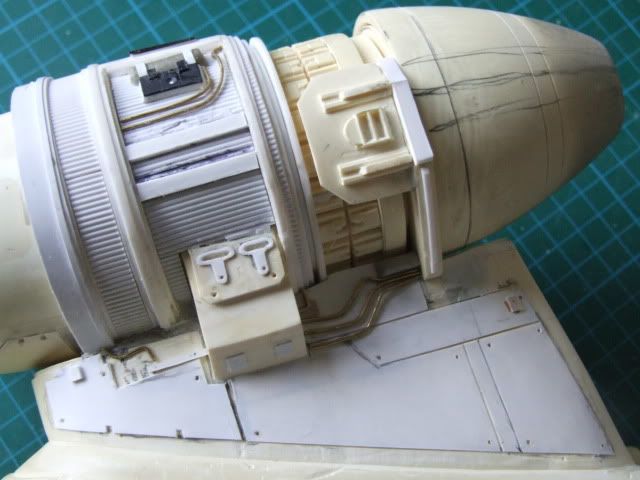
The original kit engine rims were then filled in with apoxie sculpt and I cut and drilled the detail in, as close as I could get to the ref. I know the little holes should actually have small points protruding but at this point I've had enough. Maybe later.Much, much later.


2012_0208lightingB0004.jpg


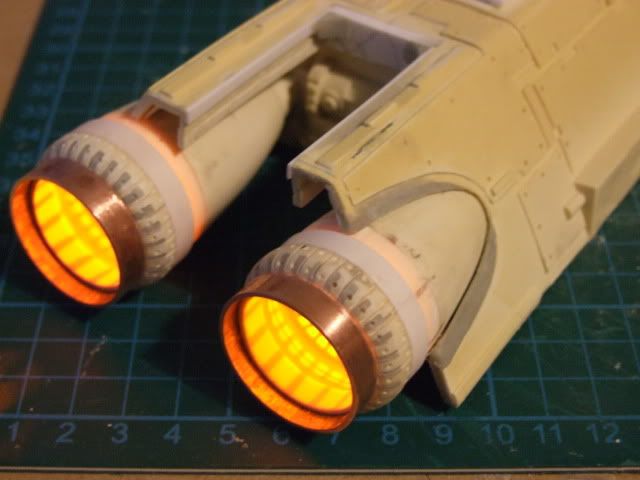
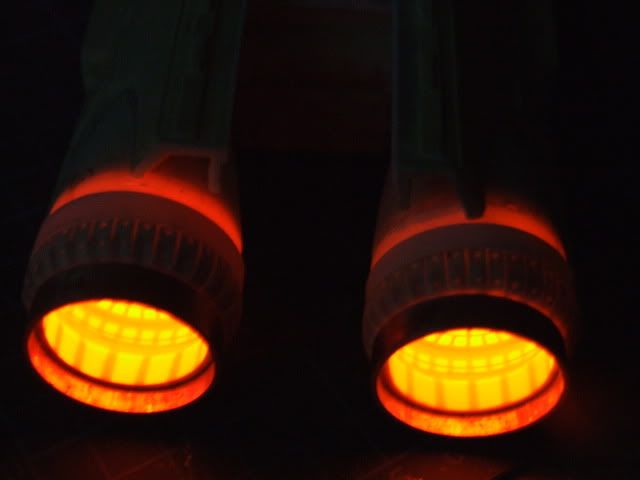
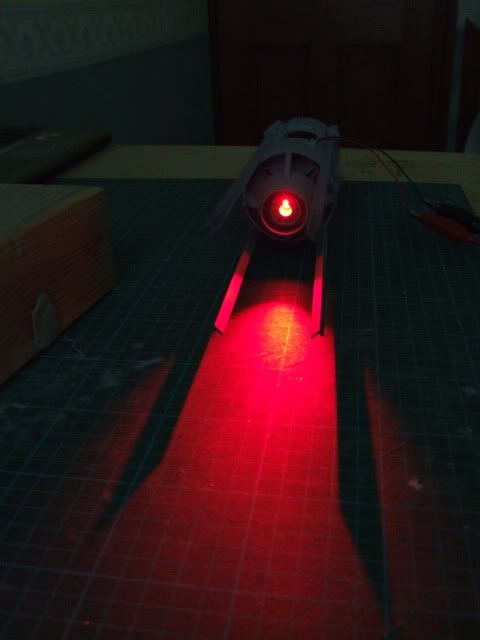
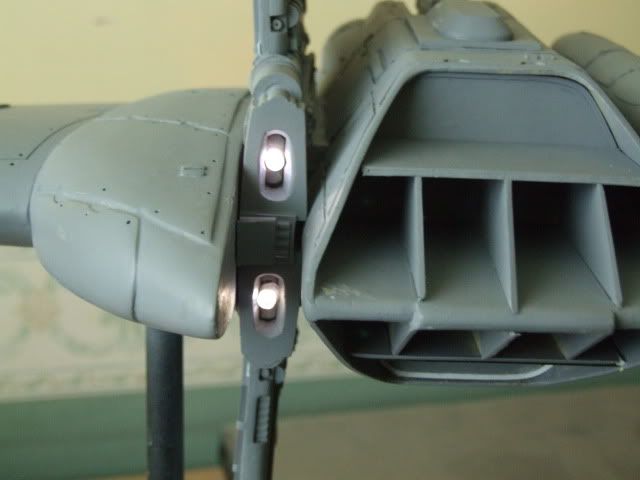
But it improves it and once the lighting goes in and on then I feel its worth the effort. Obviously I'm going to coat the inners with reflective tape and the grey undercoat should cut alot of the leaks out.


2012_0208lightingB0003.jpg


2012_0208lightingB0002.jpg


2012_0208lightingB0001.jpg


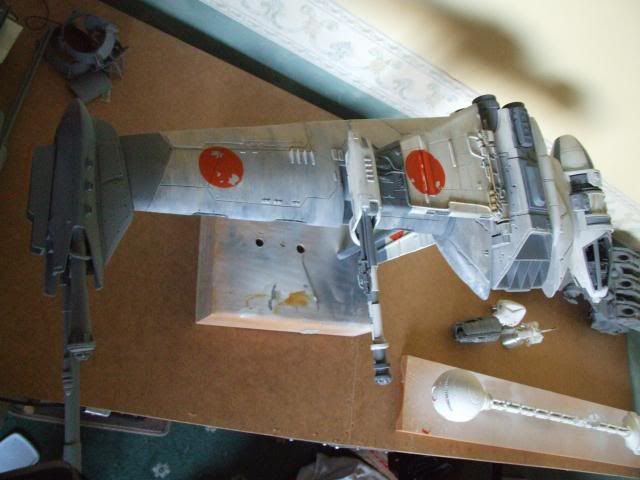
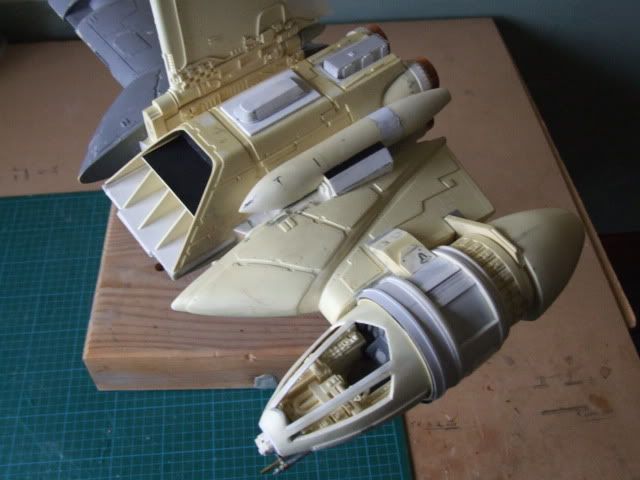
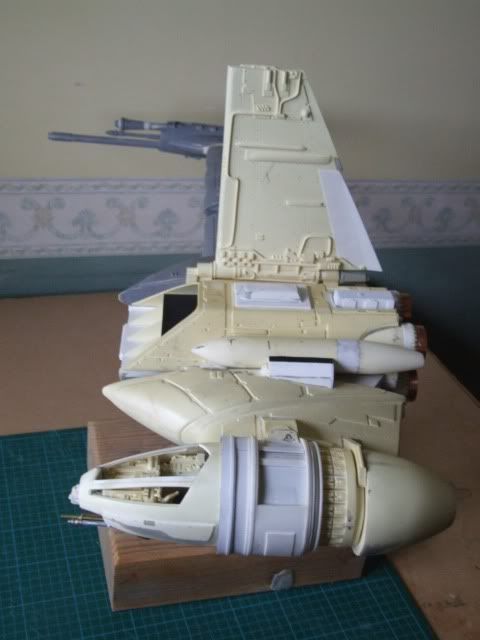
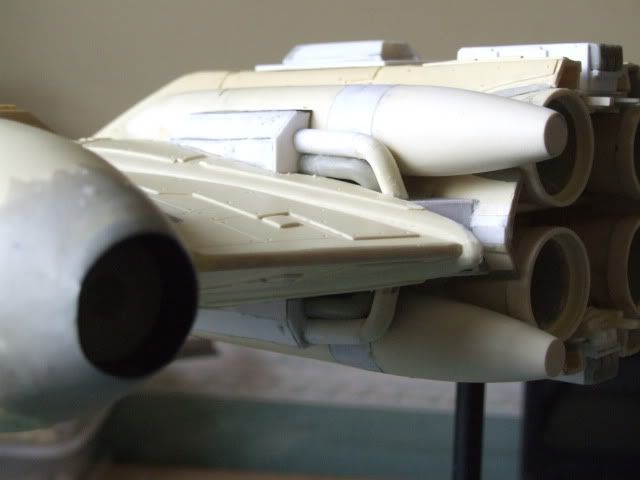
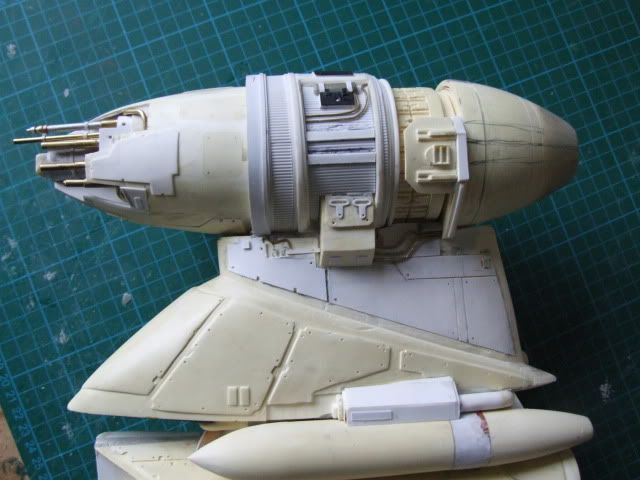
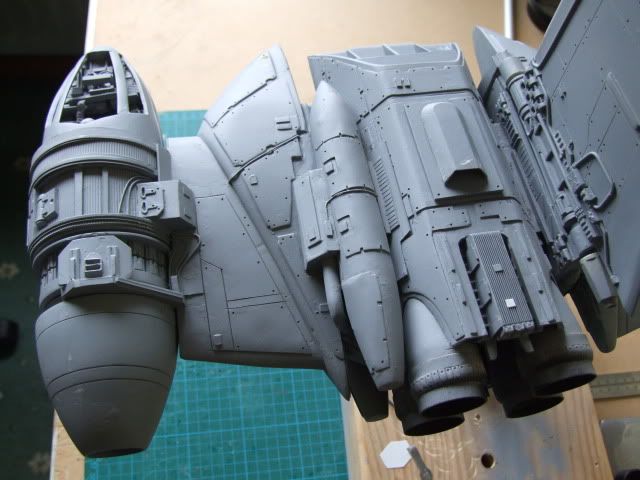
Other parts in the processes of being corrected.All I can say is thank god for apoxie sculpt. No luck with the part for the back , 1/48th A10s are thin on the ground locally.

2012_0208lightingB0005.jpg


Neo, any hobby saw blade will do. Just remember that the teeth wear down and out pretty quickly, so if you want a clean neat cut put a new one in. Never used a bench grinder,sounds a bit heavy for the small parts I use but I bet its a damn sight quicker for copper piping!
 
Last edited:
Damn I need to stop following this thread! :facepalm It´s like every new update shows me what I should have done! :lol

Great work on those engines, I especially like how you modified the cutouts in the engine housing to better fit to the bells.

What kind of LEDs and how many did you use? I made the mistake to put only one into each engine, should have put in 5 or 6, yours looks much brighter although I used aluminium foil inside and the brightest LEDs I was able to find.
 
Most of the hardwork on the B done now. Its a matter of adding surface detail, scrapping off some ,adding on others. But the real difficulties are done now.It was actually a pleasure to get the two wings onto the main hull and push it all together.


2012_0210BYFINI0007.jpg


Something had been bugging me about the cockpit though, until I realized the window support struts "bulged forward " so I cut a couple of millimetres off them both and reattatched them higher on the cabin wall. It gives it the more streamlined appearance of the studio model


2012_0210BYFINI0005.jpg


However, I am reaching the " TJ point " where it seems a bit daft to correct much more. The two missile pods are too short and paneled wrongly, and the more you correct and look at the reference the more you realise you could put in another 100 odd hrs worth and still not have finished it. So, apart from odd bits of surface detail I'm going to call it a day on the corrections and settle for what I've done. Its enough I think. My admiration for the guys who construct the masters of the studio scale ships that we end up buying has gone up massively though.

2012_0210BYFINI0004.jpg


2012_0210BYFINI0009.jpg


Darth Daniel, not sure about your LED issue. I only use one in each as well. I do buy what are called "super bright" though. They are generally twice the price of your standard 5mm LED but well worth it. I use a 3 Volt power source (2x 1.5 batteries usually) and resistors that vary between 300-360 ohms depending on the LED and power source. As you can see from the photo they generate plenty enough light. More than that it can actually start to be too strong on the eye.


2012_0210BYFINI0012.jpg


I'm hoping the temperatures are going to go up a fraction this next week so I can get a white base coat down on the Y, as I want to start the piping next. Test lit the engine, seems to be alright.


2012_0210BYFINI0003.jpg
 
Last edited:
Quickish update: Couldn't leave well alone and went back to the alterations.
I had a section of copper pipe that was almost the exact width of the pods so I cut them up, extended them then sanded off the detail.


2012_0216Wingsa0008.jpg


Then the annoying matter that they rest too far up the engine cowls resulted in me carving the resin out until they fitted in as low as I could get. unfortunately the steel bars have prevented me from going a couple of millimetres lower than I would like. I've also altered the inserts between wings and engine block to be more accurate.

2012_0216Wingsa0006.jpg


Finally able to get the A 10 part now that all my accounts are working (get those security updates installed everyone!!!!).Probably my one and only official kit bashed part purchase ever. Its a negative imprint into apoxy sculpt as I hadn't the guts to use the original part out of the whole kit . Once I've finished the final five SW kits I want I will probably go back and build the Warthog!


2012_0216Wingsa0005.jpg


2012_0216Wingsa0002.jpg


Altered the two near engine wings as far as I can as they were a bit too short at the base. The detail is also missing on the far side of them so I'll scratch what I can. All the lights and electrics are in place and working.
Slight alteration to the whole cabin area brings it much more into line with the original. Now all the really large stuff IS finished its just the detail to do. Its been the most demanding build I've ever done but strangely one of the most satisfying.

2012_0216Wingsa0009.jpg
 
Last edited:
Todays updates. Mainly small detailing around the cockpit. One question though, does anybody know from what kit the two small parts that look like escape hatch handles come from? There are four in all (top and bottom)(one sketched in pencil). Proving difficult to cut out myself. Thanks DarthDaniel, it actually feels like its coming together now. I guess that if the casting had been better on it I would probably not have bothered to alter so much of the kit, plus since I bought it so long ago I've learnt a great deal about scratch building and wouldn't have been as willing to take risks with it. Plus support from some of the guys on this board has helped massively.The design was an approximation of a B and Alfred Wong does produce an amazing variation of builds ,have a look at his website http://www.alfredsmind.ca . A great talent. But for absolute accuracy it would have to be Frank and Moes which is not available as a kit. I'll settle for what I can finally knock together.

2012_0217cc0003.jpg


2012_0217cc0002.jpg


2012_0217cc0001.jpg


2012_0217cc0004.jpg
 
Last edited:
Ammended more detail around the cabin. Carved the existing panelsl off the wing and replaced them,cut the joints back, added wiring etc. The list is extensive but worth the extra effort. The small hatchhandles were difficult to cut,but a dremmel helped. Thanks for the handy hint about cutting the lines around the rear cabin pod, worked like a dream!


2012_0222Detail0006.jpg


Also shortened the back of the wing by about .5 cm and in filled the remaining gap. it Makes it much closer to the original. Still adding detail to the cockpit.

2012_0222Detail0004.jpg


Did the same to the underside. I don't plan on removing any more panelling, its just too much of a job. Missile pods to be detailed next.


2012_0222Detail0002.jpg


2012_0222Detail0001.jpg
 
Update on build progress. Almost there. Most of the detailing is complete now. I'm not going to go much further with it(apart from tiny details). It will never be a match for the SS scale B wings for accuracy, but its now at least a close cousin (or an earlier model).Its been alot of damn work though, so for those thinking of converting, good luck and have lots of patiences! You'd be better off getting a good built one from Frank and Moe. Lightings okay, but I'm not doing the cabin. Getting the missle/fuel pods close was tricky, and I'm fed up of carving up resin! Just the painting to do now.

2012_0428FinalBK0009.jpg


2012_0428FinalBK0006.jpg


2012_0428FinalBK0005.jpg


2012_0428FinalBK0004.jpg


2012_0428FinalBK0002.jpg


2012_0428FinalBK0016.jpg


2012_0428FinalBK0015.jpg


2012_0428FinalBK0014.jpg


2012_0428FinalBK0011.jpg
 
Last edited:
Ohhhh my! Maybe not much to start with it, but the finish is going to be stellar!

That B-Wing cockpit section would look right at home on an attack helicopter. It looks MEAN!
 
Thanks everyone. GF your absolutely right about the frames,just seen a proper SS version of the cabin and they are much slimmer ! I will no doubt replace them in the near future. But thats it, the last ,the very last thing i will change !!!! Darth D, I can understand how you felt when that primer went on yours and you finished your painting. After all this time and effort I will never have to touch it again!
 
With the hot weather I've been working on the painting of the B wing again (and some other builds). I've got to say its pretty hard to get a finish like the actual studio model without a lot of effort and experiment. Some other guys have made painting it look effortless, Guy Cowens builds come particularly to mind but its very difficult to find the right mix of paints. Also as my two local hobby shops have closed get the bits and pieces to help finish kits off is now a huge pain.
I have a query on the bluish grey colour used on the wing tips and engine cowls. Does it actually have a name, and if not what mix of paints will help get close to it.
I'm going to really push and try to finish several models over the next couple of months as I have a couple of new projects that I need to really go for, probe droid, probe droid pods and macro binoculars. I have been building, but finishing things off to my satisfaction has proven really frustrating one way or another.


As you can see there is a Red Jammer Y wing, a Concept X wing , a space 1999 Swift and a 2001 Discovery to complete besides the B. Fortunately the colour schemes, such as the greys and particularly the orange are common toalot of them so I'll be firing the airbrushed up shortly. Some of these kits have been "nearly" finished for about three years.
 
Last edited:
Finally got the orange spots on, strange how much they add to the finished look of the model. Still plenty to do though, the amount of times the original was over sprayed is surprising.

2013_0618waxwings0006.jpg
 
This thread is more than 5 years old.

Your message may be considered spam for the following reasons:

  1. This thread hasn't been active in some time. A new post in this thread might not contribute constructively to this discussion after so long.
If you wish to reply despite these issues, check the box below before replying.
Be aware that malicious compliance may result in more severe penalties.
Back
Top