1/10 DeLorean Back To The Future

crackerjazz

Sr Member
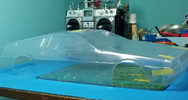
Hi guys. I wanted to have a big DeLorean to display with the remote I found off the local classifieds. It's the same model as the movie but with the red PCM label. At first I wanted to gut the radio and maybe make it useable to run the DeLorean but now that I've held the radio in my hands I feel it's too precious to cut up : )

000.png


001.png


002.png


079.  new.png

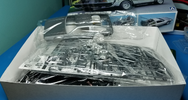
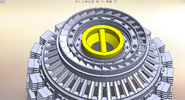
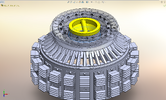
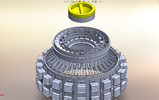
I struggled with the cutting : )


081.png


082.png


083.png


085.png
 

Attachments

  • 084.png
    084.png
    2.8 MB · Views: 77
086.  Opening up the body.png

Drilled out the corners before scoring the windows to make sure the corners don't invite tears later on.

I'm going to try and replicate the A car's reactor and other components by taking some measurements of the Aoshima kit parts and scaling them up as I don't have any other physical references. The cabin details I don't really need.

087.png


088.png


090.png


092.png


094.png


091.png


093.png

I was comparing the shells and noticed that the Aoshima body captures the shape nicely. The 1/10 Aplastics lexan body seems to have missed the slight curvature of the hood, but otherwise I'm happy with its overall shape.

096.png


097.png

I'm going to start with the rear deck greeblies.

098.png


099.png

Not sure how I'd be replicating these wraparound parts. And they have holes, too, on the 1:1. We'll see. I've been looking at pictures of the big Eaglemoss DeLorean as well -- that is just a thing of beauty.
 

Attachments

  • 090.png
    090.png
    2.5 MB · Views: 64
At first I used the measurements of the Aoshima, but then I realized the heights of the parts were simplified to make only the upper half of the hoses. The details on the Aoshima are understandably simplified as well so I tried to use photos of the parts where I could.

I figured it may be better to use the actual parts measurements and scale them down to 1/10. Did the Polara hubcap and the body with Jameco heatsinks:


023. new.png


024.png


The turbine engine top part where the yellow lid goes onto:
026.png
025.png
 
I had to separate the hubcap from the chamber because for some strange reason, the hubcap holes skin over with resin when printing. The first one was a bit easier -- the skin was a thinner film that I was able to cut away while uncured. But on my second print the holes were totally covered. Really strange how that happens when they're open on the 3D model.

012.png


Hopefully, separating the hubcap will correct that. Will have to test some more.

004.png


000.png


007.png


009.png


011.png
 

Attachments

  • 012.png
    012.png
    2.8 MB · Views: 71
  • 010.png
    010.png
    747.2 KB · Views: 66
  • 008.png
    008.png
    820.4 KB · Views: 67
  • 006.png
    006.png
    648.1 KB · Views: 72

Your message may be considered spam for the following reasons:

If you wish to reply despite these issues, check the box below before replying.
Be aware that malicious compliance may result in more severe penalties.
Back
Top