Revell 1/72 Madalorian Razor Crest (Late to the party edition)

modelerdave

Sr Member
I started this kit a while ago and then put it on pause when the Blockade Runner arrived. I'm now back on it and will continue until it's finished (date TBD).

I bought the gun upgrade from Green Strawberry. I thought the way they had the end of the gun attach to the barrel was a little fragile, so I drilled out small holes on both the barrel and the tip so I could insert a small piece of wire to make it more secure.

FGJLjHd.jpg


Fo8NR47.jpg


Here I drilled out the holes for the wall sconces in the cargo hold. I was going to leave them round even though they're rectangular because I didn't want to deal with that much cutting in a small location, but I ended up enlarging them anyway, mostly with a small drill and X-acto. I'm going to use the kit decals over the openings and I have a length of COB LEDs to light them. I had to grind out some of the wall behind them. Still unsure if they will fit or if I'll need to grind out some more.

kmesSPj.jpg


Here they are cut out a little more.

szk76cx.jpg


Grinding out the kit ladder that's molded in so I can replace it with a photo etch ladder that extended into the upper deck.

CGyxsr4.jpg


Sahajio.jpg
 
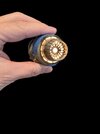
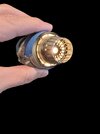
Here's an upgrade to my original engine lights. These are Neopixel rings from Adafruit. The first version only had the outer ring. I was going to add a single Neopixel to the center but then I found small rings that fit perfectly inside the larger ones so that's what I'm going with. For the Arduino running it I found a campfire program in the Arduino library that I modified by increasing the rotation speed, flicker rate, and changed the colors.

 
Finished guns.

1y2bUao.jpg


Early light test of the cargo wall sconces.

zNCvIao.jpg


I have extra photo etch so I added some detail to the landing gear bays, which were kind of plain.

WnbPK40.jpg


The pilot seat, passenger chairs, and a folded extra chair with photo etch seat belts. They still need to be weathered. The folding chair will probably go in the cargo hold with some other crates and things.

WnbPK40.jpg


The other crates and things.

LgaUIPJ.jpg


More photo etch in the rear of the landing gear housing.

LgaUIPJ.jpg


Small photo etch on the left and right landing ramps.

BHCmMui.jpg


Part of the cockpit wall. This is the kit part, which is only half of the original part. I was going to use the Green Strawberry cockpit which requires you to cut the kit part side walls in half, but I decided the GS part was going to be too difficult to light, so I bailed on that. I'll just carefully glue the kit parts back together. This is hand-painted but not weathered yet.

7kRcjgR.jpg


First round of painting on the interior walls. Still more detail work to do, then weathering.

PydmoWe.jpg


Paint work on the ceiling and side walls.

JNtQSog.jpg
 
Last edited:
Work continues. The cockpit lighting is done. I think there are 40 fiber optic threads, though I did break two off from the side wall when fitting it into the tub, which I'm still working on.

 
A few more build pics.

bjO9Id9.jpg


RUenxJ4.jpg


qH47jR7.jpg


VzKw9KF.jpg


I replaced the large vertical tube on the left with a piece of copper wrapped with lead wire, and added a few more details.
zOmPmBK.jpg


One cargo bay wall mostly done. In addition to the sconces there are four additional small fiber optic lights along the wall at different points.
MaZHkh9.jpg


Fiber optics near the port door and the sconces lit up.
qfbJAnJ.jpg


All glued together, with some cargo boxes added for detail.
5DnlOsb.jpg


Lights on. There is a carbonite chamber on the left leaning against the wall with a red blinking LED in the control panel.
bWSfNlK.jpg


This is at 9 volts and a little too dim. Twelve volts works much better so I'll be using a wall plug instead of a battery. The base for this is going to be pretty big.
o5QuUwl.jpg
 
Thanks guys! Right now I'm working on the engines, trying to get the NeoPixel rings to align perfectly as well as find a diffuser that works.

Engine bell and housing. Weathered with blue and carbon black acrylic inks, Alclad copper, and oil paints.
HUxUpdo.jpg


rulw2bs.jpg


img]https://i.imgur.com/FYUzWVh.jpg[/img]

Front engine cowl. AK Extreme Metals Steel paint and weathered with oils.
rOVDLDQ.jpg


Engine intake.
uRz6KOj.jpg


Main guns.
YBqnBpN.jpg


Landing gear.
5BSgl1c.jpg


Exit ramps, though the frame piece isn't on the rear ramp in this photo.
Pjcd3Iw.jpg


That's it for now. Thanks!
 
Some more work on the Razor Crest, though I'm focusing on the base more than the ship at the moment. I am having serious issues trying to get, of all things, the two front red headlights to fit between the outer and inner hulls. I'm still fiddling with options. Anyone else who has built this want to chime in on how they did it?

On the ship, I did get the engine lights installed in the housings, along with the upper and lower red caution lights or whatever they are. Here's a quick video test.


Here are a few pics of the engines. The lights are in a spin pattern similar to what they did in the show. As always, this looks better and more refined in person.
engine 1.jpeg engine 2.jpeg

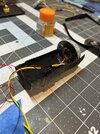
Here's the wiring mess behind the lights. It's not pretty but it works!
engine wiring.jpeg

Here's the top right quarter of the upper landing platform. I'm planning on the base being a double-decker platform with a basic landing pad on top (because ships want to land on something flat and empty), with a lower deck that houses the mechanicals like generators, storage tanks, etc. This will be elevated over water, which will be a poured resin.
upper platform.jpeg

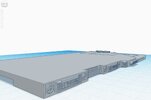
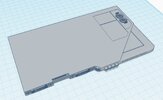
Here's the lower platform design. I'm still fine-tuning it but it's getting close to being ready for printing. This is my first time using Tinkered and I'm having a blast.
lower platform.jpeg lower platform 2.jpeg

More in a bit.
 
I am having serious issues trying to get, of all things, the two front red headlights to fit between the outer and inner hulls. I'm still fiddling with options. Anyone else who has built this want to chime in on how they did it?
I used 2 bits of 1.5mm fibre for the lights, routed back under the floorboards to the void by the landing legs where there's enough depth to get an LED in. Both fibers were attached to a single LED.

Liking the landing platform!
 
I used 2 bits of 1.5mm fibre for the lights, routed back under the floorboards to the void by the landing legs where there's enough depth to get an LED in. Both fibers were attached to a single LED.

Liking the landing platform!
I'll try that. I have the LEDs too close to the front, near the forward landing gear bay, and that's causing me all kinds of issues. I'll try your method and see if that helps.
 
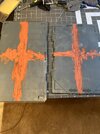
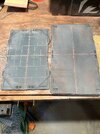
I got the upper and lower landing pads printed and epoxied together on a sheet of ABS plastic, then used generous amounts of Bondo to fill the seams between the four pieces. The first two pics show the pads with the Bondo on and after the first round of sanding. The lower pad (smaller one) is ready for primer, but the upper needs some touch-up Bondo work.

434863408_122124977858231361_8788366405558216855_n.jpg 434741830_122124978164231361_8037021503387587363_n.jpg

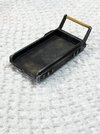
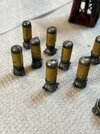
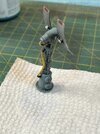
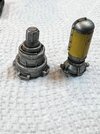
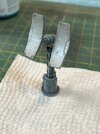
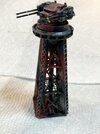
These are some of the extra parts that will be on the lower level of the landing pad, which will be the "mechanical" level. The gun turret will be in the water that will be part of the diorama.
434664532_122124978176231361_3856474743925644744_n.jpg 434717498_122124978224231361_8008054273278802045_n.jpg 434748607_122124978206231361_7409147923434977716_n.jpg 435012716_122124978266231361_3403243980501799209_n.jpg 435121603_122124978248231361_1222263910361590766_n.jpg 435166871_122124978320231361_4564223708182730140_n.jpg

The Razor Crest itself is together and I primed it with an Alclad black base last night. It will need some wet sanding to get smooth enough before I start with the AK Extreme Metals.
 

Your message may be considered spam for the following reasons:

If you wish to reply despite these issues, check the box below before replying.
Be aware that malicious compliance may result in more severe penalties.
Back
Top