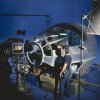
1:1 Millennium Falcon Cockpit Replica - Group Build

I think when it's done you need to find some actors to play Han and chewy and you film a little mock up film.

Loosebruce

Hey LB,

That's the plan! I'd like open the build up to anybody wanting to use it for fan films. :)

- - - Updated - - -

LOFL, this is one of those projects you come in to see, still pumped about your skills, and leave feeling amateur hour. This is incredible.

Hi T

Thanks so much for the very kind words and welcome to TheRPF! Lots of updates coming so stay tuned!

- - - Updated - - -

Amazing SK! Your build just keeps getting bigger and better!

Hey HW,

Thank you, my friend! I think we're VERY close to starting the exterior skin. I'm really beginning to lean toward an entire corridor ring instead of the half ring...
 
Hope you are putting ya feet up for an afternoon during the holidays SK, silly idea I know lol.

This year's festive lights look a lil'bit like this....

anhLIGHTSset1.jpg
 
Hi Gang,

Just want to take the time to wish everyone a very safe and Happy New Year! More importantly, thank you for your continued support, guidance and friendship all these years!

May we honor and remember those we said goodbye. Now lets make 2017 awesome!!!

Stay tuned... lots of updates coming!
 
Hi Gang,

Happy New Year! :)

You know... with all this time off I would have thought I would have been further along (as I ALWAYS do) But I spent more time waiting for filler and paint to dry than anything else... Go figure, huh? ;)

OK, got that gripe out of the way. Let's start 2017 with some forward progress!

I took apart part of the build to get to the upper light bars. I had to remove material from the edges leaving 1/8" edge for the acrylic overlay to mount. This allows MUCH more light to pass
20170102_131215_zps6l3yljbf.jpg


Marked out 1/8"
20170102_131221_zpssiqchmxz.jpg


I then cut a beveled edge
20170102_134213_zpsrqlete28.jpg


20170102_135027_zpsttwpvlzd.jpg


20170102_135032_zpsgesm1mfe.jpg


20170102_140429_zpsswhfrj5w.jpg


One down... one to go
20170102_140431_zpssutifxlr.jpg


20170102_142625_zpsqu3h6adc.jpg


Note the bevel
20170102_142629_zpstjwadec0.jpg


I then covered the light bars with reflective tape. This will help distribute the light throughout the housing when illuminated
20170102_145849_zpspudhddgb.jpg


20170102_145854_zps3gvgtel1.jpg


Back in place
20170102_150940_zpsw0jr1fk6.jpg


20170102_150943_zpsueayqu7t.jpg


I then covered the side bars
20170102_161611_zpsf7hutwgs.jpg


Horrible photo... sorry
20170102_161632_zpsgxrtt3qx.jpg


When the cockpit it taken apart I'll then cover the lower bars in reflective tape
20170102_161643_zpssq768hjv.jpg


With the light bars done I could finally put the capstone panel into place to prep for the other panels
20170103_093052_zpsgx5tdcls.jpg


So nice seeing her back where she belongs
20170103_101729_zpsmssigebo.jpg


20170103_101745_zpsp7cbvyho.jpg


20170103_101753_zpsfspysqnd.jpg


I mounted the two small screen to the foot well greeblie panel
20170102_104618_zpsahliklbd.jpg


20170102_104622_zpsdcnqantq.jpg


20170102_104645_zpsapqgxkeg.jpg


Still my fav panel! :)
20170102_104634_zpstedmqz43.jpg


I then gathered my collection of PVC pipes for the corridor access panel
20161229_062003_zpskuuayj0l.jpg


20161229_062009_zpsbewvsnjw.jpg


I laser cut several pipe mounts
20161231_102526_zpswrhfw4tr.jpg


And some interior pieces to add some visual detail to open access panel
20161231_105458_zpskyuux2dl.jpg


Let's have a little fun with this area... Enjoy
20161231_113853_zpsnet0vrqc.jpg


20161231_113857_zpsimfdcywl.jpg


20161231_113904_zpsj6gjsyok.jpg


Primer
20161231_121619_zpsgexybvza.jpg


20161231_121623_zpsfn05ml9y.jpg


20161231_121634_zpsjr9zcglk.jpg


More primer
20161231_121645_zpslmmnfepe.jpg


20161231_121650_zps47y2gszw.jpg


Some smaller trim pieces
20161231_132225_zpsku8e6u05.jpg


20161231_134840_zpsdwjgvj8e.jpg


20161231_134848_zpsgs4v4xp6.jpg


20161231_142007_zpsabsbdisb.jpg


20161231_142018_zpspeg5jet5.jpg


20161231_142123_zps2higafab.jpg


20161231_142519_zpsfrdsviy3.jpg


20161231_142526_zpszjdy1hjc.jpg


20161231_142534_zps2xdd5e1u.jpg


Looking down
20161231_142545_zpsiupuqnnz.jpg


20161231_142555_zpspi0xh78m.jpg


The MDF pipe mounts were NOT holding up well. I cut the holes to fit around the PVC nice and snug. All that did was destroy the MDF. Adding layers and layers of glue did nothing... time to scrap?
20161231_144245_zps4khuubmw.jpg


20161231_144256_zpsdzsst436.jpg


Added primer to the PVC pipes
20161231_152409_zpseoq9lb99.jpg


I tried different pipe configurations
20170101_111647_zpsluclk213.jpg


20170101_111652_zpsz1jrf2ld.jpg


20170101_111658_zpsp00j0dcp.jpg


20170101_111715_zpsjz3vd4rm.jpg


I'm even going to add some stray wiring inside the panel. I cut the corners off and will screw into the panel from these points
20170101_112938_zpsot4ntpkn.jpg


20170101_113002_zps15qdwird.jpg


After all was said and done I decided on the traditional straight pipe configuration
20170101_125031_zpsrg3qcs7r.jpg


More little details to add
20170101_151322_zpspoplzztl.jpg


20170101_154600_zpsujhanpc8.jpg


Interior painted black and slightly weathered using a dirty brush. The insulation will rest behind the interior lip
20170101_154620_zpslbypz08e.jpg


Pipe mounts in place
20170101_160637_zpsgapdjfv0.jpg


3 silver pipes
20170101_160652_zpsmeeez69s.jpg


One red
20170102_104713_zpsgcjqpdpu.jpg


One white
20170102_104717_zpsptzsnhlu.jpg


All this work led up to this moment... the area was SO tight I couldn't fit the larger pipe in place without destroying the edges of the MDF :facepalm
20170102_120738_zpsjy3elkjr.jpg


BUT... I took the opportunity to add more details
20170102_123050_zpstlnbn780.jpg


I can't wait to add weathering!
20170102_123058_zps0j4hzxpt.jpg


20170102_123103_zpslmt7001n.jpg


So I thought and thought about the space issue and the inability to fit the pipes in place with ease and it made sense to cut access holes through the back of the corridor panel
20170103_071113_zpsm3t6km3q.jpg


YUCK... what a mess
20170103_071122_zps7bokqywn.jpg


One hole turned out nice and clean... the others... not so much ;)
20170103_080047_zpsjf3d7j65.jpg


I tossed the old pipe mounts and cut new larger diam opening mounts. Now the pipes will simply slide through and rest in position
20170103_081915_zpsiiyl4d0v.jpg


20170103_082417_zpswsenoi2h.jpg


What's a build without primer?
20170103_090740_zpsl1x2hw6w.jpg


This is the basic configuration
20170103_104610_zpsguymj508.jpg


Once the filler dries I can sand, paint and mount everything in place. I'll probably add another wiring loom
20170103_104619_zpsmzdolp1c.jpg


Again, I wanted to be further along but drying time and of course the holiday festivities "got in the way" ;)
20170103_104626_zpsdjzu2s5v.jpg


Stay Tuned for More!
 
Last edited:

Your message may be considered spam for the following reasons:

If you wish to reply despite these issues, check the box below before replying.
Be aware that malicious compliance may result in more severe penalties.
Back
Top