Revell EasyKit Pocket Millennium Falcon Repaint

Archive&Future

Sr Member
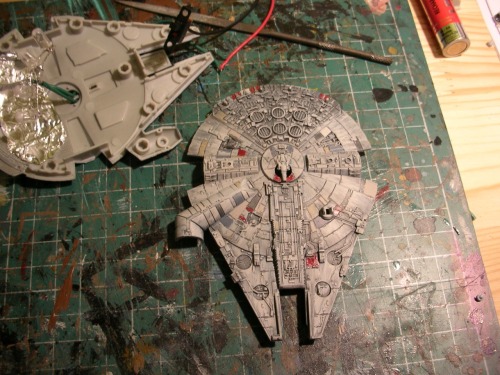
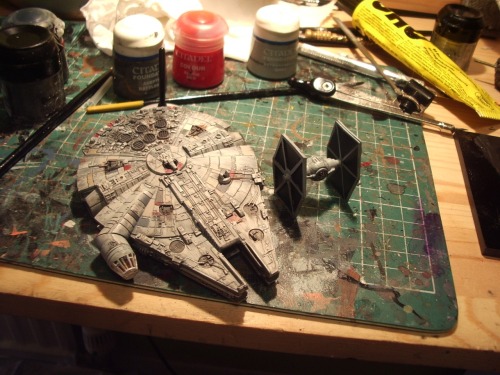
I got my hands on some half decent loot today, which included a cut-price Landspeeder (easykit again) and a pocket easykit 'Falcon

tumblr_m7zfrbU3Z91rvpchho1_500.jpg


Of course, opening the Revell kits was the usual mix of semi-disappointment and pleasant surprise that we've all come to expect from these kind of low-end cheap-ass models. Not that I'm complaining at all!

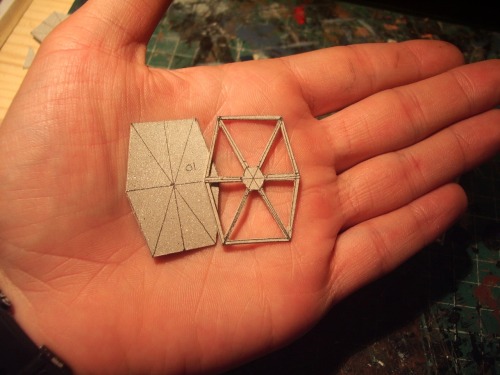
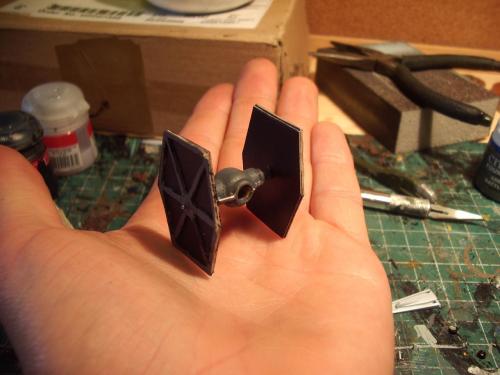
I expected a terrible paintjob, and Revell did not disappoint. The kit immediately looks plastic-y and unprofessional; on the other hand the detail this thing packs for its size is very impressive. (although still not enough to escape the modifying hands of SqbieDoo)

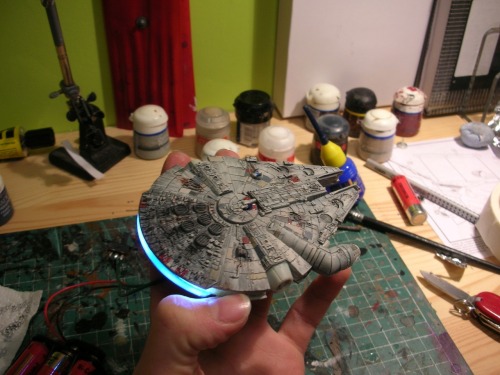
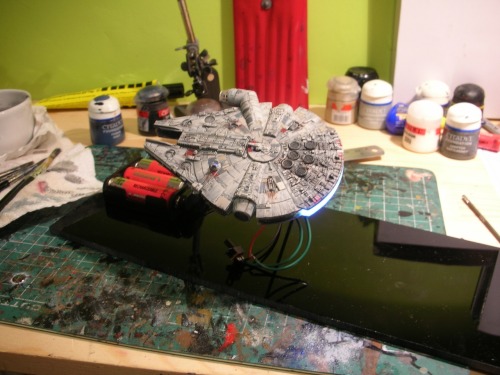
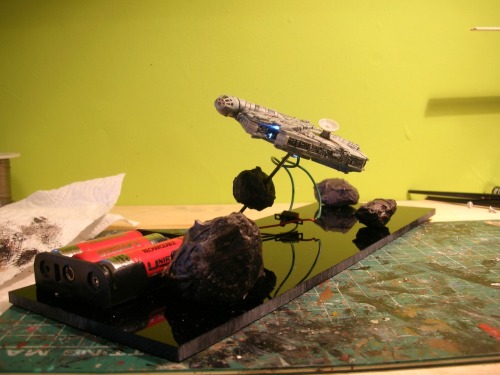
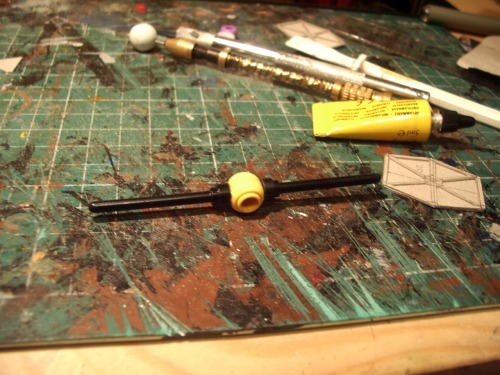
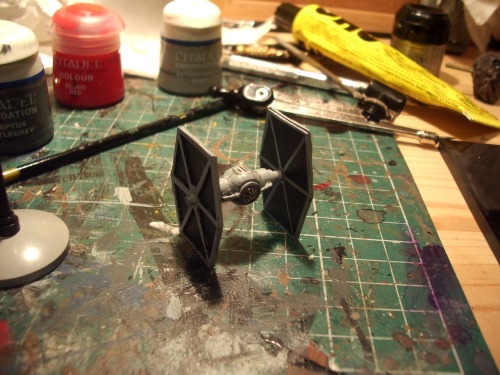
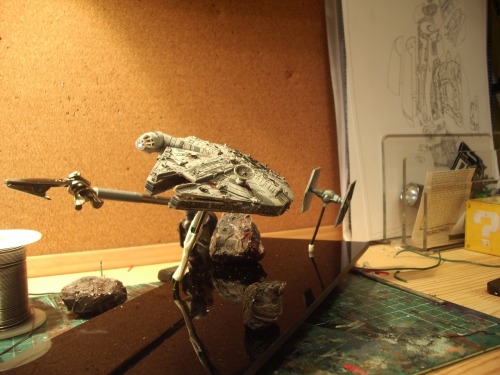
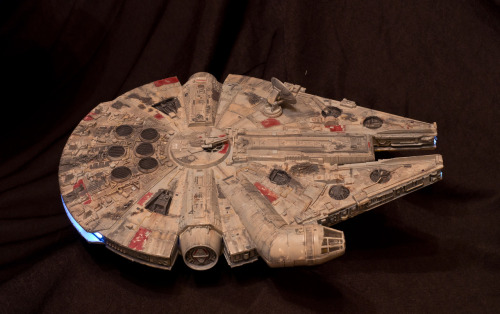
All I'm intending to do is clear and flash from moulding, maybe refine some areas but mainly repaint it and kit it out with lights. Ideally I'd love to do a display like Crackerjazz, as this scale lends itself better than kind of display.

tumblr_m7zp6eMMec1rvpchho1_500.png


At any rate, considering I only acquired this kit a few hours ago, I'm making quite a headway already! Any suggestions and advice welcome, trust me, I need it!
 
Ooh that looks nice and grimy! I don't understand why when it's pre painted it comes pristine looking.

Definitely making some good progress here. Did you get these in Model Zone? They've got the 1/24 routemaster on offer at the moment too
 
Well, if the dark gray is intended for a pre-shading attempt, be aware that it may shift your gray basecoat color a bit bluer if you keep it thin. So you may have to compensate slightly. Basecoat I used on my FM Falcon years ago was a 50/50 mixture of Light Gray and Camo Gray (both FS colors in the Testors line). I'm not sure what brands are at your disposal, although I think at least one of the shades should be available through the Humbrol line (or Xtracolor at the very least, although that will be a gloss instead of a flat).
 
I'm currently using Citadel paints, they're generally quite thick so I add a little bit of water to them. The reason I'm starting off with such a dark coat is because I want it to match my larger scale 'Falcon mod which I did last year (I'll put up a thread about that later)

tumblr_m80gyeYiqf1rvpchho1_500.jpg


As you can see, it's a leeeettle bit darker than it should be.

Basically for the small one, the dark grey is the basecoat; upon which I then drybrush a much lighter grey, followed by a more dusty colour beige/grey; then washed in a watery black ink and finally each panel is coloured separately. After that I go on to add weathering like dust, rust, grime and various star wars-y things to the surface.

With the bigger Falcon, I started straight on with light grey but I reasoned that for the smaller one, a dark basecoat would bring out the detail later on. Thanks for the suggestion though, I may pick up some Humbrol a bit later :)
 
I've gone on to paint some more and even add LEDs;
Here you can see where I've half-finished the underside and given the topside a few drybrush coats and a black ink wash

tumblr_m80vxtsN441rvpchho1_500.jpg


I then soldered up 4 white LEDs and sanded the clear engine cover and LEDs for diffusion

tumblr_m80t13ceOF1rvpchho1_500.jpg


I then put a lot of effort into the topside panel, as I know it's going to be seen more than the underside; it's also lighter in colour by a fraction and more detailed in the painting

tumblr_m80w2by9et1rvpchho1_500.jpg


After that I added dust and dirt smears, along with rust and engine burn marks; slapped it all together in a rough assembly and that's where I'm up to now! Sure is a diddy little thing

tumblr_m80w7ulrGI1rvpchho1_500.jpg
 
Very nice. I actually like those little Revell Star Wars models but never picked one up. Impressive painting skills, sir!
 
@R1V3R5 and JediDade
Cheers dudes, your interest and compliments are appreciated :)
I'm also genuinely surprised at how well it's turned out, I was definitely not expecting this level or detail to come out in the painting. I know from building the bigger scaled Revell Falcon that the design of the mini one is exactly the same, from every greeb detail to the way each part goes together: it's like it's an exact mini-me!

I'm hoping to get the asteroid field started soon, I've got some polyfilla and styrofoam for those and some nice thick copper wire for the supports, so fingers crossed it'll turn out as good as Crackerjazz's
 
Okay so I thought I'd quickly post what I've done; I've started a base..the only size acrylic I had was a 200x70 left over from a very failed HAL 9000 project. Basically, I'm going to have to make this a diorama as I can't cut the acrylic at the moment and I'm incredibly impatient.

tumblr_m81hrjcisM1rvpchho1_500.jpg


I hope I can successfully disguise that butt-ugly battery pack, I'm going to add a load of asteroids and maybe even a few scratch built TIE fighters if I get round to it
 
I'm hoping to get the asteroid field started soon, I've got some polyfilla and styrofoam for those and some nice thick copper wire for the supports, so fingers crossed it'll turn out as good as Crackerjazz's

If I may make a sugestion for your asteroids... I've seen a lot of them done some good some not so much... but one thing that I tried that looks great and is essentially free if you live near the ocean is a chunk of coral. They are usually sun-bleached chunks of white porus rock, painted brownish they look great with many little holes and pits...

Jedi Dade
 
Wow sounds like a decent way to make asteroids!
Too late though :lol I've already started making mine

tumblr_m834n1TM3Q1rvpchho1_500.jpg


They're not finished yet, they're only in place temporarily at the moment and so far all I've done is a basecoat, two coats of drybrushing and an ink wash (I'd say they still need a few more shades of brown and grey)
 
I've started to scratch build a lone TIE fighter, as I said I would. It's not very detailed, and I've got this nagging feeling it's too big, despite going by all the scales and dimensions around. :confused

Anyway. The wings are constructed simply out of some cardstock, very finely cut with a scalpel. (well...finely cut in my mind)

tumblr_m9gobqI78z1rvpchho1_500.jpg


And then I used 3 Lego pieces to make the cockpit and wing supports. I sanded the head/cockpit part to make it more spherical, but I'm still unsatisfied with it.

tumblr_m9goefWwvl1rvpchho1_500.jpg


Then I painted some basecoats on to see get the general idea of what it's going to look like, added some paperclip pins to hold it together, and inscribed some details in

tumblr_m9gogmt8TE1rvpchho1_500.jpg


It's still only about halfway complete (the TIE fighter that is) but I'm sure I'll get there in the end :)
 
It's a nice little kit but your paint job has really lifted it. Looking forward to seeing the finished diorama with the Tie Fighter
 
Several painstaking days later...

tumblr_m9s91j9Wav1rvpchho1_500.jpg


The details were etched and painted on, and the cockpit canopy was made from a 5mm LED which was cut, with the frame oh-so-carefully painted on by hand :wacko

I went by all the scales in the Star Wars ultimate cross-section book, and a bit of eyework too; but I'm still undecided about the size comparison. Logic tells me that it is indeed in proportion, but my instincts tell me the TIE is too big...hrmm
Either way, there's no way I'll bother making another, smaller one, so this'll have to do!

tumblr_m9s9u5bLXN1rvpchho1_500.jpg


Aandd a quick *dramatic* shot

tumblr_m9s9y5IMau1rvpchho1_500.jpg


Comments are very much appreciated!
 
Amazing work ! Esp. the TIE.:love Lava rocks from the home and garden section at Home Depot, etc, make good asteroids.
 
Very nice indeed! That TIE is really neat, well done on getting the proportions down so good.

Did you use the numbers from the studio scale 5 footer and the studio scale TIE or something else?

Edit: Scales from the crossover section right?
 
Last edited:
This thread is more than 9 years old.

Your message may be considered spam for the following reasons:

  1. This thread hasn't been active in some time. A new post in this thread might not contribute constructively to this discussion after so long.
If you wish to reply despite these issues, check the box below before replying.
Be aware that malicious compliance may result in more severe penalties.
Back
Top