Ackbar16
Active Member
Intro
Hi everyone! I'm a long time lurker that has finally decided to post a project that I've been working on. I've never really done a project like this before, and I'm usually guilty of starting something that I never finish. There's a huge stack of Gundam models in my garage that I've never finished painting... It's pretty embarrassing. Not wanting to admit complete defeat in regards to my hobbies, I have a new found resolve to finish a project. I thought that maybe working on something that I'm passionate about would help me to complete the task at hand. I'm a lifelong Star Wars fan that always wanted to work on props, but didn't know where to start. After seeing all of the amazing work here, I decided to give it a shot. This thread will go over what went right, and what went horribly wrong on this journey. I apologize for those that have been doing this for a while, but I will be covering all of the newbie details and lessons I learned along the way. One of the most important things for me personally, is posting my failures. This project has been difficult at times, and I want to show that. I've always had great appreciation for the threads here that prove great work can be the result of seemingly total failure. I hope that I can add something to the journey for those just getting started.
For my first real project I'll be working on a Shoretrooper helmet from Rogue One.

The helmet is one of Jim Tripon's (Jimmiroquai here on the RPF). The helmet is made of fiberglass so it feels very sturdy, and has a weight to it that makes it feel "real". I felt that a helmet that is meant to be dirty, and battle worn would be a good place to start. The idea here is that a helmet that is weathered, could hide most of my rookie mistakes. While in the end that may be somewhat true, I've already hit a few road blocks that made for some interesting challenges.
Prep/Resin
When I received the helmet, it came with the visor, and a ton of bubble wrap (Thanks Jim, my kids loved it!) I noticed almost immediately that the inside was rough fiberglass. This isn't a huge deal, but it would make wearing it without completely padding the inside quite uncomfortable. I tried to get a picture of what it looked like.

I gave the outside of the helmet a light sanding just to smooth it out a bit, and take down some bumps. It soon became clear that I would need to smooth out the inside, so I needed to pick up a few supplies. I picked up some Bondo fiberglass resin, which includes the activator. I'm lucky enough that my Gundam hobby has helped me, in that I already had a lot of the remaining supplies I needed to start. I've never worked with fiberglass before so I did a ton of research before starting.

Please make sure if you're working with this stuff to work in a well ventilated area, and wear a respirator! The stuff has a very pungent odor, and can be a bit overwhelming. Also, it's key to note that the cartridges on a respirator only last for about 40 hours, so be sure to keep track of how long you've had them exposed to oxygen. I remove mine from the mask, and keep them in a ziploc bag with all of the air removed. I also write on the bag how long I wore them each time i use them. I have no idea what kind of chemicals i'll be coming in contact with, so it's better to be safe, than sorry.
Fiberglass resin must be mixed at the proper ratio. If there is too much hardener, it will solidify way too fast to coat the entire helmet. If there is not enough activator, it won't harden, and you'll be left with a sticky mess. It's also a good idea to work in small batches. This way if multiple coats are needed, the stuff in your cup doesn't turn rock hard before you get to use it again. When mixing small amounts use 8 to 10 drops of hardener per ounce of resin. So, after mixing the resin thoroughly, I jumped in and started to coat the inside of the helmet. The end result looked like this.

Looks ok right? Wrong... After all of the preparation I did, the resin was still wet when I went back to check on it almost 10 hours later. If mixed properly, the resin should have began to harden after about 12-15 minutes. Somehow, in my haste, ignorance, or overall inexperience I totally under estimated how much hardener I needed. I believe I only put 10 drops in when I should have put about 22. I mixed just over two ounces of resin, and must have eyeballed it the first time. Seriously, save yourself the trouble and just get out the scale. I didn't, because I had already made several trips to the house to get my supplies. I didn't feel like making one more trip, and it cost me. After about 24 more hours, I decided I needed to try again. I mixed another batch (with the scale) and added just a couple of extra drops of hardener. My thought process here was that a little extra hardener might mix into the wet resin already in the helmet. I coated it, and left it overnight. I'm not sure if it was the most elegant solution, but it worked!
Now with a smooth, and hardened interior, it was time to get to work on the exterior.
Primer/Sanding
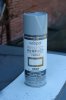
Having already given the helmet a light sanding with some 180 grit sand paper, I put on a coat of filler primer that I got at the local hardware store.


This coat serves multiple purposes. It helps to fill any scratches I may have left when sanding it the first time, and also helps to identify any imperfections in the casting. The filler primer has a rough texture to it unlike surface primer, that goes on smooth. I sat under good lighting with a sharpie, some Barry White, an adult beverage and felt up every inch of the helmet. Doing this allows you to feel little bumps, and things you can't see even with the primer coat. Any time I noticed one, I marked it. Some things are also really easy to spot, like this little gem in the corner of the mandible.

That black mark is a hole. It was probably caused while I was sanding it, but I wouldn't have noticed it without the primer. Any spots that were too high, or "bumps" I sanded down. Anything that was too low, or an outright hole was filled with Milliput Superfine White putty.

Milliput is a two part epoxy that you knead together in your hands. Once it has been mixed, it can be molded like clay. You can also use a bit of water to help smooth it out, and shape it. I already had this lying around from some unfinished Gundam models I was working on. I also used a green putty I had lying around on a few spots as well. Why the change? I don't really know, as it was Tuesday. I hate Tuesdays, and couldn't find my Miliput. Once the epoxy was applied, I let it cure overnight. I then sanded the entire helmet with a medium grit sanding block.

This block was rough enough to smooth out the epoxy, but not rough enough to scratch up the already smooth surfaces. The angled edge is also great for the corners.
Visor/Mouth Vents
I decided that this was a good time to start on cutting the visor and the "mouth vents" out. For the visor, I made an outline along the entire area that was to be cut. Doing this gave me an idea of where to stop with the cutting tool so I didn't cut too far. The remaining material could be ground down and smoothed out with the grinding attachment on my Dremel. After marking the visor, I decided that doing the mouth vents first was a good idea. Why? I don't know. Maybe I thought since they are smaller they would somehow be easier? At first I was right. Then I got cocky. I took out the drill, and used the smallest drill bit I had. I made three holes in each vent, leaving a tiny sliver of fiberglass material between each one. My plan was to take out the diamond file kit I had, and file them down to a nice smooth finish. Why do that when I could just bore them out with the drill like some kind of heathen? It would be so much easier right? Getting the diamond files that were just out of arms reach was way too much work. Boy was I wrong...


While flailing about with the drill like Leatherface at the end of Texas Chainsaw, I heard a crack. A piece of the helmet shot off the drill, and nearly hit me in the face. (eye protection, people.) As you can see, in my moment of lazy brilliance disaster struck. Now for some of you, this may seem like nothing. Being a complete novice, this was devastating. I went from angry, to disappointed in my stupidity, to nearly putting the helmet on the pile of unfinished Gundams. Then I started thinking about all of the threads here where people made the best of a bad situation, and I went for the Milliput. after about an hour or so of sculpting, I got it to a satisfactory result. It's by no means perfect, but it's the best I could do.

Next time I'll cover the ins-and-outs of working with Montana Gold spray paint, and how it's way different than anything I've worked with before... In a bad way.
Hi everyone! I'm a long time lurker that has finally decided to post a project that I've been working on. I've never really done a project like this before, and I'm usually guilty of starting something that I never finish. There's a huge stack of Gundam models in my garage that I've never finished painting... It's pretty embarrassing. Not wanting to admit complete defeat in regards to my hobbies, I have a new found resolve to finish a project. I thought that maybe working on something that I'm passionate about would help me to complete the task at hand. I'm a lifelong Star Wars fan that always wanted to work on props, but didn't know where to start. After seeing all of the amazing work here, I decided to give it a shot. This thread will go over what went right, and what went horribly wrong on this journey. I apologize for those that have been doing this for a while, but I will be covering all of the newbie details and lessons I learned along the way. One of the most important things for me personally, is posting my failures. This project has been difficult at times, and I want to show that. I've always had great appreciation for the threads here that prove great work can be the result of seemingly total failure. I hope that I can add something to the journey for those just getting started.
For my first real project I'll be working on a Shoretrooper helmet from Rogue One.
The helmet is one of Jim Tripon's (Jimmiroquai here on the RPF). The helmet is made of fiberglass so it feels very sturdy, and has a weight to it that makes it feel "real". I felt that a helmet that is meant to be dirty, and battle worn would be a good place to start. The idea here is that a helmet that is weathered, could hide most of my rookie mistakes. While in the end that may be somewhat true, I've already hit a few road blocks that made for some interesting challenges.
Prep/Resin
When I received the helmet, it came with the visor, and a ton of bubble wrap (Thanks Jim, my kids loved it!) I noticed almost immediately that the inside was rough fiberglass. This isn't a huge deal, but it would make wearing it without completely padding the inside quite uncomfortable. I tried to get a picture of what it looked like.
I gave the outside of the helmet a light sanding just to smooth it out a bit, and take down some bumps. It soon became clear that I would need to smooth out the inside, so I needed to pick up a few supplies. I picked up some Bondo fiberglass resin, which includes the activator. I'm lucky enough that my Gundam hobby has helped me, in that I already had a lot of the remaining supplies I needed to start. I've never worked with fiberglass before so I did a ton of research before starting.
Please make sure if you're working with this stuff to work in a well ventilated area, and wear a respirator! The stuff has a very pungent odor, and can be a bit overwhelming. Also, it's key to note that the cartridges on a respirator only last for about 40 hours, so be sure to keep track of how long you've had them exposed to oxygen. I remove mine from the mask, and keep them in a ziploc bag with all of the air removed. I also write on the bag how long I wore them each time i use them. I have no idea what kind of chemicals i'll be coming in contact with, so it's better to be safe, than sorry.
Fiberglass resin must be mixed at the proper ratio. If there is too much hardener, it will solidify way too fast to coat the entire helmet. If there is not enough activator, it won't harden, and you'll be left with a sticky mess. It's also a good idea to work in small batches. This way if multiple coats are needed, the stuff in your cup doesn't turn rock hard before you get to use it again. When mixing small amounts use 8 to 10 drops of hardener per ounce of resin. So, after mixing the resin thoroughly, I jumped in and started to coat the inside of the helmet. The end result looked like this.
Looks ok right? Wrong... After all of the preparation I did, the resin was still wet when I went back to check on it almost 10 hours later. If mixed properly, the resin should have began to harden after about 12-15 minutes. Somehow, in my haste, ignorance, or overall inexperience I totally under estimated how much hardener I needed. I believe I only put 10 drops in when I should have put about 22. I mixed just over two ounces of resin, and must have eyeballed it the first time. Seriously, save yourself the trouble and just get out the scale. I didn't, because I had already made several trips to the house to get my supplies. I didn't feel like making one more trip, and it cost me. After about 24 more hours, I decided I needed to try again. I mixed another batch (with the scale) and added just a couple of extra drops of hardener. My thought process here was that a little extra hardener might mix into the wet resin already in the helmet. I coated it, and left it overnight. I'm not sure if it was the most elegant solution, but it worked!
Now with a smooth, and hardened interior, it was time to get to work on the exterior.
Primer/Sanding
Having already given the helmet a light sanding with some 180 grit sand paper, I put on a coat of filler primer that I got at the local hardware store.
This coat serves multiple purposes. It helps to fill any scratches I may have left when sanding it the first time, and also helps to identify any imperfections in the casting. The filler primer has a rough texture to it unlike surface primer, that goes on smooth. I sat under good lighting with a sharpie, some Barry White, an adult beverage and felt up every inch of the helmet. Doing this allows you to feel little bumps, and things you can't see even with the primer coat. Any time I noticed one, I marked it. Some things are also really easy to spot, like this little gem in the corner of the mandible.
That black mark is a hole. It was probably caused while I was sanding it, but I wouldn't have noticed it without the primer. Any spots that were too high, or "bumps" I sanded down. Anything that was too low, or an outright hole was filled with Milliput Superfine White putty.
Milliput is a two part epoxy that you knead together in your hands. Once it has been mixed, it can be molded like clay. You can also use a bit of water to help smooth it out, and shape it. I already had this lying around from some unfinished Gundam models I was working on. I also used a green putty I had lying around on a few spots as well. Why the change? I don't really know, as it was Tuesday. I hate Tuesdays, and couldn't find my Miliput. Once the epoxy was applied, I let it cure overnight. I then sanded the entire helmet with a medium grit sanding block.
This block was rough enough to smooth out the epoxy, but not rough enough to scratch up the already smooth surfaces. The angled edge is also great for the corners.
Visor/Mouth Vents
I decided that this was a good time to start on cutting the visor and the "mouth vents" out. For the visor, I made an outline along the entire area that was to be cut. Doing this gave me an idea of where to stop with the cutting tool so I didn't cut too far. The remaining material could be ground down and smoothed out with the grinding attachment on my Dremel. After marking the visor, I decided that doing the mouth vents first was a good idea. Why? I don't know. Maybe I thought since they are smaller they would somehow be easier? At first I was right. Then I got cocky. I took out the drill, and used the smallest drill bit I had. I made three holes in each vent, leaving a tiny sliver of fiberglass material between each one. My plan was to take out the diamond file kit I had, and file them down to a nice smooth finish. Why do that when I could just bore them out with the drill like some kind of heathen? It would be so much easier right? Getting the diamond files that were just out of arms reach was way too much work. Boy was I wrong...
While flailing about with the drill like Leatherface at the end of Texas Chainsaw, I heard a crack. A piece of the helmet shot off the drill, and nearly hit me in the face. (eye protection, people.) As you can see, in my moment of lazy brilliance disaster struck. Now for some of you, this may seem like nothing. Being a complete novice, this was devastating. I went from angry, to disappointed in my stupidity, to nearly putting the helmet on the pile of unfinished Gundams. Then I started thinking about all of the threads here where people made the best of a bad situation, and I went for the Milliput. after about an hour or so of sculpting, I got it to a satisfactory result. It's by no means perfect, but it's the best I could do.
Next time I'll cover the ins-and-outs of working with Montana Gold spray paint, and how it's way different than anything I've worked with before... In a bad way.
Attachments
Last edited:
")