ob1
New Member
Hi there and Happy New Year! ")
My name is Simon and I’m from Germany.
This is my first post here even though I’m a RPF member for more than two years. Well, I’m more a reader than a writer.
Two years ago I decided to build a lifesize IG-88. In November 2012 I started the concept phase and investigations of the outer dimensions.
As you know good pictures of IG-88 are rare and there is no picture of his back!
First step was the design of the base frame…two legs…body center axis…shoulders…arms.
Due to screen accuracy my IG has no articulation apart from arms and head. The upper and lower arms can rotate and do some sidewise movement. The head has a ball joint so rotation and nodding is possible.


My whole construction was pre-designed virtually with CAD. It was very exhausting but in the build-phase I saved a lot of time. In several cases I printed the drawings (scale 1:1) and glued them directly on the MDF or Foamex plates.

After receiving my Derwent tube cast I started with the real build-up in February 2013.
First step: The feet. I used the 1980 Kenner 12” IG-88 as reference. In ESB you can’t see any feet. IG was mounted to a plate.
The feet look easy to build but they are definitively not…many angles and slants here. I built a rigid inner frame (MDF 19mm) holding a big x-piece in place. This x-piece, representing the ankle, is made out of PVC and holds the leg tube and of course the rest of IG. The outer frame is 3.2mm MDF. The hollow space is filled with crushed stones to increase their weight as much as possible to lower the centre of gravity.

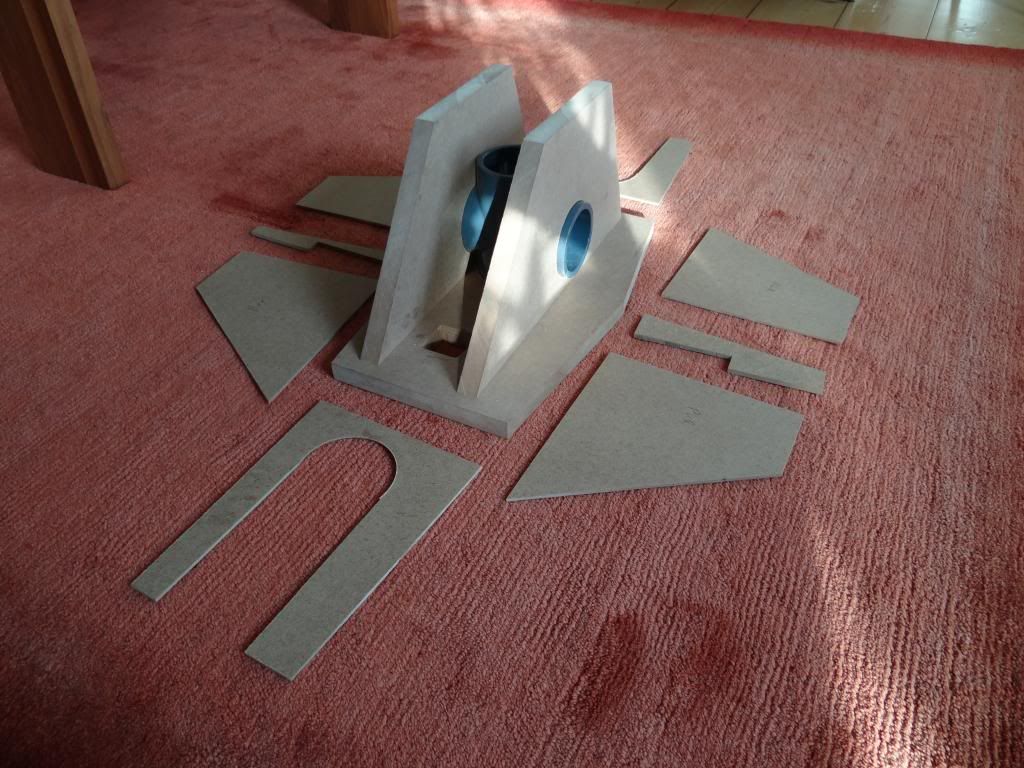


The legs are PVC tubes with a big wall thickness of 4.7mm…very strong against bending. You can even cut a screw thread into it. I used these tubes wherever possible but they are available in specific diameters (25, 30, 40, 50, 63, 75,….) only. In some cases I switched to aluminium tubes.


The middle torso section is a MDF construction. A good place to store electronic and battery stuff.
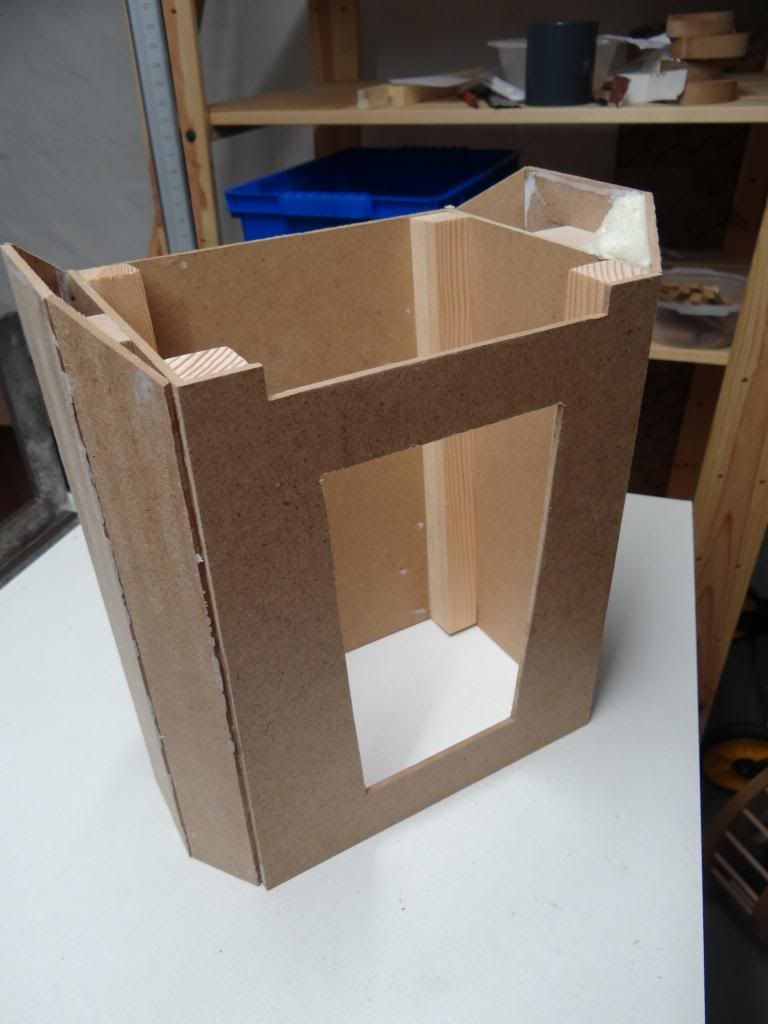
The lower torso section is a combination of PVC tubes and MDF plates. There is a front and a back plate which hold all the bits and pieces. These structures are mostly made out of PVC foam plates (Foamex), glued together and sanded to get a smooth surface.


The chest has a characteristic round shape in the front area. Here I used two large MDF discs which are connected through several wooden pins. The discs have a circular cut-out to hold a PVC x-piece. This is clamped between the discs. The x-piece is connected to the center axis tube and additionally has the function to hold the shoulder tubes in place.


Here you can see a first shot of the assembly. The head is missing because the height of the room is 2.10m “only”
The total height is about 2.40m.

Next one is my piece of engineering…the shoulder joint. There are two tubes. The first one is glued to the x-piece, the second is shoved into the first one. Now it is possible to rotate the arms. To stop that rotation and to fix the arm in a certain position a long screw is used to pull a conus into the second tube which is sliced at the end. I hope you understand my bad English. :rolleyes I added an explosion view of the shoulder joint below.


The arms consist mainly of PVC tubes and some aluminum rails. I used a small tube as an inner guiding tube. The bigger tubes around were stabilized with long screws.
It was a hell of a search to find the right egg-shaped things on the back of IG’s upper arm. Finally found plastic Easter eggs which fulfilled the right dimensions requirements.
Plastic nuts for the flange area reduce the total weight of the arm and look nice after priming and coating. I chose a grey metal color from the automotive supplies…I think it’s a VW color. The elbow joint is a plastic screen mount to make the lower arm adjustable in every position.
Here are some impressions of the arm build…


The head needs some putty and sanding as the cast is rather medium quality.:rolleyes
At least the binoculars are ready. I’m struggling with the lights at the moment.

This is the current status. The front tubes pairs are ready but missing here.

Next steps are:
-implementation of lights into the head
-final coating of remaining body parts
-implementation of hoses
I uploaded a short video on Youtube. This is the status from October 2014.
The comments are in German, sorry for that.
https://www.youtube.com/watch?v=c4paTNGd4d8
Thanks to ‘mekroid’ for his helpful input and his outstanding description of his IG build.
To be continued…
My name is Simon and I’m from Germany.
This is my first post here even though I’m a RPF member for more than two years. Well, I’m more a reader than a writer.
Two years ago I decided to build a lifesize IG-88. In November 2012 I started the concept phase and investigations of the outer dimensions.
As you know good pictures of IG-88 are rare and there is no picture of his back!
First step was the design of the base frame…two legs…body center axis…shoulders…arms.
Due to screen accuracy my IG has no articulation apart from arms and head. The upper and lower arms can rotate and do some sidewise movement. The head has a ball joint so rotation and nodding is possible.
My whole construction was pre-designed virtually with CAD. It was very exhausting but in the build-phase I saved a lot of time. In several cases I printed the drawings (scale 1:1) and glued them directly on the MDF or Foamex plates.
After receiving my Derwent tube cast I started with the real build-up in February 2013.
First step: The feet. I used the 1980 Kenner 12” IG-88 as reference. In ESB you can’t see any feet. IG was mounted to a plate.
The feet look easy to build but they are definitively not…many angles and slants here. I built a rigid inner frame (MDF 19mm) holding a big x-piece in place. This x-piece, representing the ankle, is made out of PVC and holds the leg tube and of course the rest of IG. The outer frame is 3.2mm MDF. The hollow space is filled with crushed stones to increase their weight as much as possible to lower the centre of gravity.
The legs are PVC tubes with a big wall thickness of 4.7mm…very strong against bending. You can even cut a screw thread into it. I used these tubes wherever possible but they are available in specific diameters (25, 30, 40, 50, 63, 75,….) only. In some cases I switched to aluminium tubes.
The middle torso section is a MDF construction. A good place to store electronic and battery stuff.
The lower torso section is a combination of PVC tubes and MDF plates. There is a front and a back plate which hold all the bits and pieces. These structures are mostly made out of PVC foam plates (Foamex), glued together and sanded to get a smooth surface.
The chest has a characteristic round shape in the front area. Here I used two large MDF discs which are connected through several wooden pins. The discs have a circular cut-out to hold a PVC x-piece. This is clamped between the discs. The x-piece is connected to the center axis tube and additionally has the function to hold the shoulder tubes in place.
Here you can see a first shot of the assembly. The head is missing because the height of the room is 2.10m “only”
The total height is about 2.40m.
Next one is my piece of engineering…the shoulder joint. There are two tubes. The first one is glued to the x-piece, the second is shoved into the first one. Now it is possible to rotate the arms. To stop that rotation and to fix the arm in a certain position a long screw is used to pull a conus into the second tube which is sliced at the end. I hope you understand my bad English. :rolleyes I added an explosion view of the shoulder joint below.
The arms consist mainly of PVC tubes and some aluminum rails. I used a small tube as an inner guiding tube. The bigger tubes around were stabilized with long screws.
It was a hell of a search to find the right egg-shaped things on the back of IG’s upper arm. Finally found plastic Easter eggs which fulfilled the right dimensions requirements.
Plastic nuts for the flange area reduce the total weight of the arm and look nice after priming and coating. I chose a grey metal color from the automotive supplies…I think it’s a VW color.
The elbow joint is a plastic screen mount to make the lower arm adjustable in every position.Here are some impressions of the arm build…
The head needs some putty and sanding as the cast is rather medium quality.:rolleyes
At least the binoculars are ready. I’m struggling with the lights at the moment.
This is the current status. The front tubes pairs are ready but missing here.
Next steps are:
-implementation of lights into the head
-final coating of remaining body parts
-implementation of hoses
I uploaded a short video on Youtube. This is the status from October 2014.
The comments are in German, sorry for that.
https://www.youtube.com/watch?v=c4paTNGd4d8
Thanks to ‘mekroid’ for his helpful input and his outstanding description of his IG build.
To be continued…