practicecactus
Active Member
Hope you enjoy the reprieve from all the Mass Effect 3 guns and Iron Man builds ;P.
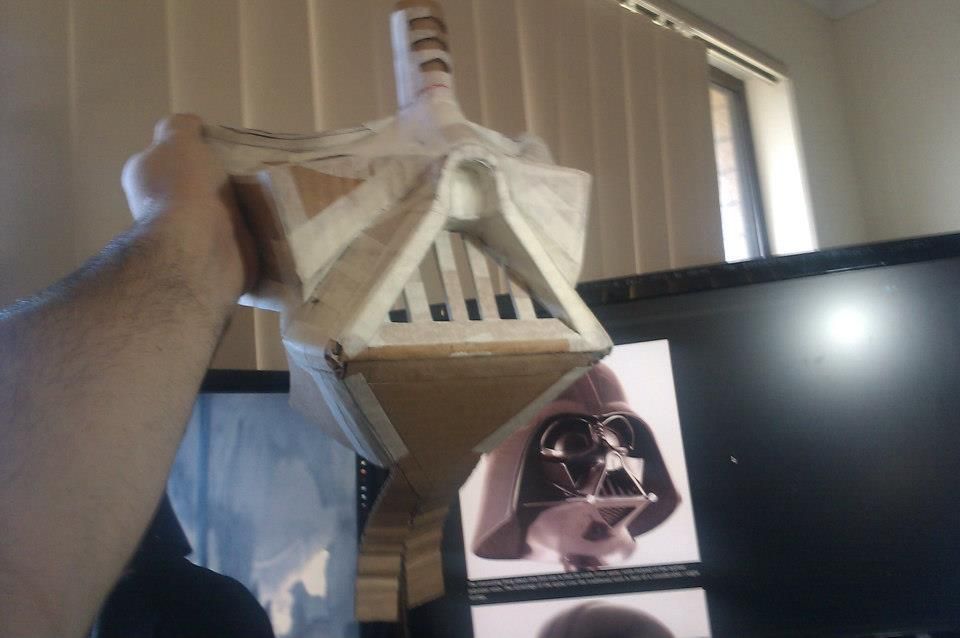
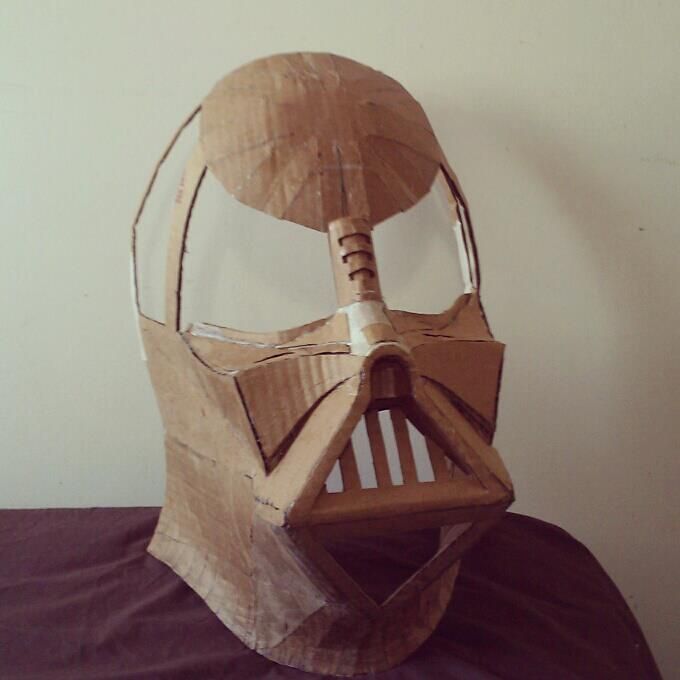
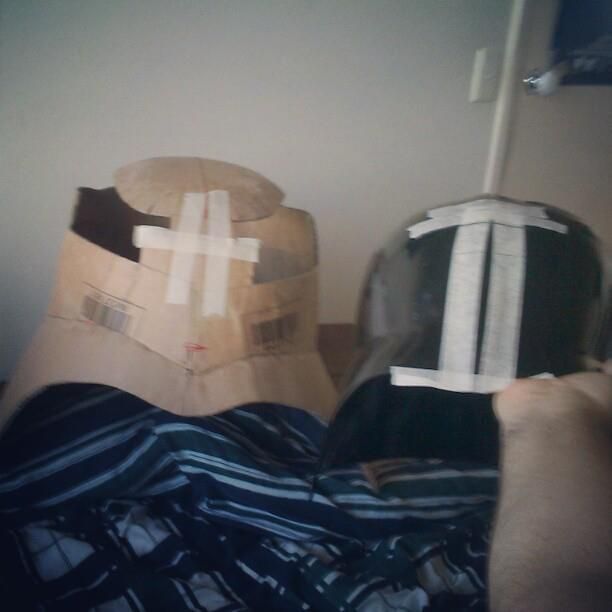
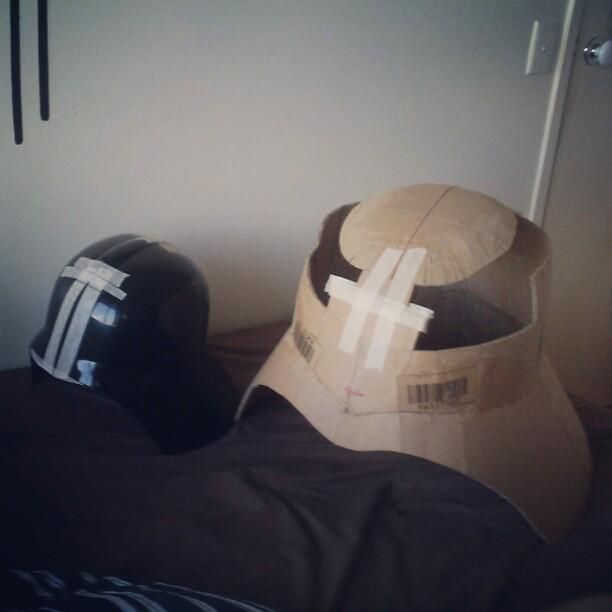
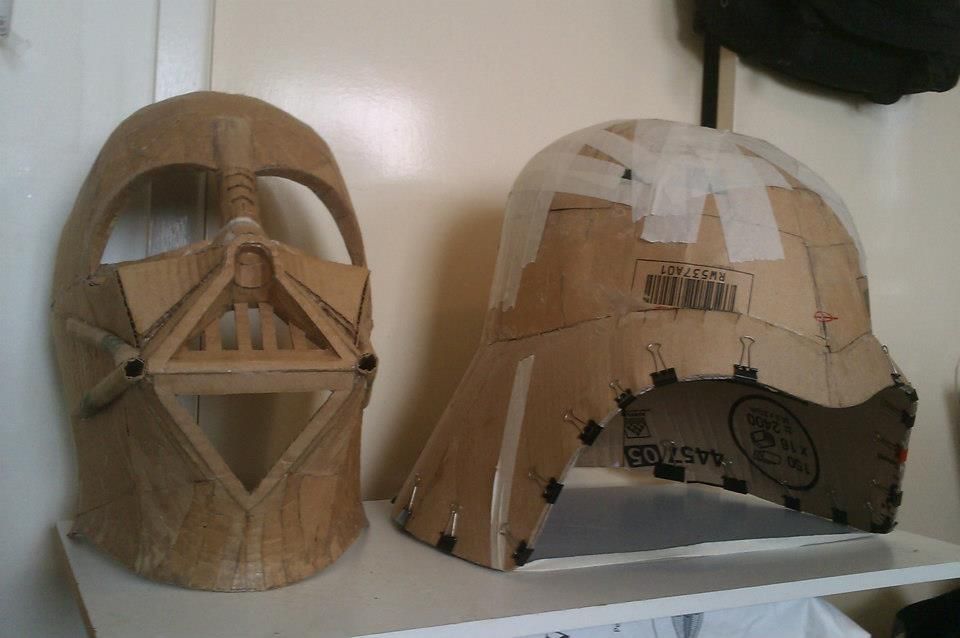
This is my cardboard oversized Darth Vader helmet. At 1:1.5 scale, made entirely out of cardboard and wood glue so far.
I had started a previous version, some of you may have seen in a thread quite a while back, and while I got pretty far with it, it sat for a long time and coming back to it one day to try to finish it off, I realized how incredibly cringe-worthy it was looking, so I decided to start again from scratch.
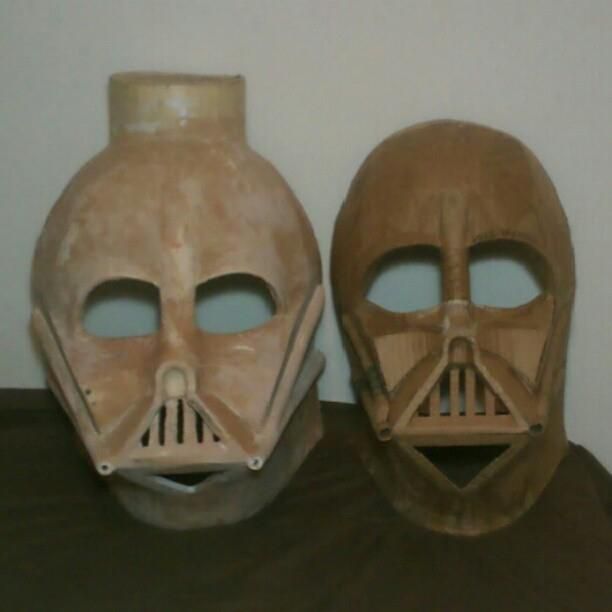
Using my Rubies Vader helmet, I made pattern-templates off it to upscale it. I know the Rubies bucket is far from perfect so I tried to learn as much as I could from photos. I need to thank starwarshelmets.com and everyone who's made Vader helmets, for all the photo references.
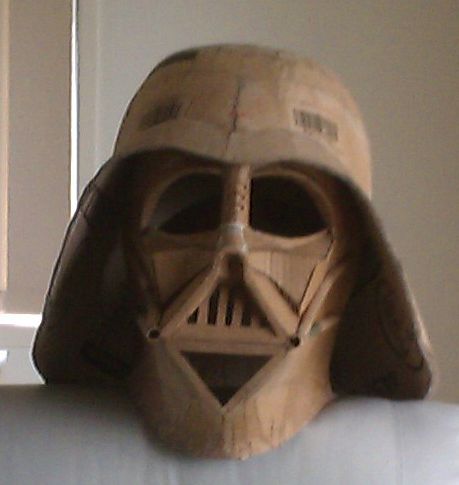
The plan is to resin it up and body-filler it as well as I can, then paint it up, so I'm making a note of all the areas that need fixing at this stage. If you've got any advice on areas that need work [so long it's not completely unfixable at this stage] I'm totally open to constructive criticism. I'm really pushing myself on the accuracy because while I know I'll never get it to 100%, at least I can try to get it as perfect as I can and hopefully still do an ok job overall. The dome of the helmet is really hard to do without any right angles or hard edged starting points. Even taking measurements as much as I can, in some places on the helmet I'm still off by about 10 to 20mm. Also if anyone has any tips on resin with cardboard, I'd love to hear from you. I used to work with fiberglass but never used it on cardboard, but I'm assuming the resin will soak into the cardboard pretty well but should I also glass up the inside of the dome and weight stress areas, or will it hold together ok? Being cardboard it’s super light at the moment, so I’m not sure how the added weight of resin will work out.
I do hope to one day get the rest of the costume together and wear it to a con, so the idea is completely silly, but I'm playing it straight. I'm treating this like a proper replica helmet build. Just a little bigger.
Couldn’t tell you how many hours I’ve spent on this thing. I’ve just slowly been chipping away at it late at night, small pieces at a time. Total money spent on it so far has pretty much just been on about 5 rolls of masking tape, so about 10 bucks so far, I guess.
No plans to make copies of it when it’s finished. I think I’d have to make a vacuum forming rig and split the helmet down the middle to do that. But I might make a vacuum forming table to make a plastic version once I have all the surface prep done. We’ll see when I come to that.
I just really wanted a big Darth Vader helmet and one didn’t exist.
[Apologies in advance for Instagram versions of some of the photos]
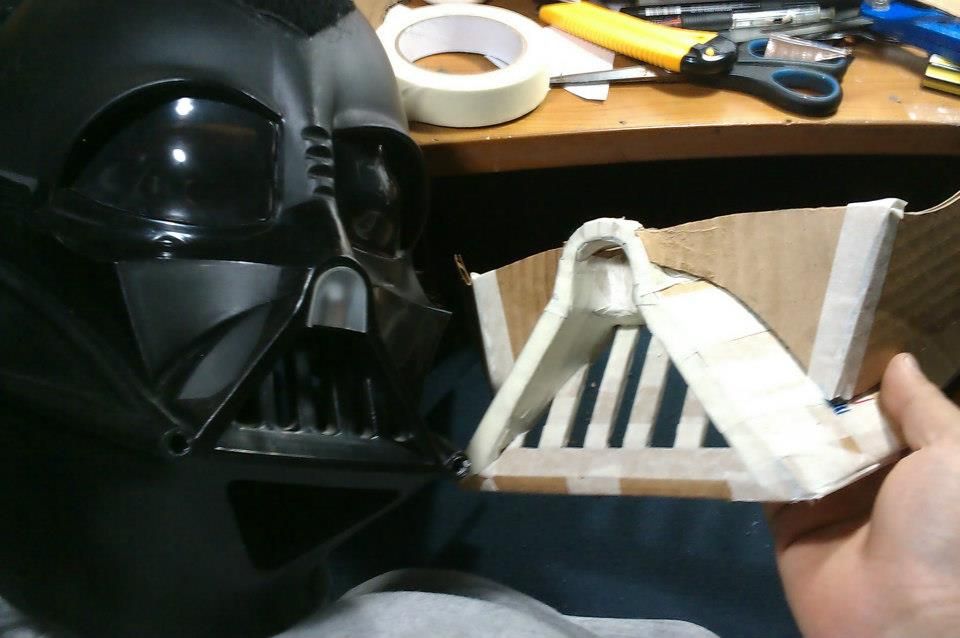
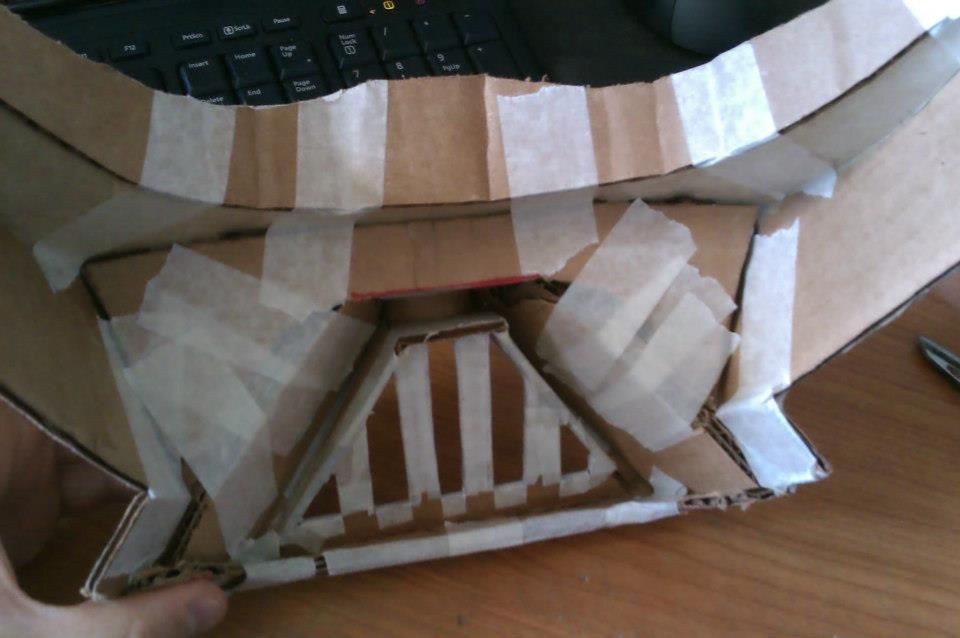
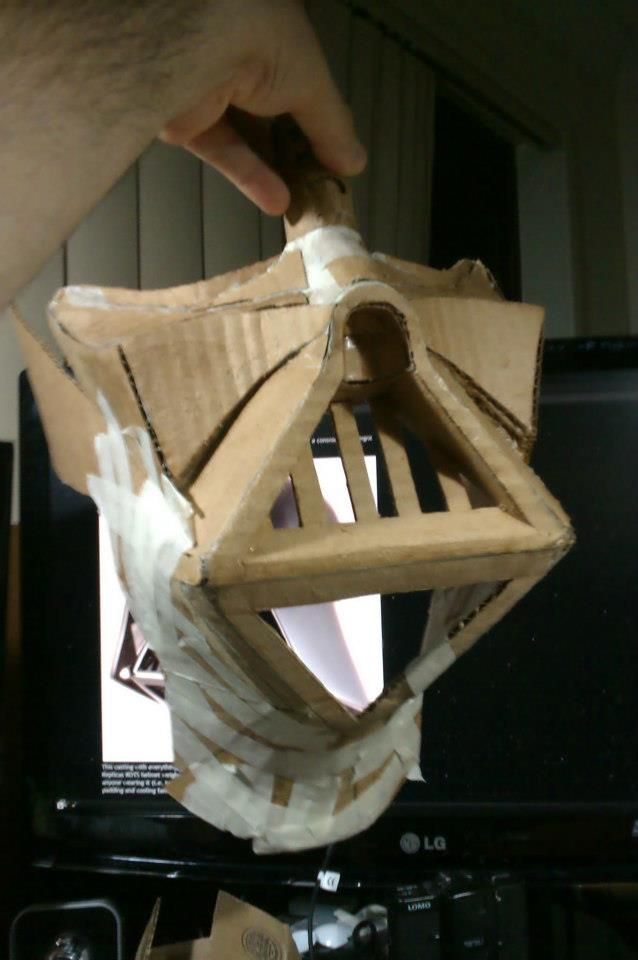
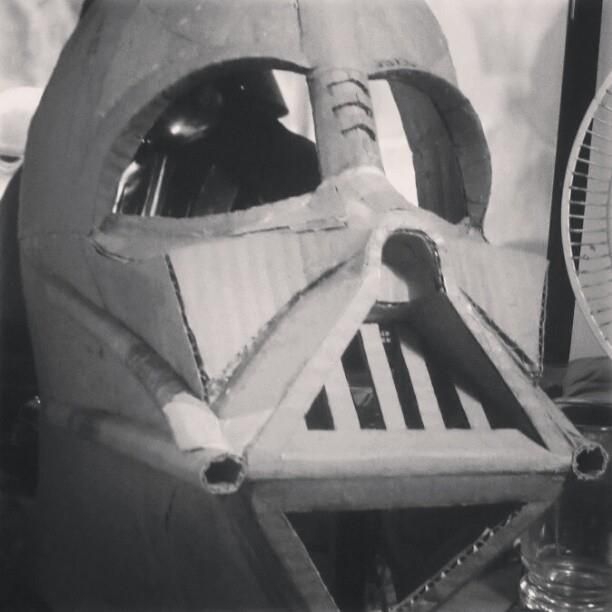
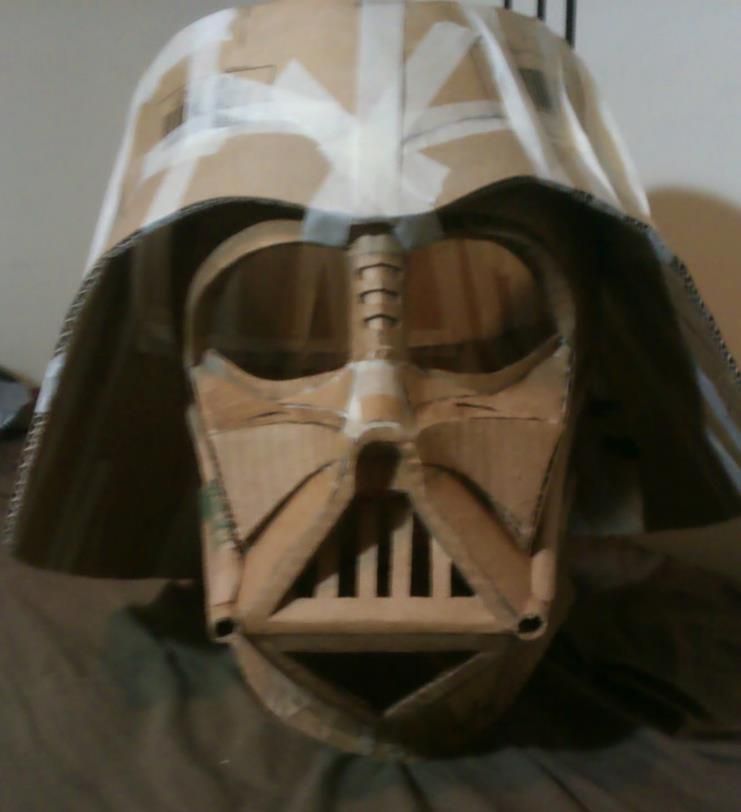
It's at this point I realised I shouldn't be using masking tape to hold it together and should just glue everything together. I don't know why I thought masking tape was a good idea. I also don't know why I made the chin grill opening with hard corners. I totally forgot to make the corners rounded.
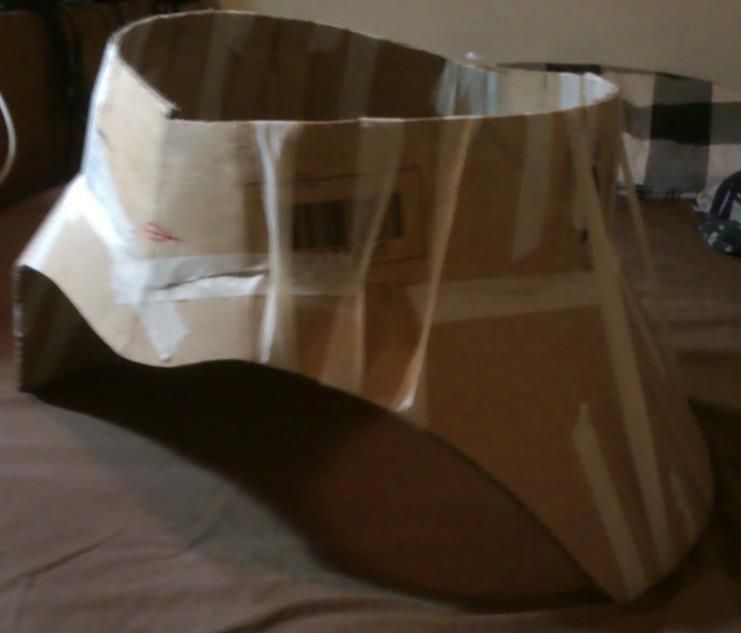
Reinforcing the neckline so it keeps it's shape. Naked thigh for free.

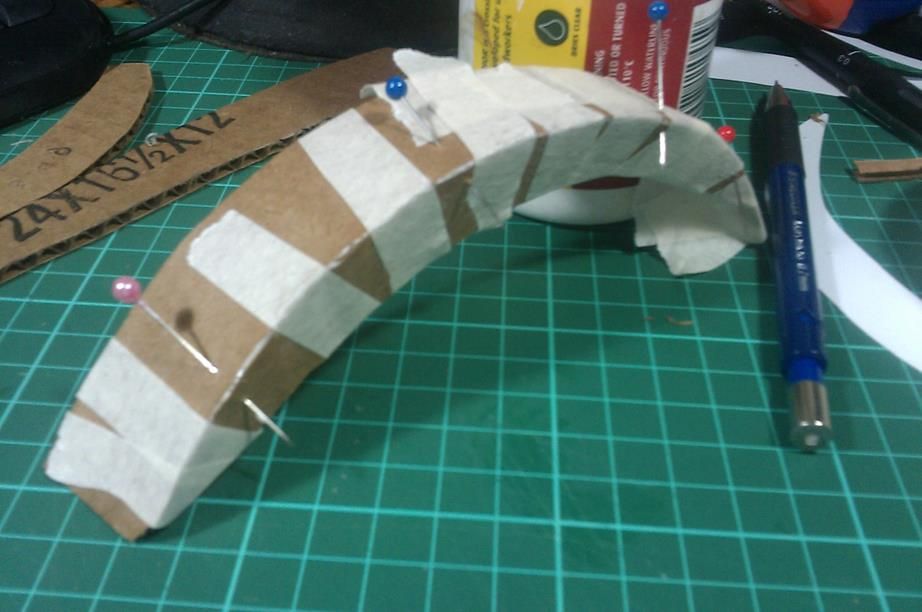
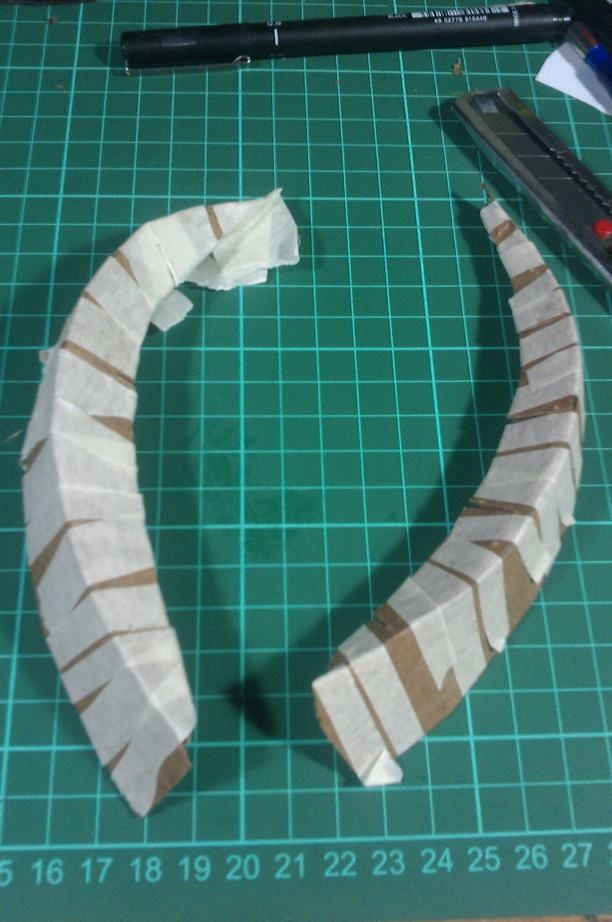
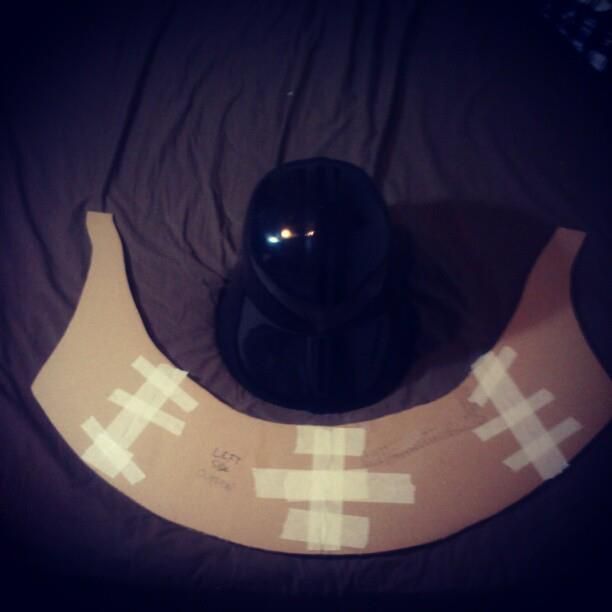
Making pattern of the helmet's skirt.

Checking placement look.
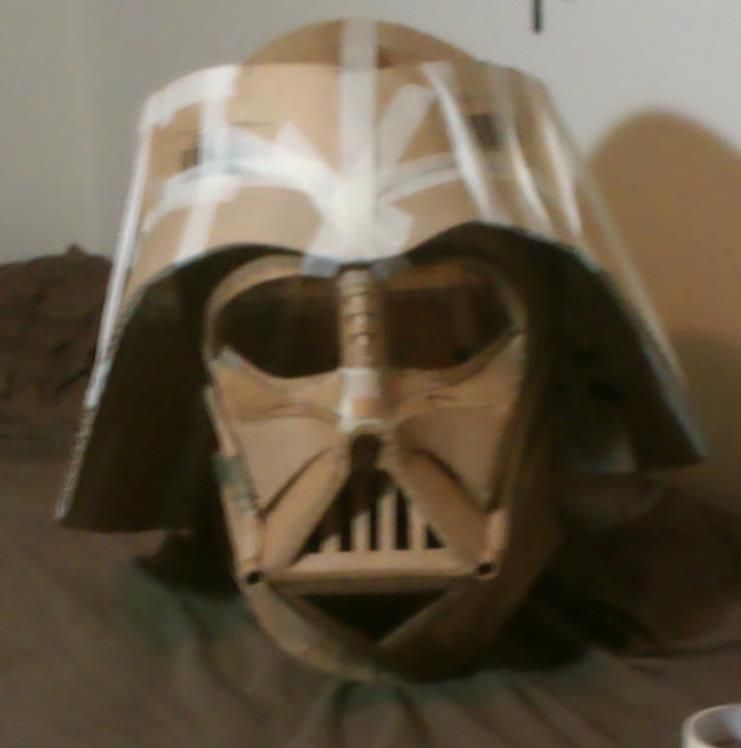
Photo taken further back.
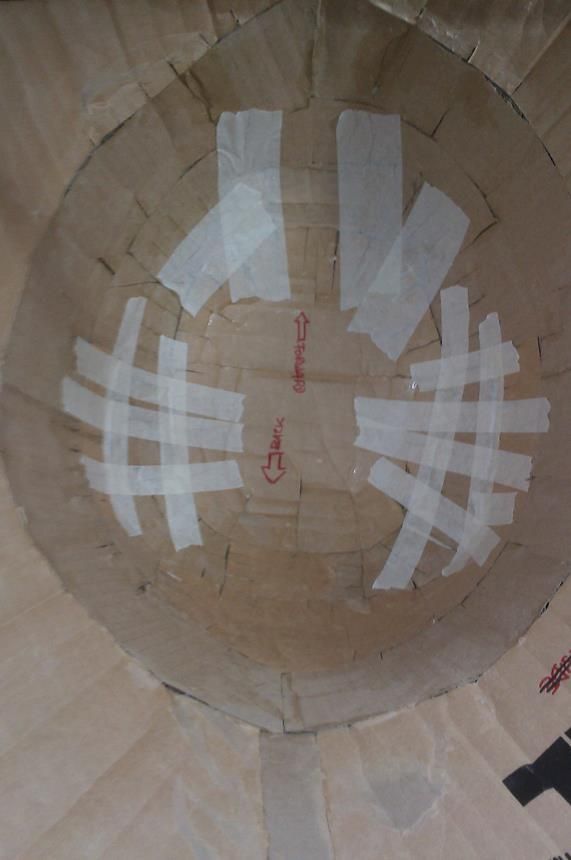
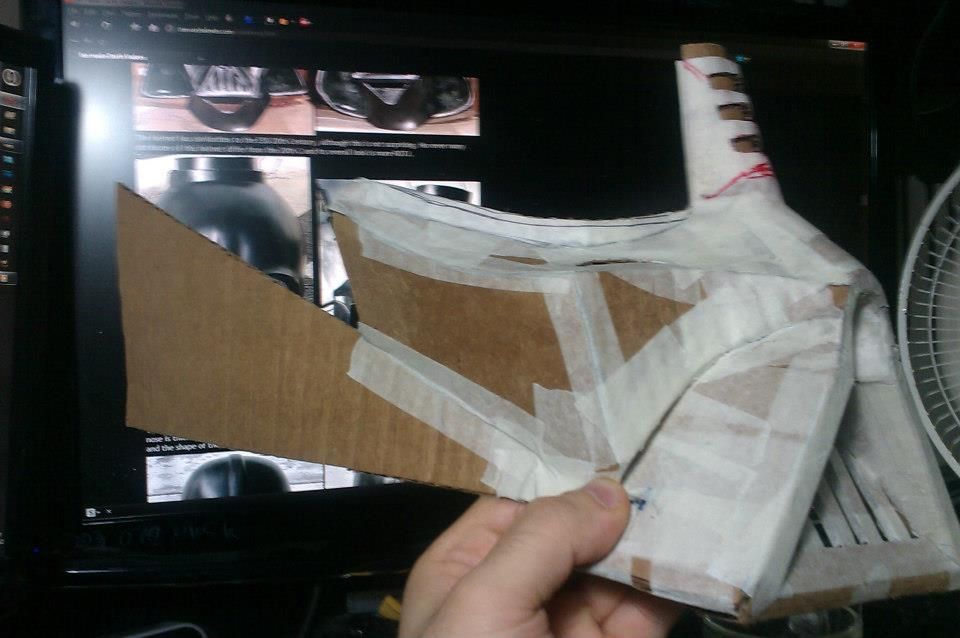
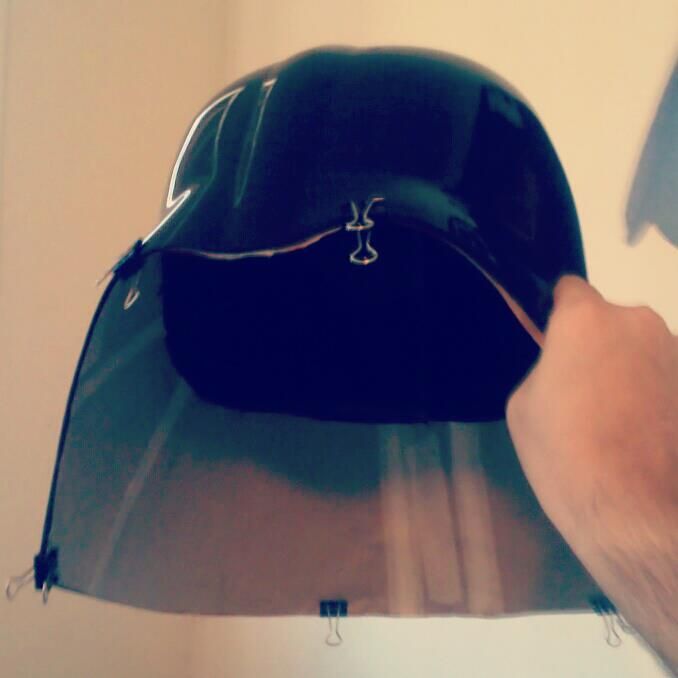
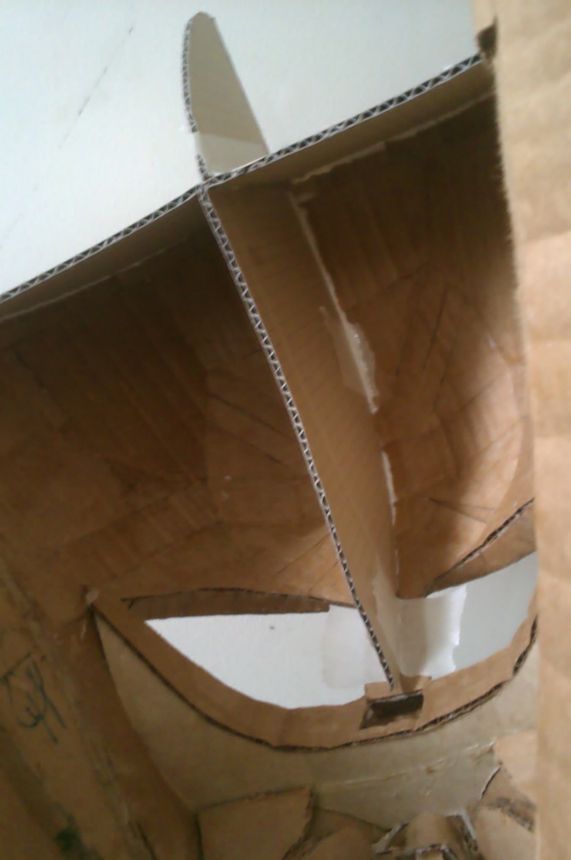
Adding extra layer inside to hold it's shape and proper distance.
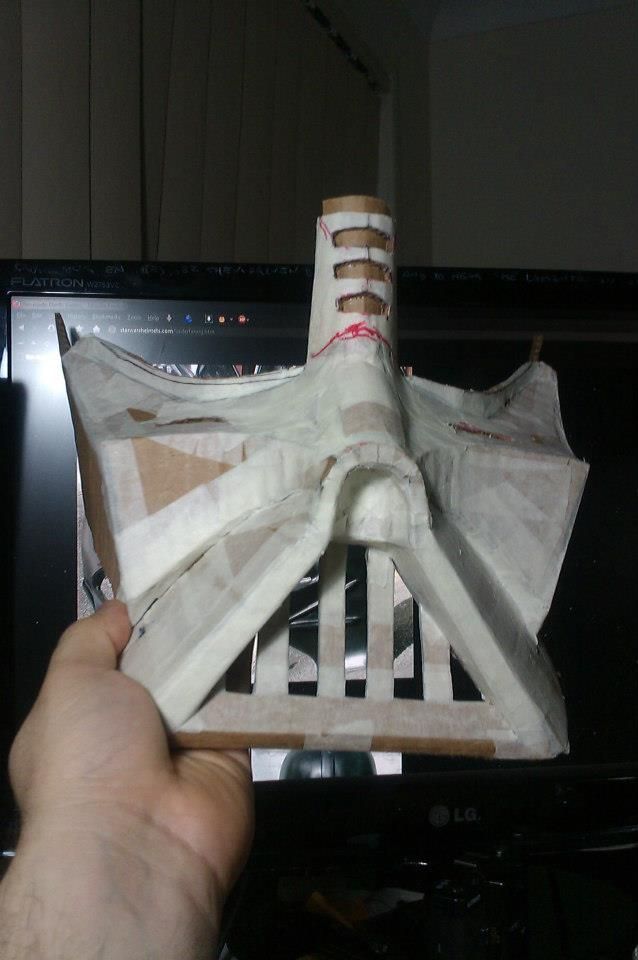
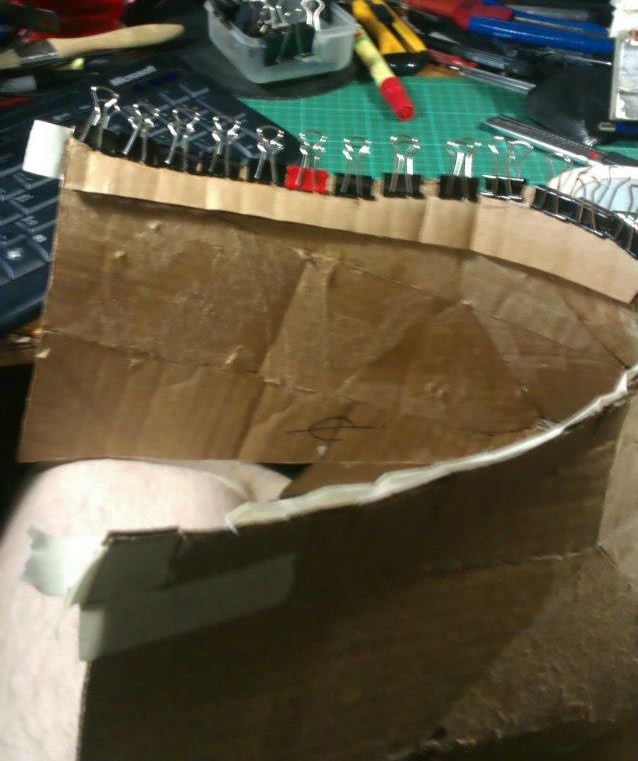
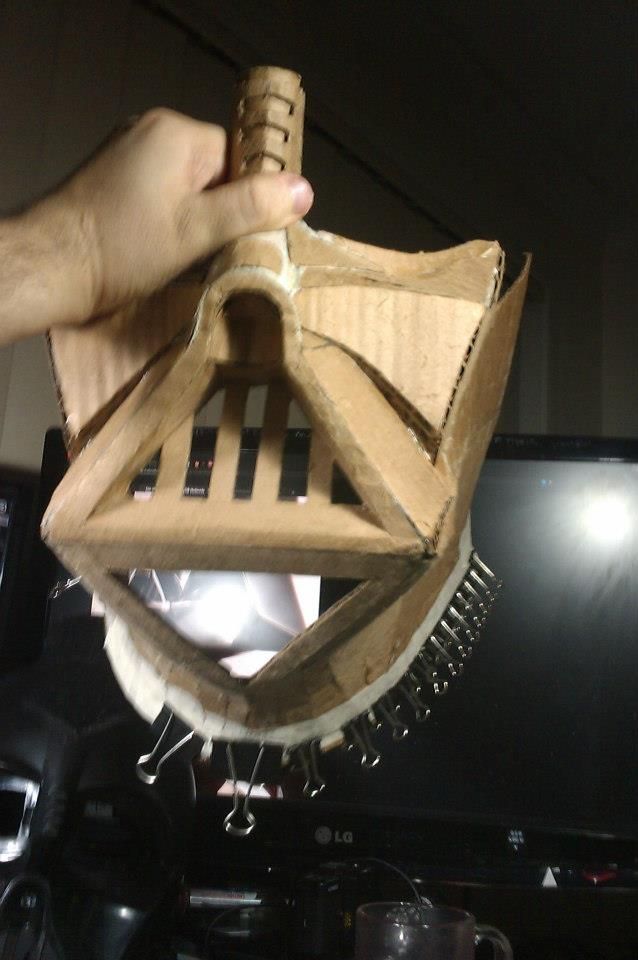
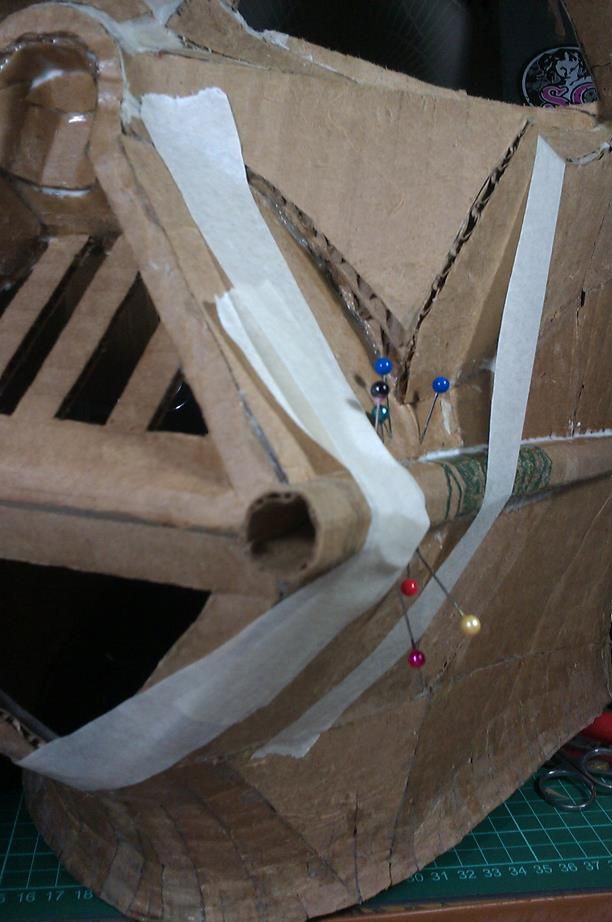
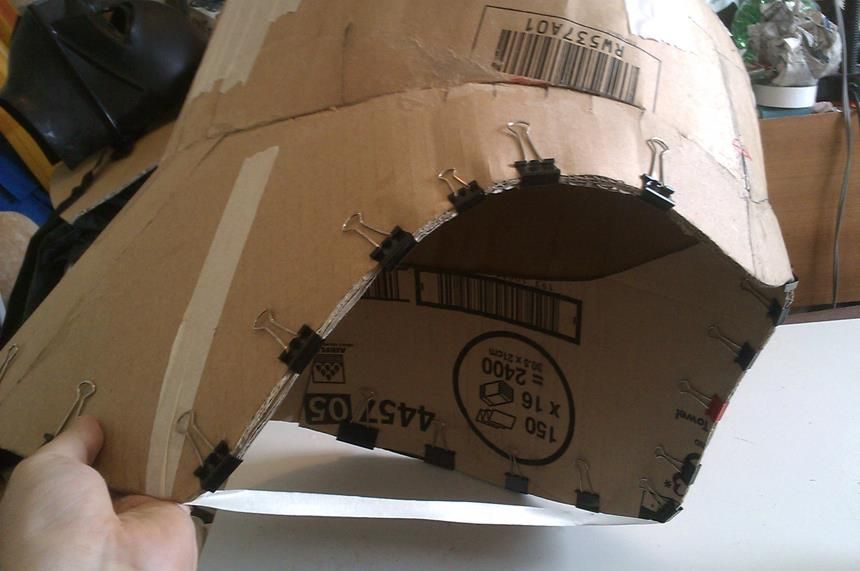
Reinforcing for the helmet attachment.
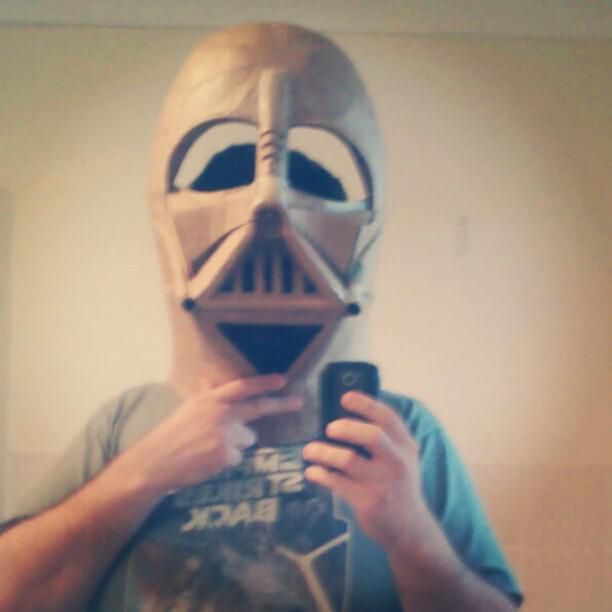
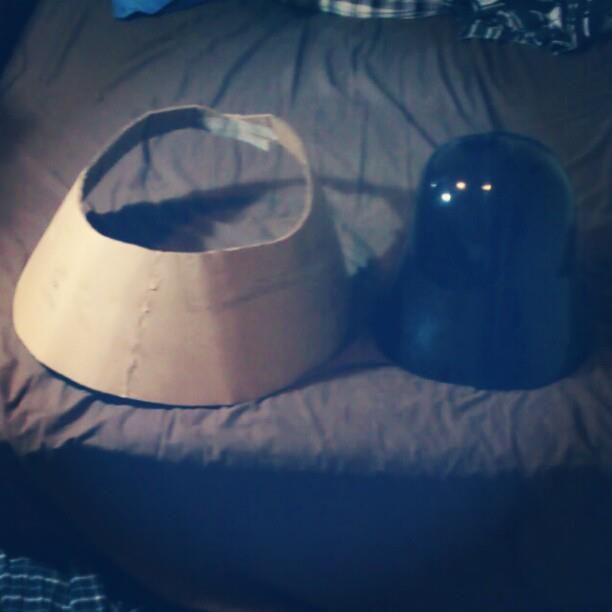
I don't know what I saw in my previous attempt. :unsure
So that's where I'm at so far. I still need to work on the attachment system for the helmet to the mask. Might leave it for a few days so I can notice any mistakes when I come back to it fresh, but I'm sure you Vader experts can point out anything that's not looking right. I'll have to take some better pics at the correct distance. You guys insist on photos taken 6 feet back for helmets right? I guess I'll have take my photos from 9 feet back.
I've tried to incorporate any asymetrical mistakes in the original, but realise I may not be able to what with the limitations of cardboard, but I am gonna at least try.
This is my cardboard oversized Darth Vader helmet. At 1:1.5 scale, made entirely out of cardboard and wood glue so far.
I had started a previous version, some of you may have seen in a thread quite a while back, and while I got pretty far with it, it sat for a long time and coming back to it one day to try to finish it off, I realized how incredibly cringe-worthy it was looking, so I decided to start again from scratch.
Using my Rubies Vader helmet, I made pattern-templates off it to upscale it. I know the Rubies bucket is far from perfect so I tried to learn as much as I could from photos. I need to thank starwarshelmets.com and everyone who's made Vader helmets, for all the photo references.
The plan is to resin it up and body-filler it as well as I can, then paint it up, so I'm making a note of all the areas that need fixing at this stage. If you've got any advice on areas that need work [so long it's not completely unfixable at this stage] I'm totally open to constructive criticism. I'm really pushing myself on the accuracy because while I know I'll never get it to 100%, at least I can try to get it as perfect as I can and hopefully still do an ok job overall. The dome of the helmet is really hard to do without any right angles or hard edged starting points. Even taking measurements as much as I can, in some places on the helmet I'm still off by about 10 to 20mm. Also if anyone has any tips on resin with cardboard, I'd love to hear from you. I used to work with fiberglass but never used it on cardboard, but I'm assuming the resin will soak into the cardboard pretty well but should I also glass up the inside of the dome and weight stress areas, or will it hold together ok? Being cardboard it’s super light at the moment, so I’m not sure how the added weight of resin will work out.
I do hope to one day get the rest of the costume together and wear it to a con, so the idea is completely silly, but I'm playing it straight. I'm treating this like a proper replica helmet build. Just a little bigger.
Couldn’t tell you how many hours I’ve spent on this thing. I’ve just slowly been chipping away at it late at night, small pieces at a time. Total money spent on it so far has pretty much just been on about 5 rolls of masking tape, so about 10 bucks so far, I guess.
No plans to make copies of it when it’s finished. I think I’d have to make a vacuum forming rig and split the helmet down the middle to do that. But I might make a vacuum forming table to make a plastic version once I have all the surface prep done. We’ll see when I come to that.
I just really wanted a big Darth Vader helmet and one didn’t exist.
[Apologies in advance for Instagram versions of some of the photos]
It's at this point I realised I shouldn't be using masking tape to hold it together and should just glue everything together. I don't know why I thought masking tape was a good idea. I also don't know why I made the chin grill opening with hard corners. I totally forgot to make the corners rounded.
Reinforcing the neckline so it keeps it's shape. Naked thigh for free.
Making pattern of the helmet's skirt.
Checking placement look.
Photo taken further back.
Adding extra layer inside to hold it's shape and proper distance.
Reinforcing for the helmet attachment.
I don't know what I saw in my previous attempt. :unsure
So that's where I'm at so far. I still need to work on the attachment system for the helmet to the mask. Might leave it for a few days so I can notice any mistakes when I come back to it fresh, but I'm sure you Vader experts can point out anything that's not looking right. I'll have to take some better pics at the correct distance. You guys insist on photos taken 6 feet back for helmets right? I guess I'll have take my photos from 9 feet back.
I've tried to incorporate any asymetrical mistakes in the original, but realise I may not be able to what with the limitations of cardboard, but I am gonna at least try.
Last edited:

