Bandai AT-AT 1/144 scale diorama *Official Photoshoot*

Scarecrow Joe

Sr Member
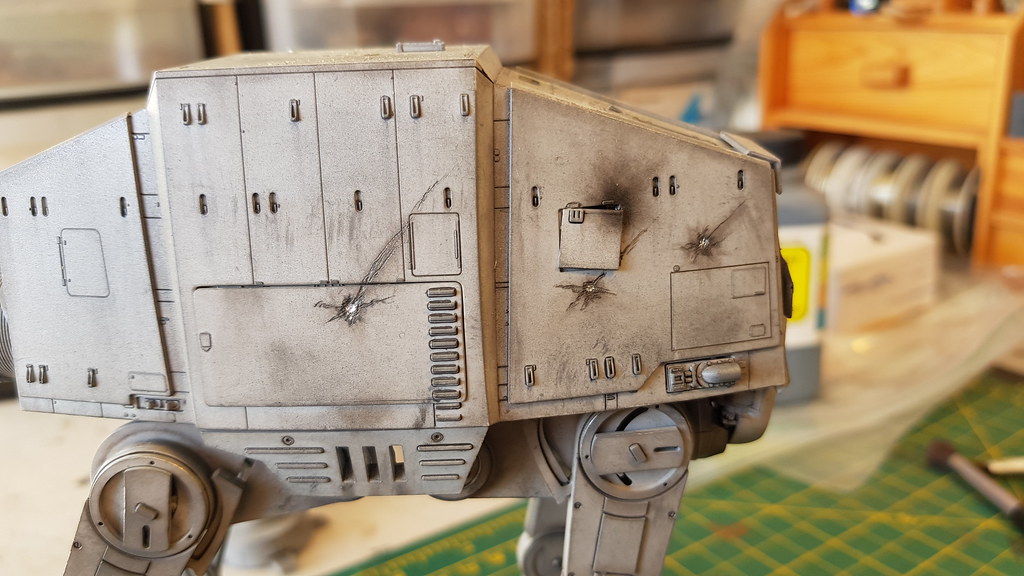
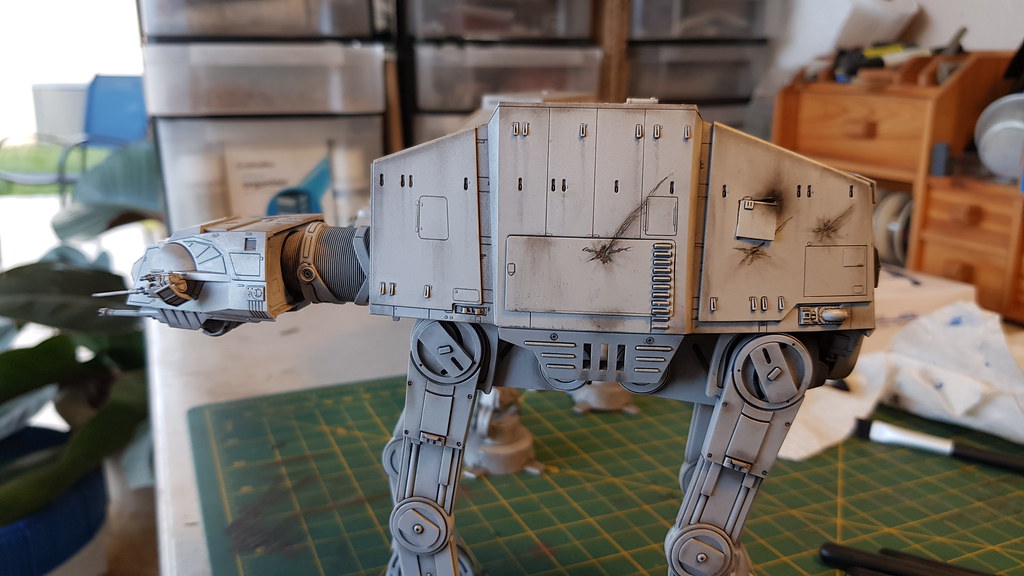
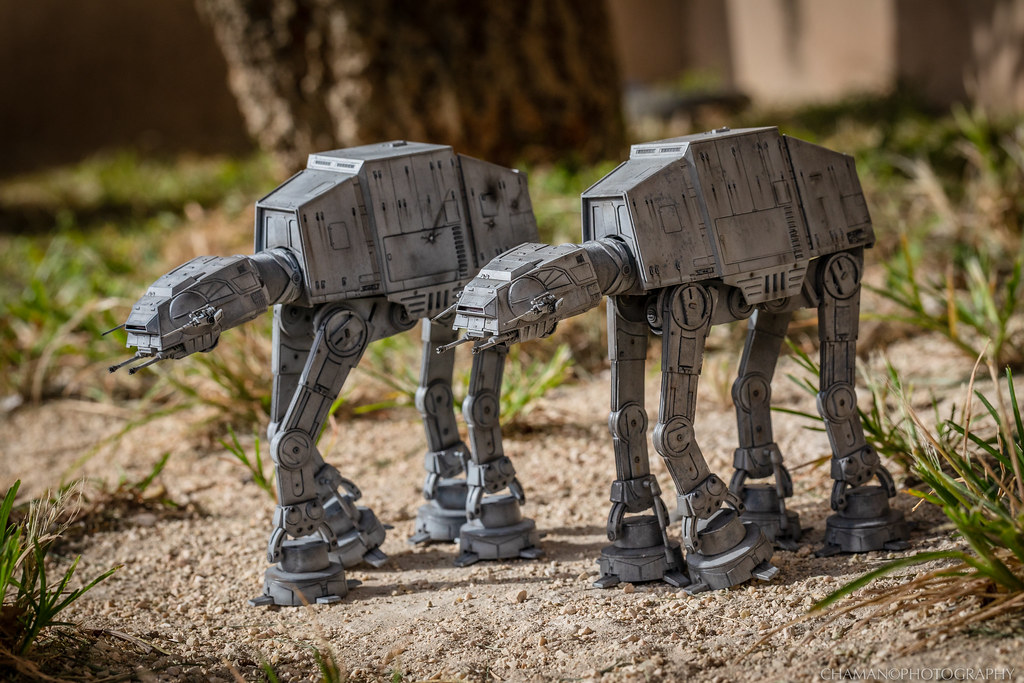
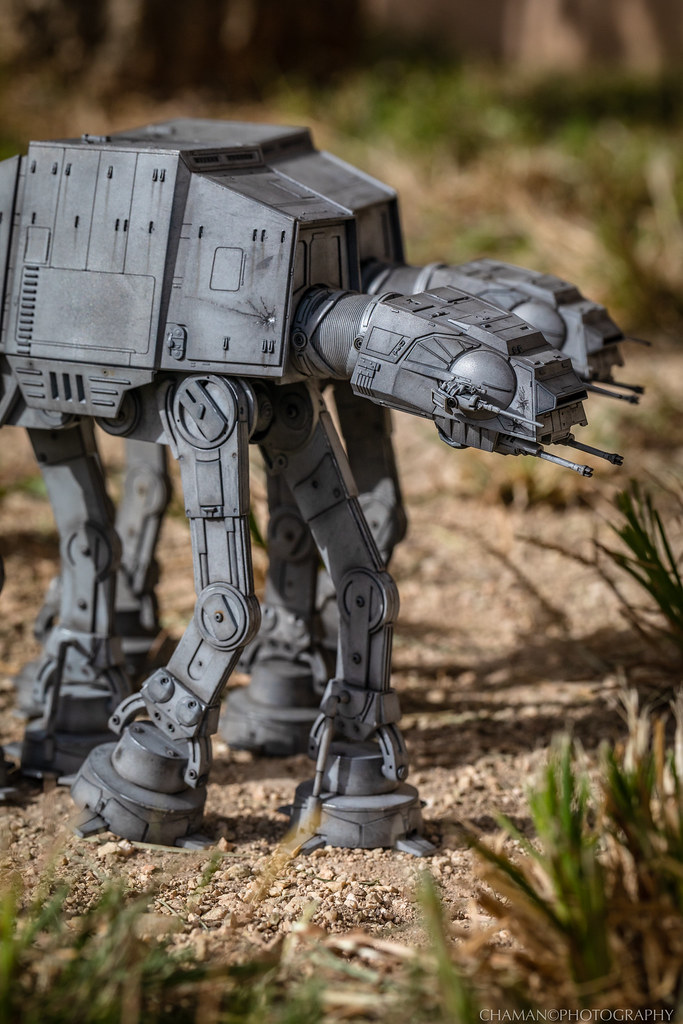
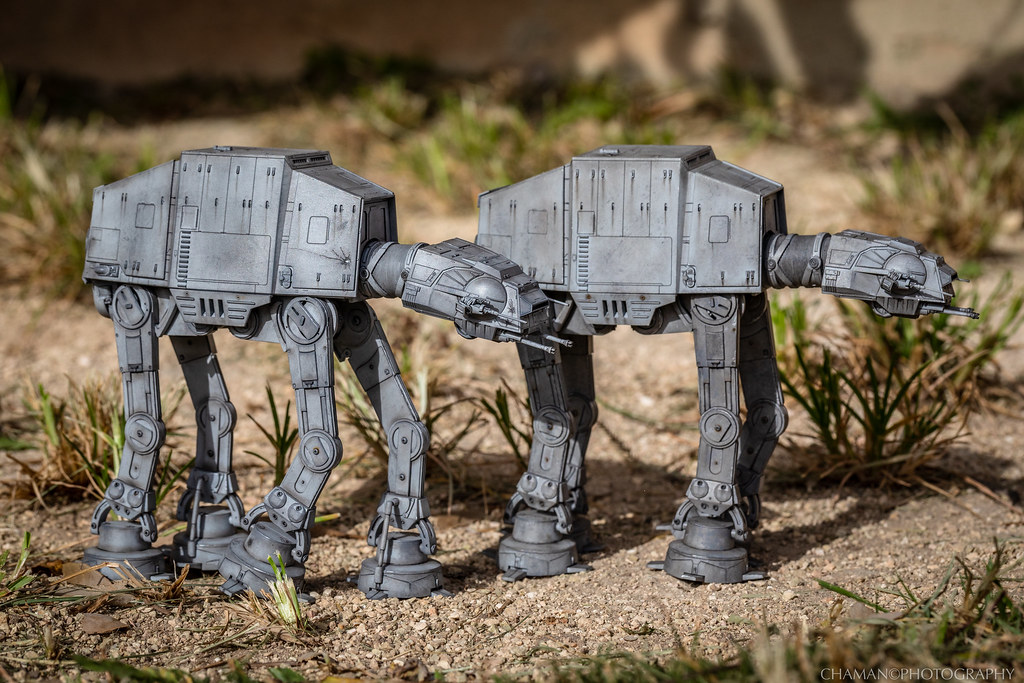
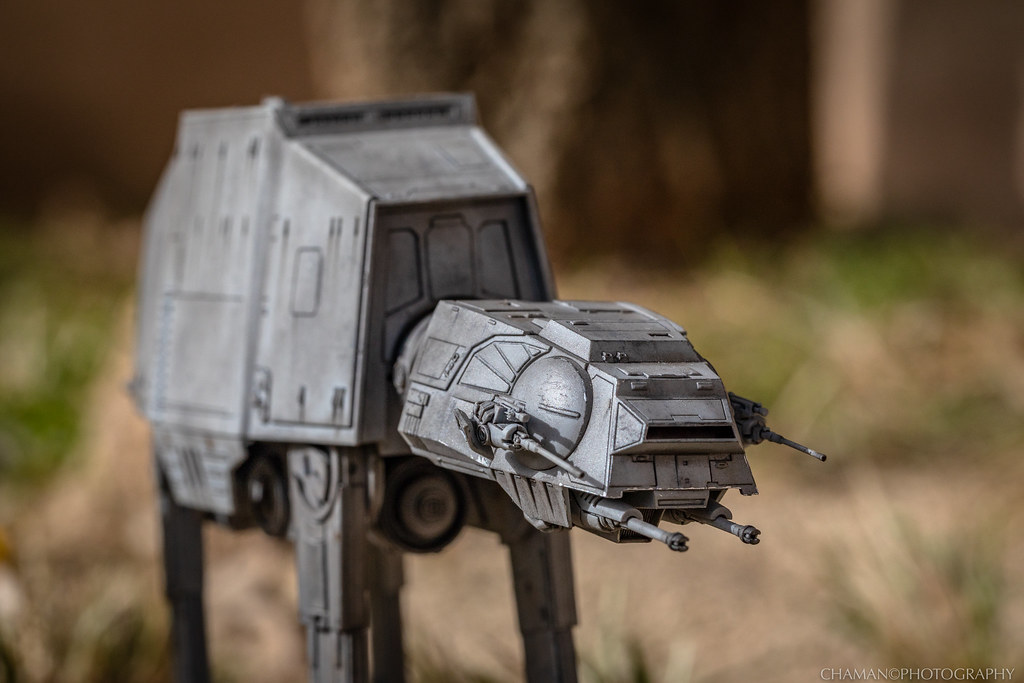
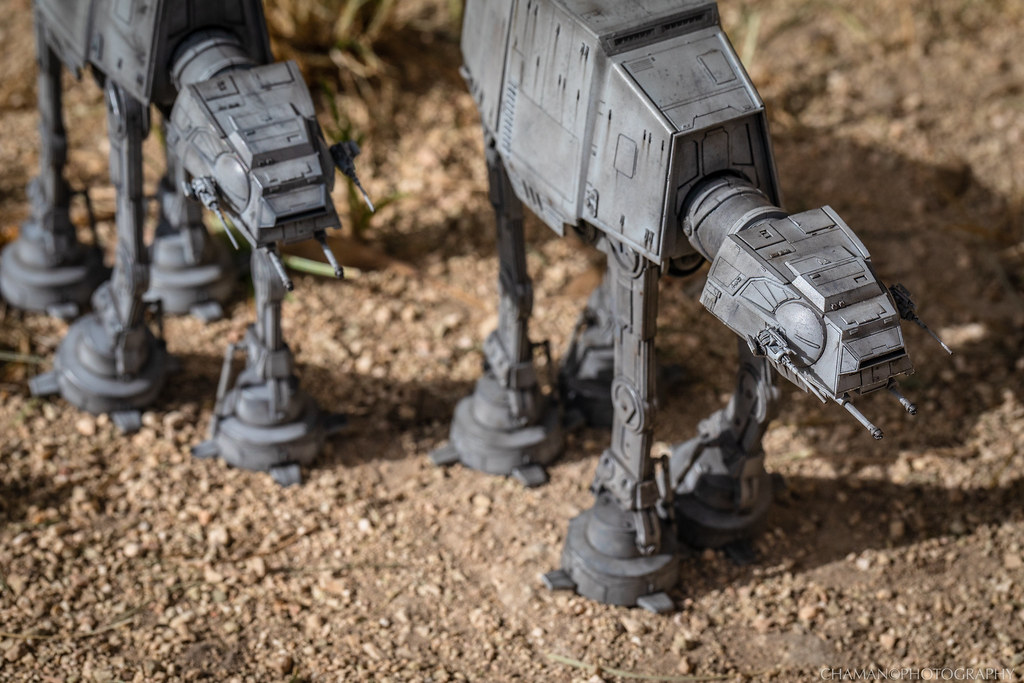
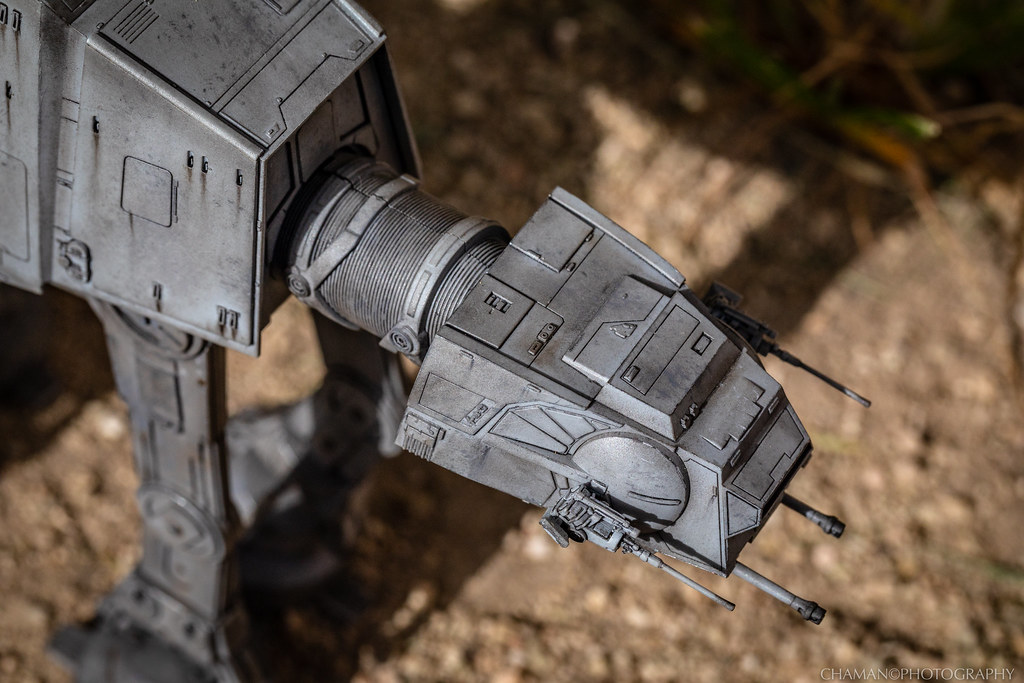
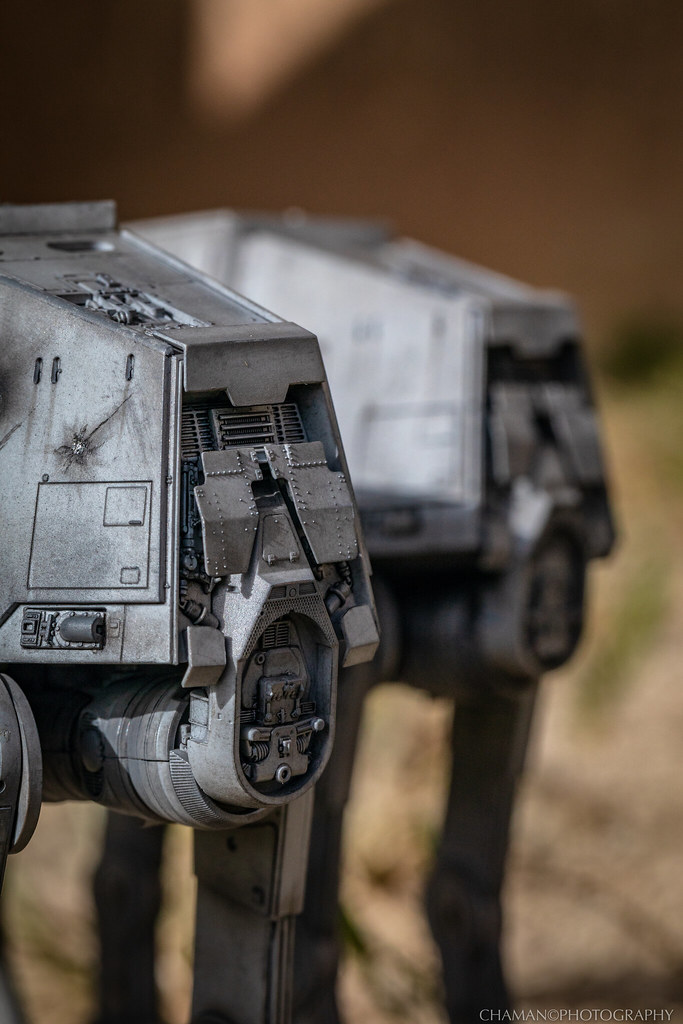
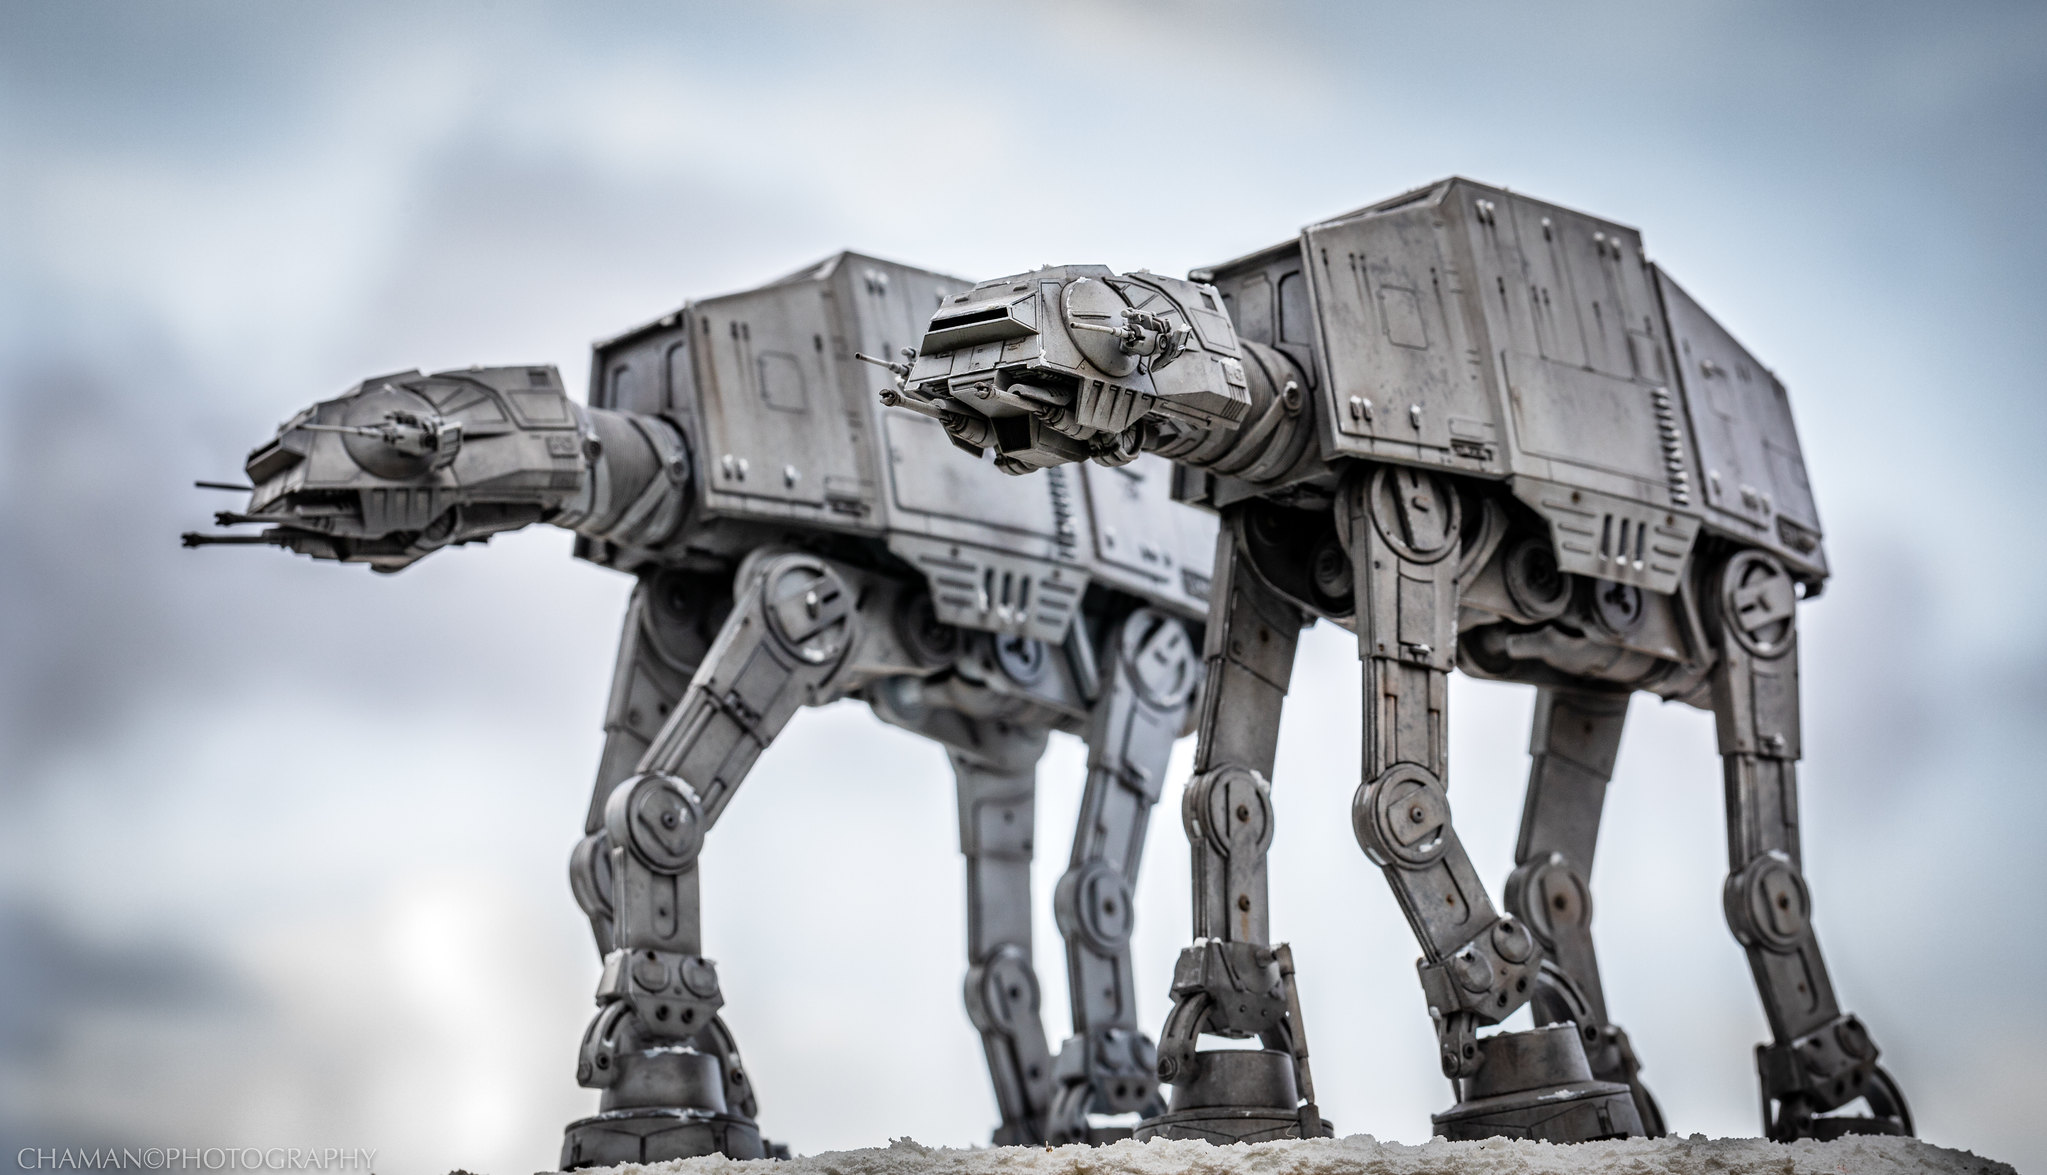
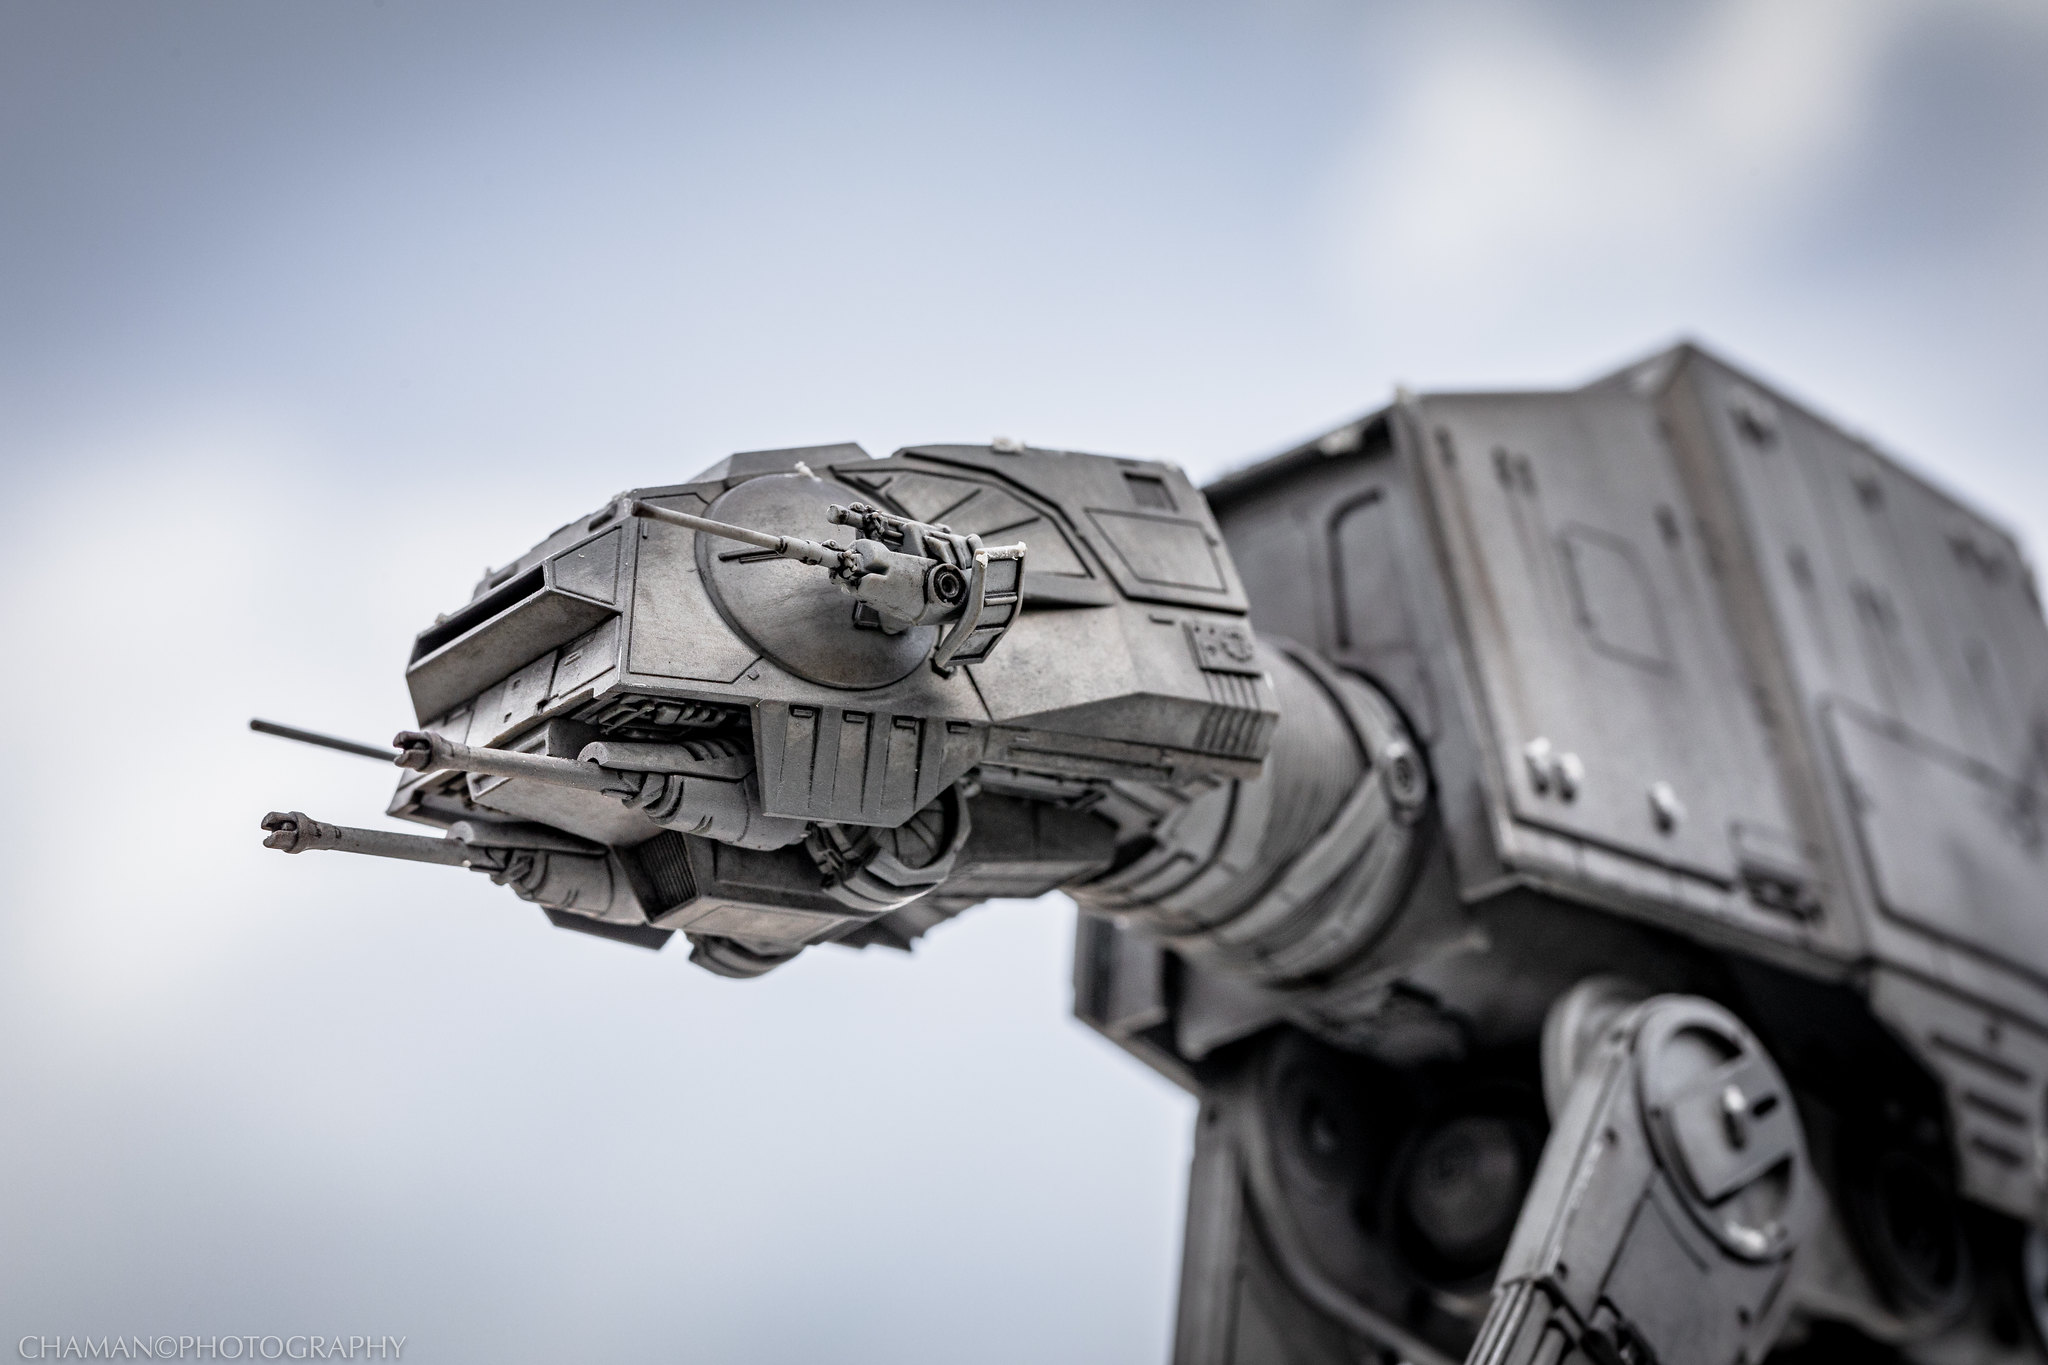
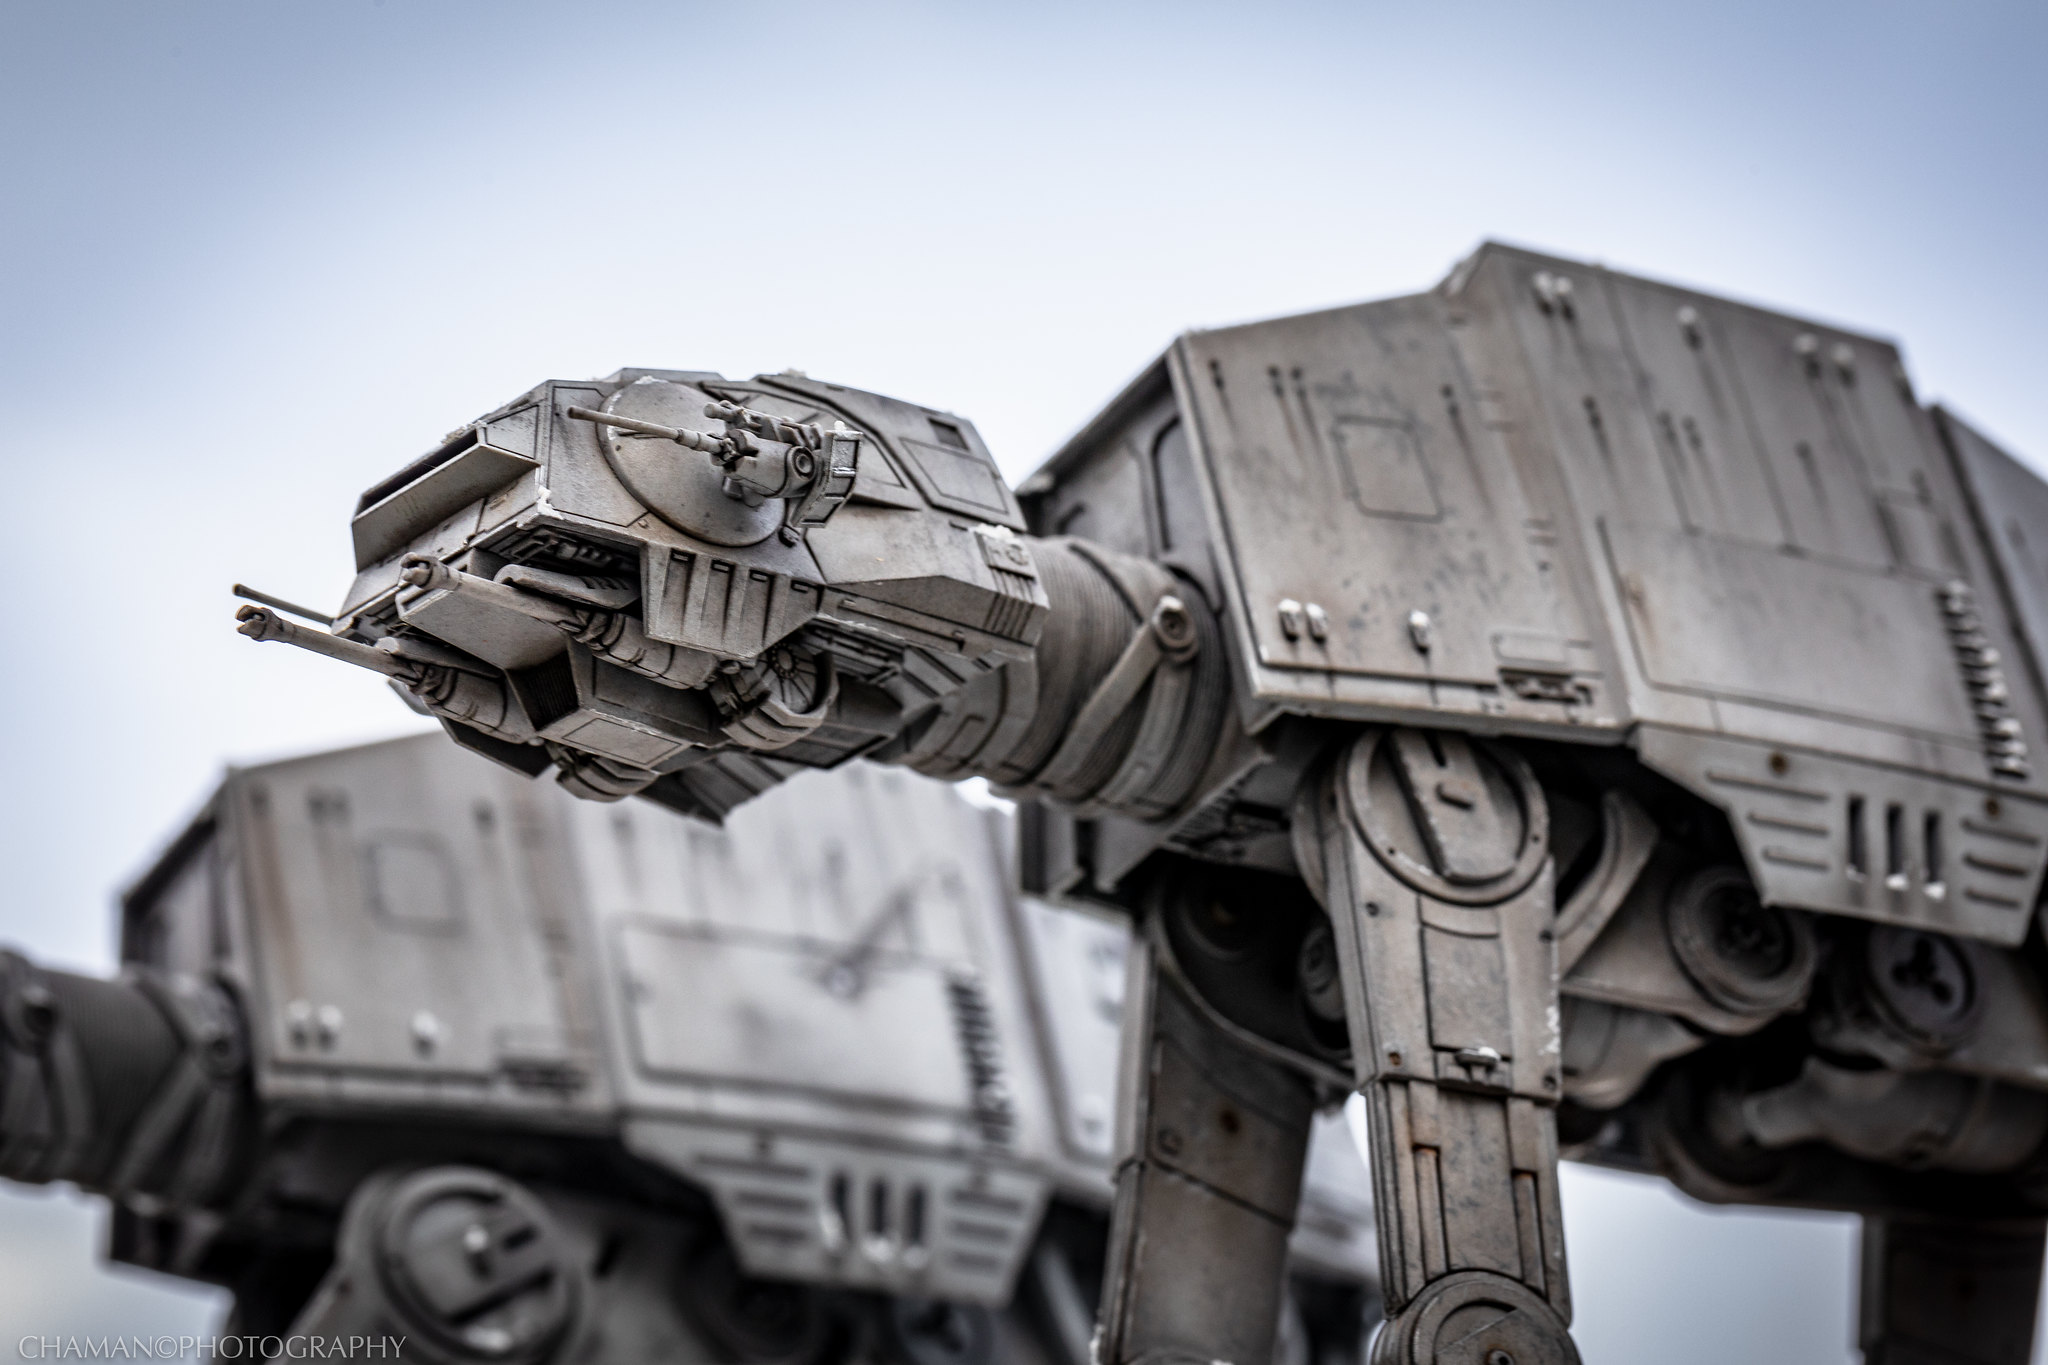
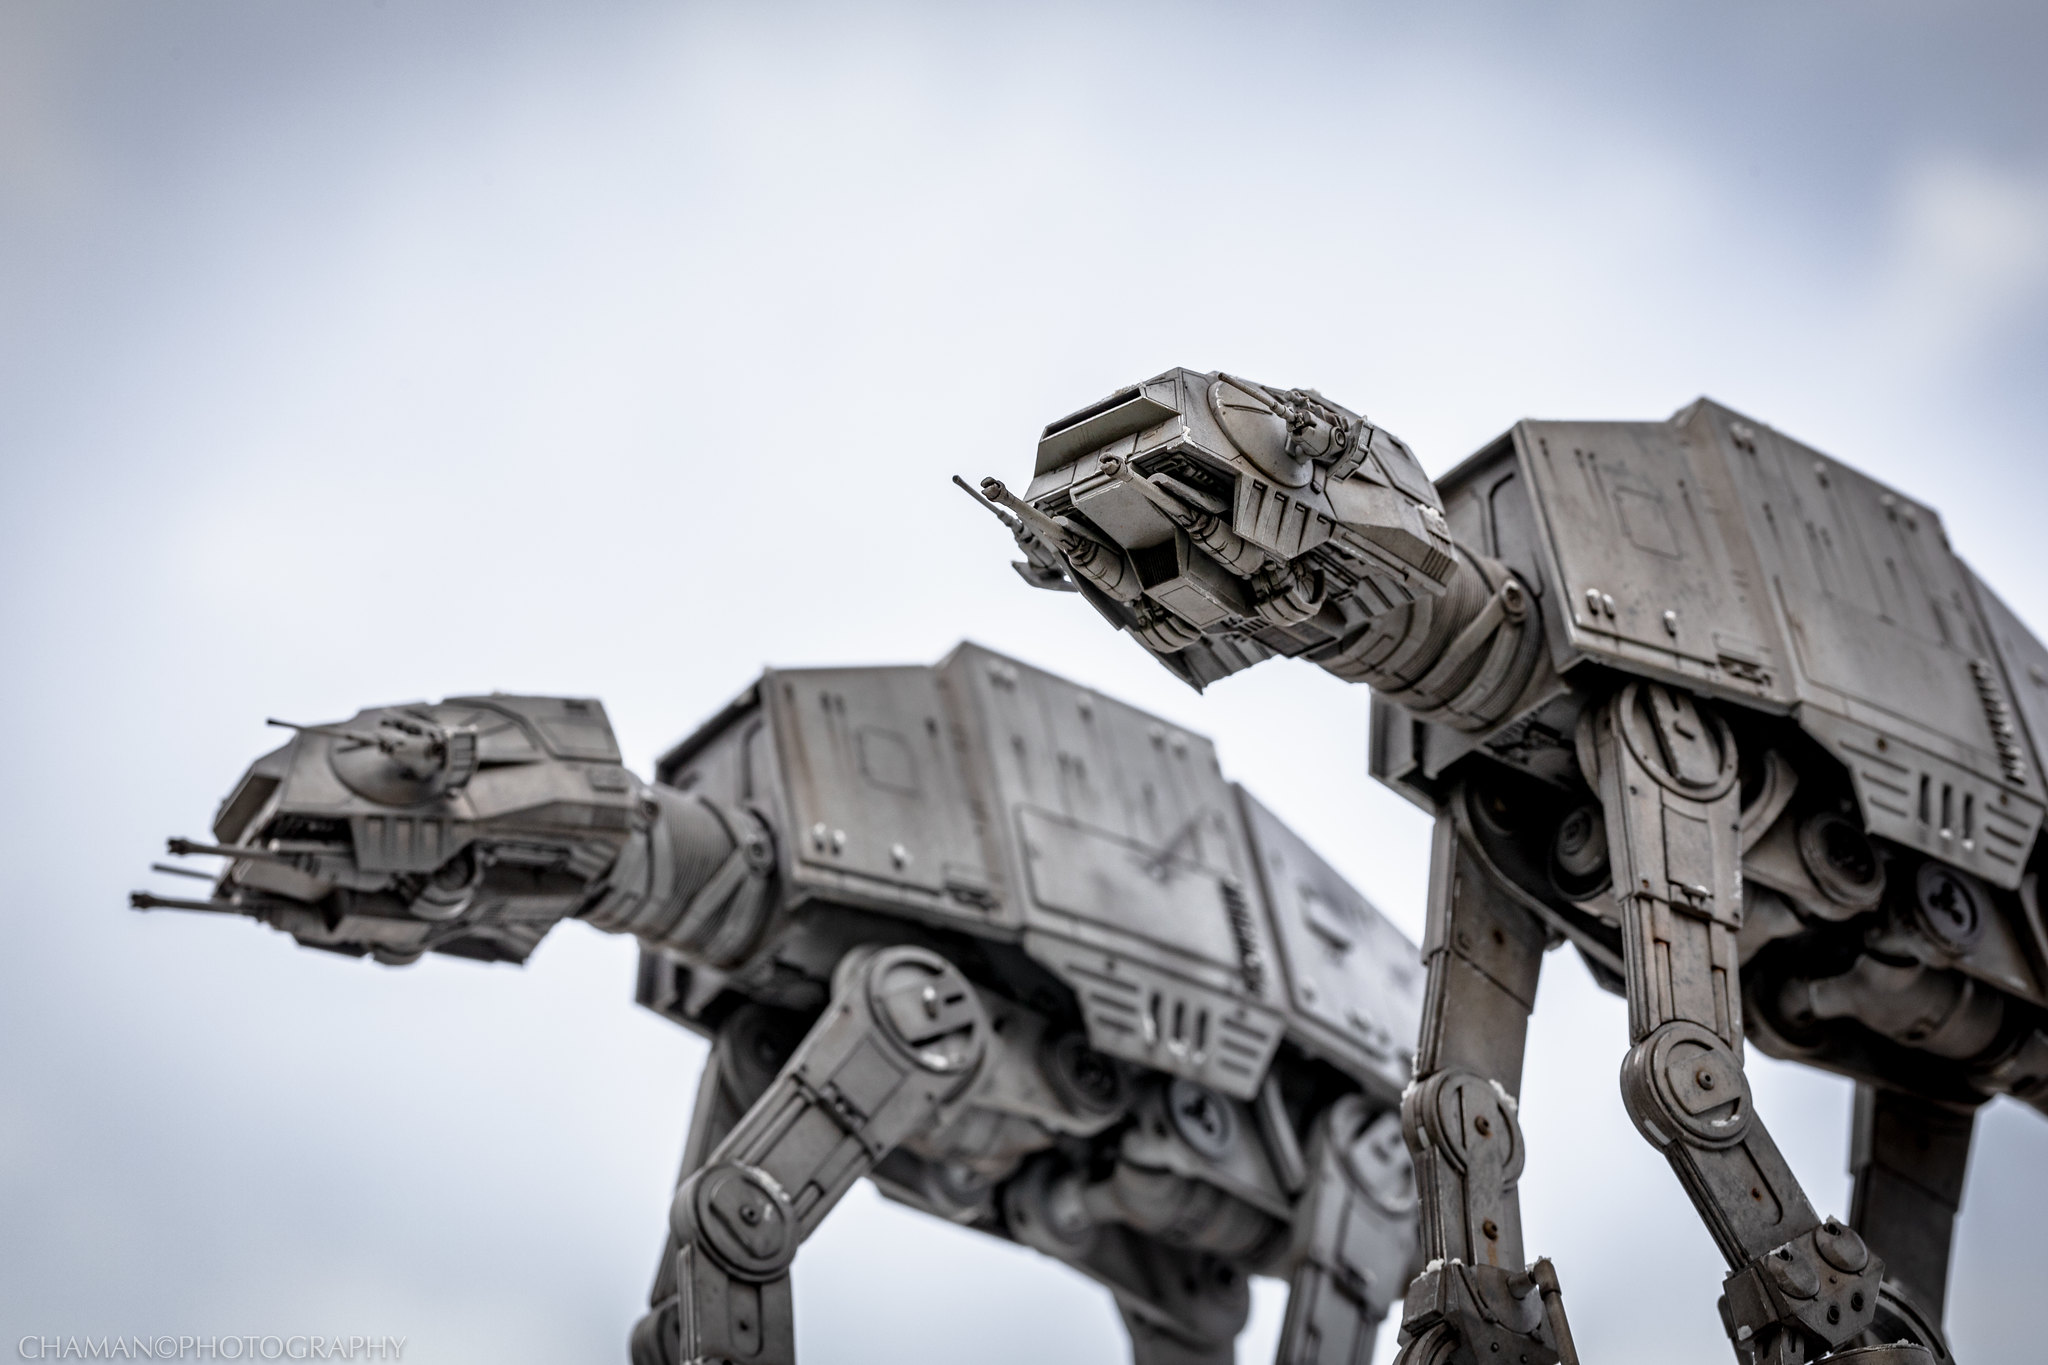
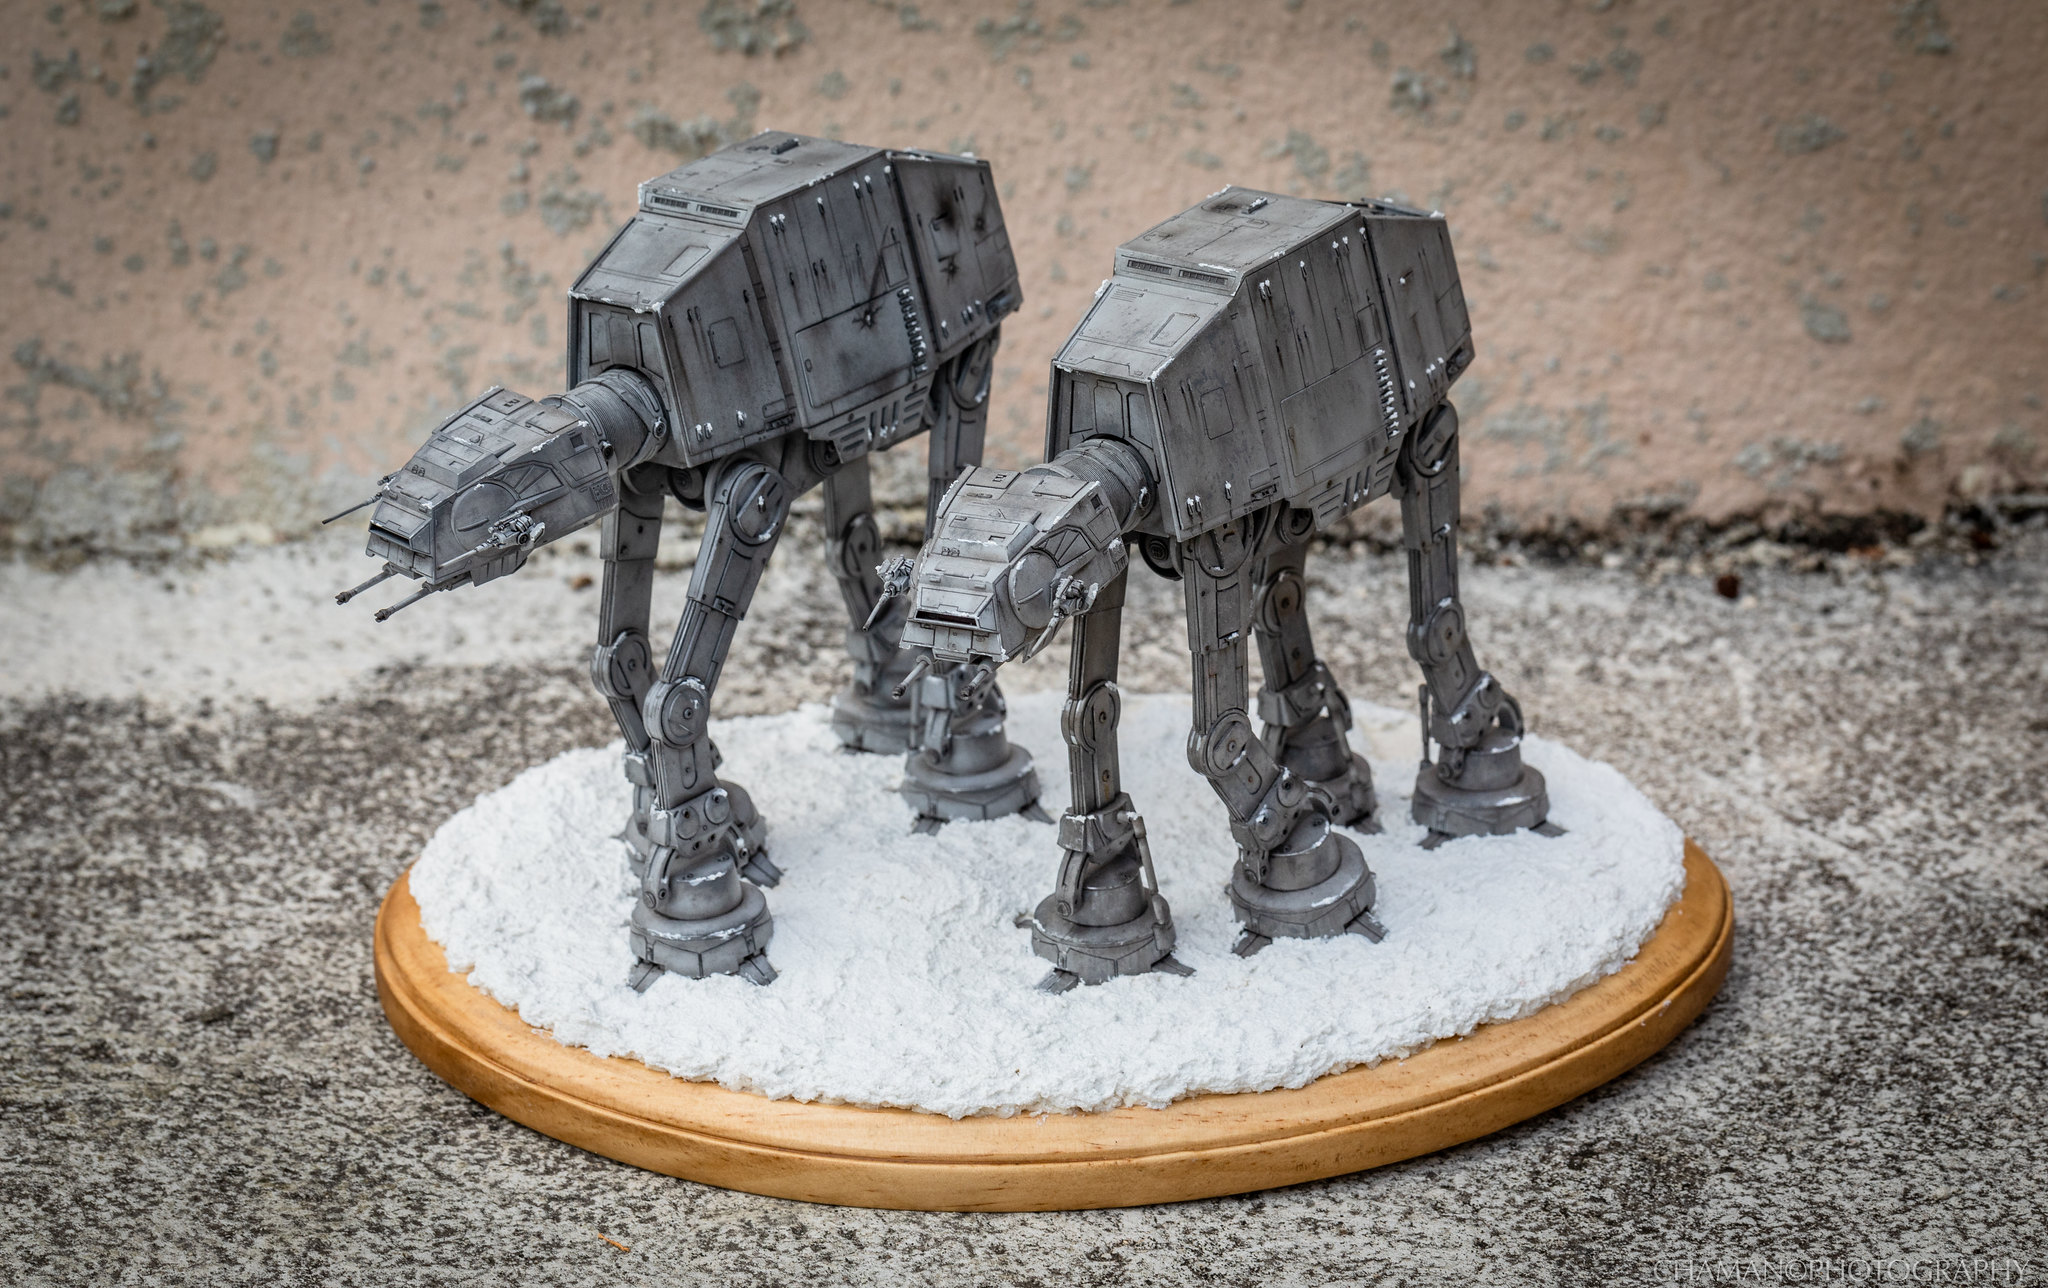
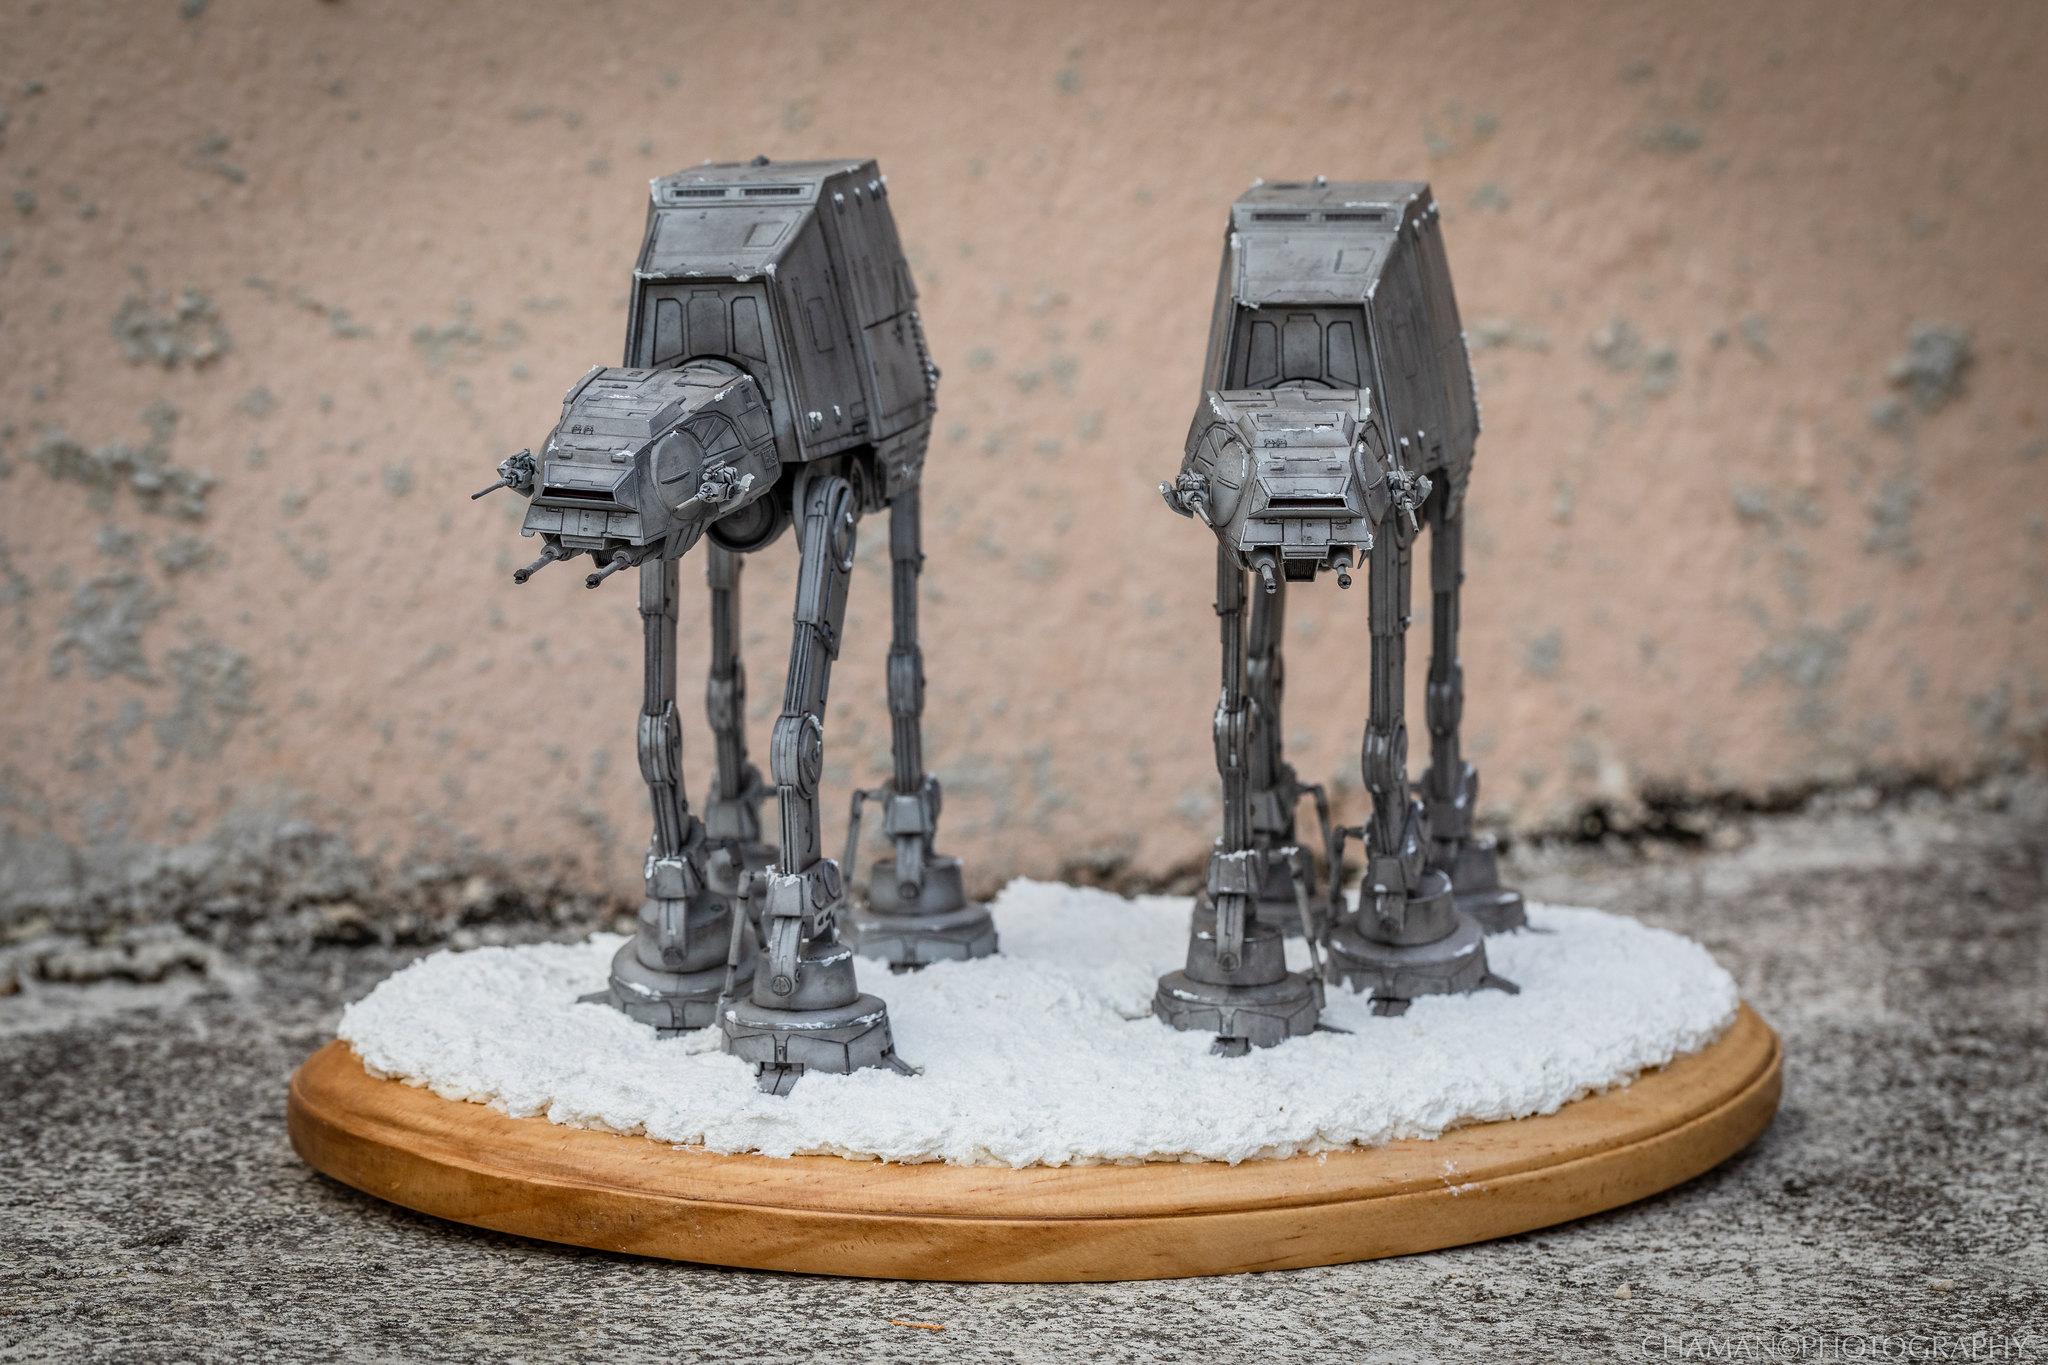
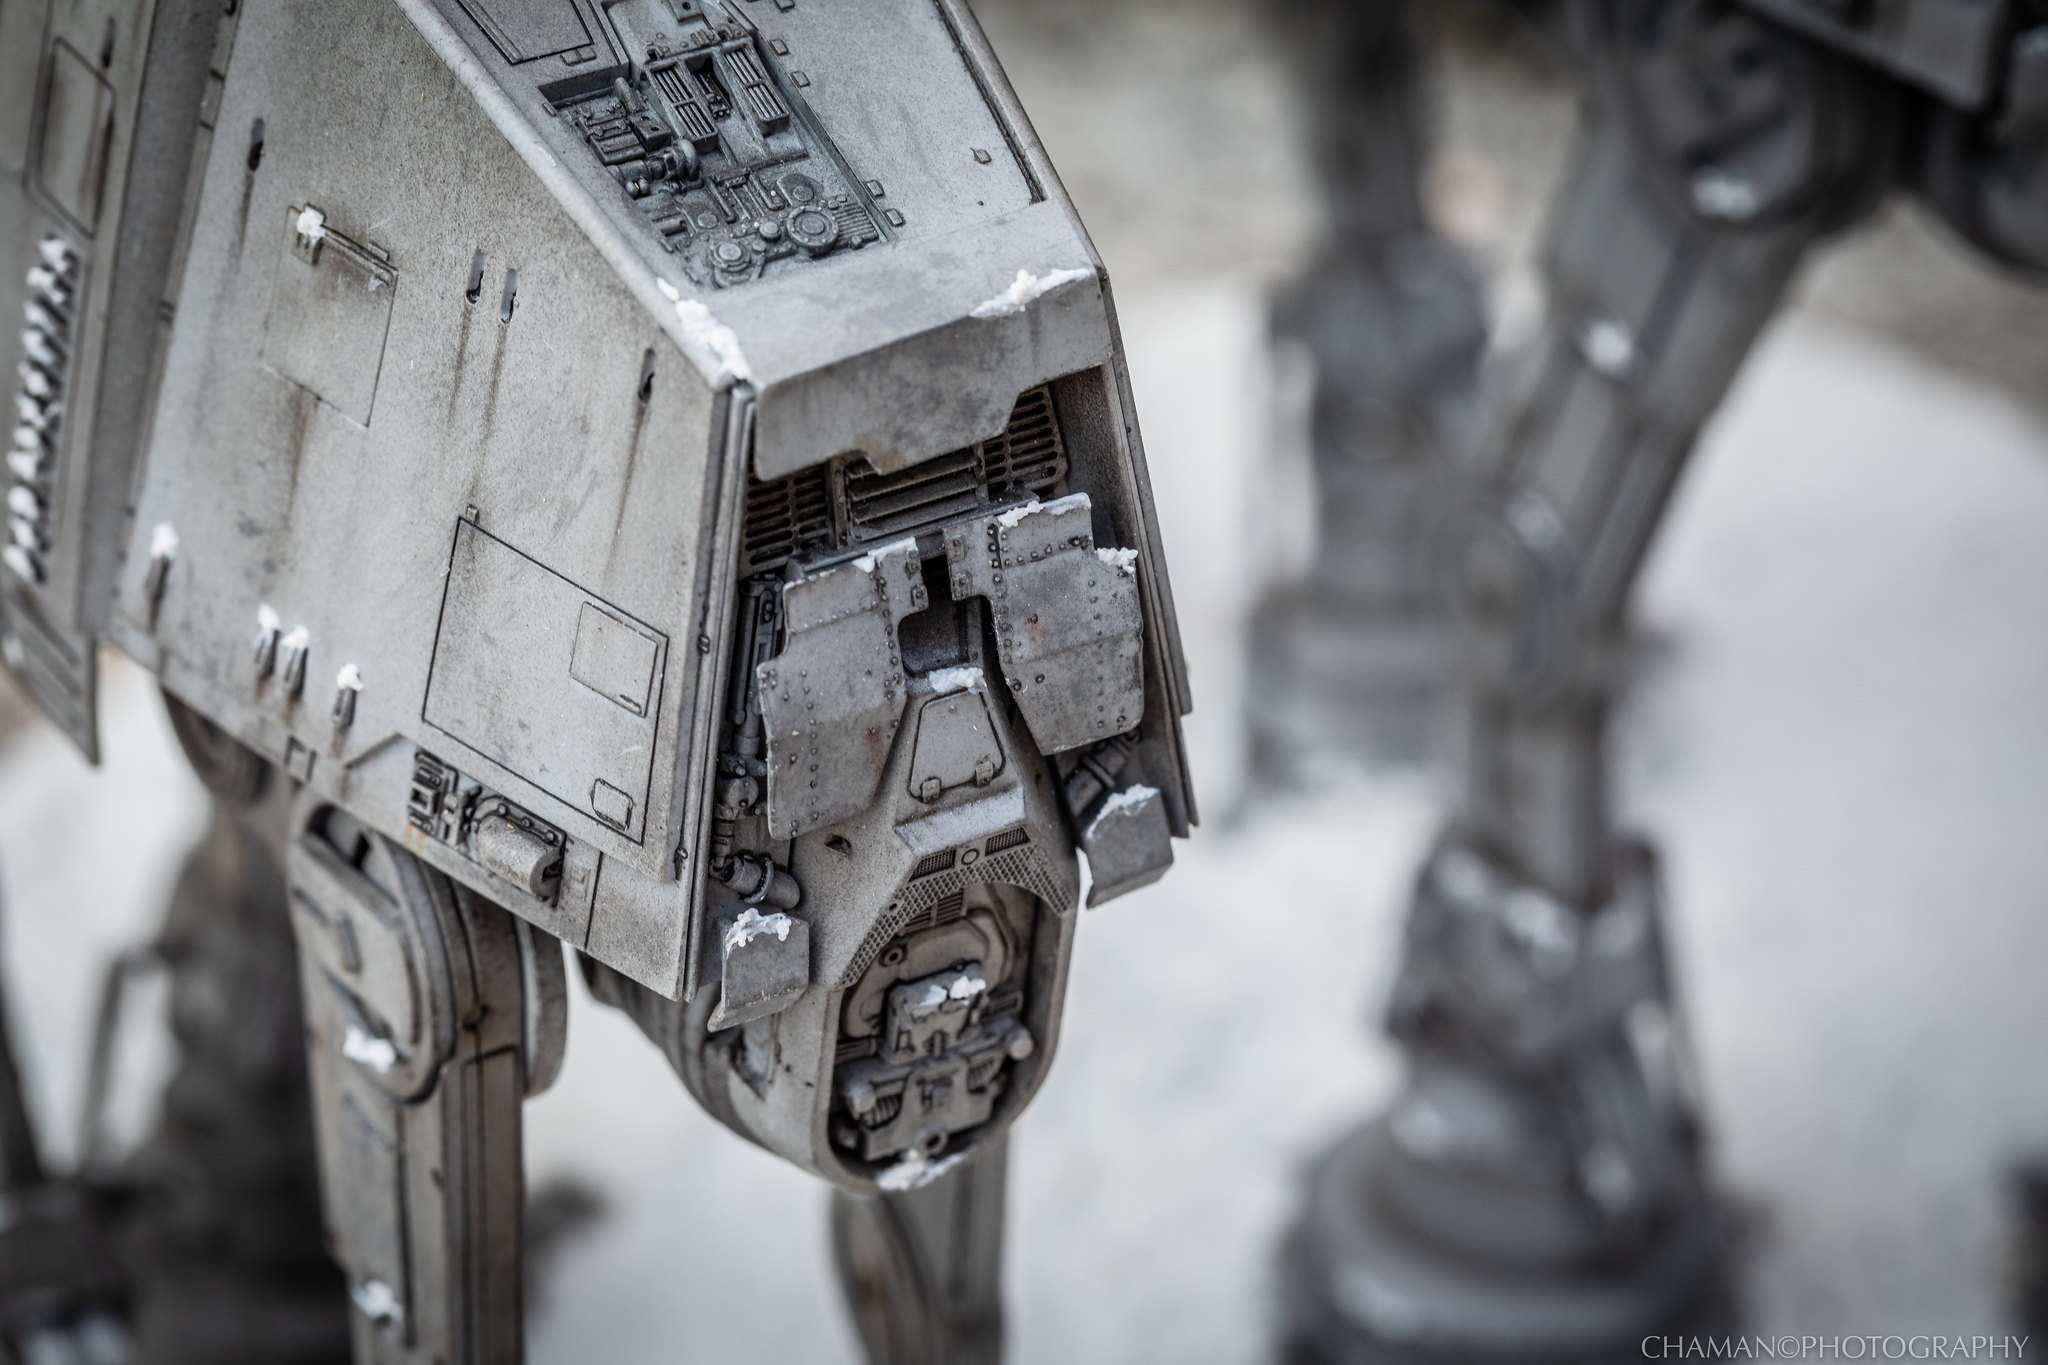
This one is finally done. First time working with this Vallejo snow material and hope it wont be the last. Tried too get these as realistic as possible for the final photographic image in mind. Hope you like.

269A1109 by Oscar Baez Soria, on Flickr

269A1113 by Oscar Baez Soria, on Flickr

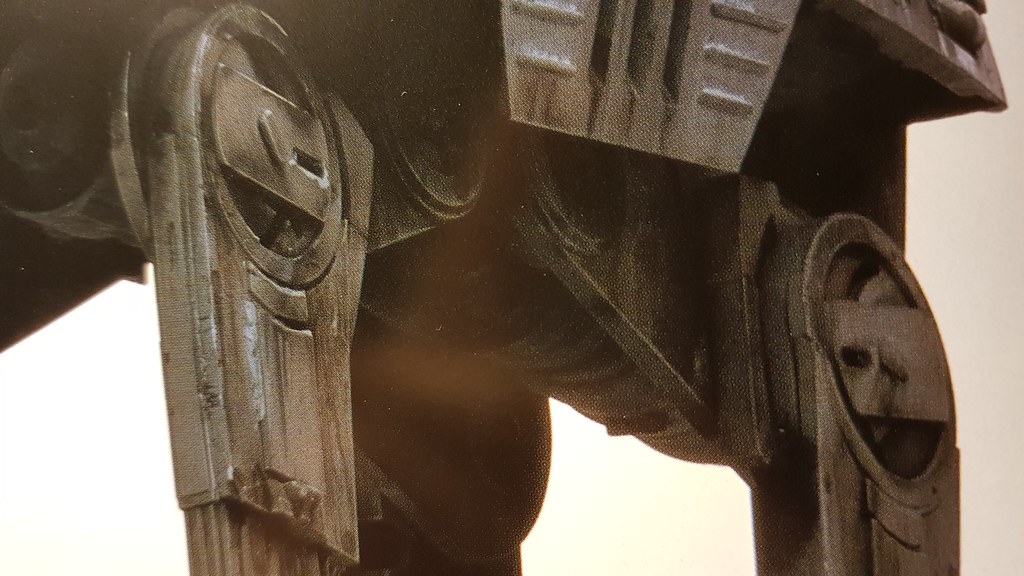
269A1115 by Oscar Baez Soria, on Flickr

269A1117 by Oscar Baez Soria, on Flickr

269A1119 by Oscar Baez Soria, on Flickr

269A1121 by Oscar Baez Soria, on Flickr

269A1125 by Oscar Baez Soria, on Flickr


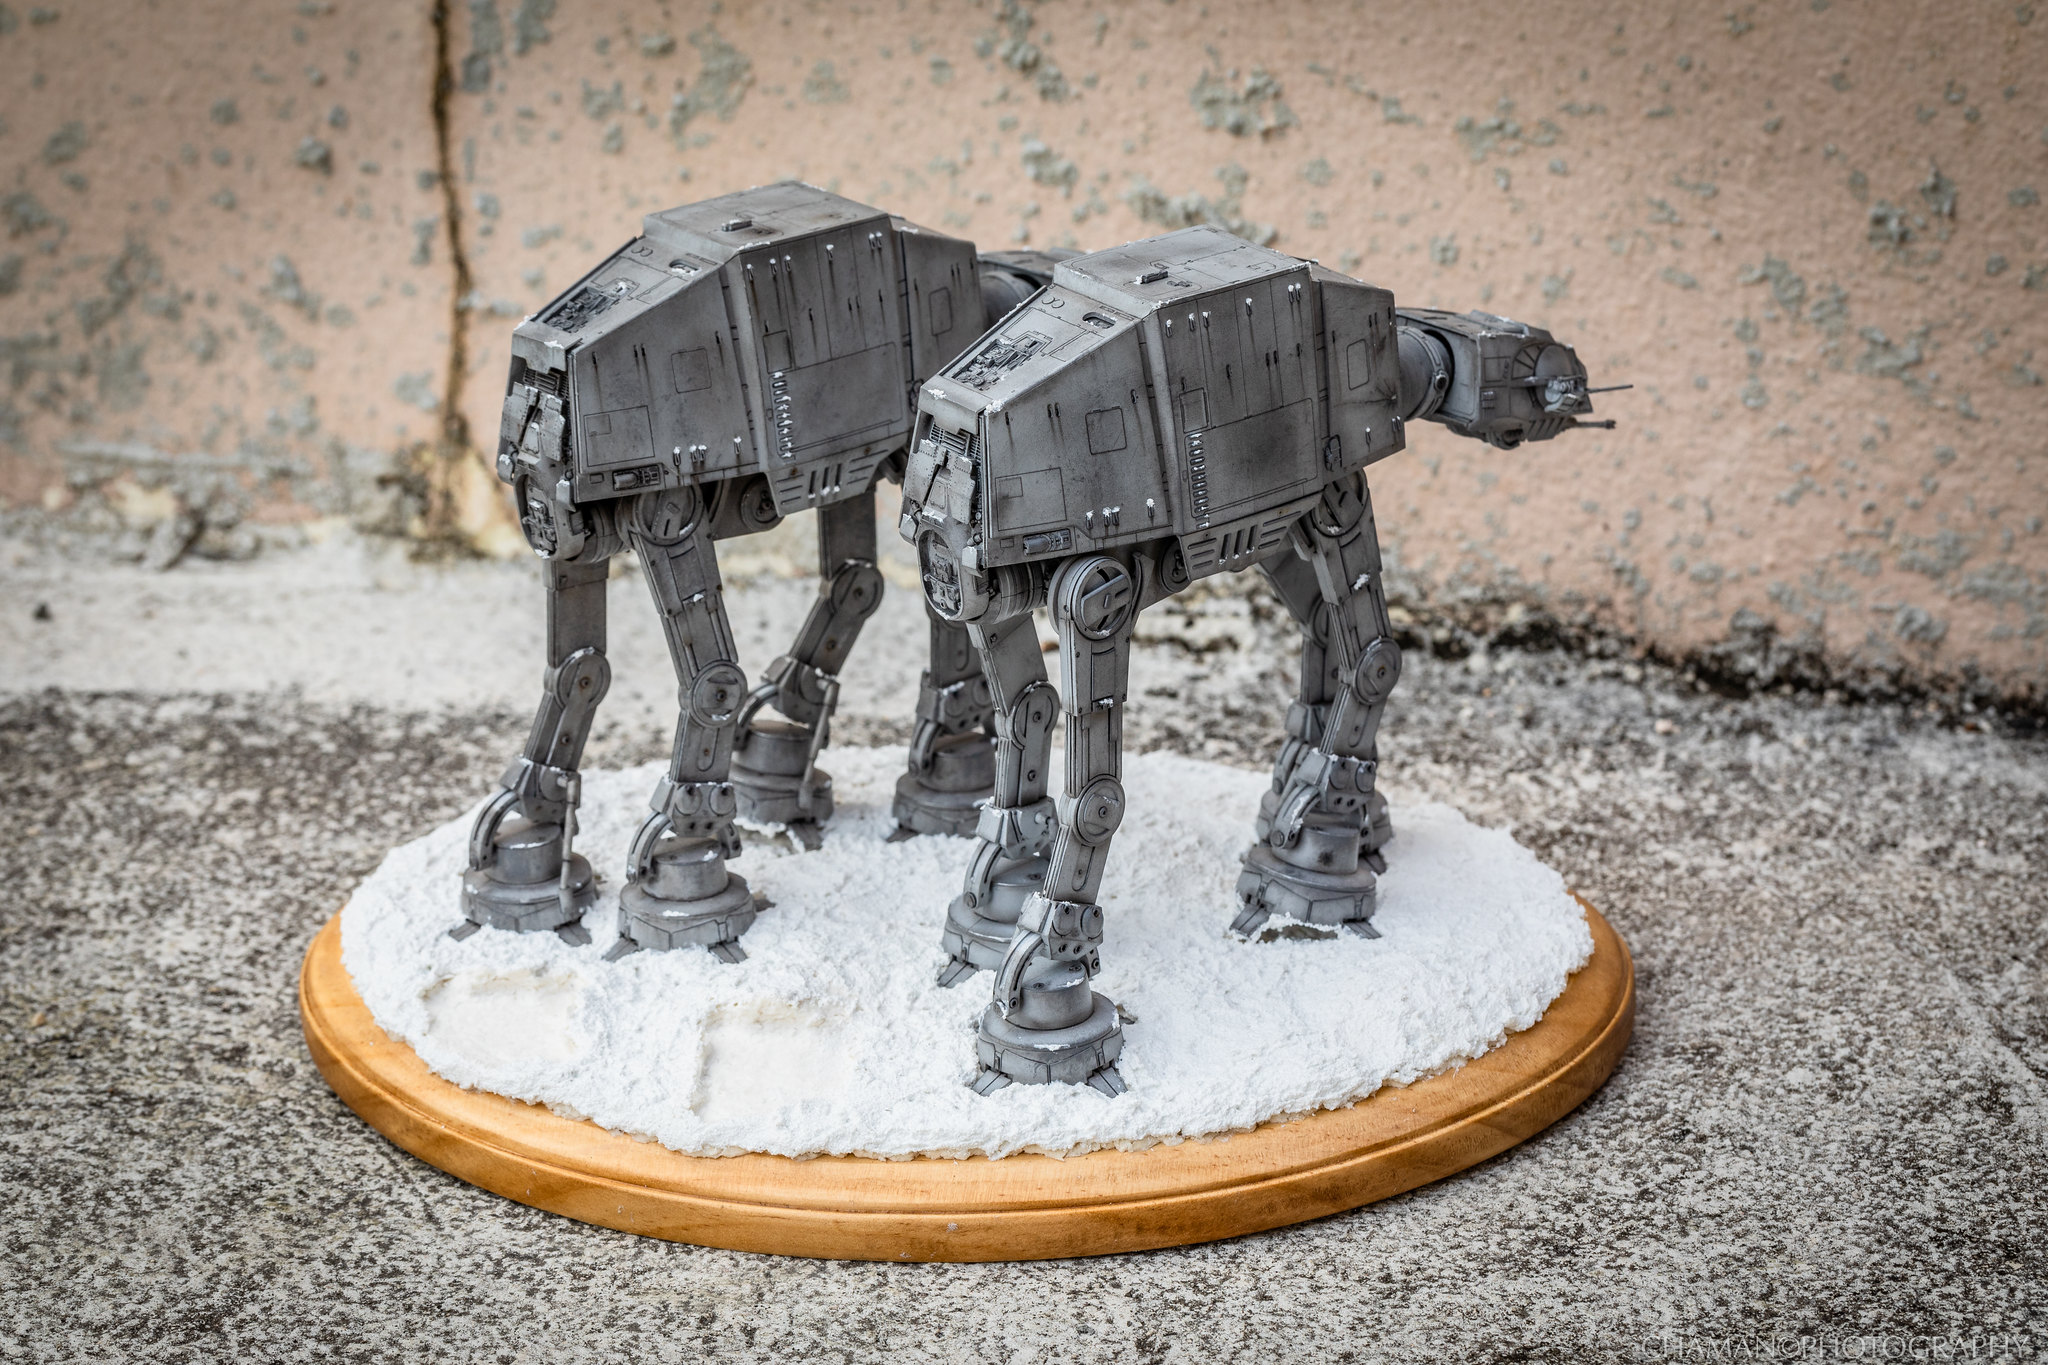
How they really look:

269A1131 by Oscar Baez Soria, on Flickr

269A1137 by Oscar Baez Soria, on Flickr

269A1145 by Oscar Baez Soria, on Flickr

269A1152 by Oscar Baez Soria, on Flickr
 
Fantastic weathering on the armour, subtley uneven and worn/weathered!

But, (and please take this as constructive criticism), i do question the snow deposits on the body and legs. On a vehicle that size, those bits of snow would be quite large, and with the lurching, thudding, high impact way the AT-AT moves, i dont think that amount of snow would stay in those locations.

If it was standing still, at a depot, or staging ground scenario, where its not moving, then yes. But in motion, i wouldnt expect to see any snow on it except around the feet.

Please dont take offence, i just always try and think in practical terms when it comes to weathering.

Review these still images from the movie and various official artworks from the movie and you will see snow in those places. Star Wars weathering not always follow logic. See this image:

yvNps.jpg

In those places there is indeed snow. Also images from official reference books (detailed images from actual props from the movies)

20180702_235316 by Oscar Baez Soria, on Flickr

20180702_235337 by Oscar Baez Soria, on Flickr

If I were to do it again I would put snow in those same places. The only thing I would try is to control the amount better but still in the same places. Star wars weathering is not practical. Its a mix of art and fantasy. Thanks for looking.
 
Review these still images from the movie and various official artworks from the movie and you will see snow in those places. Star Wars weathering not always follow logic. See this image:

View attachment 828323

In those places there is indeed snow. Also images from official reference books (detailed images from actual props from the movies)

https://farm2.staticflickr.com/1828/42447682494_77e7627607_b.jpg20180702_235316 by Oscar Baez Soria, on Flickr

https://farm1.staticflickr.com/845/42447687844_4b0672b9c2_b.jpg20180702_235337 by Oscar Baez Soria, on Flickr

If I were to do it again I would put snow in those same places. The only thing I would try is to control the amount better but still in the same places. Star wars weathering is not practical. Its a mix of art and fantasy. Thanks for looking.


Movie accurate, if not quite reality accurate, thats all good :)
 
Looking great!

One question - any concern over the stride structure, or desire to make it movie-accurate? The stopmo models were animated like an elephant (left-left, right-right), and only the leg currently taking a step has a bend at the knee (an intentional limitation due in part to the required stability of the model as the animator inched it forward - non-stepping legs were locked at the knee with those feet secured to the table so the body could be pushed forward).

Again, great stuff!
 
Congratulations at being a master in two fields ( that we know of ! ) ... beautiful work ! :p .
Thanks for sharing .


:cheersGed
 
Looking great!

One question - any concern over the stride structure, or desire to make it movie-accurate? The stopmo models were animated like an elephant (left-left, right-right), and only the leg currently taking a step has a bend at the knee (an intentional limitation due in part to the required stability of the model as the animator inched it forward - non-stepping legs were locked at the knee with those feet secured to the table so the body could be pushed forward).

Again, great stuff!

As you said they were limited by the technology of the time. If you watch the new AT-M6 from TLJ their movement is more fluid and organic. Pretty sure the AT-AT would have been made to move like that if ILM had the means then. I prefer seen them moving more fluidly myself so I went with that. HEre are the AT-M6s:

EP8_CA_000270.0.jpg

Their knees bend in a more organic way.

Thanks guys! Appreciate the props!
 
I am most impressed with your placement of the walker legs...which seems to be one of the hardest things for people to get right. lol. Great little diorama!
 
You know, I'm no art critic, but I know what I hate.
I don't hate this.

Very nice work. The images, where you can't see the whole base, really evoke the visuals from Empire.
 
This picture is wallpaper worthy.
How did you do the weathering? Everything looks so... in scale! My favorite walkers, so far.

Is the Vallejo snow stuff good? Thought about using it for a diorama, too.


Thanks for the props!

First there is no painted basecoat! I think the original plastic color used by Bandai is very close to the real thing. taking advantage of this slippery shiny surface I applied a selective black wash to accentuate all its details. then this was sealed with a clear matte coat. This step provides a nice surface for the whole weathering steps and gets rid of the toy like shiny surface. Using various combinations of powdered pastels oils and dry brushing I added graphite dust that creates a dulled bare metal look specially on the sharp edges where you expect wear. Using an old toothbrush and dark gray paint some sprinkles were added to create tan interesting texture. This is an old technique used by ILM. A final clear matte coat was given. As a final touch some shiny fresh scratches were added with Vallejo Chrome here and there. This is left as a final step since applying clear coat over this type of shiny bare metal effect tends to tone down the shine of it to a clear gray, effectively killing the effect.

I try to recreate the original prop but always try to include my own ideas and creativity. Going for an exact copy is great but some what not as fun! At least IMO.

The Vallejo snow for dioramas is a great and easy to use material. It dries hard but when wet clean up very easily with water/ I found that applying with wooden sticks and toothpicks was the best way to control it specially over small details. A Dremel was used to create some damage too.

20180612_163039 by Oscar Baez Soria, on Flickr

20180609_180549 by Oscar Baez Soria, on Flickr

- - - Updated - - -

You know, I'm no art critic, but I know what I hate.
I don't hate this.

Very nice work. The images, where you can't see the whole base, really evoke the visuals from Empire.

Glad you dont hate it then...LOL!
 
Last edited:
To anyone interested in seeing a bit more details of these evil twins the following were some test shots I did of them before attaching them to the base. No snow on these and they look more like been in Endor perhaps? LOL!

269A0996 by Oscar Baez Soria, on Flickr

269A0991 by Oscar Baez Soria, on Flickr

269A0998 by Oscar Baez Soria, on Flickr

269A1002 by Oscar Baez Soria, on Flickr

269A1010 by Oscar Baez Soria, on Flickr

269A1013 by Oscar Baez Soria, on Flickr

269A1035 by Oscar Baez Soria, on Flickr

269A1008 by Oscar Baez Soria, on Flickr

269A1037 by Oscar Baez Soria, on Flickr

269A1041 by Oscar Baez Soria, on Flickr

These are not as dramatic as the final shots but thought they show a few more details of them. The final shots also prove that using the proper light and angle a small prop can be made to look much bigger than it actually is (even if the panel lines were highlighted with selective wash like it has been wrongfully said before....LOL!) Hope you like them too!
 
Last edited:
Thanks for the props!

First there is no painted basecoat! I think the original plastic color used by Bandai is very close to the real thing. taking advantage of this slippery shiny surface I applied a selective black wash to accentuate all its details. then this was sealed with a clear matte coat. This step provides a nice surface for the whole weathering steps and gets rid of the toy like shiny surface. Using various combinations of powdered pastels oils and dry brushing I added graphite dust that creates a dulled bare metal look specially on the sharp edges where you expect wear. Using an old toothbrush and dark gray paint some sprinkles were added to create tan interesting texture. This is an old technique used by ILM. A final clear matte coat was given. As a final touch some shiny fresh scratches were added with Vallejo Chrome here and there. This is left as a final step since applying clear coat over this type of shiny bare metal effect tends to tone down the shine of it to a clear gray, effectively killing the effect.

It's incredible that these have zero paint on it.
The weathering is heavy, but it doesn't look overweathered, which is pretty hard to achieve at this tiny scale.
Will definitely use these as a template when i'm gonna build mine.
 
This thread is more than 5 years old.

Your message may be considered spam for the following reasons:

  1. This thread hasn't been active in some time. A new post in this thread might not contribute constructively to this discussion after so long.
If you wish to reply despite these issues, check the box below before replying.
Be aware that malicious compliance may result in more severe penalties.
Back
Top