xl97
Master Member
After some time looking for the correct font...
here: http://www.therpf.com/showthread.php?t=261968&page=2&highlight=Tony+Stark+keyboard
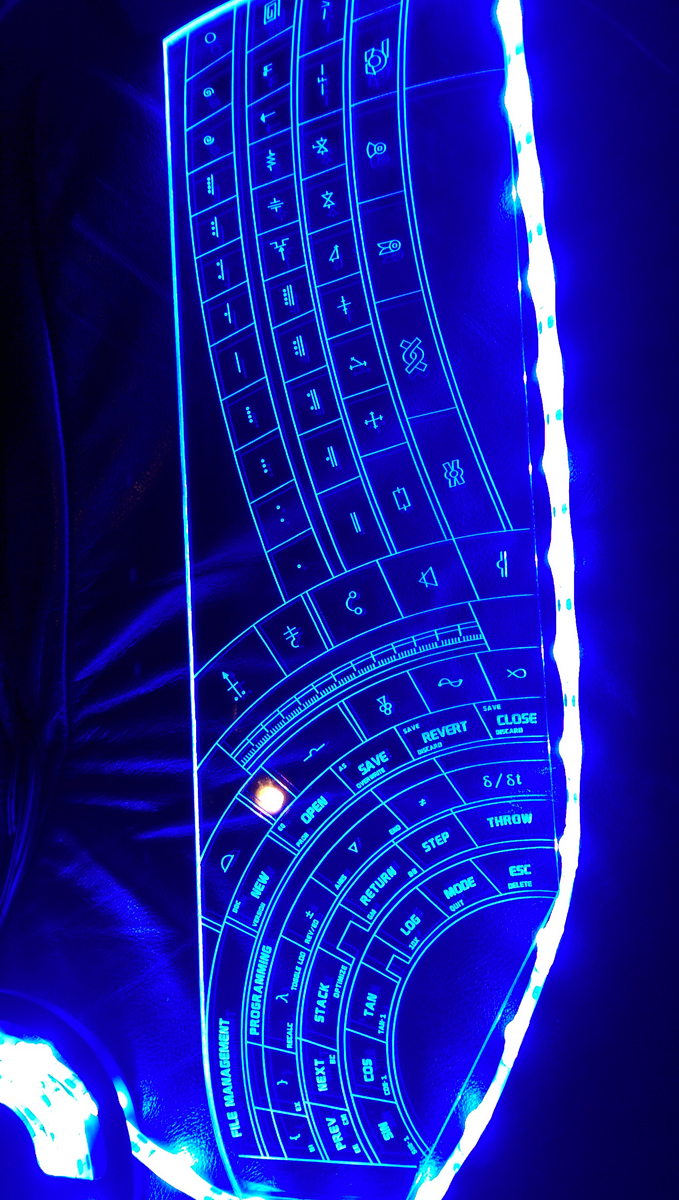
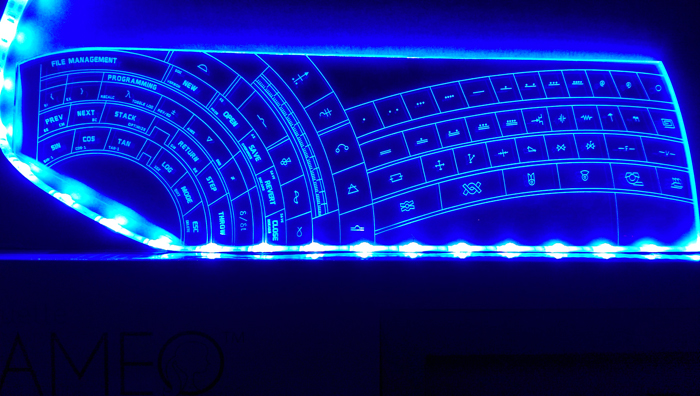
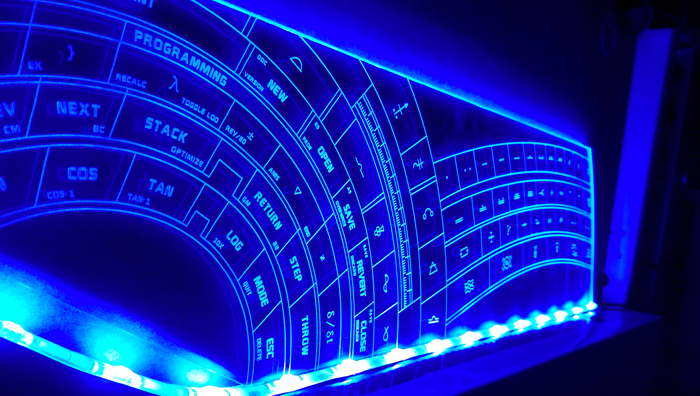
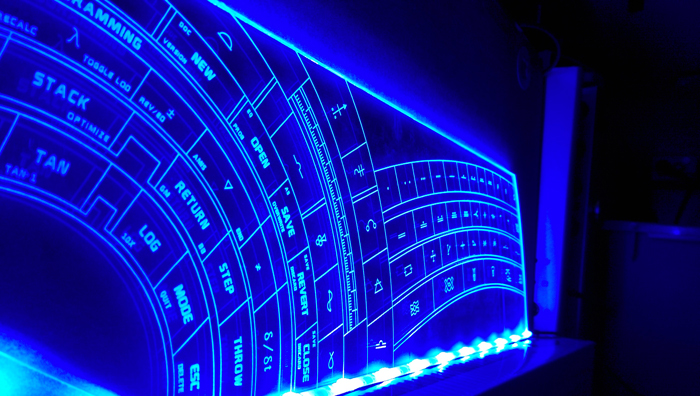
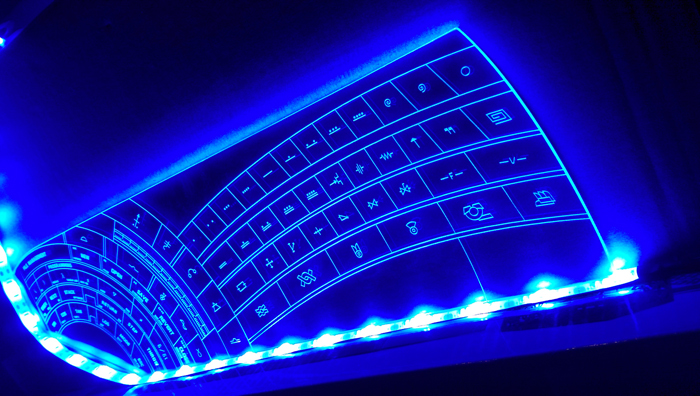
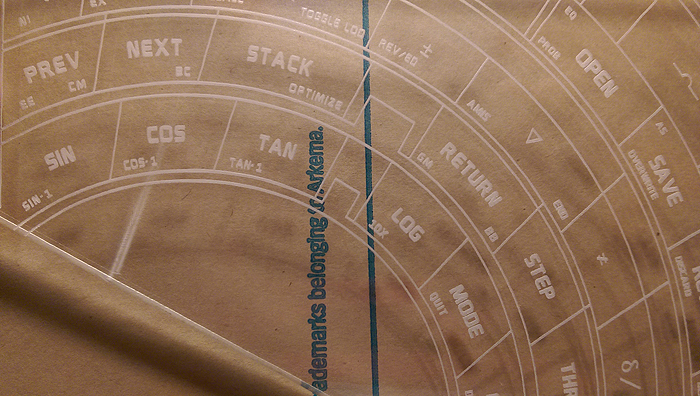
I did a mock run using my original artwork instead...
*I'll need to do some more tests, since it took a very long time to engrave.. so I'll need to play with some settings to see if I can get same quality but in less time.
I use a scrap piece of 1/4 acrylic (cast) for the initial tests..
I feel it came out great!

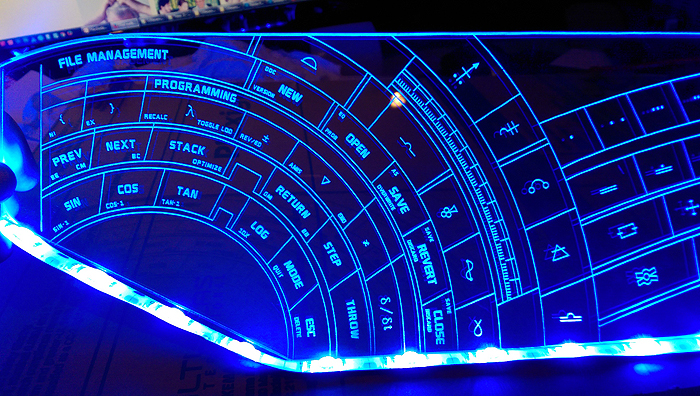
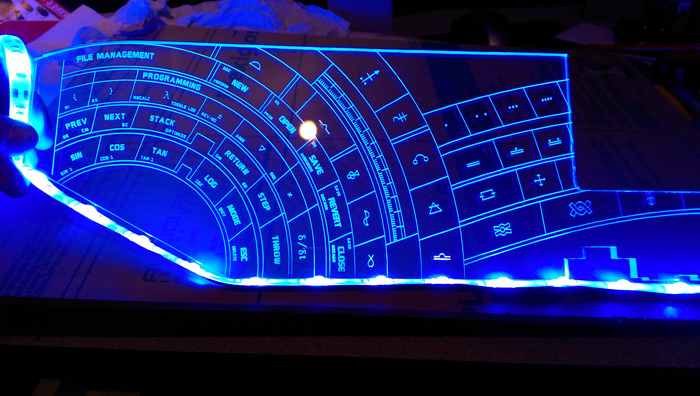
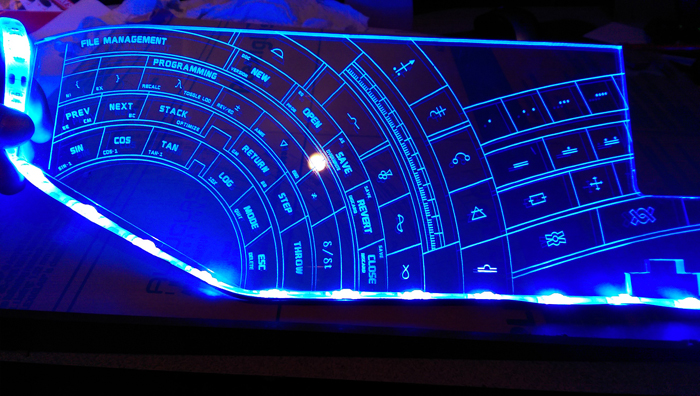
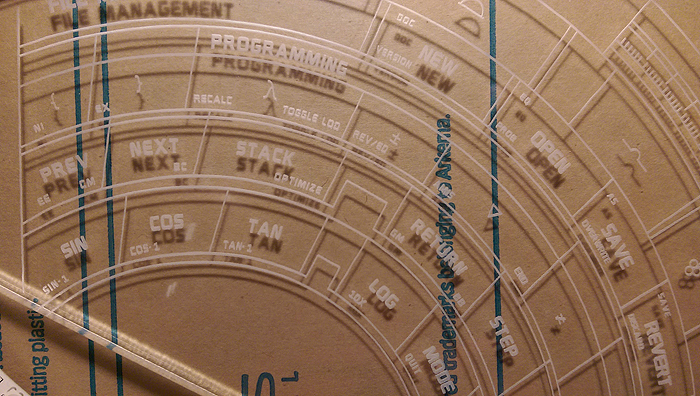
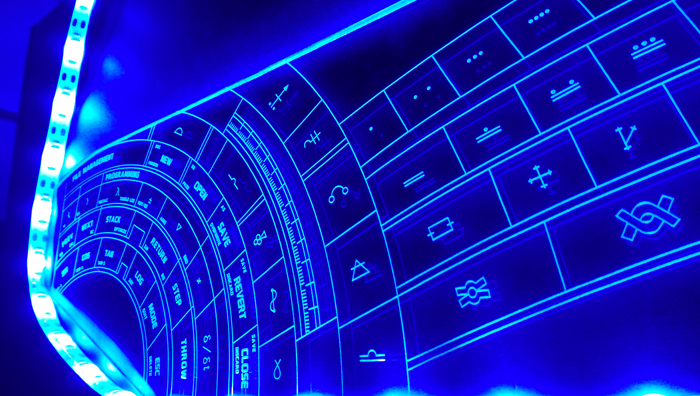
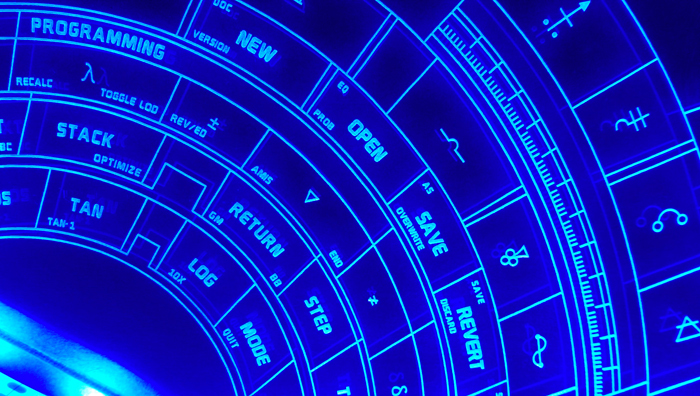
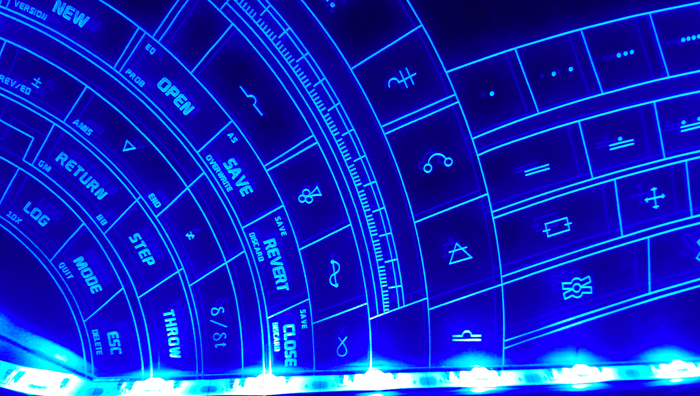
feedback appreciated.. anyone see something I may have missed? errors? typos?...etc
Next.. I'll do some:
* more tests in acrylic with different settings to see about getting better run times.
* I have never molded/cast anything.. might be a good project to start with to make the keyboard pieces.
* decide on how to make electronics function.. (I have no issues technically, I just need to finalize a feature list)
anyone has some suggestions on the demo piece above.. let me know.
If anyone wants to chit-chat about the electronics side of things.. feel free to post.
Most likely Arduino based.. leds lit-up.. motion detection..etc (probably similar to Ryan's (The RealTonyStark) project in behavior)
Thanks for looking!
here: http://www.therpf.com/showthread.php?t=261968&page=2&highlight=Tony+Stark+keyboard
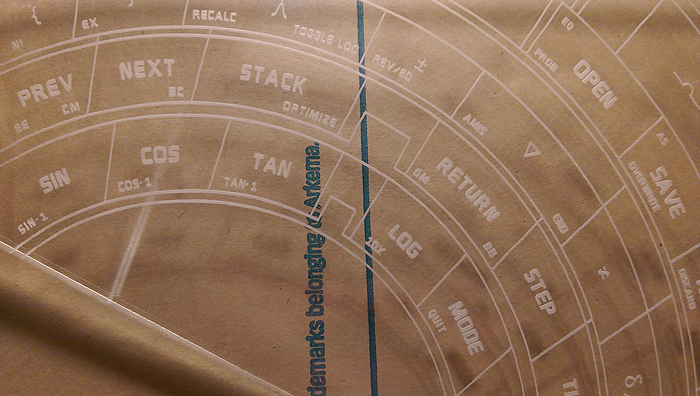
I did a mock run using my original artwork instead...
*I'll need to do some more tests, since it took a very long time to engrave.. so I'll need to play with some settings to see if I can get same quality but in less time.
I use a scrap piece of 1/4 acrylic (cast) for the initial tests..
I feel it came out great!
feedback appreciated.. anyone see something I may have missed? errors? typos?...etc
Next.. I'll do some:
* more tests in acrylic with different settings to see about getting better run times.
* I have never molded/cast anything.. might be a good project to start with to make the keyboard pieces.
* decide on how to make electronics function.. (I have no issues technically, I just need to finalize a feature list)
anyone has some suggestions on the demo piece above.. let me know.
If anyone wants to chit-chat about the electronics side of things.. feel free to post.
Most likely Arduino based.. leds lit-up.. motion detection..etc (probably similar to Ryan's (The RealTonyStark) project in behavior)
Thanks for looking!
")