Westies14
Master Member

For reference, we utilized three different sets of HD images from the hero pack at Sony’s archives where it exists in its Ghostbusters 2 state. The Venkman pack was more heavily modified than the other hero packs which were refitted for the sequel, as it was the pack they chose to clay up and mold to create the lightweight GB2 semi-hero packs and GB2 stunt packs. Many parts were removed, replaced, or modified in some way. In order to dial in our build to the pack’s original features, we referenced production photos from the first film as well as blu-ray frames and a 4k scan of a 35mm print of the movie. I know there are some killer replicas out there, including some which have never been shared publicly, but I truly feel we’ve included at least a few tiny details which have not been replicated before thanks to the quality of our reference material.
The pack features every found item we were able to get our hands on, and I believe the only identified items which aren’t part of it are the original bellows (we had one on hand to compare to, though), the heatsink (sadly, only a handful of originals have been found) and the thrower’s bargraph (which can be difficult to find at all, and difficult to obtain individually or as a civilian should you find one - and even then the price tag is over $1k). Here are some of the found items on the build:
- Vintage G1 Dark Grey 4mm Legris Elbows (x3)
- Vintage Brass Clippard Hex Fittings (x2)
- Clippard Brass Hose Barbs (x5)
- Vintage Legris Square Fitting
- Vintage Clippard & Legris Tubing
- Modern Orange Sloan Panel Indicator
- Vintage “Milky White” Sloan Panel Indicators (x2)
- Vintage 4mm Legris Banjo Elbows with Brass Bolts (x2)
- Vintage Clippard R-331 Minimatic Valve
- Vintage Clippard R-701 Minimatic Valve
- Vintage 3-Part Grey Raytheon Crank Knob
- Arcolectric Red Panel Indicator Lamp
- Arcolectric Clear Panel Indicator Lamp
- Vintage Black Momentary Button
- Vintage Dark Red Momentary Button
- Vintage UMPCO 1.25” P-Clamp
- Vintage LC-1 ALICE Pack Frame & Straps
- Vintage Switchcraft Female 4-Pin XRL Connector
- Vintage “No Ring” Dale PH-25 Resistor
- Vintage Dale RH-50 Resistor With Raised Oval Logo
- Vintage Pacific 25W Resistor
- 3/4” and 1/4” Split Loom Hose
- Vintage Dixon Ticonderoga Pencils (Booster Frame Master)
- Vintage Ribbed Mat (Booster Frame Master)
- MDF (Booster Frame Master)
- Vintage GE AG-1 Flash Bulb
I have to throw a nod to Kenny Brandzel, who parted with several of these components through his personal collection. He also fabricated the replica GB1 ribbon cable - I have several makers’ takes on this piece and his is the best by far. It’s precise and clean, and the clear shrink tubing holding it together even has a slightly yellow tone compared to others, giving it a slightly vintage look. The rest of the vintage parts came from my own supplies - if there’s something specific you’re looking for, reach out and I’ll see if I can help you out.
The pack also includes a few production-lineage pieces, cast by Neil Ward:
- Production-Cast Bumper
- Production-Lineage Grips (cast in brown resin, like the originals)
- Production-Cast Stunt Booster Frame (used as reference to create a new hero master)
We had help with machining, welding, and other aspects of metal fabrication. Some of the pieces I used were obtained years ago from members of the now-defunct GBNerds community; new parts were fabricated or CNC-machined by RJ Umowski of Freeky Geeky, Eric Gunther, Nathan Stevic, or Christopher Tillson. RJ was responsible for the thrower body and knobs, and I honestly can’t recommend him enough. He did over a dozen iterations of some small pieces, dialing in special requests or measurements with each pass until we approved each part. Once in hand, we did some additional machining, drilling, and shaping to better match the original parts seen on the hero packs. Everything which should be fabricated from aluminum on the build has been done in the same fashion as the originals:
- Ion Arm
- Ion Arm End Block
- Bellows (produced to spec by AJ Quick of GBFans through an actual bellows manufacturer)
- Beam Line
- Filler Tube
- Vacuum Tube
- N-Filter
- HGA
- Motherboard
- PPD
- Booster Tube
- Injector Tubes
- Injector Tube Bracket
- Ribbon Cable Clamp
- V-Hook (Male & Female)
- Thrower Body
- Trigger Box/Rear Instrument Bar
- Thrower Track
- Thrower Track Discs
- Front Handle/Ears
- Front Handle Inner Tube
- Tip Pop Mechanism
- Thrower Front Cylinder
- Thrower Rear Cylinder
- Trigger Tip/Ring
- Heatsink
- Switchcraft XLR/AC Plate
The electronics package is an updated version of the Mighty Microcontroller. It’s not as compact or easy to install as the GBFans system, but its sound functions elevate it above the current GBFans version for me - there’s a smoother transition between sounds, some different functionality. Both vendors are offering updated kits this year and it will be interesting to compare them for future builds! This pack includes white, orange, red and orange strobes, warm white LEDs in the power cell and cyclotron, vibration motor which runs when firing the thrower, a midrange woofer (rear facing) and midrange tweeter (forward facing) in the pack, an amplifier, ground loop isolator, and a very easy to use rechargeable LiPo battery pack which is charging anytime the pack is plugged in (the unit can also run from AC power per the buyer’s request) and which shuts itself off automatically before being fully discharged in order to preserve its longevity. We installed the cyclotron lights to run counter-clockwise, as Venkman's pack does in the film.
Last but certainly not least, we used Chris Bosh’s brilliant hero shell as a base for the pack body. We’ve had a few different iterations of the production lineage shell (Neil Ward owns that project, whose original source was a reassembled discarded GB1 stunt mold, and the copies from other sources are inferior copies of a reject casting made partway through the restoration), but due to generations of removal and resculpted sections, they’re not as close to the real thing as the Bosh replica. We made some minor changes to the shell based on our reference materials, but that’s not meant to take away from Chris’ efforts - he’s come closer than anyone to nailing the hero pack shells with his master. Usefully, Chris also referenced the Venkman hero (or the GB2 semi-heroes cast from it) in creating his shell, and as such he’s included some scratches and small details specific to this particular pack.
The rest of the fabrication and assembly was done in our workshop between Ernie Slaughter and myself (with an occasional hand or moral support from our buddy Jeff Schmidt and near-infinite patience from my wife, Julie!). We cut spacers for the motherboard/ALICE frame, drilled & tapped dozens of parts, riveted pieces together, installed electronics, created and cast a booster frame master from vintage parts (the “production-cast” frame making the rounds in the hobby has been debunked, as it’s too short overall and inaccurate in several other key details), sourced vintage pieces, applied labels and transfers, painted and weathered the component parts, and much more than Ernie or I can recall, I’m sure. To dial in this specific pack took many months - from late Fall to early Spring - and the wealth of incredible reference we had on hand really just made the work that much more intensive. Almost every aspect of the pack was revised more than once before we called it “done!”
The finish is multi-layered with flat grey primer, semi-gloss black paint, several light & dark washes, light and dark drybrushing, and hand-painted details. Some steel details were treated with a rust accelerant made from vinegar, salt, and hydrogen peroxide. Additional rust was applied with shavings from a steel bolt and dust from rusted steel wool. Subtractive weathering and surface wear was completed with various grits of sandpaper and steel wool. Fuller’s earth was applied and removed in order to give the pack the look of accumulated dust. Our goal was to give the pack the appearance of having gone through the first film’s production, and to have survived decades of handling and storage since.
Some of the other special features of this pack:
- Thin wire wrap on vacuum line split-loom hose near gearbox
- Engraved “3” on thrower ear, as seen on Venkman hero
- Braided steel anchor wire between pack and thrower
- Red/brown wire run through front handle (it was covered black in the GB2 repaint where it crosses between the ears), with clear heat shrink sheathing between front grip and thrower body
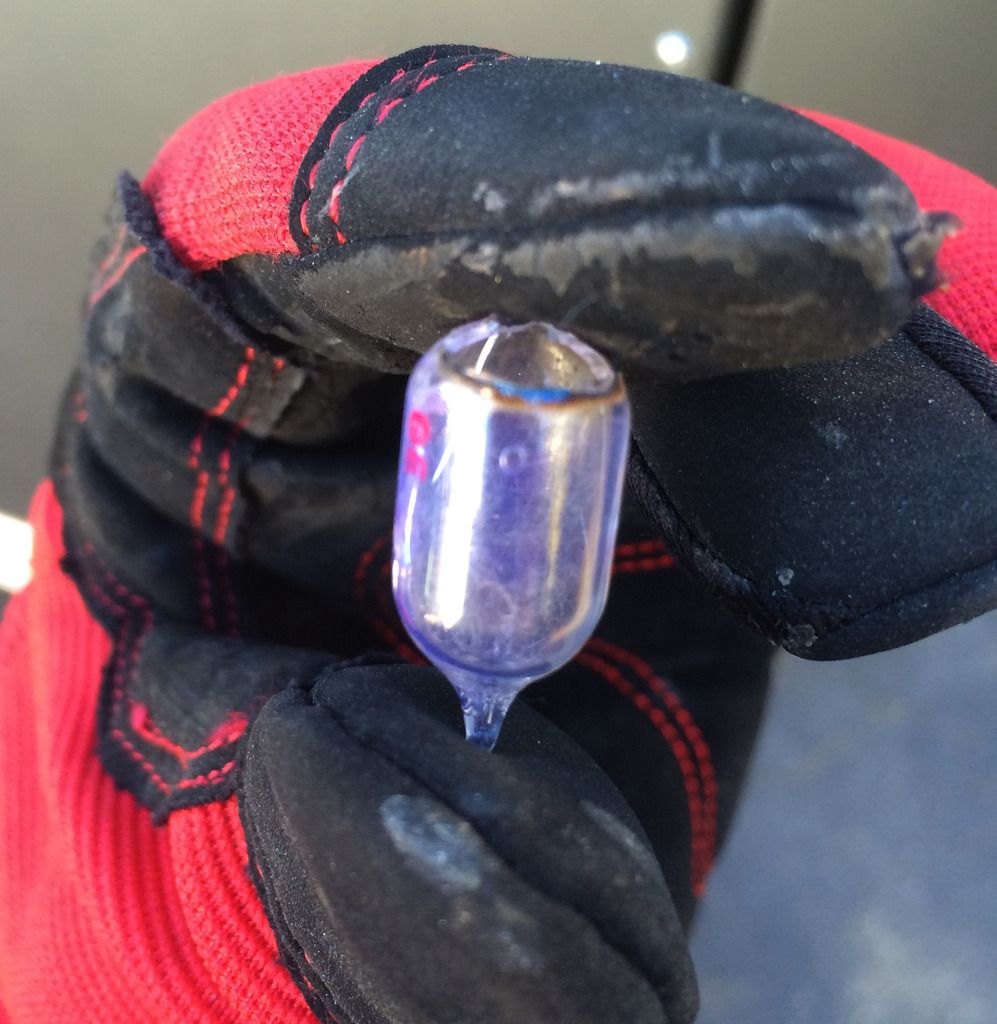
- Acrylic tip contains strobe LEDs, a continuation of the red/brown wire, and a cut-down vintage AG-1 strobe bulb
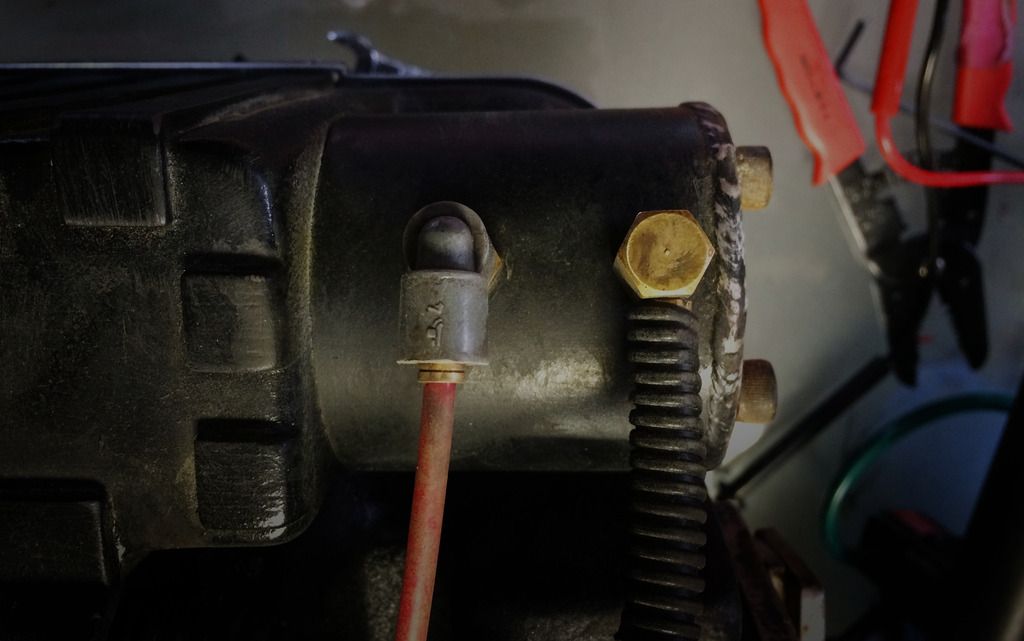
- Drilled vintage Legris Banjo Tips allow the flash/strobe wire to pass through as on the original hero packs
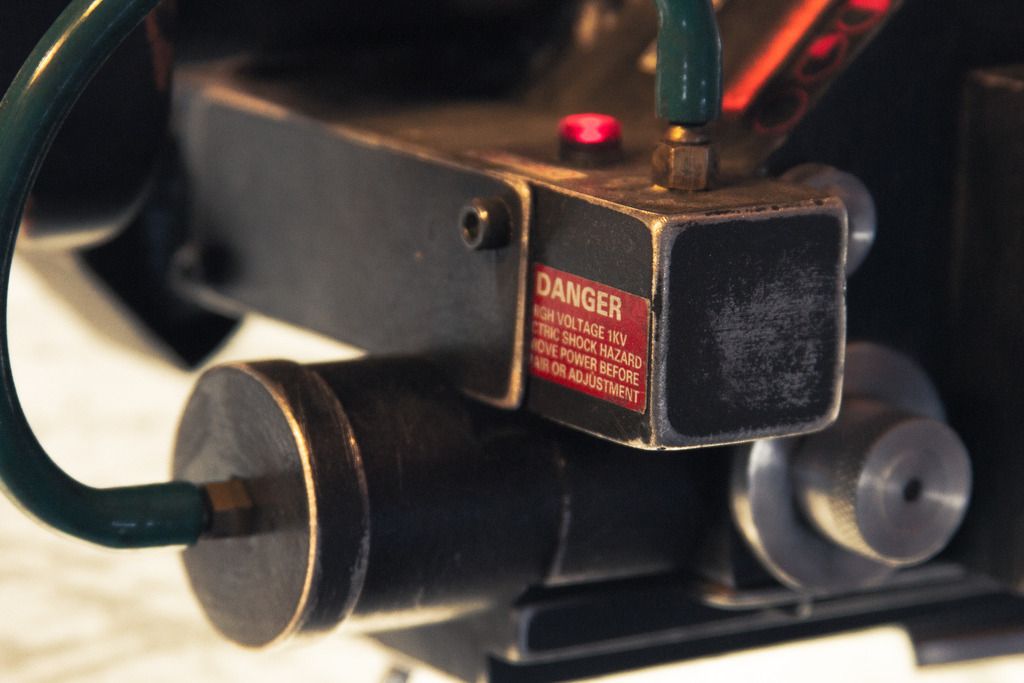
- The vintage grey Raytheon crank knob is somewhat different than my others - the face of the knob tapers into the stem, but beneath that the body does not - the ridged wall meets the stem at a hard angle. Even the 35mm scan doesn’t show which was used conclusively, but after many hours of study I lean towards this variant being used (the hero packs’ knobs were replaced with black ones - the tapered kind - in GB2). There’s often a hint of that edge, and the vintage makes sense given the timing of the first film’s production.
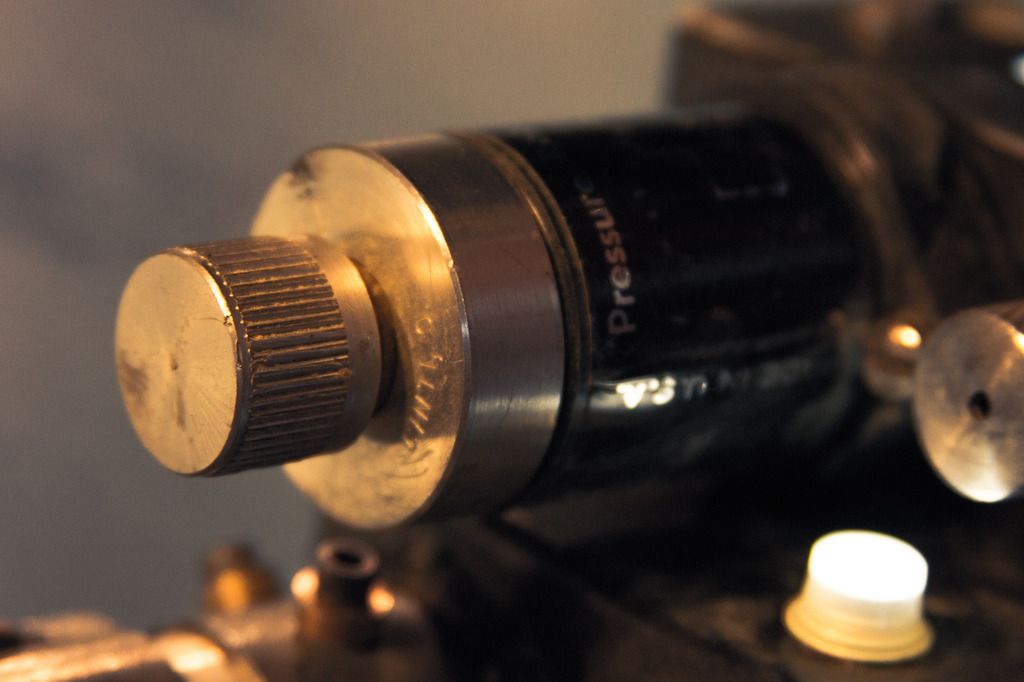
- Accurate variants of the accurate Clippard Valves
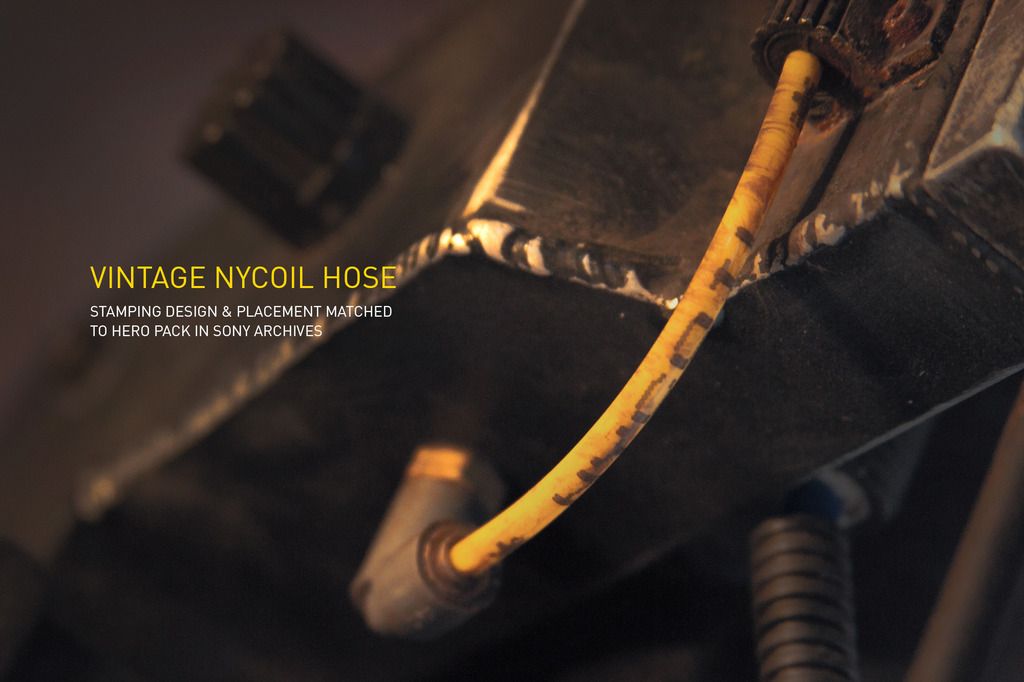
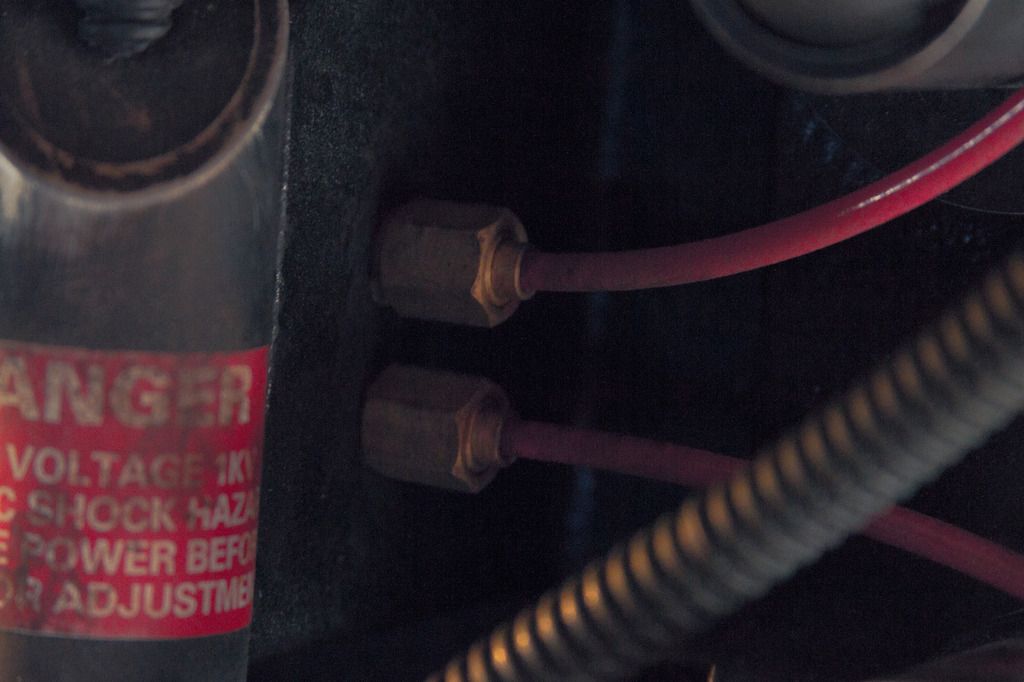
- Vintage Clippard and Nycoil hoses match stamping and placement to the Venkman hero pack where possible
- Vintage brass Clippard fittings differ slightly from their modern equivalents
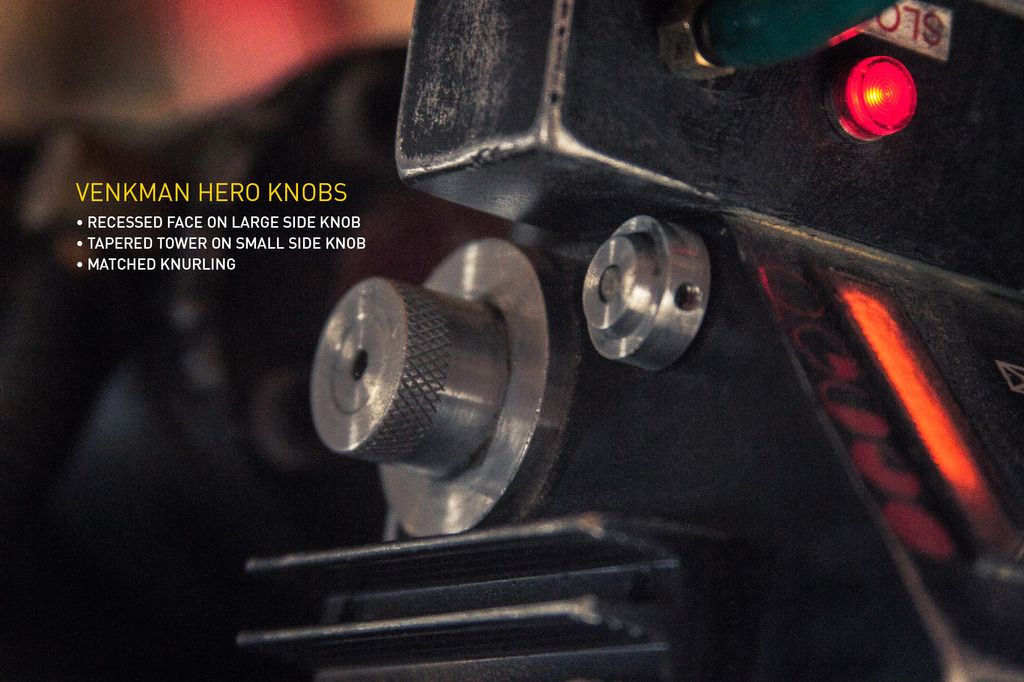
- Venkman-specific versions of the thrower knobs include a large side knob with a recessed center on its face, a tapered tower on the small side knob, and skipped knurling on the front knob (an error on the original which took over a dozen attempts for RJ to reproduce)
- Bill Murray’s signature is mounted inside the shell! It’s a postcard signed “Wish I were here, Bill Murray” and it was signed to “Alice” (as in the librarian!) in NYC in the 1980s - we felt this would inject the Venkman pack with a bit of soul! The signature came from a collection I trust - a waitress at a popular NYC steakhouse had a collection of autographs from many famous patrons of the restaurant, each on postcards from the steakhouse which span a couple decades, and each was PSA/DNA certified.
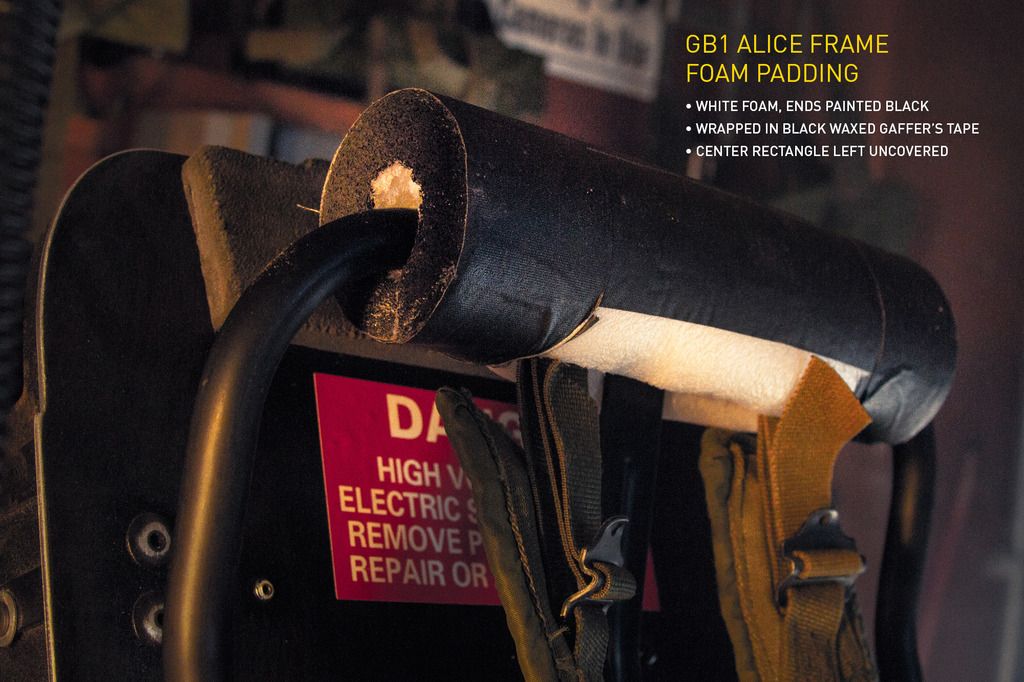
- White foam with black-painted ends and bare bottom center sections padding the top of the ALICE frame - we had to custom make this piece.


Cutting the vintage AG-1 flash bulb to cover the LED strobe inside the acrylic tip:
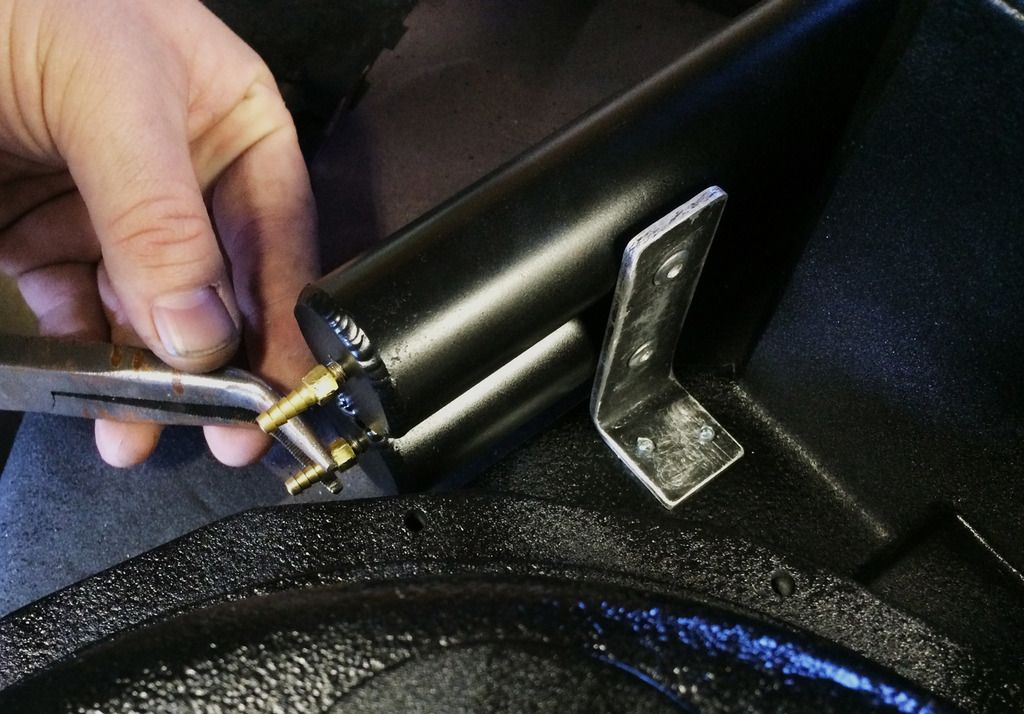
Unlike the original hero packs, we used Clippard hose barbs to attach the injector tubes' vintage hoses. It makes for a cleaner, more "realistic" build - and preserves crucial inches of the vintage hose material:

The injector tube bracket was never re-installed on the Venkman pack after it was disassembled and molded for Ghostbusters 2. We used shots of the inside of the hero shell in the Sony archives to place the rivets which secure its base and pre-weathered it before installing. The side of the bracket facing the injector tubes is unpainted like the original.


Aluminum parts and other details, pre-painting:

Semi-gloss black paint, pre-weathering:

Some of the minor modifications to Chris Bosh's shell:

We had to run an extra wire to the front ear, so Ernie cut a channel for it to re-enter the barrel underneath the grip - only the red/brown wire should be seen exiting the grip and feeding into the thrower body. There's a channel cut in the inner tube for this wire so that the handle may still twist:


Most of the metal work was done a little TOO perfectly! We spent a lot of time sanding down the corners and edges to bring back the handmade quality (and years of wear) seen on the original hero packs:


Engraving inside the pack on the motherboard. We also applied Venkman's Dymo (accurate vintage font) label seen on the outside of his pack in GB2:


New old stock vintage LC-1 ALICE pack frame and straps:


The booster frame's back is rounded to fit the booster tube:


GB1 style V-hook, bolted on from inside the pack:

Screened metal plate label on the HGA:


The protective foam at the top of the motherboard was added partway through production of the original Ghostbusters. At some point after application, Venkman's foam contracted, causing the bottom edge to curve up towards the top of the pack. We referenced the adhesive residue from this area to cut the outline of our 1/2" foam cushion in order to match its original shape:


The n-filter is attached with two bolts on its upper mounting plate and two rivets on its lower plate:


The proper vintage UMPCO P-clamp is stamped with the designation "DG-18," along with other info. Our vintage clamps match all stamping from the originals on a clamp of the same size, with the exception of an additional "W" at the front of the "DG-18." The only difference we could find is in the gasket, which had an extra spike to help it better fit a round shape. We swapped this for the simpler gasket seen on the DG-18. The vintage metal patina was perfect!

Some of Chris' shell's Venkman-specific defects can be seen in the powercell:


The Venkman pack's PPD has a hole in the bottom. It's clayed up now (from molding for GB2), but in the first film this hole likely went through top to bottom. We inserted a socket cap screw to help sell the pack's functionality should you inspect it up close:


The charging is done through the switchcraft plate - we wired these components up with the proper wire colors & gauges:


Vintage milky white "hat lights" (or panel indicators) and sockets were used on the thrower. We were only able to source caps with brass inserts, which are still terribly rare, but I had to grab one shot with my steel insert cap (the only one I've ever been lucky enough to come across). You can see the brass insert cap at the bottom left, and the second one is inserted into the top of the thrower body from below, next to the vent:

Drilled genuine vintage 4mm Legris Banjo Elbow:


The wiring and pop mech inside the thrower body:


The acrylic tip is often a wasted opportunity on really nice pack builds! It's so much more satisfying when it's full of electronics - and a vintage flashbulb in the nose!


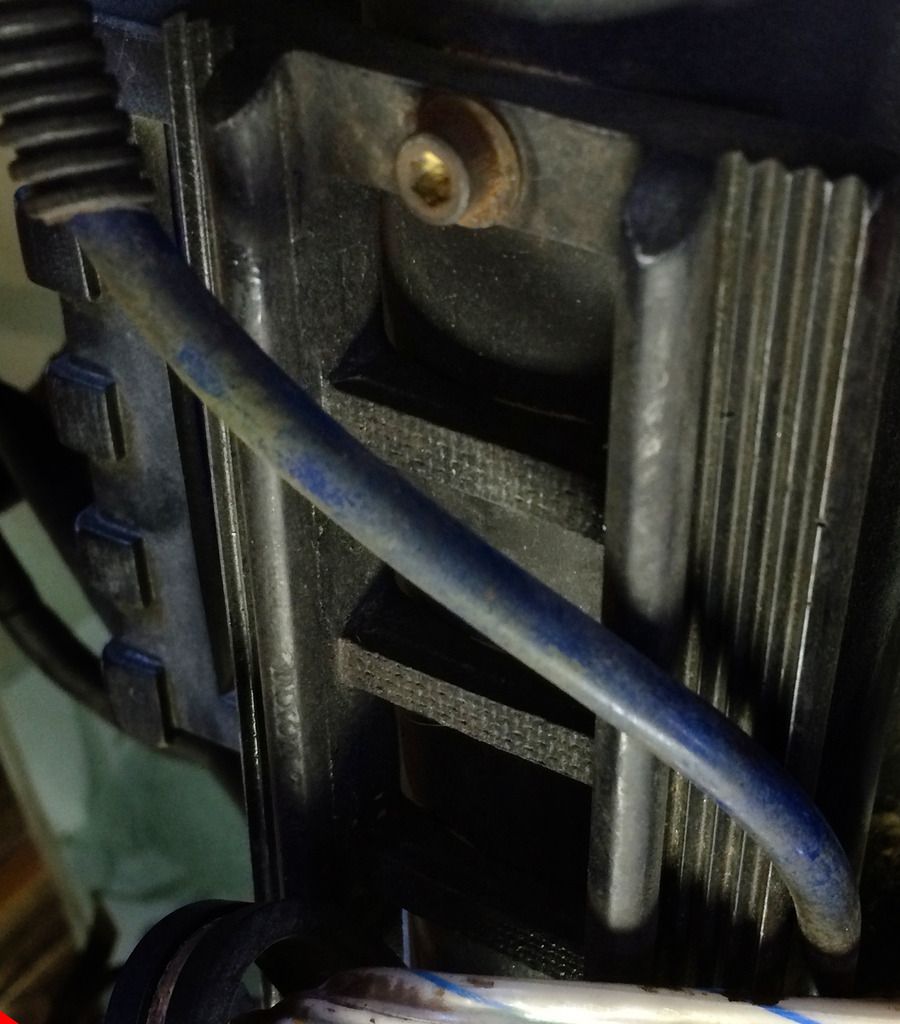
The green lever has a "Clippard" stamp on the bottom of the rubber hose sheath as seen on the original Venkman hero:


Brown/red wire with clear heat shrink tubing:

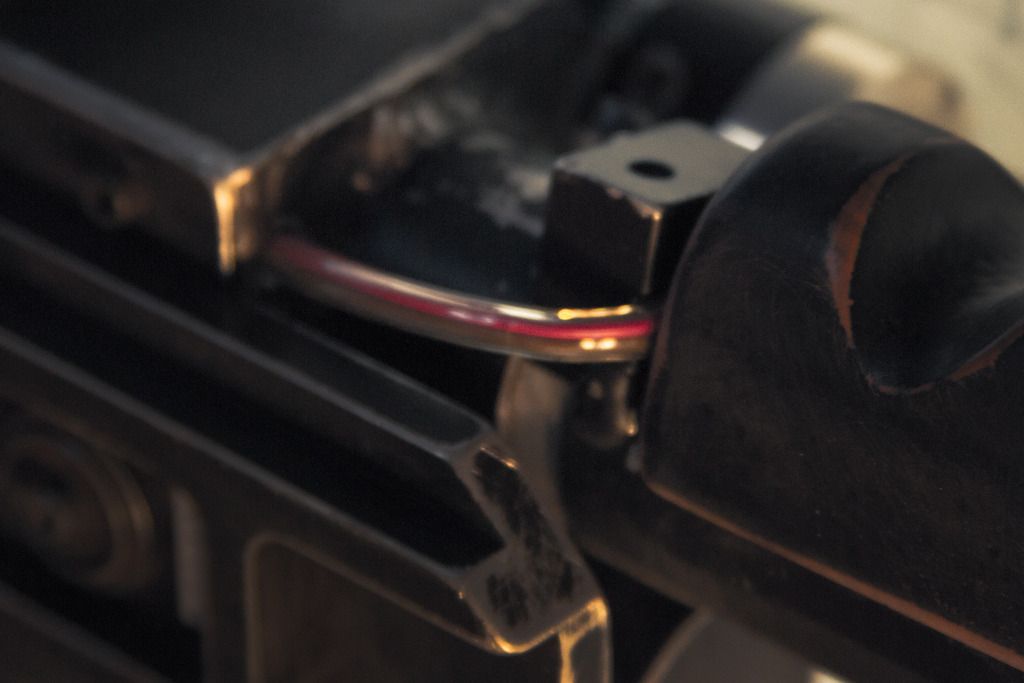
When repainted for GB2, this segment of the brown/red wire was painted black - it can be seen in color in the first film:

Shipping, receiving, and unboxing!


Last edited:

