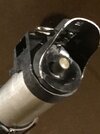
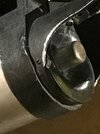
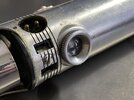
I'm about to start my third Strobonar saber and I do agree that it does look like the shroud was intentionally cut down. I think it might have been a bit too intrusive when left uncut.


You are using an out of date browser. It may not display this or other websites correctly.
You should upgrade or use an alternative browser.
You should upgrade or use an alternative browser.
Tom's: Gary Kurtz Darth Vader Stunt Lightsaber
- Thread starter thd9791
- Start date
if it was the telegraph, we would see the extruded bump where the light bulb goes. Its not there on the real prop.
ir is that what the patch is covering? hhhmmm
that seems like a hell of a lot of extra work if you ask me. They had to grind out the extrusion, cover it with the patch and they also had to cut the telegraph.
AnubisGuard
Master Member
This was a rather recent discovery. The words on a slave extend beyond the borders of the correct sized patch (see Kurtyboy's saber), and they are not present on this saber.
View attachment 1409495
The second tell is the included set-screw, only seen on Telegraph graflexes.
View attachment 1409494View attachment 1409497
Do we know that there weren't telegraph slaves?
Now that would be rare.
the other thing is that the size of the slave unit matches spot on the dimensions of the real prop when put on top of the Strobonar. I can see the details you pointed out are obviously there. but something just isnt adding up.
AnubisGuard
Master Member
the other thing is that the size of the slave unit matches spot on the dimensions of the real prop when put on top of the Strobonar. I can see the details you pointed out are obviously there. but something just isnt adding up.
Agreed. If you're going to use a telegraph top, why cut it short instead of hiding the john under the "clamp?" And why go to the trouble of grinding away the shoulders? Not saying they couldn't have done that, I've built enough sabers to know that sometimes you end up with weird scrap from other projects and maybe it was a leftover, but with the shape and dimensions being what they are, the simplest explanation to my mind is that there's slaves out there that lack the stamping and have those tiny set screws.
Benjo
Well-Known Member
I would add many O.T flashgun lightsabers were just pieces cobbled together, sometimes drilled (DV6), but everything seem to imply they did as simple and fast as they can.Agreed. If you're going to use a telegraph top, why cut it short instead of hiding the john under the "clamp?" And why go to the trouble of grinding away the shoulders? Not saying they couldn't have done that, I've built enough sabers to know that sometimes you end up with weird scrap from other projects and maybe it was a leftover, but with the shape and dimensions being what they are, the simplest explanation to my mind is that there's slaves out there that lack the stamping and have those tiny set screws.
It might be possible they used an old really beaten telegraph to cut it out and recover it, but, once again, that seems a lot of work considering the lack of care they put into lightsabers.
Another thing to consider is that the telegraph, much like the regular graflex, have the switch tab on the left side. We would see evidence of it on the real prop.


Poikilotherm
Sr Member
View attachment 1488847This was a rather recent discovery. The words on a slave extend beyond the borders of the correct sized patch (see Kurtyboy's saber), and they are not present on this saber.
View attachment 1409495
The second tell is the included set-screw, only seen on Telegraph graflexes.
View attachment 1409494View attachment 1409497
View attachment 1488848
View attachment 1488858
I am currently working on my own Gary Kurtz Vader Lightsaber and I believe I see the Graflex slave text in this image, judging from this image, it may not be screws, just paint peeling....... There is also a grip similar to the ESB Graflex Lightsaber series, and the D-ring base appears to be made of three wooden boards glued together.
View attachment 1488849
View attachment 1488866
View attachment 1488850
View attachment 1488851
View attachment 1488863
View attachment 1488859
View attachment 1488852
View attachment 1488853
View attachment 1488854
View attachment 1488855
View attachment 1488857
The circuit board in the control box, I think they accidentally cut the board short when they cut the board, or maybe the brass finger itself is very short, then they cut a square strip from the original board and splice it onto the PCB... I recently bought a circuit board, and I did the same, with good results.
View attachment 1488860
As for the grips, if I read them correctly, they use rivets........View attachment 1488873
View attachment 1488862
As for the shroud, I always thought they cracked when sanding it..... I can clearly see the crack here in this image. My other Heiland Strobonar is on its way, probably in a few days. I will trim the shroud then and see the effect...
Last edited:
Do you have the larger picture of the saber laying on its back?View attachment 1488847
View attachment 1488848
View attachment 1488858
I am currently working on my own Gary Kurtz Vader Lightsaber and I believe I see the Graflex slave text in this image, judging from this image, it may not be screws, just paint peeling....... There is also a grip similar to the ESB Graflex Lightsaber series, and the D-ring base appears to be made of three wooden boards glued together.
View attachment 1488849
View attachment 1488866
View attachment 1488850
View attachment 1488851
View attachment 1488863
View attachment 1488859
View attachment 1488852
View attachment 1488853
View attachment 1488854
View attachment 1488855
View attachment 1488857
The circuit board in the control box, I think they accidentally cut the board short when they cut the board, or maybe the brass finger itself is very short, then they cut a square strip from the original board and splice it onto the PCB... I recently bought a circuit board, and I did the same, with good results.
View attachment 1488860
As for the grips, if I read them correctly, they use rivets........View attachment 1488873
View attachment 1488862
As for the shroud, I always thought they cracked when sanding it..... I can clearly see the crack here in this image. My other Heiland Strobonar is on its way, probably in a few days. I will trim the shroud then and see the effect...
The parts you're making looks great - and since you pointed out the notches in the T track, those look to me to be stops for sliding a window or something. I bet every so many feet there were notches like that and they just cut the track with whatever it looked like, that's so bizarre I wonder what it was now
Those may be rivets, or allen screws, not quite sure
And yes, the D ring was a layered composite build, the Energizer saber shroud was also built in layers, with glue it looks like
My shroud cracked in the same place and I used apoxie sculpt to fill it!
Ummm. and yes, I'm still on the fence about the Gx part. Those set screws are particular to early graflexes, and I don't see the slave logo, just a scratch in the silver paint revealing flat metal beneath.
The card? I don't see a splice seam line, can you show me again!?
Poikilotherm
Sr Member
View attachment 1488878Do you have the larger picture of the saber laying on its back?
The parts you're making looks great - and since you pointed out the notches in the T track, those look to me to be stops for sliding a window or something. I bet every so many feet there were notches like that and they just cut the track with whatever it looked like, that's so bizarre I wonder what it was now
Those may be rivets, or allen screws, not quite sure
And yes, the D ring was a layered composite build, the Energizer saber shroud was also built in layers, with glue it looks like
My shroud cracked in the same place and I used apoxie sculpt to fill it!
Ummm. and yes, I'm still on the fence about the Gx part. Those set screws are particular to early graflexes, and I don't see the slave logo, just a scratch in the silver paint revealing flat metal beneath.
The card? I don't see a splice seam line, can you show me again!?
View attachment 1488879
View attachment 1488889
View attachment 1488890
View attachment 1488882I try to find the clearest image of this location in the picture I can see..... If not illusion.......
excellent! I see it now, you're right, that does look like an extra bit stuffed in there.View attachment 1488878
View attachment 1488879
View attachment 1488889
View attachment 1488890
View attachment 1488882I try to find the clearest image of this location in the picture I can see..... If not illusion.......
I am going to sit with these photos and inspect them myself to see if I can help the research. Thank you SO much, I was at a standstill because I couldn't decide on construction
Did you design and print these yourself?View attachment 1488847
View attachment 1488848
View attachment 1488858
I am currently working on my own Gary Kurtz Vader Lightsaber and I believe I see the Graflex slave text in this image, judging from this image, it may not be screws, just paint peeling....... There is also a grip similar to the ESB Graflex Lightsaber series, and the D-ring base appears to be made of three wooden boards glued together.
View attachment 1488849
View attachment 1488866
View attachment 1488850
View attachment 1488851
View attachment 1488863
View attachment 1488859
View attachment 1488852
View attachment 1488853
View attachment 1488854
View attachment 1488855
View attachment 1488857
The circuit board in the control box, I think they accidentally cut the board short when they cut the board, or maybe the brass finger itself is very short, then they cut a square strip from the original board and splice it onto the PCB... I recently bought a circuit board, and I did the same, with good results.
View attachment 1488860
As for the grips, if I read them correctly, they use rivets........View attachment 1488873
View attachment 1488862
As for the shroud, I always thought they cracked when sanding it..... I can clearly see the crack here in this image. My other Heiland Strobonar is on its way, probably in a few days. I will trim the shroud then and see the effect...
Poikilotherm
Sr Member
Did you design and print these yourself?
View attachment 1489161
View attachment 1489170
Yeah, based on what I can see with the naked eye. I don't know what the final appearance will be yet. There are some things I don't like in the modeling process that I have made a big imagination and may not be accurate.
View attachment 1489164
View attachment 1489165
View attachment 1489167
View attachment 1489171
View attachment 1489166
View attachment 1489168
Today, I tried to solve fixed problems with my friends, so far the progress is very smooth. Expect to see the final look soon.View attachment 1489169
Last edited:
Similar threads
- Replies
- 7
- Views
- 1,362
- Replies
- 14
- Views
- 705


