You are using an out of date browser. It may not display this or other websites correctly.
You should upgrade or use an alternative browser.
You should upgrade or use an alternative browser.
Tom’s Andor Corporate Issue Blaster
- Thread starter thd9791
- Start date


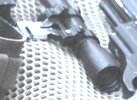
It looks like the side details and the grip details are a LITTLE different from the Binatone.
The other American versions are much more different... straight knurled endcap, no ringed shoulder near the barrel nut, and a more different handgrip. Close enough for me!
I'm thinking eventually I may fill this with resin so I can sculpt it and hopefully retain the original gun as a durable prop. In case they scanned and recreated theirs
Currently I'm trying to figure out how the scope bracket is held in.


It looks like it slides in from the top, and then slides back until the pin hits the end of the slot on the mount plate.
I can see a permanent pin or whatever inside the bracket, makes sense, but since there is space for it to slide front to back, what holds it in place? I was thinking some screw or pin in the empty space but I don't see anything there.
The other American versions are much more different... straight knurled endcap, no ringed shoulder near the barrel nut, and a more different handgrip. Close enough for me!
I'm thinking eventually I may fill this with resin so I can sculpt it and hopefully retain the original gun as a durable prop. In case they scanned and recreated theirs
Currently I'm trying to figure out how the scope bracket is held in.
It looks like it slides in from the top, and then slides back until the pin hits the end of the slot on the mount plate.
I can see a permanent pin or whatever inside the bracket, makes sense, but since there is space for it to slide front to back, what holds it in place? I was thinking some screw or pin in the empty space but I don't see anything there.
I’ve made a decision. I am always wary of clamshell props, since I am not a museum they will get handled, moved and stored. They also don’t weigh anything, kind of a let down.
Some props, like the scuba gun from ESB, I tipped upside down and filled with resin. This, on the other hand, has a wonderful trigger and satisfying momentary switch! In order to keep that functional, I decided to fill it in two halves.


First step is wall-ing off the trigger area and raising some walls so there is only one level for the resin to fill. This way it won’t spill into weird areas and stay at the “halfway” height.
I used old fashioned styrene, Testors weld and JB Weld


Theoretically, there are still guide pins around the trigger and the screw holes will still line up. The screws are really nice long machine screws, I was pleasantly surprised!
Some props, like the scuba gun from ESB, I tipped upside down and filled with resin. This, on the other hand, has a wonderful trigger and satisfying momentary switch! In order to keep that functional, I decided to fill it in two halves.
First step is wall-ing off the trigger area and raising some walls so there is only one level for the resin to fill. This way it won’t spill into weird areas and stay at the “halfway” height.
I used old fashioned styrene, Testors weld and JB Weld
Theoretically, there are still guide pins around the trigger and the screw holes will still line up. The screws are really nice long machine screws, I was pleasantly surprised!
Super cool great build on something a bit diffrant.
Before I forget, it seems I’ve realized some key differences. Even though this is the closest to Binatone, the Special Model has a thick ridge at the base of the grip, which protrudes further forward as well. The Binatone grip is flat with a slight flare
Also the screw placement is different, slightly. I’m thinking I might switch to flat faced socket screws to limit the obviousness of the screw head placement.
There is also a pill-shaped detail on the Binatone that is filled with some mesh on the prop. It’s a recess in the plate they add to the prop so I think I can include that in detail.
I admit.. I’m not a fan of the Aubresh, nor the blue rubber looking grip. I may customize this.. thinking of adding gold Death Star mesh or Calculator pcb to the square buttons, and a dark exotic wood grip plate instead.
To be frank, I'm not a fan of the scope or the magwell. Not every Star Wars gun had them or needs them, and based on this gun's size, it looks just tacked on, especially how the curves of the gun come to abrupt stops to flush details. The OT aesthetic built off of existing things already on the base items. The art department built on top of them to hide or extend the features that were extant. They look messy but there was method to the madness.
For me, I would just add some kind of laser sight to the bottom of the blaster sans scope and magwell and maybe add a little OT standard greebs to it.
For me, I would just add some kind of laser sight to the bottom of the blaster sans scope and magwell and maybe add a little OT standard greebs to it.
One of the neat things about thee scope rings is that they are mostly circular. It looks like the prop people cut off one of the legs, and ground the other one flat. The scope mount is just flat aluminum
So I did this with a set of older Tasco rings as opposed to the basic low cost Chinese ones you get today


Unfortunately I disassembled the scope these came with and cut off the wrong end. lol I grabbed another similar one for cheap as well, they are very light aluminum but slightly better made.
So I did this with a set of older Tasco rings as opposed to the basic low cost Chinese ones you get today
Unfortunately I disassembled the scope these came with and cut off the wrong end. lol I grabbed another similar one for cheap as well, they are very light aluminum but slightly better made.
I’ve made some headway on what I interpret of the scope. I got ahold of a second older Tasco 4x20 - slightly different than the gloss versions, it’s matte and has a slightly different setup inside.
I removed the windage knob section, and slid my trimmed scope rings to the right places, and put it back on. Then I eyeballed and cut the main tube with a bandsaw blade turned into a hacksaw!
I used a scrap section of Boat Antenna fiberglass from my Original Trilogy Lightsaber Blades as a spacer, because the spring-loaded center tube was left floating when it was cut.


I also took the crosshairs from the other scope I ruined and used my metal lathe to make a version of the cap on the scope


I removed the windage knob section, and slid my trimmed scope rings to the right places, and put it back on. Then I eyeballed and cut the main tube with a bandsaw blade turned into a hacksaw!
I used a scrap section of Boat Antenna fiberglass from my Original Trilogy Lightsaber Blades as a spacer, because the spring-loaded center tube was left floating when it was cut.
I also took the crosshairs from the other scope I ruined and used my metal lathe to make a version of the cap on the scope
As usual, I got experimental, ****** up, and now I’m better off
Upon closer inspection it appears the barrel unit of this blaster slides into the receiver of the gun, not over it. I THOUGHT that they chopped the barrel tube to hug the light guns details, but there is a shadow above the break, not under it.
So I took a look at the gun again and I realized you can separate the cuts into 2-3 simple moves, in order to implant a fat barrel. Made so much more sense!


I only used sandpaper on the lathe! The tool is from a previous project! I don’t have a bull nose live center for pipe so like… I can only do pipe that is short enough to cut against the chuck. Or sand like this.
Anyway, it’s hard to do this by hand, and I didn’t get the curve right, so I poured some more resin under the barrel. Unfortunately, it leaked out everywhere. I buy really good resin… so I spent a few hours chipping away the excess resin, scratching up the gun in the process
So I went ahead and did some hand sculpting that I was planning on doing anyway. I will hit the rest with sandpaper and putty, do my best to smooth this out!


Upon closer inspection it appears the barrel unit of this blaster slides into the receiver of the gun, not over it. I THOUGHT that they chopped the barrel tube to hug the light guns details, but there is a shadow above the break, not under it.
So I took a look at the gun again and I realized you can separate the cuts into 2-3 simple moves, in order to implant a fat barrel. Made so much more sense!
I only used sandpaper on the lathe! The tool is from a previous project! I don’t have a bull nose live center for pipe so like… I can only do pipe that is short enough to cut against the chuck. Or sand like this.
Anyway, it’s hard to do this by hand, and I didn’t get the curve right, so I poured some more resin under the barrel. Unfortunately, it leaked out everywhere. I buy really good resin… so I spent a few hours chipping away the excess resin, scratching up the gun in the process
So I went ahead and did some hand sculpting that I was planning on doing anyway. I will hit the rest with sandpaper and putty, do my best to smooth this out!
Last edited:
Also for those wondering, the Binatone sight sits right above the “dial” detail. On this it’s further back, so I’m kinda splitting the difference on my replica.
I also see why they added the extra step behind the barrel, to smooth out the transition. My step doesn’t have to stop to get around the sight, for the same reason
I also see why they added the extra step behind the barrel, to smooth out the transition. My step doesn’t have to stop to get around the sight, for the same reason
Here are some research ideas. I believe those white background close-ups to be from a resin cast or rubber stunt. There are crooked joints and parts. Let alone the front body screw is half filled in

Also I'm seeing some new detail. I believe these to be casts/prints. The bottom of the mount might have a gap or raised edge? There is a bump visible in the open window


This I believe to be the "hero" mount. Look at those two slotted screws visible right on the surface

I would say the rear screw is the axle for the scope mount, but I'm not sure. Also maybe this is how it's tightened?
Also I'm seeing some new detail. I believe these to be casts/prints. The bottom of the mount might have a gap or raised edge? There is a bump visible in the open window
This I believe to be the "hero" mount. Look at those two slotted screws visible right on the surface
I would say the rear screw is the axle for the scope mount, but I'm not sure. Also maybe this is how it's tightened?
Attachments
Similar threads
- Replies
- 64
- Views
- 5,246
- Replies
- 10
- Views
- 1,240